Author

Ethan

Browsing

Unlock the Delight of Candied Pecans

Welcome to your new favorite snack: candied pecans. These irresistible treats not only satisfy your sweet cravings but also provide a protein boost that’s perfect for any diet. Whether you’re looking to enhance your salads, top off your yogurt, or simply enjoy a crunchy snack, this easy-to-make recipe is your go-to solution. In less than an hour, you can transform simple pecans into a deliciously sweet indulgence that fits right into your macro goals. Let’s dive into how to make these candied pecans that are sure to elevate your culinary game!

Why You’ll Love This Recipe

This candied pecans recipe isn’t just about taste; it’s about versatility and nutrition. Here are five compelling reasons to whip up a batch:

  • High in Protein: Pecans are a great source of protein, making this snack a perfect option for those who want to boost their intake without sacrificing flavor.
  • Easy to Make: With just a few simple ingredients and straightforward steps, you can have these candied pecans ready in no time.
  • Versatile Usage: Use them in salads, yogurt, desserts, or even as a topping for savory dishes. The possibilities are endless!
  • Perfect for Gifting: Pack them in a jar and you have a thoughtful, homemade gift for friends and family.
  • Kid-Friendly Recipe: Kids love the sweet crunch; it’s a great way to sneak in some healthy nuts!

Ingredients Breakdown

Here’s what you’ll need to make these delicious candied pecans:

  • 1/2 cup granulated sugar: The base sweetness.
  • 1/2 cup packed light brown sugar: Adds depth and a hint of caramel flavor.
  • 1 tablespoon ground cinnamon: For that warm, cozy spice.
  • 1 teaspoon fine sea salt: Balances the sweetness.
  • 1/8 teaspoon ground cayenne: Adds a subtle kick.
  • 12 ounces raw pecan halves: The star of the show.
  • 1 egg white: Helps the sugar mixture adhere to the nuts.

Substitutions

If you’re looking to customize your candied pecans, consider these substitutions:

  • Coconut sugar: Use instead of granulated sugar for a more natural sweetener.
  • Maple syrup: Replace both sugars for a unique flavor.
  • Nutmeg: Swap with cinnamon for a different spice profile.
  • Almonds or walnuts: Try these nuts for a variation in flavor and texture.

Step-by-Step Directions
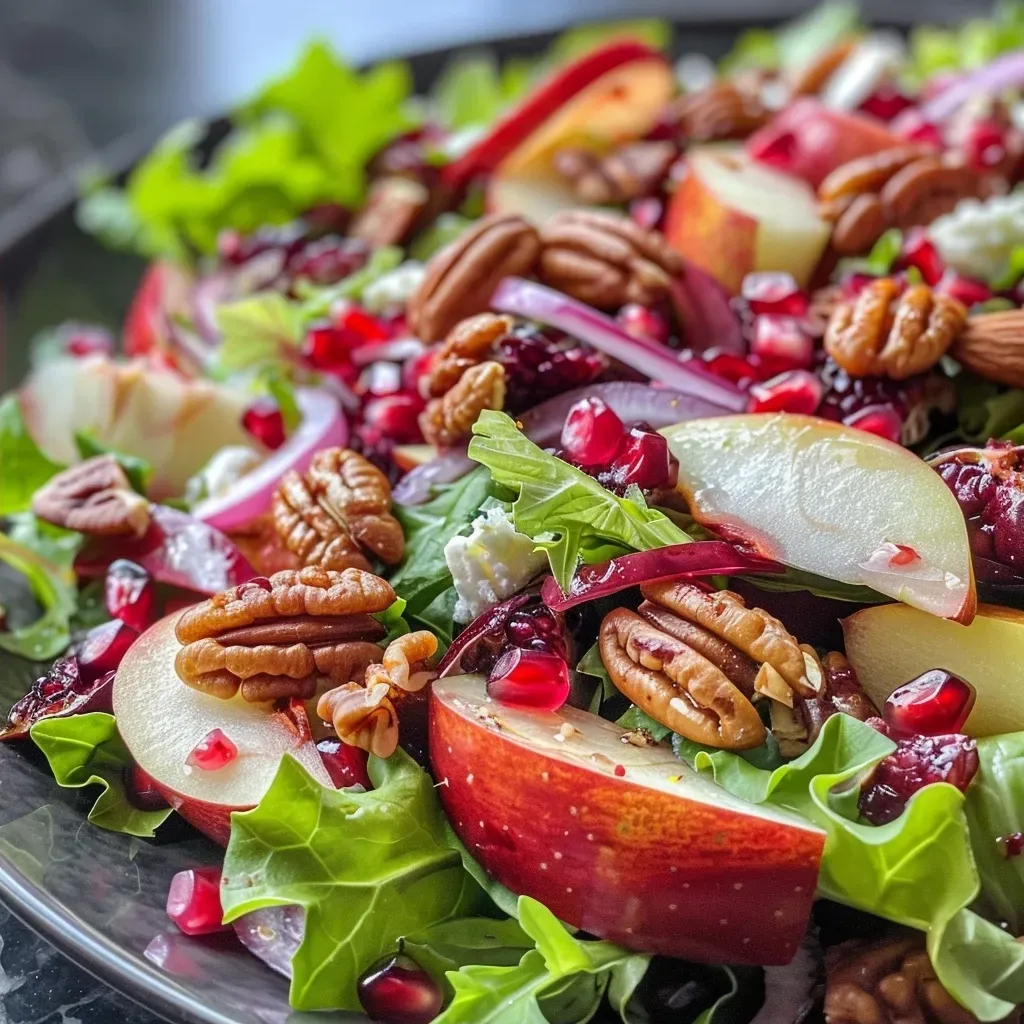
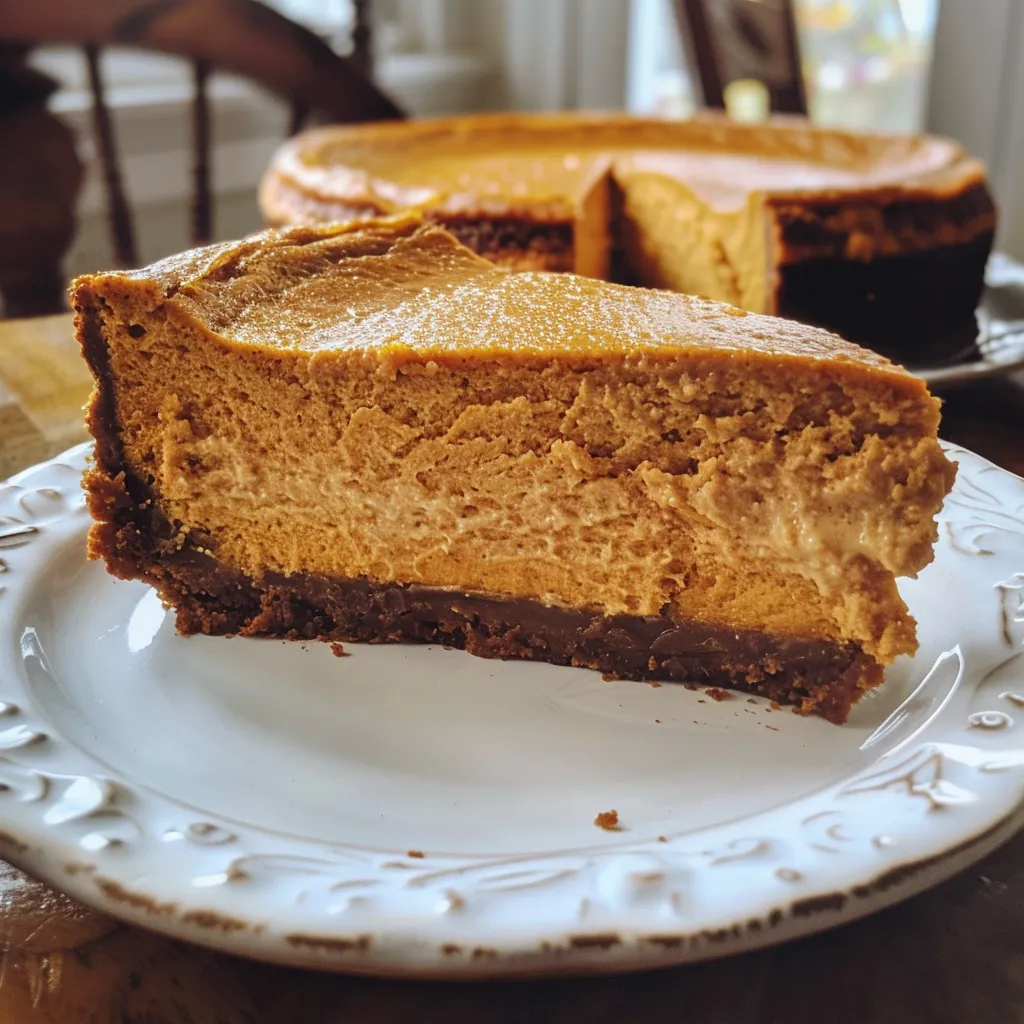
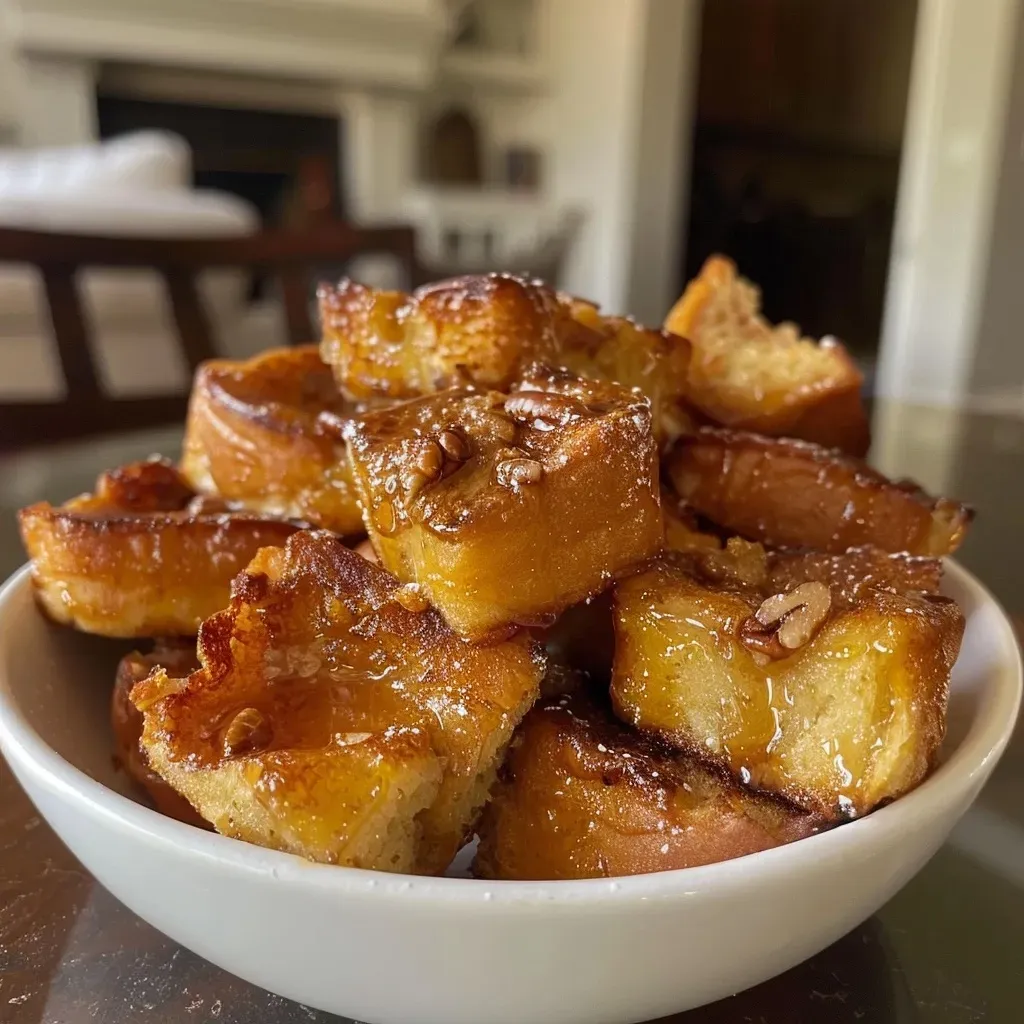
A side view highlighting the texture of crispy, glazed candied pecans.

Ready to make these easy candied pecans? Follow these simple steps:

  1. Prep oven and baking sheet: Heat your oven to 300°F (150°C) and line a large baking sheet with parchment paper.
  2. Mix the cinnamon sugar mixture: In a small bowl, whisk together the granulated sugar, brown sugar, ground cinnamon, sea salt, and cayenne.
  3. Toss the pecans: In a large bowl, combine the pecans with the whisked egg white until well-coated, then add the sugar mixture and toss until evenly coated.
  4. Bake: Spread the pecans in a single layer on the prepared baking sheet. Bake for about 20 minutes, stir, and then bake for an additional 20 minutes until fragrant.
  5. Cool: Transfer to a wire rack to cool completely before serving. Store in an airtight container at room temperature for up to 2 weeks.

Pro Tips for Perfect Candied Pecans

To ensure your candied pecans turn out perfectly every time, keep these tips in mind:

  • Watch the oven: Ovens can vary; keep an eye on the pecans to avoid burning.
  • Even coating: Ensure every pecan is well-coated with the sugar mixture for a uniform taste.
  • Cooling time: Let them cool completely before storing to prevent stickiness.
  • Use fresh pecans: Fresh nuts will enhance flavor and crunchiness.
  • Experiment with spices: Feel free to add nutmeg, cardamom, or even a pinch of vanilla extract for variations.
  • Double the batch: These go fast! Make extra to share or store.
  • Store properly: Keep in an airtight container to maintain crispness.
  • Don’t overcrowd: Spread pecans out on the baking sheet to ensure they bake evenly.

Common Mistakes and Troubleshooting

Here are some common issues you might encounter and how to fix them:

  • Sticky pecans: If they turn out sticky, they may need longer cooling time or were not cooked long enough.
  • Burnt pecans: If they burn, lower the temperature and keep a closer watch next time.
  • Uneven flavor: Ensure all pecans are coated evenly with the sugar mixture.
  • Too soft: They should harden as they cool; if they don’t, they may need more baking time.

Variations to Try

Mix things up with these delicious variations:

  • Spicy Maple Pecans: Replace the granulated sugar with maple syrup and add a dash of cayenne.
  • Chocolate-Covered Pecans: After cooling, dip in melted dark chocolate for a decadent treat.
  • Herbed Pecans: Add rosemary and thyme for a savory twist, perfect for holiday parties.
  • Honey Glazed Pecans: Substitute honey for the sugars for a unique flavor profile.

Storage and Make-Ahead Instructions

These candied pecans are perfect for make-ahead snacking:

  • Makes ahead: You can prepare them a week in advance and store in an airtight container.
  • Storage options: Keep in a cool, dry place away from sunlight to maintain freshness.

Comprehensive FAQ

Got questions? We’ve got answers!

  • Can I freeze candied pecans? Yes, they freeze well! Just ensure they’re in an airtight container.
  • How long do they last? Stored properly, they can last up to 2 weeks at room temperature.
  • Can I use other nuts? Absolutely! Almonds, walnuts, and cashews also work well.
  • What if I don’t have egg whites? You can use aquafaba (chickpea water) as a vegan substitute.
  • Can I make them without sugar? Sugar alternatives like stevia can be used, but may affect texture.
  • How do I make them less sweet? Reduce the sugar in the recipe by half for a less sweet version.
  • Can I use flavored nuts? Yes, flavored nuts can add a new dimension to the taste!
  • What can I serve them with? They pair well with cheese platters, salads, and desserts.

Nutrition Tips and Dietary Adaptations

Want to make these candied pecans even better for you? Consider these tips:

  • Lower the sugar: Use less sugar or natural sweeteners to reduce calories.
  • Add oats: Mixing in some oats can provide extra fiber and protein.
  • Incorporate seeds: Add chia or flax seeds for additional nutrients.

Equipment Recommendations

You’ll need a few kitchen essentials to make this recipe a breeze:

  • Baking sheet: A large, rimmed baking sheet is ideal for even baking.
  • Parchment paper: Prevents sticking and makes cleanup easier.
  • Mixing bowls: A large bowl for tossing the pecans and a smaller one for the sugar mix.
  • Whisk: For mixing the egg whites and sugar mixture thoroughly.

Serving Suggestions

These candied pecans can be enjoyed in various ways:

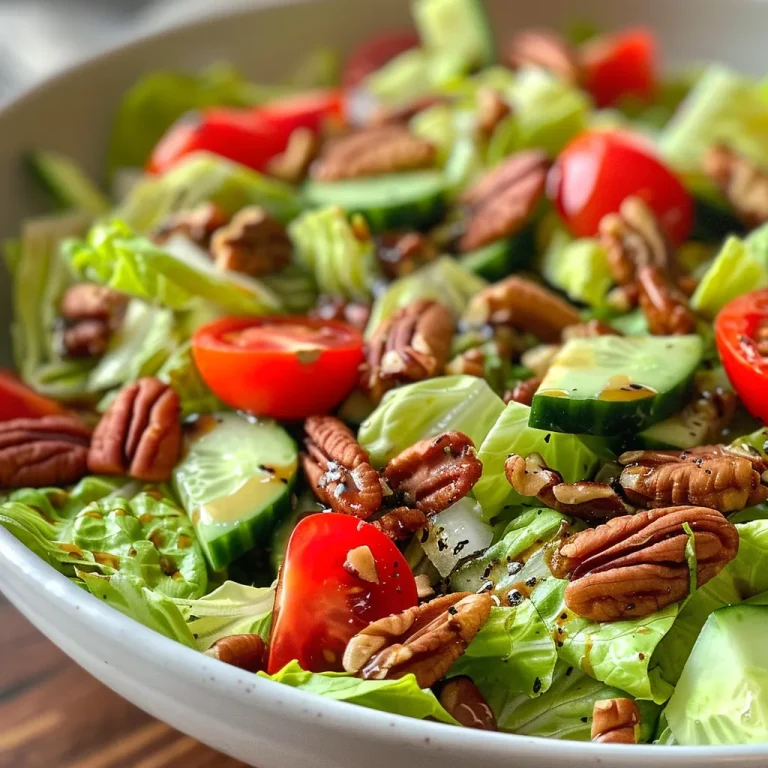
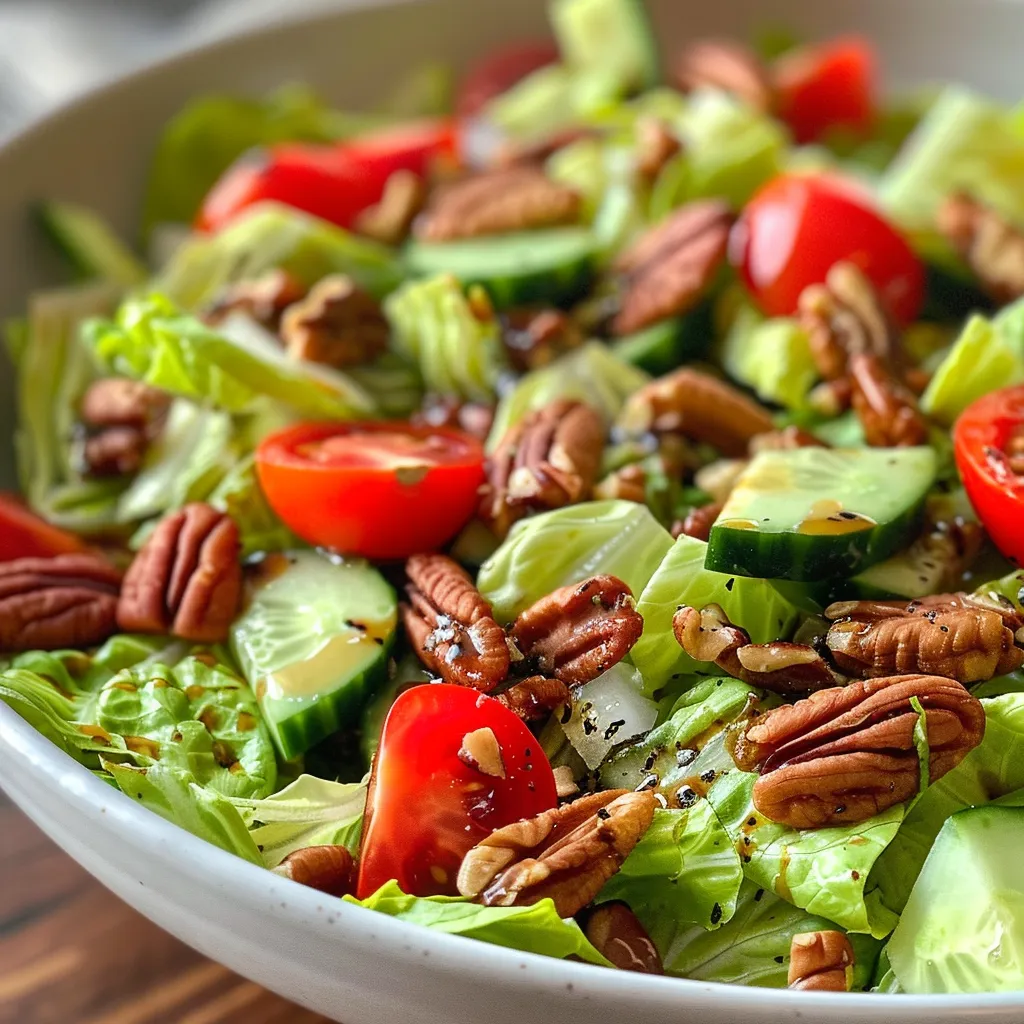
  • On salads
  • In desserts: Sprinkle over ice cream or yogurt for added texture.
  • As a snack: Serve in a bowl for a quick, nutritious snack.
  • Charcuterie boards: Use as a unique addition to cheese and meat platters.

Conclusion

Now that you’ve mastered the art of making candied pecans, it’s time to get cooking! Not only do these treats provide a satisfying crunch and a flavor boost, but they also help you hit your protein goals without sacrificing taste. So gather your ingredients, follow the steps, and enjoy the sweet, nutty goodness that these candied pecans offer. Whether for yourself or as a gift, you’ll find that they’re a delightful addition to any meal or snack time!
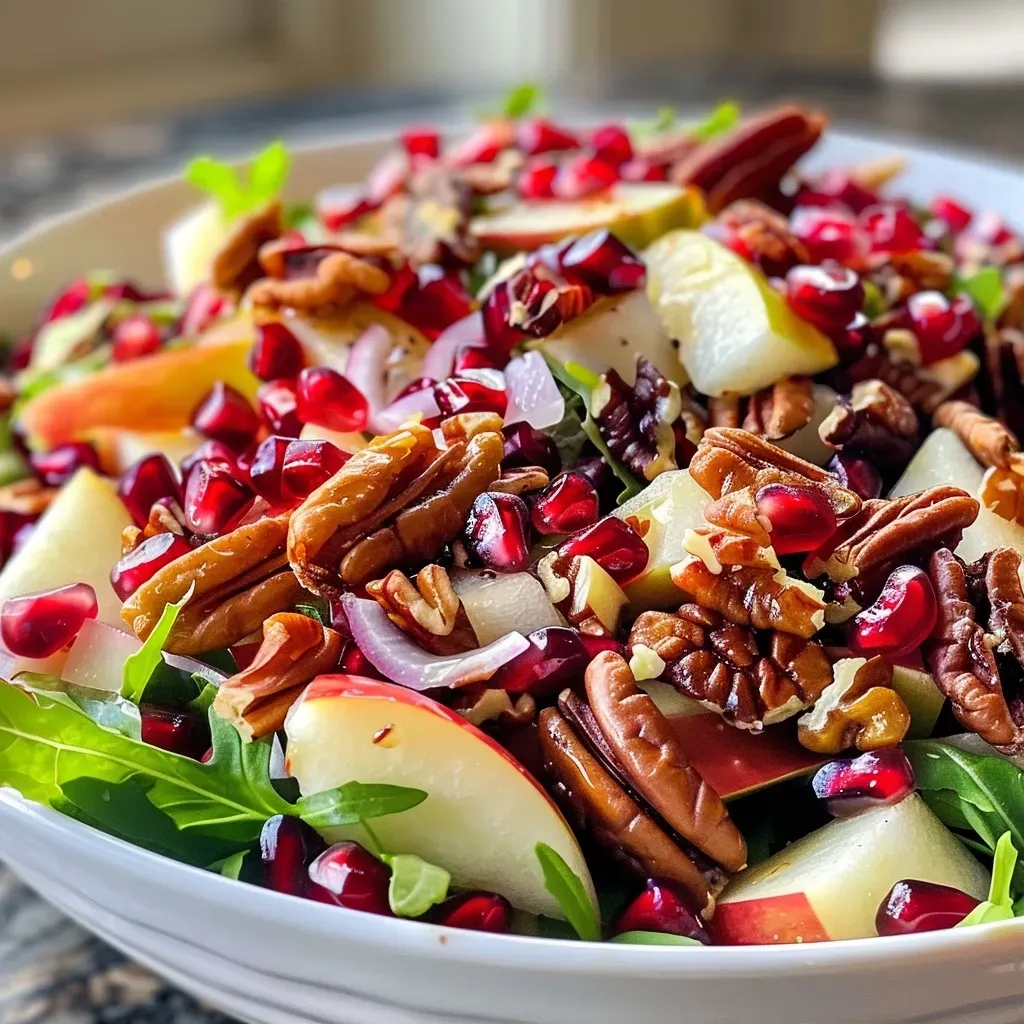
Candied Pecans

Prep Time 10 minutes
Cook Time 40 minutes
Total Time 50 minutes
Servings 4 cups
Calories 220
Sweet and spicy candied pecans make a perfect snack or topping for desserts and salads.

Ingredients

Spice Mixture

  • 1/2 cup granulated (white) sugar
  • 1/2 cup packed light brown sugar
  • 1 tablespoon ground cinnamon
  • 1 teaspoon fine sea salt
  • 1/8 teaspoon ground cayenne

Pecans

  • 12 ounces raw pecans halves
  • 1 egg white briefly whisked

Instructions 

  • Preheat oven to 300°F (150°C). Line a baking sheet with parchment.
  • Mix sugar, brown sugar, cinnamon, salt, and cayenne in a bowl.
  • Toss pecans with egg white, then coat with sugar mixture.
  • Spread pecans on baking sheet and bake for 20 minutes, stir, then bake 20 more minutes.
  • Cool on wire rack. Serve immediately or store for up to 2 weeks.

Notes

Store in an airtight container for best freshness.
Calories: 220kcal
Cost: $10
Course: Snack
Cuisine: American
Keyword: Pecans

Indulge in a High-Protein Pumpkin Cheesecake That Delivers Flavor and Nutrition

As the cooler months approach, the craving for comfort food kicks in, and what better way to celebrate the season than with a deliciously healthy pumpkin cheesecake? This pumpkin cheesecake recipe is not just a treat for your taste buds; it’s crafted with your nutritional goals in mind. With the perfect balance of flavor and health, this cheesecake uses Greek yogurt and other wholesome ingredients to create a dessert that is high in protein, low in calories, and undeniably satisfying.

Keep reading to discover how to make this delightful dish, along with tips, variations, and answers to all your burning questions about making the perfect cheesecake. Let’s get started!

Why You’ll Love This Recipe

This is not just any cheesecake; here’s why you’ll absolutely adore making and eating this pumpkin cheesecake:

  • Higher Protein Content: Packed with Greek yogurt and Greek cream cheese, this recipe boosts your protein intake without compromising on taste.
  • Low-Calorie Indulgence: Each slice is low in calories, allowing you to satisfy your sweet tooth without the guilt.
  • Simple Ingredients: Made with common pantry staples, you can whip this up without a trip to specialty stores.
  • Seasonal Flavor: Embrace the flavors of fall with pumpkin puree, cinnamon, and nutmeg that create a warm, inviting taste.
  • Versatile Dessert: Perfect for any occasion, from holiday gatherings to a simple weeknight treat.

Ingredient Breakdown

Understanding each ingredient’s role helps you appreciate why this cheesecake stands out. Here’s a detailed look:

  • 1 1/2 cups Gluten Free Baking Flour: Provides the necessary structure while keeping the cheesecake gluten-free.
  • 2 tablespoons coconut sugar: A healthier sweetener option with a lower glycemic index than regular sugar.
  • 2/3 cup extra virgin olive oil: Adds moisture and healthy fats, making the cheesecake rich and creamy.
  • 2 tablespoons unsweetened almond milk: Keeps the mixture smooth; feel free to substitute with regular milk if preferred.
  • 1/4 teaspoon salt: Enhances the flavors of the cheesecake.
  • 1/2 cup Nonfat Greek yogurt: Increases protein content while keeping the cheesecake light.
  • 1/2 cup Pumpkin Puree: Provides moisture, flavor, and that beautiful orange color.
  • 1/2 cup Greek Cream Cheese: A lower-fat alternative to regular cream cheese, ensuring creaminess without excess calories.
  • 1 teaspoon Vanilla Extract: Adds a depth of flavor that complements the pumpkin.
  • 2 drops Liquid Stevia: A no-calorie sweetener option to adjust sweetness without adding calories.
  • 1 teaspoon Cinnamon: A classic spice that enhances the pumpkin flavor.
  • 1/4 teaspoon Ground Ginger: Adds warmth and a hint of spice.
  • 1/4 teaspoon Nutmeg: Complements the other spices and adds a holiday feel.

Step-by-Step Instructions

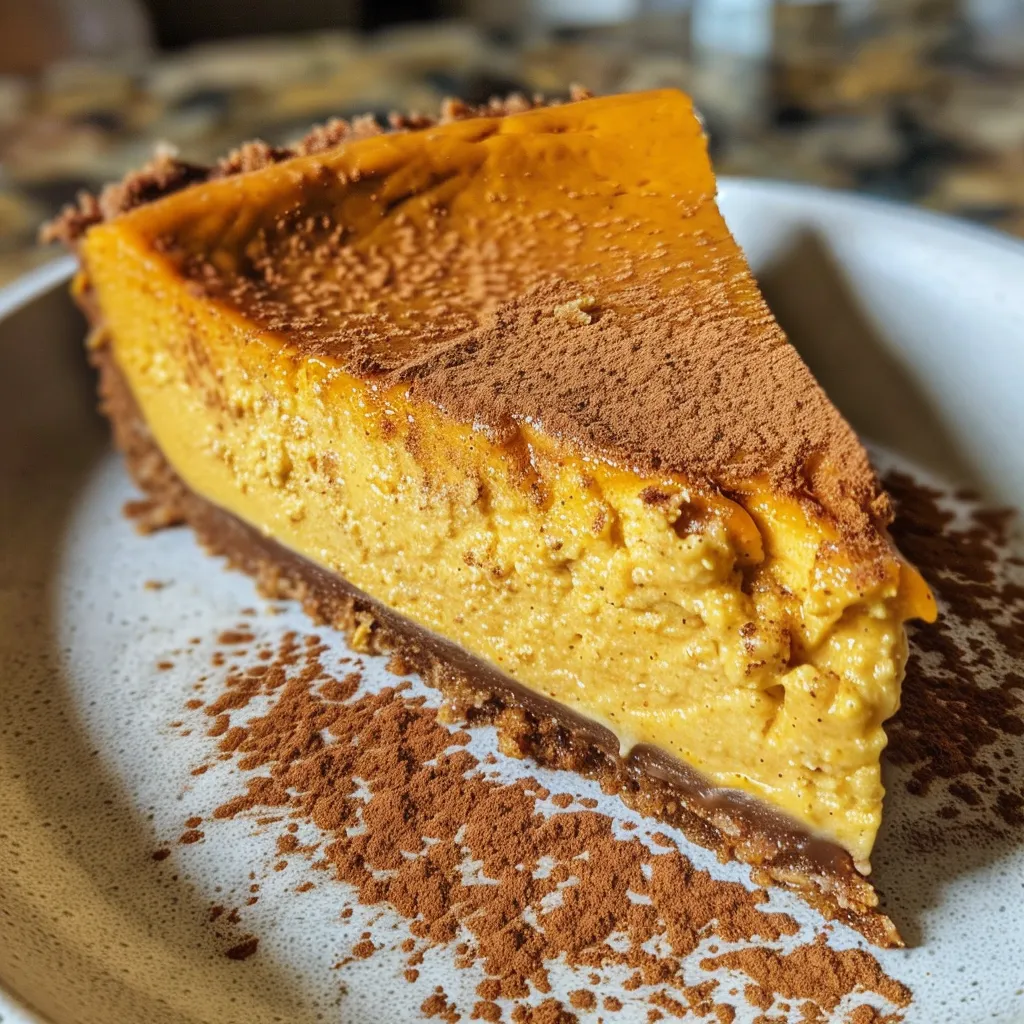
Side view of a slice of pumpkin cheesecake made with Greek yogurt, highlighting its smooth and rich appearance.

Making this cheesecake is straightforward and rewarding. Follow these simple steps:

  • Preheat your oven to 350°F (175°C).
  • In a large bowl, mix the gluten-free flour, coconut sugar, and salt until well combined.
  • Add the olive oil and almond milk, stirring until smooth.
  • In a separate bowl, whisk together the Greek yogurt, pumpkin puree, cream cheese, vanilla extract, stevia, and spices until creamy.
  • Combine the wet and dry ingredients, mixing until fully incorporated.
  • Pour the mixture into a greased cheesecake pan and smooth the top.
  • Bake for 30-35 minutes or until the center is set but still slightly jiggly.
  • Allow to cool at room temperature, then refrigerate for at least 4 hours before serving.

Pro Tips for Perfect Pumpkin Cheesecake

Elevate your cheesecake game with these expert tips:

  • Room Temperature Ingredients: Ensure your cream cheese and Greek yogurt are at room temperature to avoid lumps.
  • Don’t Overmix: Mix just until combined; overmixing can lead to a dense texture.
  • Silicone Bakeware: For easy removal, consider using silicone pans that allow for a smooth release.
  • Chill Before Serving: Allowing the cheesecake to chill enhances the flavors and improves texture.
  • Use a Water Bath: For a creamier filling, bake your cheesecake in a water bath to prevent cracks.
  • Sweetness Adjustment: Taste your batter before baking and adjust sweetness to your liking.
  • Garnish Wisely: Top with whipped Greek yogurt and a sprinkle of cinnamon for an elegant finish.
  • Storage: This cheesecake lasts well in the fridge for up to 5 days. Just cover it tightly to maintain freshness.

Common Mistakes and Troubleshooting

Avoid these pitfalls to ensure your cheesecake turns out perfectly:

  • Overbaking: Keep an eye on time; overbaking can lead to a dry cheesecake.
  • Not Cooling Properly: Let it cool completely at room temperature before refrigeration to avoid condensation.
  • Skipping Ingredients: Each ingredient plays a vital role; skipping can affect taste and texture.

Variations to Try

Feeling adventurous? Here are some tasty variations you can experiment with:

  • Chocolate Swirl: Add melted dark chocolate to the batter for a decadent twist.
  • Maple Pecan Topping: Top with a mixture of toasted pecans and maple syrup for added crunch.
  • Spiced Apple: Fold in diced apples and additional cinnamon for a delightful flavor combo.
  • Nut-Free Version: Substitute almond milk with oat or soy milk for a nut-free option.

Storage and Make-Ahead Instructions

This cheesecake can be made ahead of time, making it perfect for gatherings:

  • Refrigerate: Store covered in the fridge for up to 5 days.
  • Freeze: For longer storage, wrap tightly and freeze for up to 2 months. Thaw in the fridge overnight before serving.
  • Make Ahead: Prepare a day in advance for best results; flavors will meld beautifully.

Comprehensive FAQ

Here are some common questions that may arise:

  • Can I use regular cream cheese instead of Greek cream cheese? Yes, but this will slightly increase the fat content.
  • How do I know when the cheesecake is done? It should be set around the edges but still slightly jiggly in the center.
  • Can I substitute pumpkin puree with another flavor? Absolutely, you can use mashed bananas or applesauce for a different flavor profile.
  • Is this cheesecake gluten-free? Yes, as long as you use gluten-free flour.
  • Can I make this recipe vegan? You can try substituting with vegan cream cheese and yogurt alternatives.
  • What’s the best way to serve this cheesecake? Serve chilled, topped with a dollop of Greek yogurt or whipped cream.
  • How do I prevent cracks in my cheesecake? Use a water bath and avoid overmixing your batter.
  • Can I add more spices? Yes, feel free to adjust spices according to your taste preference.

Nutritional Tips and Dietary Adaptations

This cheesecake is not only delicious but also accommodates various dietary needs:

  • Low-Calorie Option: Use stevia or another zero-calorie sweetener to reduce sugar content.
  • Higher Protein: Incorporate more Greek yogurt or consider adding protein powder to the mix.
  • Low-Fat Version: Stick to nonfat dairy products to keep fat content in check.

Equipment Recommendations

To make this cheesecake, here’s what you’ll need:

  • Mixing Bowls: Use large and medium bowls for mixing ingredients.
  • Measuring Cups and Spoons: Accurate measurements are key to success.
  • Whisk or Electric Mixer: For blending ingredients smoothly.
  • Cheesecake Pan: A springform pan works best for easy release.
  • Spatula: For scraping down the sides and smoothing the top.

Serving Suggestions

Here’s how to make your cheesecake presentation pop:

  • Fresh Berries: Serve with mixed berries for a pop of color and flavor.
  • Whipped Cream: A dollop of whipped Greek yogurt or coconut cream adds a nice touch.
  • Cinnamon Sprinkles: Dust with cinnamon for an added visual appeal.

With this comprehensive guide, you’re well-equipped to create a healthy pumpkin cheesecake that delights your taste buds while keeping your macros in check. Remember, cooking is about experimentation, so feel free to adapt this recipe to suit your preferences. Enjoy your guilt-free indulgence!

Healthy Pumpkin Cheesecake with Greek Yogurt

Prep Time 15 minutes
Cook Time 30 minutes
Total Time 45 minutes
Servings 8 pieces
Calories 250
A delicious and healthy pumpkin cheesecake featuring Greek yogurt, perfect for fall gatherings or a nutritious dessert.

Ingredients

Dough

  • 1 1/2 cups Gluten Free Baking Flour (or regular oat flour)
  • 2 tablespoons coconut sugar

Filling

  • 2/3 cup extra virgin olive oil
  • 2 tablespoons unsweetened almond milk (or milk of choice)
  • 1/4 teaspoon salt
  • 1/2 cup Nonfat Greek yogurt
  • 1/2 cup Pumpkin Puree
  • 1/2 cup Greek Cream Cheese (or 1/3 less fat cream cheese)
  • 1 teaspoon Vanilla Extract
  • 2 drops Liquid Stevia (or zero calorie sweetener of choice)
  • 1 teaspoon Cinnamon
  • 1/4 teaspoon Ground Ginger
  • 1/4 teaspoon Nutmeg

Instructions 

  • Preheat oven to 350°F (175°C). Prepare crust with flour and coconut sugar, then press into a baking pan.
  • Mix pumpkin puree, Greek yogurt, cream cheese, vanilla, stevia, and spices to make the filling.
  • Pour filling over crust and bake for 30 minutes until set.
  • Let cool, then refrigerate before serving.

Notes

Use fresh spices for the best flavor and refrigerate leftovers.
Calories: 250kcal
Cost: $15
Course: Dessert
Cuisine: American
Keyword: cheesecake, healthy, Pumpkin

Master the Art of Protein-Packed French Toast Muffins

Are you tired of bland breakfasts that leave you feeling unsatisfied and craving more? Meet French Toast Muffins, the perfect solution for those looking to hit their protein goals without sacrificing flavor. These muffins blend the classic taste of French toast with the convenience of a muffin, making them ideal for busy mornings. With a rich custard base and the added crunch of toasted pecans, these muffins are not just nutritious; they’re downright delicious. Let’s dive into how to create these satisfying bites that will keep you fueled for the day ahead!

Why You’ll Love This Recipe

  • Protein Power: Packed with eggs and milk, these muffins provide the protein boost you need to start your day right.
  • Meal Prep Friendly: Prepare a batch ahead of time for a quick breakfast option that’s ready when you are.
  • Customizable: Make them your own by adding different fruits, nuts, or spices based on your preferences.
  • Minimal Cleanup: Easily made in a muffin pan, these muffins simplify breakfast without the hassle of multiple dishes.
  • Deliciously Versatile: Perfect for brunch, a quick snack, or a sweet treat any time of day!

Ingredients Breakdown

To make these delightful French Toast Muffins, you’ll need the following ingredients:

  • 4 cups lightly packed cubed bread: Use soft Italian, French, Challah, or Brioche for the best texture.
  • 2 large eggs: These provide the structure and protein.
  • 1 cup milk: Whole milk is preferred, but you can substitute with almond milk for a dairy-free option.
  • 1/4 cup packed dark brown sugar: Adds sweetness and moisture.
  • 4 tablespoons unsalted butter (melted): For richness and flavor.
  • 1 tablespoon all-purpose flour: Helps bind the ingredients together.
  • 1 teaspoon vanilla extract: Enhances the overall flavor.
  • 1/4 teaspoon ground cinnamon: A warm spice that complements the sweetness.
  • 1/8 teaspoon salt: Balances the flavors.
  • 1/4 cup toasted pecans (chopped): Adds a delightful crunch and nutty flavor.

How to Make French Toast Muffins

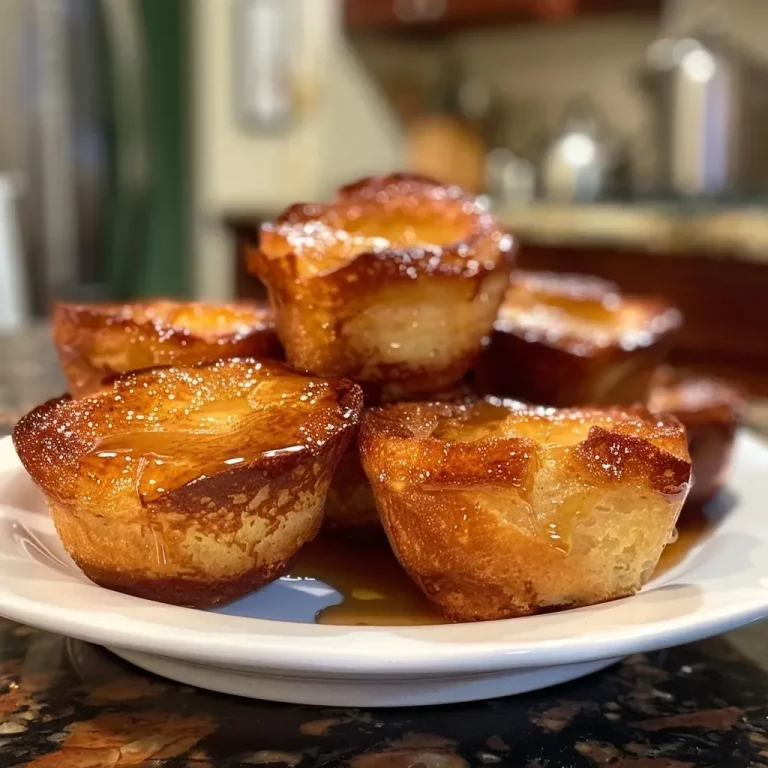
Side view of freshly baked French Toast Muffins showcasing their fluffy interior.

Follow these simple steps to create your French Toast Muffins:

  1. Preheat the oven to 350°F. Generously spray a 6-cup muffin pan with non-stick cooking spray.
  2. Mix wet ingredients: In a large bowl, whisk together the eggs, milk, melted butter, brown sugar, vanilla, and salt until combined.
  3. Add the bread: Toss in the cubed bread and stir until well-coated with the egg mixture.
  4. Fill the muffin pan: Divide the mixture into the greased muffin cups, ensuring even distribution.
  5. Prepare the topping: In a small bowl, mix chopped pecans with brown sugar and cinnamon, then sprinkle over the muffin batter.
  6. Bake for about 30 minutes or until the muffins are puffed and golden brown. Let them cool on a wire rack.
  7. Serve warm: Dust with confectioners’ sugar and drizzle with maple syrup for an indulgent finish.

Expert Pro Tips for Perfect Muffins

  • Choose the right bread: Stale bread absorbs the custard better, so feel free to use leftover bread from previous meals.
  • Don’t overmix: Gently fold in the bread to avoid gummy muffins.
  • Variate your nuts: Swap pecans for walnuts or almonds based on your taste preferences.
  • Adjust sweetness: If you prefer less sweetness, reduce the brown sugar or substitute with a sugar alternative.
  • Consider the oven: Every oven is different, so keep an eye on your muffins as they bake to avoid overcooking.
  • Try different spices: Add nutmeg or pumpkin spice for an extra flavor twist.
  • Store properly: Keep leftover muffins in an airtight container to maintain freshness.
  • Experiment with fillings: Add chocolate chips or berries for a fun surprise in each bite.

Common Mistakes and Troubleshooting

Even the best of us can encounter hiccups while baking. Here are some common pitfalls and how to avoid them:

  • Muffins are too dry: This can occur if you overbake or use stale bread. Keep an eye on them in the oven and ensure your bread is just slightly stale, not completely dried out.
  • Egg mixture isn’t soaking in: Make sure to let the mixture sit for a few minutes before baking to allow the bread to absorb the custard.
  • Too sweet: If you’ve added too much sugar, balance it out by serving with plain yogurt or a less sweet topping.
  • Burnt tops: If your muffins are browning too quickly, cover them with foil halfway through baking.

Delicious Variations to Try

Want to switch things up? Here are some enticing variations to make your French Toast Muffins even more exciting:

  • Berry Blast: Add 1 cup of fresh or frozen blueberries or raspberries to the batter for a fruity twist.
  • Chocolate Chip Delight: Fold in 1/2 cup of chocolate chips for a dessert-like treat.
  • Banana Nut: Incorporate 1 ripe mashed banana and a handful of walnuts for added flavor and texture.
  • Spiced Apple: Mix in diced apples and a dash of nutmeg for a cozy fall-inspired muffin.

Storage and Make-Ahead Instructions

These muffins are great for meal prep! Here’s how to store and reheat them:

  • Fridge: Store in an airtight container in the refrigerator for up to 5 days.
  • Freezer: Freeze muffins individually wrapped in plastic wrap, then place them in a freezer-safe bag for up to 3 months.
  • Reheating: Microwave for 20-30 seconds or toast in the oven at 350°F for about 10 minutes until warmed through.

Comprehensive FAQ

  • Can I make these muffins gluten-free? Yes, you can use gluten-free bread and flour as substitutes.
  • How do I know when they’re done baking? Muffins should be puffed up and golden brown; a toothpick inserted should come out clean.
  • Can I use other types of milk? Absolutely! Almond milk, oat milk, or soy milk can work just fine.
  • What can I serve with these muffins? Pair them with yogurt, fresh fruit, or a drizzle of peanut butter for extra protein.
  • Can I double the recipe? Yes, simply double the ingredients and use a larger muffin pan or bake in batches.
  • What if I don’t have a muffin pan? You can use a ramekin or bake it in a larger dish, adjusting the baking time.
  • Can I make these muffins vegan? Substitute eggs with flax eggs and use plant-based milk and butter.
  • How can I enhance the flavor? Consider adding zest from an orange or lemon for a citrusy kick.

Nutritional Insights and Dietary Adaptations

These muffins can fit various dietary needs:

  • High Protein: Packed with eggs and milk, they’re perfect for fueling your workouts.
  • Low Sugar Option: Reduce the sugar or use sugar alternatives for a healthier muffin.
  • Dairy-Free: Substitute milk and butter with plant-based options.

Essential Equipment for Success

Here’s what you’ll need to whip up these muffins:

  • Muffin Pan: A standard 6-cup muffin pan is recommended for even baking.
  • Mixing Bowls: Use a large bowl for mixing and a smaller bowl for toppings.
  • Whisk: Essential for combining wet ingredients smoothly.
  • Measuring Cups and Spoons: Precision is key in baking!

Serving Suggestions

Enhance your French Toast Muffins with these delicious accompaniments:

  • Maple Syrup: A classic choice for drizzling on top.
  • Fresh Berries: Serve with strawberries, blueberries, or raspberries for a refreshing contrast.
  • Yogurt: Greek yogurt adds creaminess and protein.
  • Nuts: Sprinkle additional chopped nuts for extra crunch and nutrition.

Final Thoughts

Now you have a complete guide to creating Protein-Packed French Toast Muffins that are not only delicious but also nutritious. Whether you’re meal prepping for the week or looking for a special brunch treat, these muffins are sure to impress. With the flexibility to customize and adapt to your dietary needs, they are an easy staple for any kitchen. So, roll up your sleeves, gather your ingredients, and enjoy a breakfast that fuels your day without compromise!

French Toast Muffins

Prep Time 10 minutes
Cook Time 30 minutes
Total Time 40 minutes
Servings 6 muffins
Calories 250
Enjoy these delicious and easy-to-make French Toast Muffins, perfect for a cozy breakfast or brunch treat.

Ingredients

Bread

  • 4 cups lightly packed cubed bread (Italian, French, Challah, Brioche) (Use soft bread for best texture)
  • 2 large eggs
  • 1 cup milk
  • 1/4 cup packed dark brown sugar
  • 4 tablespoons unsalted butter (melted)
  • 1 tablespoon all-purpose flour
  • 1 teaspoon vanilla extract
  • 1/4 teaspoon ground cinnamon
  • 1/8 teaspoon salt
  • 1/4 cup toasted pecans (chopped)
  • 1 tablespoon packed dark brown sugar
  • 1/4 teaspoon ground cinnamon

Instructions 

  • Preheat oven to 350°F (175°C). Spray a 6-cup muffin pan with non-stick spray.
  • Whisk eggs, milk, brown sugar, melted butter, flour, vanilla, cinnamon, and salt in a large bowl.
  • Add bread cubes to the mixture and toss to coat evenly. Divide into muffin cups and drizzle remaining custard on top.
  • Mix chopped pecans, brown sugar, and cinnamon for topping; sprinkle over muffins.
  • Bake for 30 minutes until golden and puffy. Cool slightly and serve warm.

Notes

For extra flavor, top with powdered sugar or serve with maple syrup.
Calories: 250kcal
Cost: $12
Course: Breakfast
Cuisine: French
Keyword: Bread, Eggs

Transform Your Salad Game with the Ultimate Balsamic Pecan Salad

Are you tired of the same old bland salads that leave you unsatisfied? Look no further! This balsamic pecan salad combines vibrant greens with the rich crunch of toasted pecans and a tangy balsamic vinaigrette, creating a dish that fuels your gains and satisfies your taste buds. In this article, we’ll break down everything you need to know to make this salad a staple in your kitchen, ensuring you hit your protein goals without sacrificing flavor.

Why You’ll Love This Recipe

This salad is not just a mix of greens; it’s a powerhouse of nutrients and flavors! Here are five compelling reasons to try it:

  • Protein-Packed: With toasted pecans adding a healthy dose of protein, this salad supports muscle recovery and growth.
  • Quick and Easy: Ready in just 15 minutes, it’s perfect for busy weeknight dinners or meal prep.
  • Flavor Explosion: The combination of sweet, crunchy pecans with a tangy balsamic dressing creates a delightful balance of flavors.
  • Versatile: Perfect as a side dish, light meal, or even as a base for grilled chicken or shrimp.
  • Customizable: Easily adjust ingredients and toppings to suit your taste or dietary needs.

Ingredient Breakdown

Let’s dive into the ingredients that make this salad shine. Here’s what you’ll need:

  • 1 head romaine lettuce: Shredded for a crisp base.
  • 1/4 cup cucumber: Diced for a refreshing crunch.
  • 1/4 cup tomatoes: Chopped for a juicy burst of flavor.
  • 1/3 cup pecans: Toasted to perfection for added richness.
  • 1/8 tsp sea salt: To enhance the flavors.
  • 1/8 tsp black pepper: Or to taste, for a bit of heat.
  • 1 tbsp extra virgin olive oil: For a healthy fat source.
  • 1 drizzle of balsamic glaze: To finish it off with a sweet tang.

**Ingredient Substitutions:** If you’re looking to mix things up or accommodate dietary restrictions, consider these substitutions:

  • Lettuce: Swap romaine for spinach or mixed greens for a different flavor profile.
  • Pecans: Use walnuts or almonds if you prefer.
  • Tomatoes: Cherry tomatoes or bell peppers can provide a sweet crunch.
  • Olive oil: Avocado oil or any neutral oil can work well.

How to Make Your Balsamic Pecan Salad

Tasty Balsamic Pecan Salad with romaine lettuce, tomatoes, and pecans.

Follow these simple steps to create your salad:

  1. Cut the lettuce into shreds and add it to a salad bowl.
  2. Chop the cucumber and tomato, then add them on top of the lettuce.
  3. In a dry non-stick pan on medium-low heat, toast the pecans for 4 minutes until warm and fragrant, making sure to move them around so they don’t burn.
  4. Place the warm pecans on top of the salad. Add the sea salt, black pepper, olive oil, and drizzle the balsamic glaze over everything.
  5. Serve and enjoy! Toss with a fork to incorporate the dressing.

Pro Tips for the Perfect Salad

Here are some expert insights to elevate your salad-making skills:

  • Fresh Ingredients: Use the freshest produce you can find for the best flavor and texture.
  • Toast Your Nuts: Toasting the pecans enhances their flavor; don’t skip this step!
  • Make Ahead: Prepare the salad ingredients in advance but add dressing just before serving to avoid sogginess.
  • Dress It Right: A light drizzle of dressing is usually enough; you can always add more!
  • Chill Before Serving: Letting the salad chill for a bit can help meld the flavors.
  • Experiment with Dressings: Try different vinegars or oils to find your favorite combination.
  • Balance Your Flavors: If your salad is too sweet, add a pinch of salt or a squeeze of lemon juice to balance it out.
  • Add Protein: For a more filling meal, consider adding grilled chicken, chickpeas, or quinoa.

Avoid Common Mistakes

Even seasoned cooks can make mistakes in the kitchen. Here’s how to avoid common pitfalls when making your balsamic pecan salad:

  • Overdressing: Too much dressing can make the salad soggy. Start with less and add more if needed.
  • Using Wilted Greens: Always check your greens for freshness; wilted greens can ruin the salad’s texture.
  • Not Toasting Nuts: Skipping the toasting step can lead to a less flavorful salad.
  • Ignoring Seasoning: Salt and pepper are crucial for enhancing the flavors; don’t forget them!

Variations to Try

Once you’ve mastered the basic salad, try these variations:

  • Fruit Additions: Add sliced apples or berries for a sweet contrast.
  • Cheese Options: Incorporate feta or goat cheese for creaminess.
  • Grain Boost: Toss in cooked quinoa or barley for extra fiber and protein.
  • Herb Infusion: Fresh herbs like basil or cilantro can elevate the flavor profile.

Storage and Make-Ahead Instructions

This salad can be prepared ahead of time, making it perfect for meal prep:

  • Storage: Keep the salad in an airtight container in the fridge for up to 3 days.
  • Dressing Storage: Store the dressing separately to keep the greens crisp.
  • Make Ahead: Pre-chop your vegetables and store them in the fridge, then assemble when ready to eat.

Nutritional Information

This salad is not only delicious but also nutritious. Here’s a quick look at its benefits:

  • Caloric Content: Approx. 250 calories per serving (without additional proteins).
  • Protein: Around 6g from the pecans and additional protein if you add chicken or other sources.
  • Healthy Fats: Packed with healthy fats from olive oil and nuts.
  • Vitamins: Rich in vitamins A and C from the greens and vegetables.

Frequently Asked Questions

Got questions? Here are some answers to common queries about the balsamic pecan salad:

  • Can I use other nuts? Yes, walnuts or almonds are great alternatives!
  • How long does it last in the fridge? Up to 3 days, but best consumed fresh.
  • Is this salad gluten-free? Absolutely, all the ingredients are naturally gluten-free.
  • Can I make this vegan? Yes, just leave out any cheese or meat and use a vegan dressing.
  • How can I add more protein? Consider adding grilled chicken, chickpeas, or even tofu.
  • What type of balsamic glaze should I use? A high-quality balsamic glaze will provide the best flavor.
  • How can I make this salad spicier? Add sliced jalapeños or a spicy dressing for a kick!
  • Can I use store-bought candied pecans? Yes, just watch out for added sugars!

Essential Equipment Recommendations

Having the right tools can make your salad prep effortless:

  • Salad Bowl: A large bowl for easy mixing.
  • Knife: A sharp knife for clean cuts.
  • Cutting Board: A sturdy board to chop your ingredients safely.
  • Non-Stick Pan: For toasting nuts without burning.

Serving Suggestions

This salad is incredibly versatile. Here are some ideas for serving:

  • As a Side Dish: Pair it with grilled meats or fish for a complete meal.
  • Light Lunch: Add a protein source for a filling lunch on its own.
  • Picnic Perfect: Pack it for a healthy meal on the go.
  • Meal Prep: Make a big batch for the week and enjoy it daily.

In conclusion, the balsamic pecan salad isn’t just a salad; it’s a celebration of flavors, textures, and nutrition. With its ease of preparation and endless variations, it’s a dish you’ll want to revisit time and again. So grab your ingredients, and let’s elevate your salad game today!

Balsamic Pecan Salad

Prep Time 10 minutes
Cook Time 4 minutes
Total Time 14 minutes
Servings 2 servings
Calories 250
A fresh and crunchy salad featuring toasted pecans, crisp lettuce, and a tangy balsamic glaze dressing.

Ingredients

Vegetables

  • 1 head romaine lettuce (shredded)
  • 0.25 cup cucumber (diced)
  • 0.25 cup tomatoes (chopped)

Nuts & Seeds

  • 0.33 cup pecans (toasted)

Seasonings & Oils

  • 0.125 tsp sea salt
  • 0.125 tsp black pepper (to taste)
  • 1 tbsp extra virgin olive oil
  • 1 drizzle balsamic glaze

Instructions 

  • Shred the lettuce and place in a salad bowl. Add diced cucumber and chopped tomatoes on top.
  • Toast pecans in a dry pan over medium-low heat for 4 minutes until fragrant, stirring frequently.
  • Add toasted pecans to the salad. Season with sea salt and black pepper.
  • Drizzle olive oil and balsamic glaze over the salad. Toss gently to combine.

Notes

Use fresh ingredients for best flavor and crunch.
Calories: 250kcal
Cost: $12
Course: Salad
Cuisine: American
Keyword: Balsamic, Pecan

Unlock the Secret to Deliciously Moist Buttermilk Cornbread Muffins

If you’re on a mission to hit your protein goals without sacrificing flavor, you’re in the right place. These buttermilk cornbread muffins not only offer a delightful texture but also pack a punch of flavor, making them perfect for breakfast, snacks, or even a side dish. In this comprehensive guide, I’ll walk you through everything you need to know about making the best cornbread muffins, from ingredients to expert tips. Let’s get you set up for success!

Why You’ll Love This Recipe

  • Protein-Packed: Each muffin contains a good amount of protein, thanks to the addition of eggs and buttermilk, helping you stay on track with your nutrition goals.
  • Versatile & Flavorful: These muffins are not just for breakfast; they pair beautifully with soups, stews, or as a standalone snack.
  • Easy Preparation: With simple ingredients and straightforward steps, these muffins can be whipped up quickly, making them perfect for meal prep.
  • Customizable: Feel free to add your favorite mix-ins such as cheese, jalapeños, or herbs for an extra flavor kick.
  • Moist & Delicious: The buttermilk ensures that these muffins are moist and tender, with a slight tang that enhances their flavor.

Ingredient Breakdown and Substitutions

Understanding your ingredients is crucial for creating the perfect buttermilk cornbread muffins. Here’s a closer look at each component:

  • Ground Cornmeal: This is the star of the show! It provides that classic cornbread texture and flavor. You can use yellow or white cornmeal interchangeably.
  • All-Purpose Flour: Adds structure to your muffins. You can substitute with whole wheat flour for added fiber, but the texture may vary.
  • Granulated Sugar: While optional, a little sugar can balance the flavors. If you prefer a savory muffin, feel free to omit it.
  • Baking Powder & Baking Soda: These leavening agents work together to give your muffins a nice rise. Make sure they’re fresh for best results!
  • Salt: Enhances all the flavors in your muffins. Don’t skip it!
  • Buttermilk: This ingredient adds moisture and tenderness. If you’re out, you can make a quick substitute by mixing regular milk with a teaspoon of vinegar or lemon juice.
  • Melted Butter: Adds richness and flavor. You can use coconut oil or a dairy-free butter alternative if needed.
  • Eggs: These provide structure and moisture. You can substitute with flax eggs for a vegan option.

Step-by-Step Instructions for Perfect Muffins

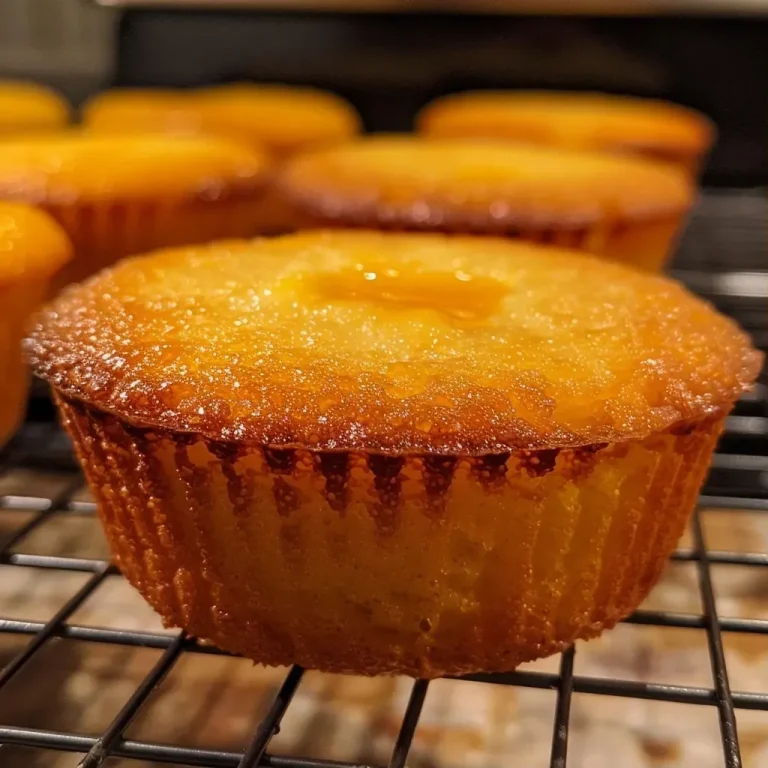
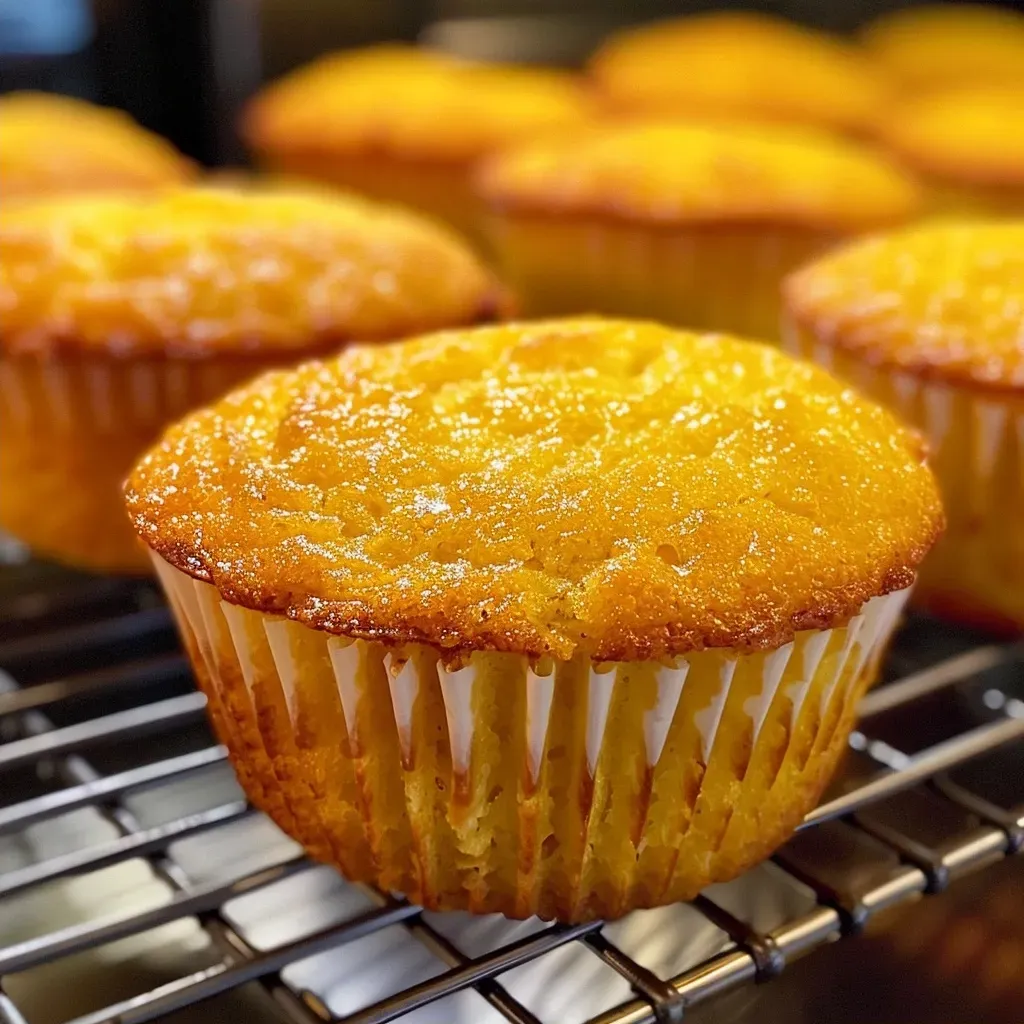
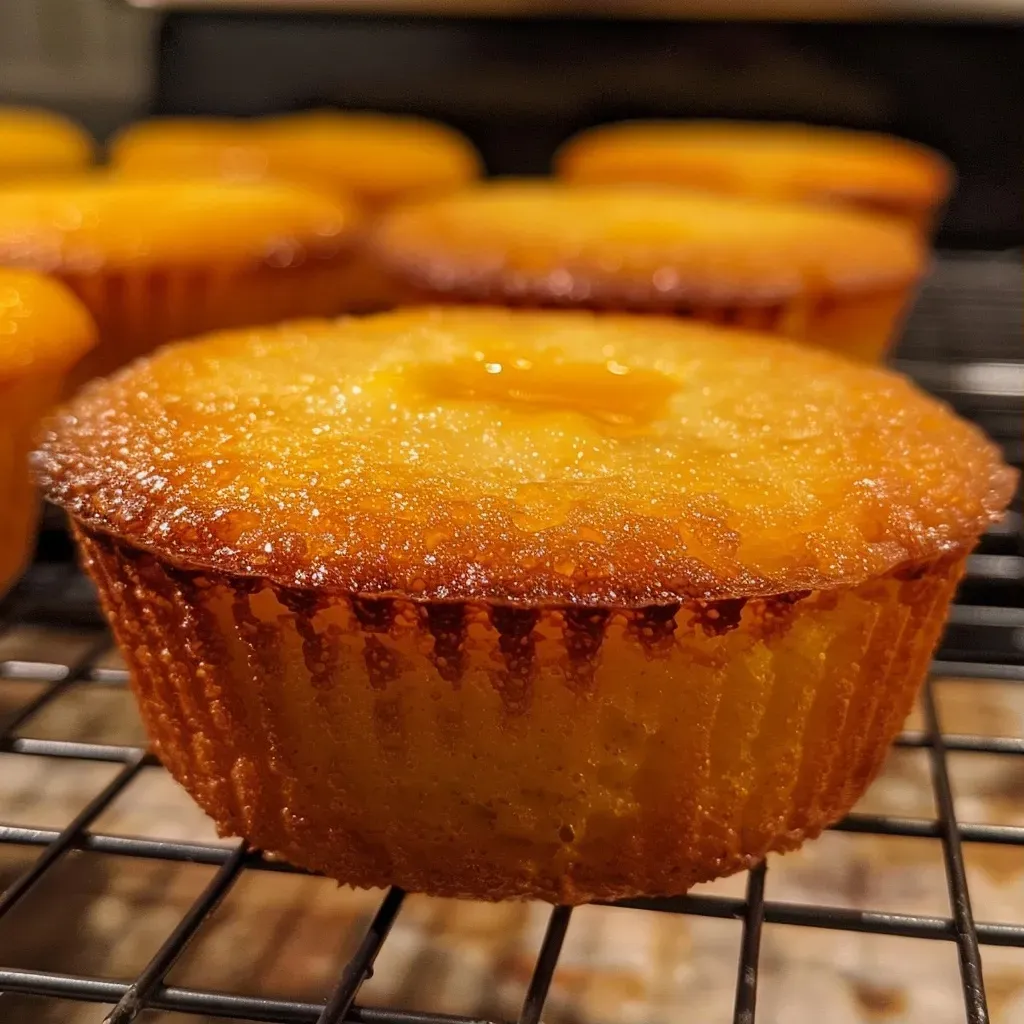
Juicy, baked buttermilk cornbread muffins with a golden crust, presented from a side angle.

Follow these detailed steps to create your own batch of delicious buttermilk cornbread muffins:

  1. Preheat your oven to 400°F (204°C). Grease a 12-cup muffin pan with butter or cooking spray and set aside.
  2. In a large mixing bowl, combine 1 1/4 cups ground cornmeal, 3/4 cup all-purpose flour, 2 tablespoons granulated sugar (if using), 2 teaspoons baking powder, 1 teaspoon baking soda, and 1 teaspoon salt. Whisk until there are no clumps.
  3. Make a well in the center of your dry ingredients and add 1 cup buttermilk, 6 tablespoons melted butter, and 2 large eggs. Mix until just combined—don’t overmix!
  4. Portion the batter evenly into your muffin tins, filling each about 3/4 full.
  5. Bake for 11-14 minutes, or until the tops spring back when gently pressed and a toothpick inserted comes out clean.
  6. Let the muffins cool in the pan for at least 5 minutes before transferring them to a wire rack.
  7. Optionally, brush the tops with a little melted butter for added flavor before serving.

Pro Tips for Success

  • Check Your Leavening Agents: Make sure your baking powder and soda are fresh for optimal rise.
  • Don’t Overmix: Mix just until combined to keep your muffins light and fluffy.
  • Test for Doneness: Use a toothpick to check if your muffins are cooked through—if it comes out clean, they’re ready!
  • Cooling Time: Allow your muffins to cool slightly in the pan to prevent them from sticking.
  • Experiment with Add-ins: Consider adding shredded cheese, bacon bits, or diced jalapeños for a savory twist.
  • Use Room Temperature Ingredients: This helps everything to combine more easily, resulting in a better batter.
  • Store Properly: Keep your muffins in an airtight container for freshness.
  • Make-ahead Option: You can prepare the dry ingredients ahead of time and store them, so you’re ready to bake when the mood strikes.
  • Don’t Skip the Salt: It’s a key flavor enhancer that balances the sweetness.
  • Brush with Butter: For an extra touch of flavor, brush the hot muffins with melted butter right after baking.

Common Mistakes and Troubleshooting

Even the best of us make mistakes in the kitchen. Here are some common pitfalls and how to avoid them:

  • Dry Muffins: This can happen if you overmix the batter or use too much flour. Always scoop and level your flour instead of scooping directly from the bag.
  • Dense Texture: If your muffins are too dense, it might be due to expired leavening agents or overmixing. Check freshness and mix gently.
  • Sticking to the Pan: Ensure you grease your muffin tin well, or use paper liners to prevent sticking.
  • Uneven Baking: If some muffins are browner than others, make sure to rotate your pan halfway through baking.

Variations to Try

These buttermilk cornbread muffins are delicious as is, but here are some variations to elevate your experience:

  • Cheddar Jalapeño: Add 1 cup of shredded cheddar cheese and 1-2 diced jalapeños for a spicy kick.
  • Blueberry Cornbread Muffins: Fold in 1 cup of fresh or frozen blueberries for a sweet and tangy treat.
  • Herbed Corn Muffins: Mix in dried herbs like thyme or rosemary for a savory version.
  • Maple Pecan: Substitute 1/4 cup of sugar with maple syrup and add chopped pecans for a nutty flavor.

Storage and Make-Ahead Instructions

Storing your muffins correctly will keep them fresh and delicious:

  • Room Temperature: Store in an airtight container at room temperature for up to 3 days.
  • Refrigerator: For longer storage, keep in the fridge for up to a week.
  • Freezing: Freeze muffins in a single layer on a baking sheet, then transfer to a freezer-safe bag for up to 3 months. Reheat in the oven or microwave when ready to enjoy.
  • Make Ahead: Prepare the dry ingredients up to a week in advance, store in an airtight container, and then mix in the wet ingredients when you’re ready to bake.

Comprehensive FAQ

  • Can I use regular milk instead of buttermilk? Yes! Mix regular milk with a teaspoon of vinegar or lemon juice to mimic buttermilk.
  • How do I know when my muffins are done? The tops should spring back when touched, and a toothpick should come out clean when inserted in the center.
  • Can these muffins be made gluten-free? Absolutely! Substitute all-purpose flour with a gluten-free flour blend.
  • What can I use instead of eggs? Try using flax eggs (1 tablespoon of flaxseed meal + 2.5 tablespoons of water = 1 egg).
  • How can I make these muffins sweeter? Simply add more sugar or include sweet add-ins like chocolate chips or honey.
  • What’s the best way to reheat frozen muffins? Thaw overnight in the fridge and reheat in the oven for a couple of minutes.
  • Can I double this recipe? Yes! Simply double all the ingredients and use two muffin tins.
  • How long does it take to bake mini muffins? Mini muffins typically take about 8-10 minutes to bake at the same temperature.

Nutrition Tips and Dietary Adaptations

These muffins can be adapted to fit various dietary needs:

  • Low-Carb Option: Use almond flour instead of all-purpose flour for a lower-carb version.
  • Dairy-Free: Substitute buttermilk with a dairy-free alternative and use coconut oil instead of butter.
  • Higher Fiber: Incorporate whole wheat flour for added fiber.
  • Low-Sugar: Reduce or omit the sugar, or use a sugar substitute if desired.

Equipment Recommendations

To ensure your baking process goes smoothly, here are some essential tools:

  • Muffin Pan: A non-stick muffin pan will help your muffins release easily.
  • Mixing Bowls: Use large mixing bowls for combining dry and wet ingredients.
  • Whisk: A good whisk is essential for mixing ingredients without clumps.
  • Measuring Cups and Spoons: Accurate measurements lead to the best results.
  • Cooling Rack: Allows your muffins to cool evenly and prevents sogginess.

Serving Suggestions

These muffins are delicious on their own, but here are some ideas to serve them:

  • With Honey Butter: Spread a generous dollop of honey butter on warm muffins for a sweet treat.
  • As a Side Dish: Pair with chili or soup for a comforting meal.
  • Top with Jam: Add your favorite jam or preserves for an extra layer of flavor.
  • Breakfast Sandwich: Split the muffin and fill with scrambled eggs and cheese for a satisfying breakfast.

Now that you’re equipped with all the knowledge needed to create the most delicious and protein-packed buttermilk cornbread muffins, it’s time to get in the kitchen and start baking! Remember, hitting your protein goals doesn’t mean sacrificing taste. Enjoy your culinary adventure!

Buttermilk Cornbread Muffins

Prep Time 10 minutes
Cook Time 12 minutes
Total Time 22 minutes
Servings 12 muffins
Calories 180
These moist and flavorful cornbread muffins are perfect as a side or snack, with a tender crumb and a hint of sweetness.

Ingredients

Dry ingredients

  • 1 1/4 cups ground cornmeal
  • 3/4 cup all purpose flour
  • 2 tablespoons granulated sugar ((optional))
  • 2 teaspoons baking powder
  • 1 teaspoon baking soda
  • 1 teaspoon salt

Wet ingredients

  • 1 cup buttermilk
  • 6 tablespoons unsalted butter ((melted))
  • 2 large eggs

Instructions 

  • Preheat oven to 400°F (200°C). Grease a 12-cup muffin pan.
  • Mix dry ingredients in a bowl. Add wet ingredients and stir until just combined.
  • Divide batter evenly into muffin cups. Bake for 11-14 minutes until golden and a toothpick comes out clean.
  • Cool for 5 minutes before removing. Optionally brush with melted butter before serving.

Notes

For extra flavor, add a touch of honey or serve with butter.
Calories: 180kcal
Cost: $10
Course: Side Dish
Cuisine: American
Keyword: cornbread, cornmeal, Muffins

Welcome to a culinary adventure that not only satisfies your taste buds but also propels you towards your fitness goals. This Quick Chicken Curry recipe is your new go-to for a protein-packed meal that’s bursting with flavor. Perfect for meal prep or a quick weeknight dinner, this dish is designed to keep you energized and satiated without compromising on taste. Let’s dive into why this recipe is a must-try and how it can elevate your cooking game.

Why You’ll Love This Recipe

  • Quick and Easy: With just a handful of ingredients and 30 minutes of cooking time, you can whip up a delicious meal even on your busiest days.
  • Protein Powerhouse: Each serving is packed with protein from chicken and Greek yogurt, making it perfect for muscle recovery and growth.
  • Flavor Explosion: The combination of curry powder, garlic, and fire-roasted tomatoes creates a rich, savory sauce that will have you coming back for seconds.
  • Customizable: Easily adjust the spice level and add your favorite vegetables to make this dish your own.
  • Meal Prep Friendly: This curry is perfect for batch cooking, allowing you to enjoy healthy meals throughout the week.

Ingredients Breakdown

Let’s take a closer look at the ingredients that make this chicken curry shine:

  • 2 teaspoons extra-virgin olive oil: A healthy fat for sautéing that adds rich flavor.
  • 1 small yellow onion (chopped): Provides sweetness and depth to the dish.
  • 2 cloves garlic (minced): Aromatic and essential for flavor.
  • 1 tablespoon curry powder: The star spice that gives the dish its signature taste.
  • 1 (14.5 oz.) can diced fire-roasted tomatoes (drained): Adds acidity and a smoky flavor.
  • 1/3 cup low-sodium chicken broth: Helps create a delicious sauce without too much sodium.
  • 1/2 teaspoon kosher salt: Enhances all the flavors.
  • 1/4 teaspoon black pepper: For a touch of heat.
  • 1/8 teaspoon cayenne pepper (optional): If you like it spicy!
  • 1 1/2 cups cooked chicken (chopped): Use rotisserie or leftover chicken for convenience.
  • 3/4 cup plain Greek yogurt: Adds creaminess and protein; choose from non-fat, 2%, or 5% fat.
  • Chopped fresh parsley or cilantro: For garnish and freshness.
  • Chopped peanuts (optional): Adds crunch and flavor.

Pro Tips for Perfect Chicken Curry

  • Use leftover chicken: Rotisserie chicken saves time and keeps the dish flavorful.
  • Adjust spice levels: If you’re sensitive to heat, start with less cayenne pepper and add more to taste.
  • Fresh herbs matter: Always garnish with fresh parsley or cilantro for a burst of freshness.
  • Let it simmer: Allow the curry to simmer longer for a deeper flavor.
  • Batch cook: Make a double batch for easy meal prep throughout the week.
  • Use low-sodium broth: To control the salt content in your dish.
  • Thicken as needed: If the sauce is too thin, let it simmer longer without the lid.
  • Experiment with veggies: Add bell peppers, spinach, or peas for extra nutrients.

Common Mistakes and Troubleshooting

Juicy chicken curry in a bowl, featuring diced tomatoes and yogurt.

Here are some common pitfalls to avoid when making this chicken curry:

  • Overcooking the chicken: If you’re using fresh chicken, ensure you don’t overcook it, as it can become dry.
  • Not draining tomatoes: Always drain canned tomatoes to prevent a watery sauce.
  • Forgetting the Greek yogurt: Stir it in off the heat to keep it creamy and prevent curdling.
  • Skipping the simmer: Allow the curry to simmer for at least 5 minutes for flavors to meld.
  • Using low-quality curry powder: Invest in good quality curry powder for the best flavor.

Variations to Try

Feel free to customize this recipe to suit your palate:

  • Vegetarian Version: Substitute chicken with chickpeas or tofu for a plant-based option.
  • Extra Spicy: Increase the cayenne pepper or add a dash of hot sauce.
  • Coconut Curry: Add a can of coconut milk for a creamier texture and tropical flavor.
  • Vegetable Loaded: Toss in your favorite veggies like spinach, peas, or bell peppers for added nutrition.

Storage and Make-Ahead Instructions

This quick chicken curry is perfect for meal prep:

  • Refrigerate: Store in an airtight container for up to 4 days.
  • Freeze: This dish freezes well; just ensure to cool it completely before freezing. It will last for up to 3 months.
  • Reheat: Thaw overnight in the fridge, then reheat on the stovetop or microwave until heated through.

Comprehensive FAQ

Here are some common questions about this recipe:

  • Can I use frozen chicken? Yes, just ensure it’s fully cooked before adding it to the dish.
  • What if I don’t have curry powder? You can create a blend of spices using turmeric, cumin, and coriander.
  • Can I make this dairy-free? Yes, substitute Greek yogurt with coconut yogurt or omit it entirely.
  • Is this recipe spicy? It’s mildly spicy; adjust cayenne to your preference.
  • What can I serve with chicken curry? Serve with rice, quinoa, or flatbreads for a complete meal.
  • Can I use canned chicken? Yes, but fresh or rotisserie chicken is recommended for better flavor.
  • How can I make it more nutritious? Add more vegetables and reduce the amount of oil used.
  • What’s the best way to store leftovers? Store in airtight containers in the fridge or freezer as mentioned earlier.

Nutrition Tips and Dietary Adaptations

This quick chicken curry is not only delicious but also nutritious:

  • High Protein: Each serving provides a substantial amount of protein, essential for muscle repair.
  • Low Carb Option: Serve with cauliflower rice instead of regular rice for a lower-carb meal.
  • Gluten-Free: Naturally gluten-free, just ensure all ingredients are certified gluten-free.
  • Heart Healthy: Using olive oil and lean chicken keeps this dish heart-healthy.

Equipment Recommendations

To prepare this chicken curry, you’ll need:

  • Large Skillet: Ideal for sautéing and simmering the curry.
  • Cutting Board: For easy chopping of vegetables and chicken.
  • Sharp Knife: Essential for precise cutting.
  • Measuring Cups and Spoons: For accurate ingredient measurements.

Serving Suggestions

Make your meal complete by serving this quick chicken curry with:

  • Steamed Rice: White or brown rice pairs perfectly with the curry.
  • Quinoa: A protein-packed alternative to rice.
  • Naan Bread: Perfect for scooping up the curry.
  • Salad: A fresh salad can balance the richness of the curry.

In conclusion, this Quick Chicken Curry is not just another recipe; it’s a delicious and practical solution for anyone looking to meet their protein goals without sacrificing flavor. Whether you’re a fitness enthusiast or just someone who loves a good meal, this recipe checks all the boxes. Give it a try and enjoy the journey to flavor-packed, high-protein cooking!

Quick Chicken Curry

Prep Time 10 minutes
Cook Time 10 minutes
Total Time 20 minutes
Servings 4 servings
Calories 350
A quick and flavorful chicken curry made with simple ingredients, perfect for a weeknight dinner.

Ingredients

Oil

  • 2 teaspoons extra-virgin olive oil

Vegetables

  • 1 small yellow onion (chopped)
  • 2 cloves garlic (minced)

Spices

  • 1 tablespoon curry powder

Canned Goods

  • 1 14.5 oz. diced fire-roasted tomatoes (drained)

Broth

  • 1/3 cup low-sodium chicken broth (see notes)

Seasonings

  • 1/2 teaspoon kosher salt
  • 1/4 teaspoon black pepper
  • 1/8 teaspoon cayenne pepper (optional)

Protein

  • 1 1/2 cups cooked chicken (chopped (from a rotisserie or leftover))

Dairy

  • 3/4 cup plain Greek yogurt (non-fat, 2% or 5% fat)

Garnish

  • Chopped fresh parsley or cilantro
  • Chopped peanuts (optional)

Instructions 

  • Heat olive oil in a large skillet over medium heat.
  • Add onion and sauté for 4-5 minutes, then add garlic and cook for 30 seconds.
  • Stir in curry powder, tomatoes, and chicken broth. Season with salt, pepper, and cayenne if using. Simmer for 2-3 minutes.
  • Add chicken and cook until warmed through, 1-2 minutes. Turn off heat and stir in Greek yogurt.
  • Serve hot, garnished with parsley or cilantro and chopped peanuts.

Notes

For extra flavor, use leftover cooked chicken or rotisserie chicken.
Calories: 350kcal
Cost: $12
Course: Main Course
Cuisine: International
Keyword: Chicken, Curry

Elevate Your Snack Game with Protein-Packed Cranberry Brie Bites

If you’re looking to impress your guests or just want a delicious snack that aligns with your fitness goals, then this recipe for cranberry brie bites is exactly what you need. Combining the rich flavors of buttery puff pastry with the creamy texture of brie cheese and the sweet tang of cranberry sauce, these bites are not just tasty; they support your protein intake without sacrificing flavor. Here, I’ll guide you through everything you need to know to make these delectable morsels, ensuring that each step is simple and straightforward.

Why You’ll Love This Recipe

  • High Protein Content: Each bite is packed with protein thanks to the brie and pistachios, making them a perfect snack for muscle recovery and satiety.
  • Quick to Prepare: With a prep time of just 20 minutes, you can whip these up in no time—ideal for parties or last-minute cravings.
  • Versatile Flavor Profile: The balance of sweet and savory makes these bites suitable for any occasion, from holiday gatherings to casual snacking.
  • Easy to Customize: Feel free to experiment with different toppings or sauces, making it possible to tailor the recipe to your taste.
  • Make-Ahead Friendly: These bites can be assembled ahead of time and baked just before serving, perfect for busy hosts.

Ingredient Breakdown

Let’s dive into the ingredients you’ll need for these cranberry brie bites:

  • 1 sheet frozen puff pastry: This serves as the base, providing a flaky texture. You can also use homemade pastry if you prefer.
  • Nonstick cooking spray: Essential for preventing sticking in the muffin pan.
  • 4 oz. brie cheese: Choose a good quality brie for the best flavor. The rind is edible, but you can trim it if preferred.
  • 1/2 cup cranberry sauce: Homemade or store-bought, just ensure it’s thick enough to stay put on the brie.
  • 3 tbsp. raw shelled pistachios: These add a lovely crunch and nutty flavor. Walnuts or almonds can be good substitutes.
  • Flaky sea salt and ground black pepper: Optional, but they enhance the flavor profile of the bites.

Pro Tips for Perfect Cranberry Brie Bites

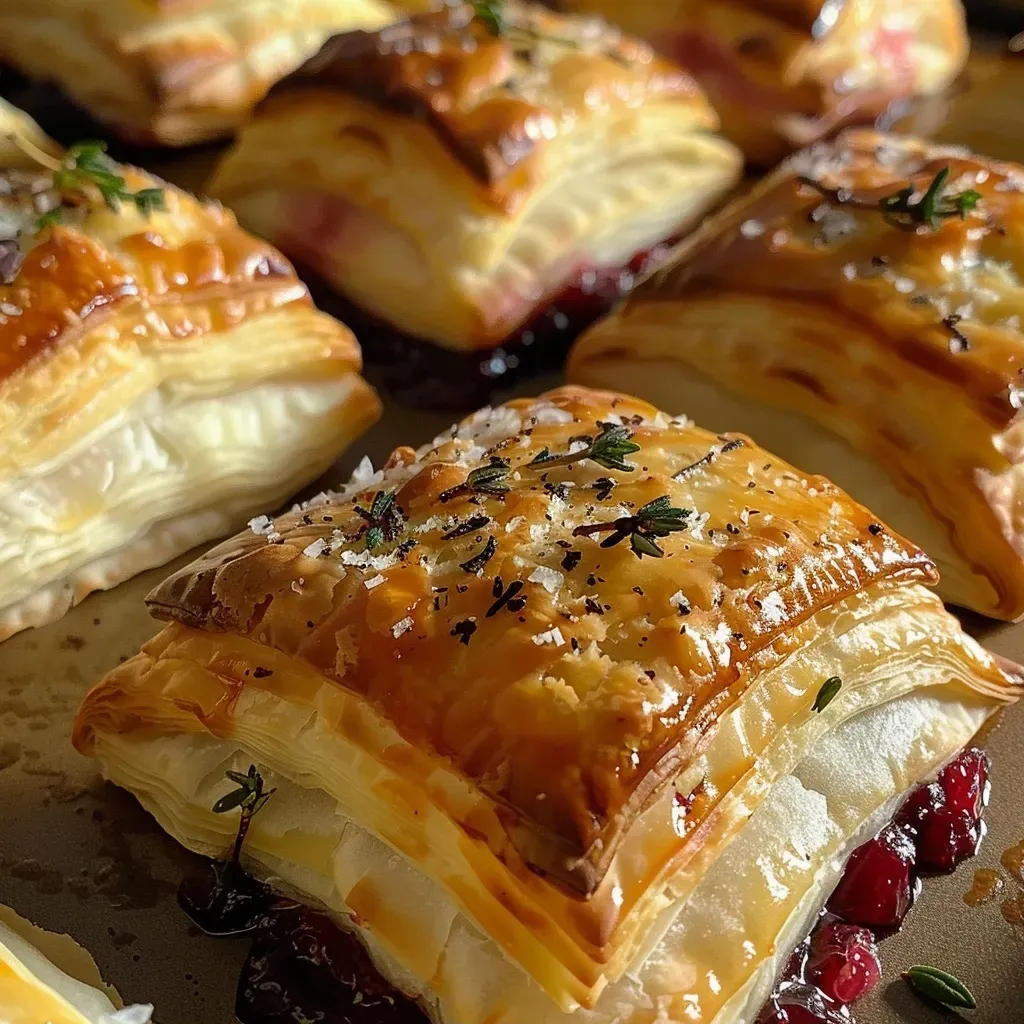
Side view of flaky puff pastry with melted brie and cranberry sauce inside.

To elevate your cooking game, consider these expert insights:

  • Thaw Completely: Make sure the puff pastry is fully thawed before rolling to avoid cracks.
  • Chill the Brie: Freezing the brie for 20 minutes before slicing makes it easier to cut and reduces the mess.
  • Use a Well-Floured Surface: This prevents the pastry from sticking as you roll it out.
  • Check Oven Temperature: An oven thermometer can help ensure your oven is accurately heated to 400°F for even baking.
  • Don’t Overfill: Use about 1 teaspoon of cranberry sauce per bite to keep them from overflowing.
  • Experiment with Flavors: Try adding herbs like thyme or rosemary for an extra flavor boost.
  • Serve Warm: These bites are best enjoyed fresh from the oven for that gooey cheese experience.
  • Garnish for Presentation: A sprinkle of chopped pistachios on top before serving adds visual appeal and extra crunch.

Common Mistakes and Troubleshooting

Here are some pitfalls to avoid:

  • Pastry Shrinking: Ensure your dough isn’t overworked to prevent shrinking during baking.
  • Burnt Edges: Keep an eye on the bites towards the end of baking; they can brown quickly.
  • Too Much Filling: Overfilling can lead to messy bites—stick to the recommended amounts.
  • Uneven Baking: Rotate your muffin pan halfway through baking for even cooking.

Variations of Cranberry Brie Bites

If you want to switch things up, try these variations:

  • Apple and Brie Bites: Substitute cranberry sauce with apple butter for a seasonal twist.
  • Spicy Jalapeño Bites: Add sliced jalapeños on top of the brie for a spicy kick.
  • Maple Glazed Pecans: Replace pistachios with maple-glazed pecans for a sweet crunch.
  • Herbed Ricotta: Swap out brie for herbed ricotta for a lighter option.

Storage and Make-Ahead Instructions

These bites can be made ahead of time:

  • Prep Ahead: Assemble the bites and store them in the fridge for up to 24 hours before baking.
  • Leftovers: Store any leftovers in an airtight container in the fridge for up to 3 days. Reheat in the oven for the best texture.
  • Freezing: You can freeze assembled bites. Just add an extra 5-10 minutes to the baking time when cooking from frozen.

Comprehensive FAQ

Here are some common questions about making cranberry brie bites:

  • Can I use different cheeses? Yes, other creamy cheeses like goat cheese or camembert work well.
  • What if I don’t have puff pastry? You can use crescent roll dough as an alternative, but keep an eye on baking time.
  • Can these be made vegan? Yes, use vegan puff pastry and a plant-based cheese substitute.
  • How do I know when they’re done? They should be golden brown and the cheese bubbly.
  • What can I serve with these bites? They pair well with a side salad or a cheese platter.
  • Can I use homemade cranberry sauce? Absolutely! Just make sure it’s thick enough to hold its shape.
  • How can I make these gluten-free? Use gluten-free puff pastry or phyllo dough.
  • What’s the best way to reheat them? Use the oven to maintain crispiness instead of the microwave.

Nutrition Tips and Dietary Adaptations

For those monitoring nutrition:

  • Higher Protein: Add more pistachios or serve with a protein-rich dip.
  • Low-Carb Option: Use cauliflower-based pastry for a low-carb alternative.
  • Dairy-Free: Opt for a dairy-free cheese alternative to make it suitable for lactose intolerance.

Equipment Recommendations

Here’s what you’ll need to make these bites:

  • Mini Muffin Pan: Essential for perfectly shaped bites.
  • Rolling Pin: To roll out the puff pastry evenly.
  • Sharp Knife: For cutting the brie and pastry.
  • Parchment Paper: Optional, for easy cleanup.

Serving Suggestions

These bites are best served warm, but here are some ideas for presentation:

  • Garnish with Fresh Herbs: A sprinkle of fresh thyme or parsley adds a pop of color.
  • Pair with a Drink: Consider serving with a sparkling wine or a light cocktail.
  • Accompany with Dipping Sauce: A balsamic glaze or honey drizzled over the top can enhance the flavor.

Conclusion

With this guide, you’re well-equipped to make stunning, protein-packed cranberry brie bites that will not only satisfy your cravings but also help you stay on track with your nutrition goals. Remember, cooking is all about experimenting, so feel free to modify the recipe to suit your taste. Get ready to elevate your snack game and impress your friends with these delightful bites!

Cranberry Brie Bites

Prep Time 15 minutes
Cook Time 15 minutes
Total Time 30 minutes
Servings 24 pieces
Calories 150
These elegant Cranberry Brie Bites are perfect for parties, combining flaky puff pastry with creamy cheese and tart cranberry sauce.

Ingredients

Dough

  • 1 sheet frozen puff pastry (from 1 (17-oz.) box)
  • 4 oz. brie cheese

Filling

  • 1/2 cup cranberry sauce (homemade or canned)
  • 3 tbsp. raw shelled pistachios (chopped)

Seasoning

  • to taste flaky sea salt and ground black pepper (optional)

Instructions 

  • Thaw puff pastry and preheat oven to 400°F. Spray mini muffin pan with nonstick spray. Chill brie until firm.
  • Roll pastry into a 10x15-inch rectangle, cut into 24 squares, and press into muffin wells.
  • Slice brie into 24 pieces, place a piece on each pastry square, top with cranberry sauce, and sprinkle with pistachios.
  • Bake for 15 minutes until golden and bubbly. Cool for 5 minutes, then garnish with sea salt and pepper if desired.

Notes

Serve warm for best flavor and presentation.
Calories: 150kcal
Cost: $12
Course: Appetizer
Cuisine: American
Keyword: Brie, cranberry, Puff Pastry

Are you ready to enjoy the festive flavors of gingerbread while hitting your fitness goals? These gingerbread protein muffins are not just a treat for your taste buds; they are a powerhouse of nutrition! With 20g of protein per muffin, they’re perfect for a post-workout snack, breakfast on the go, or an afternoon pick-me-up. This recipe is easy to make and uses wholesome ingredients that support your health without sacrificing flavor. Let’s dive into why these muffins are a must-try!

Why You’ll Love This Recipe

  • Protein-packed: Each muffin contains 20g of protein, making them a great addition to your fitness regimen.
  • Flavorful and satisfying: The warm spices of ginger and cinnamon create a comforting taste that evokes holiday memories.
  • Simple ingredients: Made with clean, high-quality ingredients like almond flour and protein powder, these muffins are easy to whip up.
  • Versatile: Enjoy them as a snack, breakfast, or even dessert. They’re perfect any time of day!
  • Make-ahead friendly: These muffins store well, making them perfect for meal prep!

Detailed Ingredient Breakdown

Now, let’s look at each ingredient you’ll need to create these delightful gingerbread protein muffins:

  • 1 cup blanched almond flour (100g): A low-carb, gluten-free flour that adds moisture and flavor.
  • 3/4 cup Nuzest Vanilla Protein Powder (70g): Provides the essential protein boost. You can substitute with another brand if preferred.
  • 1/3 cup tapioca flour (40g): Helps with texture and provides chewiness. You can use arrowroot flour as an alternative.
  • 1/4 cup coconut flour (30g): Adds fiber and absorbs moisture, keeping the muffins from being too wet.
  • 1 + 1/2 tsp baking soda: Acts as a leavening agent to help the muffins rise.
  • 2 tsp ground cinnamon: Adds warmth and depth of flavor.
  • 2 tsp ground ginger: The star spice of gingerbread, providing that classic flavor.
  • 1/2 tsp nutmeg: Enhances the warmth and aroma.
  • 1/2 tsp salt: Balances the sweetness and enhances flavors.
  • 1 + 1/4 cup water: To hydrate the dry ingredients and create the batter.
  • 4 large eggs: Provides structure and moisture.
  • 2 Tbsp molasses: Adds sweetness and a rich flavor, quintessential for gingerbread.

Step-by-Step Instructions: Making Gingerbread Protein Muffins

Follow these simple steps to create your own batch of protein muffins:

  1. Preheat the oven to 350 degrees F (175 degrees C).
  2. In a large mixing bowl, combine all the dry ingredients, including almond flour, tapioca flour, coconut flour, protein powder, baking soda, cinnamon, ginger, nutmeg, and salt.
  3. In a separate bowl, mix the wet ingredients: water, eggs, and molasses. Stir well until combined.
  4. Pour the wet mixture into the dry ingredients and stir until just combined. Avoid over-mixing.
  5. Pour the batter into a silicone-lined muffin pan (or grease it well) and fill each cup about 3/4 full.
  6. Place the muffins in the middle rack of the oven and bake at 350 degrees F for 20-22 minutes, or until a toothpick inserted in the center comes out clean.
  7. Cool in the pan for about 5 minutes, then transfer to a cooling rack to cool completely. Store in the fridge for best freshness.

Pro Tips for Success

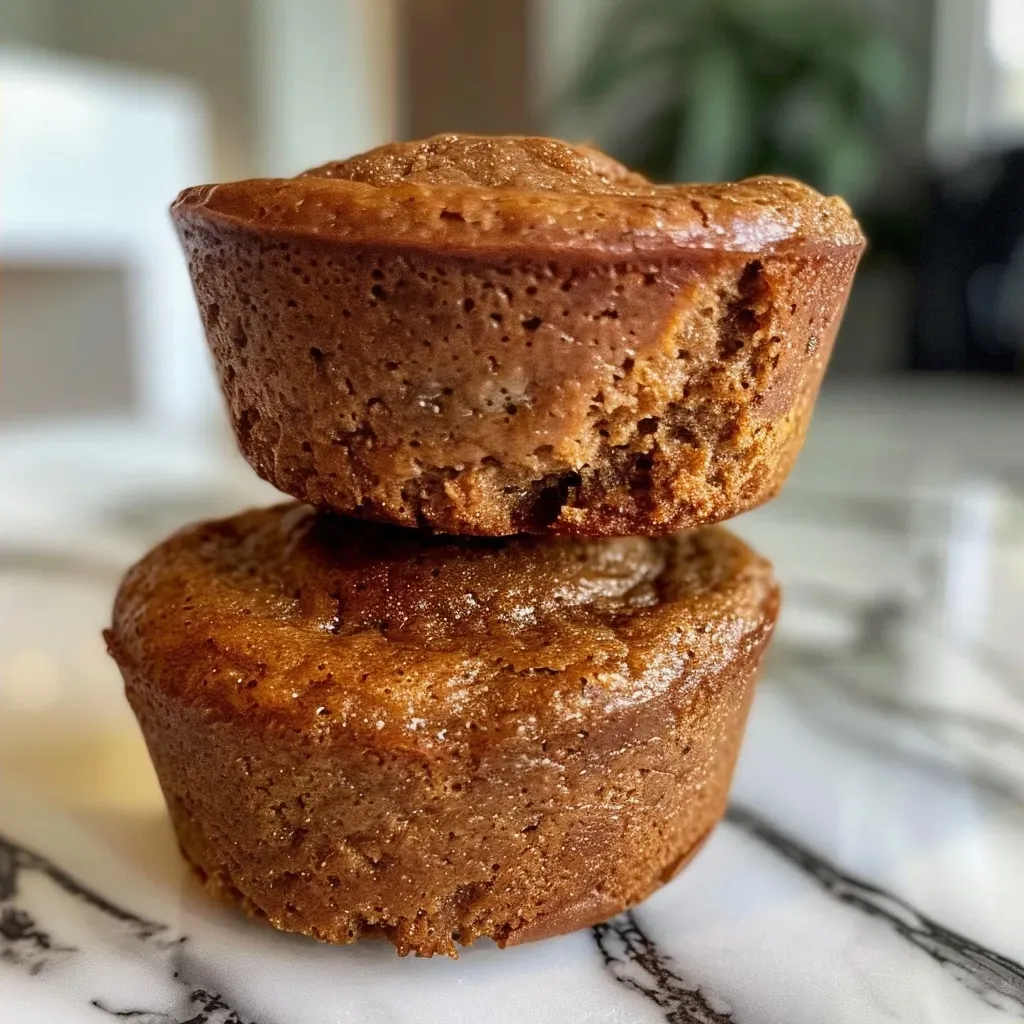
Side view of freshly baked gingerbread protein muffins in a rustic setting.

To ensure your gingerbread protein muffins come out perfectly, keep these tips in mind:

  • Measure accurately: Use a kitchen scale for precise measurements, especially for the flours.
  • Don’t overmix: Overmixing can lead to dense muffins. Mix just until combined.
  • Check for doneness: Use a toothpick to check if the muffins are done; they should come out clean.
  • Cool properly: Let the muffins cool completely before storing to prevent them from becoming soggy.
  • Experiment with flavors: Feel free to add nuts, chocolate chips, or dried fruit for extra flavor and texture.
  • Use silicone liners: They make it easier to remove the muffins without sticking.
  • Don’t skip the molasses: It’s crucial for that traditional gingerbread flavor and moisture.
  • Store properly: Keep in an airtight container in the fridge for up to a week, or freeze for longer storage.

Common Mistakes and Troubleshooting

Encountering issues while baking? Here are some common mistakes and how to fix them:

  • Muffins are too dry: Ensure you’re measuring the flour correctly and not overbaking them.
  • Muffins don’t rise: Check that your baking soda is fresh; it’s essential for rising.
  • Muffins are too dense: This can happen from overmixing the batter. Mix just until combined.
  • Flavor is lacking: Consider adding extra spices or a touch of vanilla extract to enhance flavor.

Delicious Variations to Try

Want to mix things up? Here are some delicious variations of the gingerbread protein muffins:

  • Chocolate Chip Gingerbread Muffins: Add mini chocolate chips to the batter before baking for a sweet twist.
  • Nutty Gingerbread Muffins: Fold in chopped walnuts or pecans for added crunch and nutrition.
  • Fruit-Infused Muffins: Add dried cranberries or raisins for a fruity burst of flavor.
  • Spiced Pumpkin Muffins: Replace some of the wet ingredients with canned pumpkin for a seasonal spin.

Storage and Make-Ahead Instructions

These muffins are excellent for meal prep! Here’s how to store them:

  • Refrigerate: Store in an airtight container in the fridge for up to a week.
  • Freeze: Freeze muffins in a single layer on a baking sheet, then transfer to a zip-top bag for up to 3 months. Thaw in the fridge or at room temperature.
  • Reheat: Warm in the microwave for about 15-20 seconds before enjoying.

Frequently Asked Questions

Got questions? Here are some common inquiries about gingerbread protein muffins:

  • Can I substitute the protein powder? Yes, you can use any protein powder you prefer, but the flavor may vary.
  • How long do these muffins last? They can be stored in the fridge for up to one week or frozen for three months.
  • Can I make these muffins vegan? Yes, replace eggs with flax eggs or a plant-based egg substitute and ensure your protein powder is vegan.
  • What can I use instead of almond flour? You can use oat flour or a gluten-free all-purpose blend, but texture may vary.
  • Are these muffins gluten-free? Yes, as long as you use gluten-free certified ingredients.
  • Can I add additional spices? Absolutely! Feel free to experiment with spices like allspice or cardamom.
  • What if my batter is too thick? Add a little more water to reach the desired consistency.
  • Can I use sweetener instead of molasses? You can, but molasses adds unique flavor that’s hard to replicate.

Nutritional Tips and Dietary Adaptations

These muffins are already packed with protein, but here are additional tips to enhance their nutritional profile:

  • Add seeds: Incorporate flaxseeds or chia seeds for added omega-3 fatty acids.
  • Use less sugar: If you prefer a less sweet muffin, consider reducing the molasses slightly.
  • Experiment with different protein sources: Try using pea protein or casein for varied nutritional benefits.

Equipment Recommendations

Here’s what you’ll need to make these gingerbread protein muffins:

  • Mixing bowls: A set of mixing bowls in various sizes for your ingredients.
  • Silicone muffin pan: This makes for easy muffin removal and cleanup.
  • Measuring cups and spoons: Essential for accurate ingredient measurements.
  • Whisk: For combining dry and wet ingredients thoroughly.

Serving Suggestions

These muffins are delicious on their own, but you can elevate the experience with these serving suggestions:

  • Spread some nut butter: Almond or peanut butter makes a great topping for added protein and flavor.
  • Pair with yogurt: Serve alongside Greek yogurt for a balanced meal.
  • Enjoy with coffee: These muffins make a cozy pairing with your morning brew.

In conclusion, these gingerbread protein muffins are a fantastic way to enjoy a healthy treat that satisfies your cravings while supporting your fitness goals. So preheat that oven and get baking — your taste buds and body will thank you! Remember, eating high-protein meals doesn’t have to be boring. Embrace the flavors, enjoy the process, and hit those protein goals with confidence!

Gingerbread Protein Muffins

Prep Time 10 minutes
Cook Time 20 minutes
Total Time 30 minutes
Servings 12 muffins
Calories 150
Enjoy these healthy, protein-packed gingerbread muffins perfect for a festive breakfast or snack.

Ingredients

Dry ingredients

  • 1 cup blanched almond flour ((100g))
  • 3/4 cup Nuzest Vanilla Protein Powder ((70g)*)
  • 1/3 cup tapioca flour ((40g))
  • 1/4 cup coconut flour ((30g))
  • 1 1/2 tsp baking soda
  • 2 tsp ground cinnamon
  • 2 tsp ground ginger
  • 1/2 tsp nutmeg
  • 1/2 tsp salt

Wet ingredients

  • 1 1/4 cup water
  • 4 large eggs
  • 2 Tbsp molasses

Instructions 

  • Preheat oven to 350°F (175°C).
  • Mix dry ingredients in a large bowl.
  • Add water, eggs, and molasses; stir well.
  • Pour batter into lined muffin pan and bake for 20-22 minutes.
  • Cool for 5 minutes, then transfer to rack to cool completely.

Notes

Store in fridge for best freshness.
Calories: 150kcal
Cost: $15
Course: Breakfast
Cuisine: American
Keyword: gingerbread, Muffins, protein

Unlock the Flavor: Your Guide to Decadent Chestnut Cream

If you’re looking for a way to satisfy your sweet tooth while hitting your protein goals, look no further than this delightful chestnut cream recipe. Rich, creamy, and packed with flavor, this treat not only elevates your dessert game but also provides nutritional benefits that align with your fitness journey. In this comprehensive guide, you’ll learn how to create a **chestnut cream** that can be enjoyed on its own or as a versatile ingredient in various dishes.

Why You’ll Love This Recipe

  • High in Protein: This chestnut cream packs a protein punch that helps fuel your workouts and recovery.
  • Versatile Ingredient: Use it as a topping, filling, or even in savory dishes, making it a staple in your kitchen.
  • Natural Ingredients: Made with simple, wholesome ingredients that you can feel good about consuming.
  • Easy to Make: With step-by-step instructions, this recipe is perfect for home cooks of any skill level.
  • Kid-Friendly: A delicious treat that kids will love, making it an ideal addition to family baking sessions.

Ingredient Breakdown

Understanding your ingredients is crucial for the best results. Here’s a breakdown of what you need to make the perfect chestnut cream:

  • Chestnuts (4.4 lbs): Fresh or frozen, chestnuts are the star of this recipe. Ensure they are peeled for the best texture.
  • Sugar (3 cups): Regular granulated sugar works best, but feel free to experiment with alternatives like coconut sugar for a healthier option.
  • Water (2¾ cups): This creates the right consistency for your cream.
  • Lemon Peel (1, untreated): Adds a refreshing zing that complements the sweetness of the chestnuts.
  • Vanilla Bean (1): The seeds from the vanilla pod bring an aromatic richness that elevates the flavor.

Step-by-Step Instructions

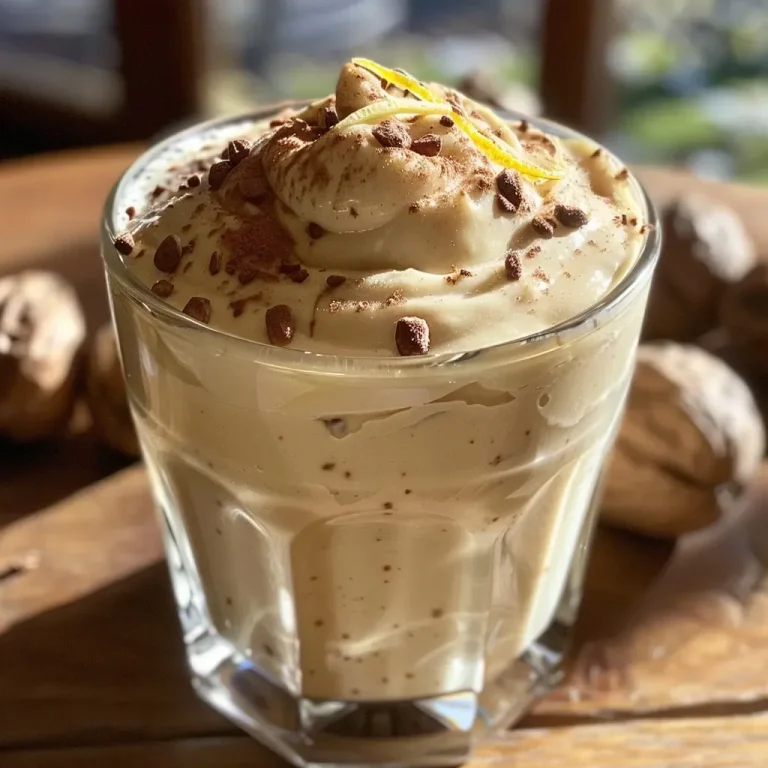
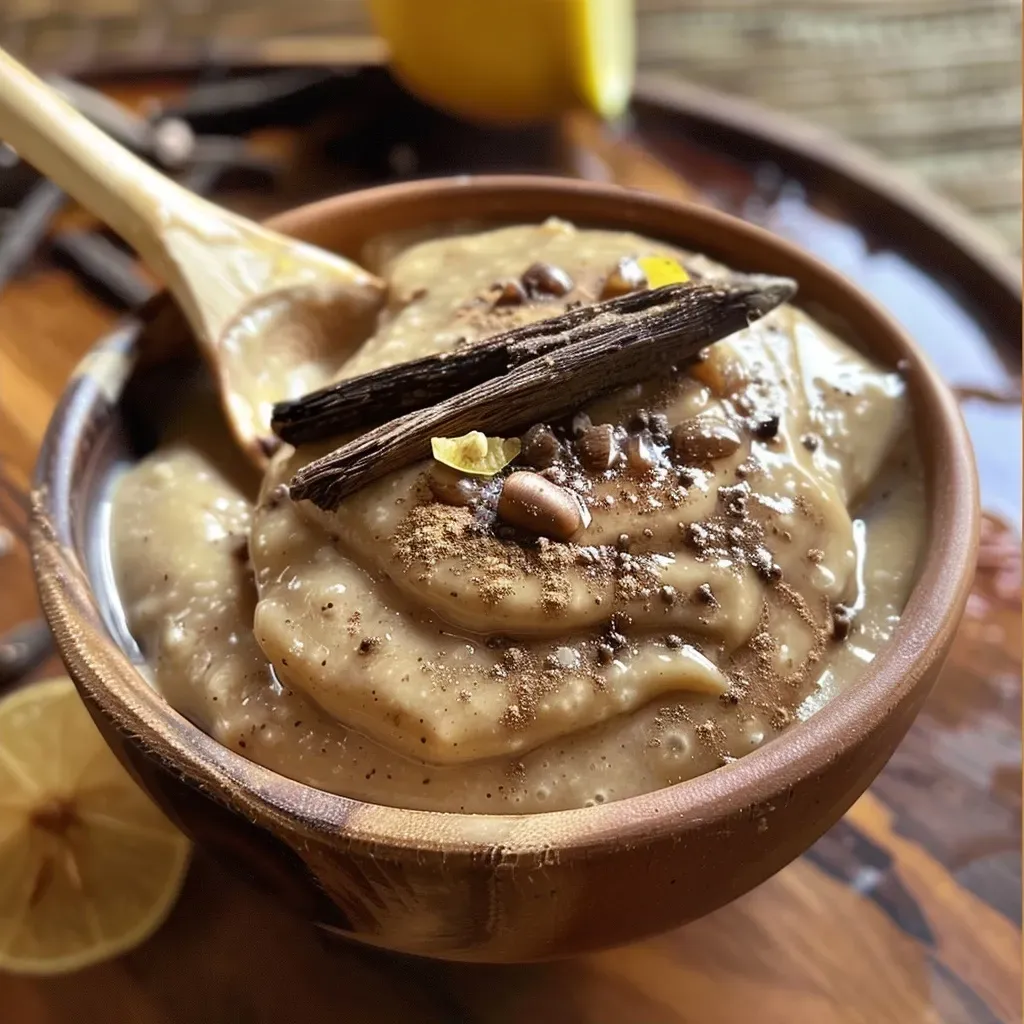
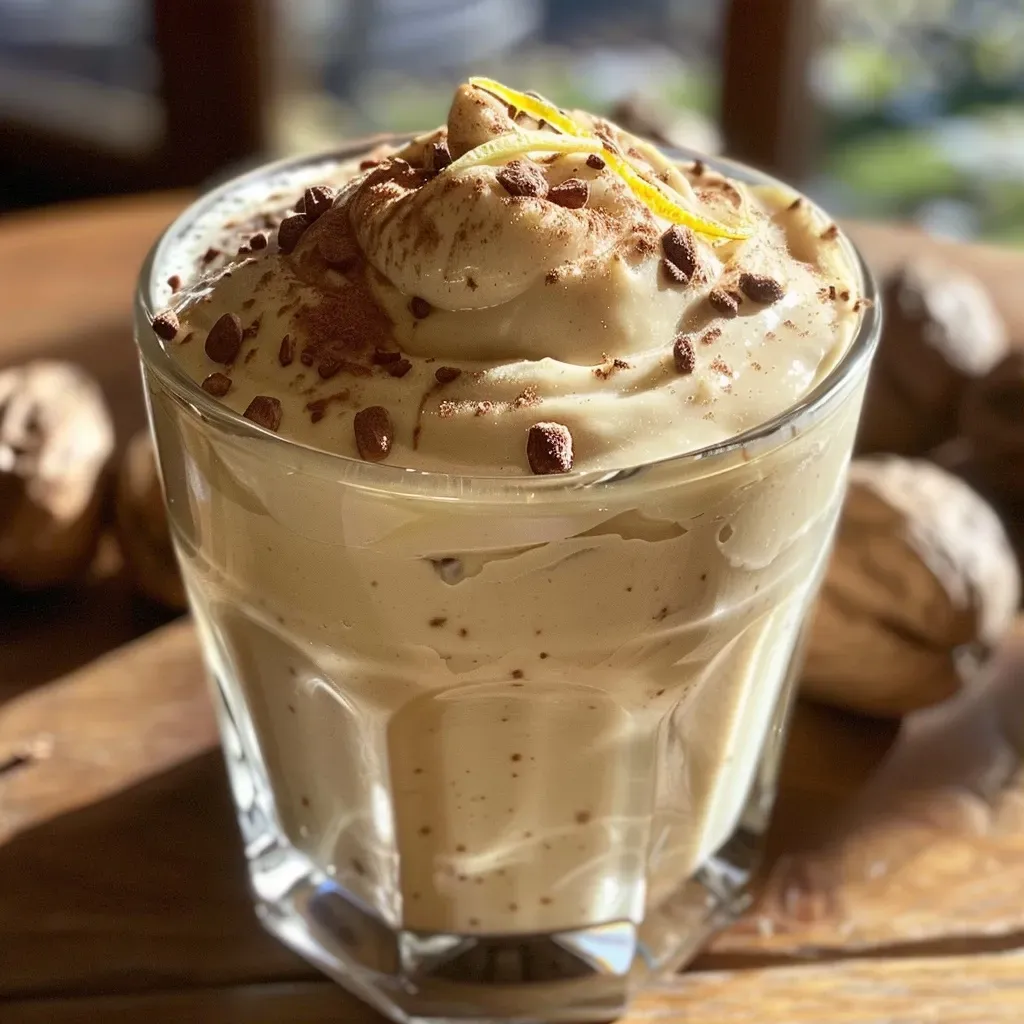
Side view of a glossy chestnut cream spread with chestnuts scattered around.

Let’s dive into the preparation of this delectable chestnut cream:

  1. Start by washing the **chestnuts** under running water, then place them whole in a pot full of water and boil for at least 15 minutes. Drain and let them cool slightly.
  2. Once cooled, peel the **chestnuts** with a sharp knife.
  3. Transfer the peeled **chestnuts** into a food mill to obtain a sandy mixture. Alternatively, use a potato masher; this yields about 3.5 lbs of pulp.
  4. Cut the **vanilla pod** lengthwise and extract the seeds.
  5. In a high-sided pan, combine the **vanilla pod**, seeds, **sugar**, and **water**. Melt the **sugar** over medium heat, stirring for about 10 minutes until fully dissolved.
  6. Remove the **vanilla pod** and add the **chestnut** mixture, stirring to combine.
  7. Grate the zest of an untreated lemon and add it to the mixture. Cook over low heat for about 1 hour, stirring occasionally until the cream thickens to a smooth puree.
  8. Transfer the chestnut cream into jars using a spoon, and your chestnut cream is ready!

Pro Tips for Perfect Chestnut Cream

  • Choose Quality Chestnuts: Fresh chestnuts will yield the best flavor and texture. Look for firm, unblemished nuts.
  • Be Patient: Cooking the cream slowly allows flavors to meld beautifully, resulting in a richer taste.
  • Experiment with Sweetness: Adjust the sugar based on your preference; you can use less for a less sweet cream.
  • Storage Matters: Store in sterilized jars to prolong shelf life; it can last several weeks in the fridge.
  • Use the Right Tools: A food mill or potato masher is essential for achieving the perfect texture.
  • Make it Ahead: This recipe can be prepared in advance, making it a convenient dessert option.
  • Pairing Suggestions: Serve with whipped cream or use it as a filling for pastries for an indulgent treat.
  • Mind the Consistency: If the cream is too thick, simply add a little more water until desired consistency is reached.

Common Mistakes and Troubleshooting

Even the best home cooks can run into issues. Here’s how to avoid common pitfalls:

  • Overcooking: If the cream becomes too thick, it may become grainy. Stir frequently and remove from heat once it reaches a smooth consistency.
  • Insufficient Sweetness: Taste as you go! You can always add more sugar if it’s not sweet enough for your liking.
  • Poor Storage: Ensure jars are sterilized to prevent spoilage; keep refrigerated and use within a few weeks.

Variations to Elevate Your Chestnut Cream

Looking to mix things up? Here are some exciting variations to try:

  • Chocolate Chestnut Cream: Add melted dark chocolate for a rich, decadent treat.
  • Cinnamon Spice: Incorporate cinnamon or nutmeg for a warm, cozy flavor perfect for fall.
  • Maple Chestnut Cream: Swap sugar for maple syrup for a unique twist that enhances sweetness.
  • Nutty Addition: Stir in crushed hazelnuts or almonds for added texture and flavor.

Storage and Make-Ahead Instructions

Chestnut cream can be made ahead and stored for future use:

  • Refrigeration: Store in airtight containers in the refrigerator for up to 2-3 weeks.
  • Freezing: You can freeze the chestnut cream in freezer-safe containers for up to 3 months. Thaw in the refrigerator before use.

Frequently Asked Questions

  • Can I use frozen chestnuts? Yes, frozen chestnuts work well. Just let them thaw before use.
  • What can I do with leftover chestnut cream? Use it as a topping for pancakes, in pastries, or even as a filling for cakes.
  • Is chestnut cream healthy? It can be part of a balanced diet, providing natural sweetness and protein.
  • Can this recipe be doubled? Absolutely! Just adjust cooking time as needed to accommodate the larger batch.
  • How do I know when the cream is ready? The cream should be smooth and thick, resembling a spreadable consistency.
  • Is there a nut-free alternative? You can substitute chestnuts with cooked sweet potatoes for a different flavor profile.
  • How long does chestnut cream last? When stored properly, it can last up to 3 weeks in the fridge.
  • Can I add alcohol to the recipe? Yes, a splash of rum or bourbon can be added for an adult version of this dessert.

Nutritional Tips and Dietary Adaptations

Want to make this recipe fit your dietary needs? Here are some suggestions:

  • Low-Sugar Option: Use a sugar substitute like erythritol or monk fruit to reduce sugar content.
  • Vegan Version: The recipe is naturally vegan; just ensure your sugar is bone-char free.
  • Gluten-Free: This recipe is gluten-free as it contains no wheat or gluten products.

Essential Equipment Recommendations

To make this chestnut cream, you’ll need the right tools:

  • Food Mill: For achieving a smooth texture.
  • Sharp Knife: Essential for peeling and cutting the chestnuts.
  • High-Sided Pan: For cooking the mixture evenly.
  • Whisk: Useful for stirring the sugar and water mixture.

Serving Suggestions

Now that you’ve mastered chestnut cream, here are some delicious ways to serve it:

  • As a Spread: Slather it on toast or pancakes for a delightful breakfast treat.
  • In Desserts: Use it as a filling for cakes or pastries.
  • With Ice Cream: Drizzle over vanilla ice cream for a decadent dessert.

Conclusion

Creating your own decadent chestnut cream is not just a rewarding culinary experience but also a step towards hitting your protein goals without sacrificing flavor. Whether enjoyed straight from the jar or as part of a larger dish, this chestnut cream recipe will become a staple in your kitchen. So roll up your sleeves, gather your ingredients, and get ready to impress your taste buds. Enjoy your culinary journey!

Chestnut Cream

Prep Time 30 minutes
Cook Time 1 hour
Total Time 1 hour 30 minutes
Servings 4 cups
Calories 250
A rich and creamy chestnut dessert perfect for spreading or filling. Made with roasted chestnuts, sugar, water, lemon peel, and vanilla for a delightful flavor.

Ingredients

Main ingredients

  • 4.4 lbs Chestnuts (roasted and peeled)
  • 3 cups Sugar
  • 2.75 cups Water
  • 1 untreated lemon peel Lemon peel (untreated)
  • 1 vanilla bean Vanilla bean

Instructions 

  • Wash the chestnuts, boil for 15 minutes, then peel with a knife.
  • Puree the peeled chestnuts using a food mill or potato masher, yielding about 3.5 lbs of pulp. Cut the vanilla bean lengthwise and extract seeds.
  • In a pan, combine vanilla pod, seeds, sugar, and water. Melt sugar over medium heat for 10 minutes.
  • Remove vanilla pod, add chestnut pulp, and cook over low heat for 1 hour, stirring occasionally until creamy.
  • Grate lemon peel and add to the mixture. Transfer to jars and let cool.

Notes

Store in airtight jars and enjoy within a week.
Calories: 250kcal
Cost: $15
Course: Dessert
Cuisine: European
Keyword: chestnut

Why You’ll Crave These Gingerbread Bars

If you’re on the hunt for a dessert that delivers big on flavor while keeping your protein intake in check, look no further than these gingerbread bars. Packed with spices that warm the soul and enriched with protein, these bars are perfect for satisfying your sweet tooth without derailing your fitness goals. Let’s dive into what makes this recipe a must-try!

Why You’ll Love This Recipe

  • High in Protein: Each bar is loaded with protein, making them a great post-workout snack or a meal prep dessert.
  • Flavor Explosion: The combination of warm spices like ginger and cinnamon creates a flavor profile that screams holiday cheer.
  • Easy to Make: With simple steps and no complicated techniques, this recipe is perfect for both novice and seasoned bakers.
  • Versatile Treat: Enjoy them as a standalone snack, or add a scoop of vanilla ice cream for an indulgent dessert.
  • Make Ahead: These bars store well, making them an excellent option for meal prep or holiday gatherings.

Essential Ingredients for Gingerbread Bars

Before we get into the recipe, let’s break down the ingredients you’ll need and some potential substitutions.

  • All-Purpose Flour (3 cups / 360g): Essential for structure. You can substitute with whole wheat flour for added fiber.
  • Cornstarch (1 tablespoon): Helps achieve a lighter texture. For a gluten-free version, use arrowroot powder.
  • Baking Soda (1 teaspoon): The leavening agent that makes the bars rise.
  • Salt (1 teaspoon): Enhances flavors. Sea salt works well here.
  • Ground Ginger (1 tablespoon): The star spice that gives gingerbread its signature flavor.
  • Ground Cinnamon (2 teaspoons): Adds warmth and depth.
  • Ground Allspice (½ teaspoon): Introduces a hint of sweetness and complexity.
  • Ground Cloves (¼ teaspoon): A little goes a long way in flavoring these bars.
  • Ground Nutmeg (¼ teaspoon): Complements the other spices beautifully.
  • Brown Sugar (1 cup / 220g): For sweetness and moisture. Light or dark brown sugar works.
  • Unsalted Butter (1 cup / 226g, melted): Adds richness. Can be substituted with coconut oil for a dairy-free option.
  • Granulated Sugar (⅔ cup / 133g): Balances the flavors. You can use coconut sugar for a lower glycemic index.
  • Unsulphured Molasses (⅓ cup / 80mL): Gives the bars a deep, rich flavor.
  • Large Eggs (2, room temperature): Binds the mixture. Flax eggs can be used for a vegan version.
  • Vanilla Extract (1 tablespoon): Enhances the overall flavor.
  • Cream Cheese (6 ounces / 170g, room temperature): For the frosting that takes these bars to the next level.
  • Unsalted Butter (¼ cup / 56g, softened): Adds creaminess to the frosting.
  • Powdered Sugar (3 cups / 360g): Sweetens the frosting. Adjust to taste.
  • Salt (¼ teaspoon): Balances the sweetness in the frosting.
  • Chopped, Candied Ginger or Sprinkles: For garnishing, adding texture and visual appeal.

How to Make Gingerbread Bars

Side view of gingerbread bars topped with a layer of cream cheese icing and sprinkled with candied ginger.

Now that you have your ingredients ready, let’s get baking!

Step-by-Step Instructions

  1. Preheat your oven to 350°F (175°C) and grease a 9×13 inch baking pan.
  2. In a large bowl, whisk together the flour, cornstarch, baking soda, salt, and spices until evenly combined.
  3. In another bowl, mix the melted butter, brown sugar, granulated sugar, molasses, eggs, and vanilla extract until smooth.
  4. Gradually add the dry ingredients to the wet mixture, stirring until just combined. Be careful not to overmix.
  5. Pour the batter into the prepared baking pan, spreading it evenly.
  6. Bake for 25-30 minutes, or until a toothpick inserted in the center comes out clean.
  7. Allow the bars to cool completely before frosting.

Making the Cream Cheese Frosting

  1. In a mixing bowl, beat the cream cheese and softened butter until smooth and creamy.
  2. Gradually add the powdered sugar, vanilla extract, and salt, mixing until fully incorporated.
  3. Frost the cooled gingerbread bars generously with the cream cheese frosting.
  4. Garnish with chopped candied ginger or sprinkles for that festive touch.

Pro Tips for Perfect Gingerbread Bars

  • Room Temperature Ingredients: Ensure that your eggs and cream cheese are at room temperature for a smoother batter.
  • Don’t Overbake: Keep an eye on them during the last few minutes of baking to prevent drying out.
  • Let Them Cool: Allow the bars to cool completely before frosting for the best texture.
  • Texture Check: The bars should spring back when lightly pressed in the center.
  • Frosting Tips: For a thicker frosting, add more powdered sugar gradually until you reach the desired consistency.
  • Chill Before Cutting: For cleaner cuts, refrigerate the bars for about an hour before slicing.
  • Experiment with Spices: Don’t hesitate to adjust spices based on your preference for a personalized touch.
  • Flavor Boosting: Adding a dash of espresso powder can enhance the flavors of the spices.

Common Mistakes and Troubleshooting

  • Dense Bars: This could be due to overmixing. Mix until just combined!
  • Dry Bars: Overbaking is a common culprit. Always check for doneness a few minutes before the timer goes off.
  • Frosting Too Runny: If your frosting is too thin, add more powdered sugar until it thickens up.
  • Uneven Baking: Ensure your oven is preheated and that you rotate the pan halfway through baking.

Delicious Variations to Try

Feel free to get creative with these variations:

  • Chocolate Chip Gingerbread Bars: Fold in 1 cup of chocolate chips for a rich twist.
  • Nutty Addition: Add 1 cup of chopped walnuts or pecans to the batter for a crunchy texture.
  • Fruit Forward: Incorporate ½ cup of dried cranberries or raisins for a fruity flavor surprise.
  • Gluten-Free Gingerbread: Substitute the all-purpose flour with a 1:1 gluten-free flour blend.

Storage and Make-Ahead Instructions

These gingerbread bars are perfect for meal prep or holiday gatherings!

  • Storing: Keep them in an airtight container in the refrigerator for up to 5 days.
  • Freezing: Freeze unfrosted bars for up to 2 months. Thaw and frost before serving.
  • Make Ahead: You can prepare the batter a day in advance and store it in the fridge before baking.

Frequently Asked Questions

  • Can I use whole wheat flour? Yes, it will make them denser but adds more fiber.
  • How do I know when they’re done? A toothpick inserted into the center should come out clean or with a few moist crumbs.
  • Can I make these bars vegan? Substitute eggs with flax eggs and use coconut oil instead of butter.
  • What’s the best way to cut the bars? Use a sharp knife and make smooth, even slices. Chilling them helps!
  • Can I add more spices? Absolutely! Feel free to adjust spices to your preference.
  • What’s the difference between these and traditional gingerbread? These bars are softer, easier to prepare, and have a richer flavor due to the cream cheese frosting.
  • Can I double the recipe? Yes, just use a larger pan and adjust the baking time as needed.
  • How can I make this gluten-free? Use a gluten-free flour blend and ensure all other ingredients are also gluten-free.

Nutrition Tips and Dietary Adaptations

To keep these bars on the healthier side:

  • Reduce Sugar: You can cut back on sugar by using a sugar substitute if desired.
  • Add Protein Powder: Mix in a scoop of vanilla protein powder to boost protein content without changing the flavor significantly.
  • Incorporate Healthy Fats: Use avocado or nut butter in the frosting for added health benefits.

Essential Equipment for Baking

  • Mixing Bowls: Medium and large bowls for mixing ingredients.
  • Measuring Cups and Spoons: Accurate measurements are key to baking success.
  • Whisk: For mixing dry and wet ingredients thoroughly.
  • Baking Pan: A 9×13 inch pan is ideal for this recipe.
  • Cooling Rack: To cool the bars evenly after baking.

Serving Suggestions

These gingerbread bars can be served in various delightful ways:

  • Warm with Ice Cream: A scoop of vanilla or ginger ice cream pairs perfectly.
  • With a Dusting of Powdered Sugar: For a simple yet elegant presentation.
  • Accompanied by a Hot Beverage: Serve with coffee, tea, or hot cider for a cozy treat.

Final Thoughts

Whether you’re prepping for the holidays or simply looking to satisfy a sweet craving while staying on track with your macros, these gingerbread bars deliver on all fronts. With their rich flavor and high protein content, they’re a delicious reminder that healthy eating doesn’t have to be boring or bland. So, roll up your sleeves, gather your ingredients, and get ready to enjoy a delightful treat that fuels your fitness journey!

Gingerbread Bars Recipe

Prep Time 20 minutes
Cook Time 25 minutes
Total Time 45 minutes
Servings 12 bars
Calories 250
Delight in these spiced gingerbread bars, perfect for holiday gatherings or cozy treats.

Ingredients

Dough

  • 3 cups all-purpose flour (360g)
  • 1 tablespoon cornstarch
  • 1 teaspoon baking soda
  • 1 teaspoon salt
  • 1 tablespoon ground ginger
  • 2 teaspoons ground cinnamon
  • ½ teaspoon ground allspice
  • ¼ teaspoon ground cloves
  • ¼ teaspoon ground nutmeg
  • 1 cup packed light brown sugar (220g)
  • 1 cup unsalted butter (melted) (226g)
  • ⅔ cup granulated sugar (133g)
  • ⅓ cup unsulphured molasses (80mL)
  • 2 large eggs (room temperature)
  • 1 tablespoon vanilla extract

Frosting

  • 6 ounces cream cheese (170g, room temperature)
  • ¼ cup unsalted butter (softened) (56g)
  • 3 cups powdered sugar (360g)
  • 1 teaspoon vanilla extract
  • ¼ teaspoon salt

Garnish

  • to taste chopped, candied ginger or sprinkles (for garnish)

Instructions 

  • Preheat oven to 350°F (175°C) and line a baking pan with parchment paper.
  • Mix dry ingredients in a bowl. In another bowl, combine wet ingredients and then mix into dry ingredients to form dough.
  • Press dough into the prepared pan and bake for 25 minutes. Let cool completely.
  • Prepare frosting by beating cream cheese, butter, powdered sugar, vanilla, and salt until smooth.
  • Spread frosting over cooled bars and garnish with candied ginger or sprinkles. Slice and serve.

Notes

Store in an airtight container for up to 3 days for best freshness.
Calories: 250kcal
Cost: $15
Course: Dessert
Cuisine: American
Keyword: bars, gingerbread, Spice