Author

Ethan

Browsing

Unlock the Delicious Potential of High-Protein Pecan French Toast Casserole

Welcome to your new favorite brunch dish! This High-Protein Pecan French Toast Casserole is not just a treat for your taste buds but also a powerhouse of nutrition. Perfect for meal prep or a cozy weekend brunch, this casserole melds the sweet and nutty flavors of pecans with the creamy goodness of a custard base, making it an irresistible option for anyone looking to hit their protein goals without sacrificing flavor. Let’s dive into why this recipe should be your go-to for any occasion!

Why You’ll Love This Recipe

  • High Protein Content: With six eggs and heavy cream, each serving provides a significant protein boost that will keep you full and energized all morning.
  • Make-Ahead Convenience: Prep this casserole the night before and pop it in the oven the next day for an effortless breakfast.
  • Versatile Ingredients: Use your favorite bread—French, Challah, or even whole grain—to customize the dish to your taste and dietary needs.
  • Perfect for Serving a Crowd: This recipe easily scales up, making it ideal for brunches, family gatherings, or meal prep for the week ahead.
  • Irresistible Flavor: The combination of cinnamon, nutmeg, and pecans creates a comforting dish that feels indulgent but is still healthy.

Ingredient Breakdown with Substitutions

Here’s what you need to whip up this delightful casserole:

  • 1 loaf of bread: French or Challah works best, but you can also use sourdough or whole grain for added fiber.
  • 6 large eggs: Essential for binding and creating that custardy texture; consider egg whites for a lower calorie option.
  • 2 cups milk: Any type works, but almond or oat milk can be used for dairy-free versions.
  • ½ cup heavy cream: For richness; substitute with coconut cream for a dairy-free alternative.
  • ½ cup brown sugar: Adds sweetness; coconut sugar or maple syrup can be used for a refined sugar-free option.
  • 1 tablespoon vanilla extract: Enhances flavor; use pure vanilla for the best results.
  • 1 teaspoon cinnamon: A cozy spice that’s key to the flavor profile.
  • ½ teaspoon nutmeg: Adds warmth; feel free to omit if you’re not a nutmeg fan.
  • 1 cup chopped pecans: For crunch and nutty flavor; walnuts or almonds can also be delicious substitutes.
  • Maple syrup for serving: A must-have topping that elevates the dish.
  • Powdered sugar for garnish (optional): Adds a touch of sweetness and visual appeal.

Pro Tips for Perfecting Your Casserole

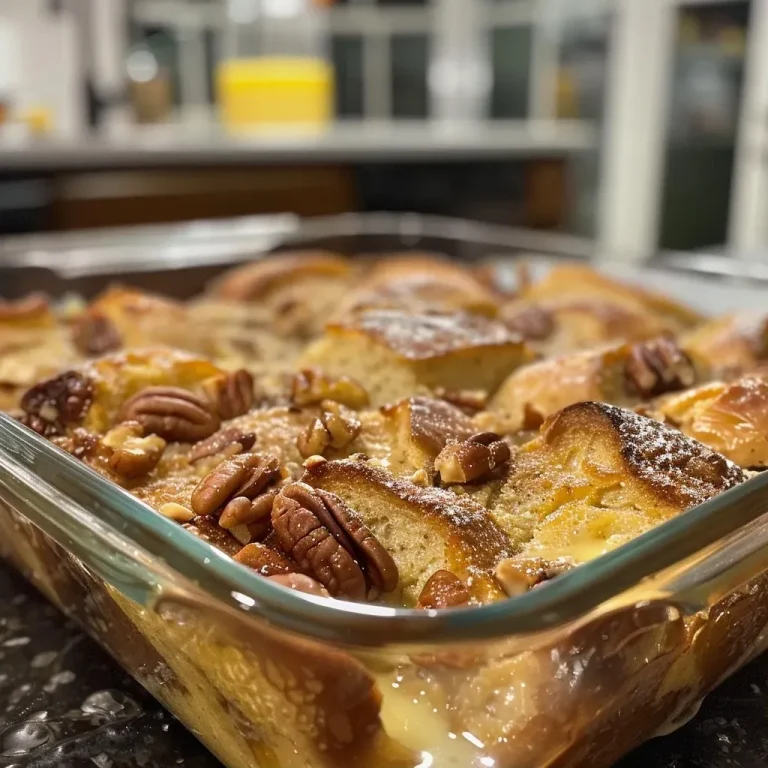
Side view of a golden-brown pecan French toast casserole served in a dish.
  • Use Stale Bread: For best results, stale bread absorbs the custard better, leading to a creamier texture.
  • Refrigerate Overnight: Allow the casserole to sit overnight for optimal flavor and texture absorption.
  • Cover with Foil Initially: This helps steam the casserole, making it fluffy before browning the top.
  • Don’t Skip the Topping: The crunch from the pecans makes the casserole irresistible, enhancing both texture and flavor.
  • Bake Until Golden: Aim for a rich golden-brown top; underbaking can lead to a soggy center.
  • Experiment with Spices: Feel free to add cardamom or ginger for a unique flavor twist.
  • Check for Doneness: Insert a knife in the center; it should come out clean when the casserole is done.
  • Let it Cool: Allow the casserole to rest for a few minutes before serving to set the custard.
  • Consider Serving with Fresh Berries: They add a refreshing contrast to the richness of the casserole.
  • Use a Baking Dish with High Sides: This helps contain the custard and prevents spills while baking.

Common Mistakes and Troubleshooting

Even the best recipes can go awry. Here are common pitfalls and how to avoid them:


Digital Kitchen Scale

★ Recommended Kitchen Tool

Digital Kitchen Scale

Make this recipe even easier with a quality Digital Kitchen Scale — a must-have kitchen staple!


🛒 Check Price on Amazon →

As an Amazon Associate, we earn from qualifying purchases.
  • Too Soggy: Ensure your bread is stale and let it absorb the custard mixture adequately.
  • Overcooked Edges: If the edges brown too quickly, cover them with foil during baking.
  • Dry Center: Make sure to mix the custard well and bake until just set.
  • Too Sweet: Adjust the sugar based on your taste; you can always add sweetness later with syrup.

Delicious Variations to Try

Mix things up with these tasty alternatives:

  • Banana Nut Casserole: Add sliced bananas and walnuts for a fruity twist.
  • Chocolate Chip Delight: Incorporate dark chocolate chips for a decadent dessert-like version.
  • Berry Bliss: Mix in fresh or frozen berries for a burst of flavor and added nutrients.
  • Savory Spinach and Feta: Swap the pecans for spinach and feta cheese for a savory breakfast option.

Storage and Make-Ahead Instructions

This casserole is perfect for meal prep. Here’s how to store it:

  • Refrigerate: Store leftovers in an airtight container for up to 4 days.
  • Freeze: Wrap tightly in plastic wrap and foil, freezing for up to 2 months. Thaw in the fridge before reheating.
  • Make-Ahead: Assemble the casserole the night before and store it in the fridge until ready to bake.

Comprehensive FAQ

  • Can I use gluten-free bread? Yes, any gluten-free loaf works well in this recipe.
  • How do I know when the casserole is done? Insert a knife in the center; it should come out clean.
  • Can I use almond milk instead of regular milk? Absolutely, almond milk is a great substitute!
  • Is it necessary to refrigerate overnight? No, but it enhances flavor and texture.
  • Can I add protein powder? Yes, incorporate a scoop into the custard for an extra protein boost.
  • What toppings can I use? Try whipped cream, fresh fruit, or a drizzle of nut butter.
  • How can I make it dairy-free? Use plant-based milk and coconut cream, and skip the heavy cream.
  • Can this dish be served cold? While it’s best warm, it can be enjoyed cold as well.

Nutritional Tips and Dietary Adaptations

For those mindful of their macros, here are a few adaptations:

  • Lower Fat: Use skim milk and reduce heavy cream or replace with a plant-based alternative.
  • Lower Sugar: Substitute brown sugar with stevia or erythritol to cut calories.
  • Higher Fiber: Opt for whole-grain bread or add chia seeds to the custard.

Recommended Equipment

To make the process easier, here’s what you’ll need:

  • 9×13 inch Baking Dish: Ideal for this casserole size.
  • Whisk: For mixing the custard ingredients thoroughly.
  • Measuring Cups and Spoons: Precision is key for consistent results.
  • Sharp Knife: For cutting the bread into cubes easily.

Serving Suggestions

Once your casserole is baked to perfection, here are some ideas to elevate the experience:

  • Drizzle with Maple Syrup: A classic choice that adds sweetness and flavor.
  • Garnish with Fresh Berries: Strawberries, blueberries, or raspberries add a refreshing touch.
  • Pair with Greek Yogurt: Adds creaminess and extra protein to the meal.
  • Serve with a Side of Bacon or Sausage: For a savory contrast that complements the sweetness.

With this High-Protein Pecan French Toast Casserole, you’re not just enjoying a meal—you’re embracing a lifestyle where taste and nutrition go hand in hand. Whether you’re prepping for a busy week or hosting friends for brunch, this dish is sure to impress. So, gather your ingredients, follow the steps, and savor the flavor. Here’s to hitting those protein goals in style!
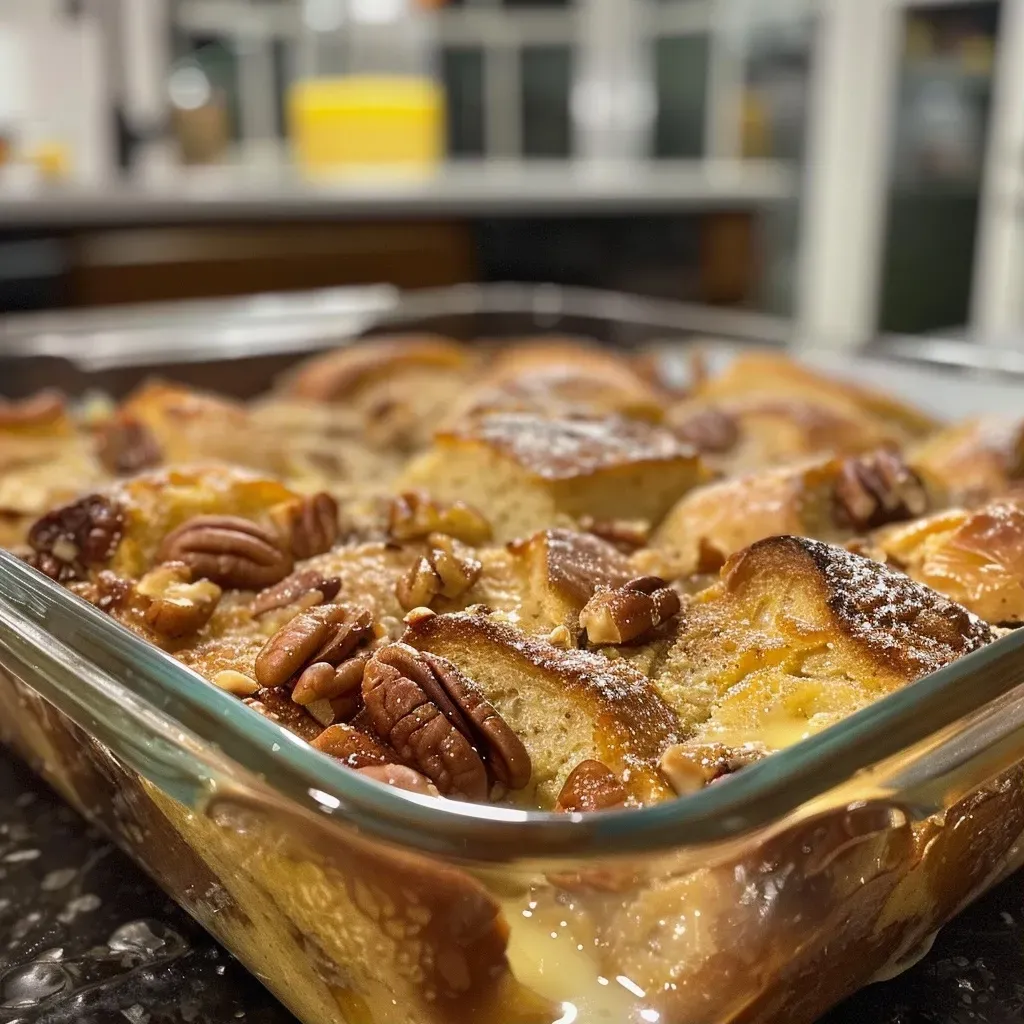
Cozy Baked Pecan French Toast Casserole

Prep Time 15 minutes
Cook Time 45 minutes
Total Time 1 hour
Servings 8 pieces
Calories 350
A warm, indulgent breakfast casserole featuring toasted bread, rich custard, and crunchy pecans, perfect for weekend mornings.

Ingredients

Bread

  • 1 loaf French or Challah bread
  • 6 large eggs eggs
  • 2 cups milk
  • ½ cup heavy cream
  • ½ cup brown sugar
  • 1 tablespoon vanilla extract
  • 1 teaspoon cinnamon
  • ½ teaspoon nutmeg
  • 1 cup chopped pecans
  • Maple syrup for serving
  • Powdered sugar for garnish (optional)

Instructions 

  • Preheat oven to 350°F (175°C) and grease a 9×13 inch baking dish.
  • Cut bread into small cubes and place evenly in the dish.
  • Whisk eggs, milk, heavy cream, brown sugar, vanilla, cinnamon, and nutmeg until combined.
  • Pour custard over bread, ensuring all pieces are coated, then stir in pecans.
  • Cover with foil and refrigerate for at least 1 hour. Bake covered for 30 minutes, then uncover and bake 15-20 minutes until golden.
  • Serve warm with maple syrup and powdered sugar if desired.
Notes

For extra flavor, toast the pecans before adding them to the casserole.
Calories: 350kcal
Cost: $15
Course: Breakfast
Cuisine: American
Keyword: French toast, Pecan

Why Apple Cider Bread Is the Perfect Fall Treat

As the leaves turn and the air becomes crisp, nothing captures the essence of fall quite like homemade apple cider bread. This moist and spiced loaf is more than just a recipe; it’s a celebration of the season. Packed with the rich flavors of apple cider and warm spices, this bread is incredibly versatile, making it perfect for breakfast, snacks, or even dessert. In this guide, we’ll explore how to create this delightful bread from scratch, ensuring every bite is both delicious and nutritious. Let’s dive into why you should get baking!

Why You’ll Love This Recipe

This easy-to-make apple cider bread offers a host of benefits:

  • Moist and Flavorful: The reduced apple cider infuses the bread with a deep, rich flavor that’s hard to resist.
  • Quick and Simple: With straightforward steps, you can whip this up in no time, making it a great option for both seasoned bakers and novices.
  • Perfect for Meal Prep: This bread keeps well, allowing you to enjoy it throughout the week.
  • Customizable: Add your favorite nuts, seeds, or fruits to make it uniquely yours.
  • Healthy Indulgence: Packed with wholesome ingredients, it’s a satisfying treat that aligns with your nutrition goals.

Ingredients for Apple Cider Bread

Before you get started, let’s break down the necessary ingredients:


Digital Kitchen Scale

★ Recommended Kitchen Tool

Digital Kitchen Scale

Make this recipe even easier with a quality Digital Kitchen Scale — a must-have kitchen staple!


🛒 Shop This Tool →

As an Amazon Associate, we earn from qualifying purchases.
  • 2 cups all-purpose flour: Provides the structure for the bread.
  • 1 teaspoon baking soda: Helps the bread rise.
  • 1 teaspoon baking powder: Adds additional lift and fluffiness.
  • ½ teaspoon salt: Enhances the flavors.
  • 1 teaspoon ground cinnamon: Infuses warmth and spice.
  • ½ teaspoon ground nutmeg: Adds a hint of earthiness.
  • 1 cup apple cider: Freshly pressed if possible, for the best flavor.
  • ½ cup granulated sugar: Sweetens the bread.
  • ½ cup light brown sugar: Adds moisture and richness.
  • 2 large eggs: Binds the ingredients together.
  • ½ cup unsalted butter: Provides richness and moisture.
  • 1 teaspoon pure vanilla extract: Enhances the overall flavor.
  • 1 medium apple, peeled and finely chopped: Optional for added texture and flavor.

Pro Tips for Perfect Apple Cider Bread

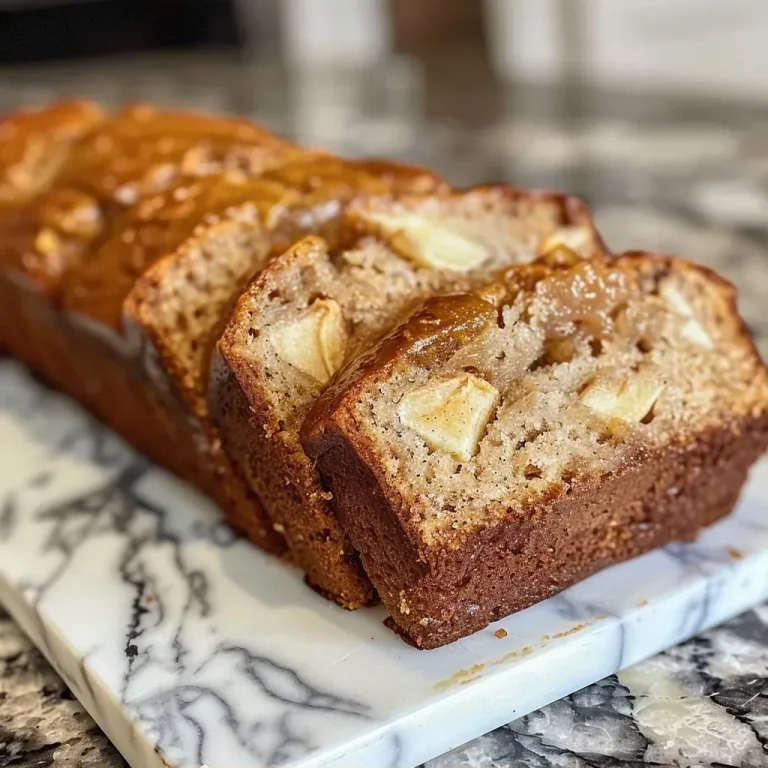
A slice of apple cider bread showcasing its fluffy interior with visible spices and apple chunks.

To ensure your apple cider bread turns out perfectly, consider these expert tips:

  • Reduce the cider: Simmering the cider concentrates its flavor, resulting in a more pronounced apple taste.
  • Room temperature ingredients: Use eggs and butter at room temperature for a smoother batter.
  • Don’t over-mix: Gently combine the wet and dry ingredients to prevent a dense loaf.
  • Use parchment paper: Lining your loaf pan makes for easy removal and cleanup.
  • Cool properly: Let the bread cool in the pan for 10 minutes before transferring it to a wire rack to maintain its moisture.
  • Experiment with spices: Feel free to add cloves or allspice for a unique twist.
  • Check your oven temperature: Ovens can vary, so ensure yours is calibrated for accurate baking.
  • Store properly: Keep leftover bread in an airtight container to maintain freshness.

Common Mistakes and Troubleshooting

Even seasoned bakers can make mistakes. Here are some common pitfalls and how to avoid them:

  • Dense texture: This often results from over-mixing. Mix just until combined.
  • Dry bread: Ensure you’re measuring flour correctly; too much flour can dry out the bread.
  • Uneven baking: Rotate your pan halfway through baking to ensure even cooking.
  • Sticky batter: If your batter seems overly sticky, it may need a bit more flour, but add it sparingly.

Variations of Apple Cider Bread

Want to switch things up? Here are some creative variations to try:

  • Walnut Apple Cider Bread: Add 1 cup of chopped walnuts for a nutty crunch.
  • Gluten-Free Option: Substitute all-purpose flour with a gluten-free blend.
  • Chocolate Chip Delight: Fold in ½ cup of chocolate chips for a sweet twist.
  • Spiced Pumpkin Cider Bread: Replace some of the apple cider with pumpkin puree for a seasonal twist.

How to Store and Make Ahead

This apple cider bread can be made ahead of time and stored for later enjoyment:

  • Room Temperature: Store in an airtight container for up to 3 days.
  • Refrigerator: To extend shelf life, wrap it tightly and refrigerate for up to a week.
  • Freezing: Slice and freeze in a freezer-safe bag for up to 3 months. Thaw at room temperature when ready to enjoy.

Frequently Asked Questions

Here are answers to some common questions about making this recipe:

  • Can I use store-bought apple cider? Yes, but fresh cider enhances the flavor significantly.
  • How do I know when the bread is done? Insert a toothpick into the center; it should come out clean or with a few moist crumbs.
  • What can I serve with apple cider bread? It’s delicious with butter, cream cheese, or even as a base for French toast.
  • Can I make this bread vegan? Substitute eggs with flax eggs and use plant-based butter.
  • Is it possible to make mini loaves? Absolutely! Adjust baking time to about 25-30 minutes.
  • What if I don’t have baking soda? You can double the baking powder, though the texture may vary a bit.
  • How can I enhance the apple flavor? Incorporate apple pie spice or additional cinnamon.
  • Can I add other fruits? Yes, dried cranberries or raisins pair well with apple cider.

Nutritional Tips and Dietary Adaptations

This apple cider bread can be tailored to fit various dietary needs:

  • Lower Sugar: Reduce the sugars to 1/2 cup total for a healthier option.
  • Whole Wheat Flour: Swap half of the all-purpose flour for whole wheat flour for added fiber.
  • Protein Boost: Add a scoop of protein powder to the dry ingredients for a protein-rich snack.

Essential Equipment for Baking

To make your baking experience seamless, ensure you have the following equipment:

  • Mixing Bowls: For combining your ingredients.
  • Whisk: Essential for mixing wet ingredients smoothly.
  • Measuring Cups and Spoons: Accurate measurements are key to successful baking.
  • Loaf Pan: A standard 9×5-inch loaf pan works best.
  • Cooling Rack: Allows the bread to cool evenly after baking.

Serving Suggestions

This apple cider bread is incredibly versatile. Here are some serving ideas:

  • Breakfast: Serve warm with a pat of butter and a drizzle of honey.
  • Snack: Enjoy sliced with a cup of tea or coffee for an afternoon treat.
  • Dessert: Top with whipped cream or vanilla ice cream for a cozy dessert option.

Conclusion

Baking your own apple cider bread is not just about satisfying your taste buds; it’s about embracing the flavors of fall in a wholesome way. With this comprehensive guide, you can confidently make a loaf that’s not only delicious but also aligns with your nutritional goals. So preheat your oven, gather your ingredients, and get ready to create a delightful bread that you’ll want to share with family and friends. Happy baking!

Apple Cider Bread Recipe – Moist, Spiced & Easy to Bake

Prep Time 15 minutes
Cook Time 50 minutes
Total Time 1 hour 5 minutes
Servings 8 slices
Calories 250
This moist and flavorful apple cider bread combines warm spices and a tender crumb, perfect for cozy mornings or afternoon tea.

Ingredients

Dry Ingredients

  • 2 cups all-purpose flour
  • 1 teaspoon baking soda
  • 1 teaspoon baking powder
  • ½ teaspoon salt
  • 1 teaspoon ground cinnamon
  • ½ teaspoon ground nutmeg

Wet Ingredients

  • 1 cup apple cider (reduced) (cooled)
  • ½ cup granulated sugar
  • ½ cup light brown sugar, packed
  • 2 large eggs (room temperature)
  • ½ cup unsalted butter, melted and cooled
  • 1 teaspoon vanilla extract

Optional Add-in

  • 1 medium apple, peeled and chopped (optional)

Instructions 

  • Preheat oven to 350°F (175°C), grease and line a 9x5-inch loaf pan.
  • Simmer 1 cup apple cider until reduced by half, then cool.
  • Mix dry ingredients in a bowl; whisk wet ingredients in another, then combine.
  • Stir in cooled apple cider and optional chopped apple.
  • Pour batter into pan, bake for 45-55 minutes, cool before slicing.

Notes

Ensure not to over-mix to keep the bread light and moist.
Calories: 250kcal
Cost: $15
Course: bread
Cuisine: American
Keyword: apple, spiced bread

Unlock the Power of High-Protein Snacking

Are you tired of bland, uninspired snacks that do little to fuel your fitness goals? If you’re on a quest to maintain a high-protein diet without sacrificing flavor, you’re in the right place. This article will guide you through everything you need to know about making High-Protein Cheesy Mashed Potato Puffs—a delicious, satisfying snack that fits right into your macro-friendly meal plan.

These cheesy potato puffs are not just any snack; they are a game-changer for anyone looking to up their protein intake while enjoying tasty food. Packed with nutrients, they make for the perfect post-workout treat or a quick, kid-friendly option. Let’s dive in!

Why You’ll Love This Recipe

  • High Protein Content: Each puff delivers a significant protein boost, making them ideal for recovery after workouts.
  • Flavor-Packed: The combination of creamy mashed potatoes and melted cheddar cheese creates a rich, indulgent flavor.
  • Easy to Make: With simple ingredients and straightforward steps, this recipe can fit into any busy schedule.
  • Versatile Snack: These puffs can be enjoyed on their own or served with your favorite dipping sauce.
  • Meal Prep Friendly: Great for batch cooking, they can be stored and reheated easily for quick snacks throughout the week.

Ingredients Breakdown

Here’s what you’ll need to make these protein-packed delights:


Meal Prep Container Set

★ Recommended Kitchen Tool

Meal Prep Container Set

Make this recipe even easier with a quality Meal Prep Container Set — a must-have kitchen staple!


🛒 View on Amazon →

As an Amazon Associate, we earn from qualifying purchases.
  • 2 cups mashed potatoes: You can use fresh or leftover mashed potatoes.
  • ½ cup shredded cheddar cheese: For that cheesy goodness.
  • ¼ cup Greek yogurt: Adds creaminess and a protein boost.
  • 2 egg whites: Acts as a binder while keeping the fat content low.
  • 1 scoop whey protein (optional): For an extra protein kick; feel free to skip if you prefer.
  • ½ tsp garlic powder: Adds a savory flavor.
  • Salt & pepper: To taste.
  • 2 tbsp flour or almond flour: Helps to hold the puffs together.
  • Cooking spray or butter: For greasing the baking sheet.

Ingredient Substitutions

  • Cheese: Swap cheddar for mozzarella or a dairy-free alternative.
  • Greek yogurt: Replace with cottage cheese or sour cream if desired.
  • Whey protein: Use plant-based protein powder or omit entirely.
  • Flour: Use oat flour or coconut flour for gluten-free options.

How to Make High-Protein Cheesy Mashed Potato Puffs

Side view of crispy high-protein mashed potato puffs, highlighting a cheesy interior.

Follow these simple steps to whip up your new favorite snack:

  1. Preheat your oven to 400°F (200°C).
  2. Mash potatoes until smooth and free of lumps.
  3. Mix in Greek yogurt, egg whites, and optional whey protein until fully incorporated.
  4. Season the mixture with garlic powder, salt, and pepper; fold in the flour.
  5. Stir in shredded cheese until evenly distributed.
  6. Shape the mixture into small puffs and place them on a parchment-lined baking sheet.
  7. Bake for 15–20 minutes or until golden brown and slightly crispy.
  8. Serve warm and enjoy your protein-rich snack!

Pro Tips for Perfect Puffs

  • Use Cold Mashed Potatoes: This helps maintain the fluffiness of the puffs.
  • Don’t Overmix: Gently fold in the ingredients to keep the puffs light.
  • Experiment with Seasonings: Add herbs like chives or spices like paprika for a flavor twist.
  • Adjust Cooking Time: Keep an eye on your puffs; ovens vary and you want them golden, not burnt.
  • Let Them Cool Slightly: This helps them firm up for easier handling.

Common Mistakes and Troubleshooting

  • Too Dry: If your mixture is too dry, add a little more Greek yogurt or mashed potatoes.
  • Too Wet: If the mixture is too wet, incorporate a bit more flour to firm it up.
  • Not Crispy: Ensure your oven is preheated and avoid overcrowding the baking sheet.

Variations to Try

Mix things up with these tasty variations:

  • Spicy Puffs: Add diced jalapeños and a sprinkle of cayenne pepper for heat.
  • Herb and Garlic: Mix in fresh herbs like parsley or cilantro for added freshness.
  • Buffalo Chicken: Stir in shredded cooked chicken and buffalo sauce for a spicy twist.
  • Vegetable Medley: Fold in finely chopped spinach or broccoli for an extra dose of nutrients.

Storage and Make-Ahead Instructions

These puffs are perfect for meal prep:

  • Refrigeration: Store in an airtight container in the fridge for up to 5 days.
  • Freezing: Freeze cooked puffs in a single layer on a baking sheet, then transfer to a freezer bag for up to 3 months.
  • Reheating: Bake from frozen at 375°F (190°C) for 20–25 minutes or until heated through.

Frequently Asked Questions

  • Can I make these puffs without cheese?: Yes! You can omit the cheese for a dairy-free version.
  • What can I serve with these puffs?: They pair well with Greek yogurt dip, salsa, or guacamole.
  • Are these puffs gluten-free?: Use almond flour or gluten-free flour to make them gluten-free.
  • How can I increase the protein content further?: Add more whey protein or serve with a high-protein dip.
  • Can I use leftover mashed potatoes?: Absolutely! This is a great way to use up leftovers.
  • What’s the best way to reheat them?: Bake them to retain their crispiness.
  • Can children enjoy these puffs?: Yes! They are kid-friendly and make a great snack.
  • How long do these puffs last?: They can be stored in the fridge for up to 5 days or frozen for 3 months.

Nutrition Tips and Dietary Adaptations

These High-Protein Cheesy Mashed Potato Puffs are not only delicious but also adaptable to various dietary needs:

  • Low-Carb Option: Use cauliflower mash instead of potatoes for a lower-carb alternative.
  • Vegan Friendly: Substitute egg whites with flaxseed meal mixed with water and use vegan cheese.
  • Keto Adaptation: Replace flour with almond flour and ensure your cheese is low-carb.

Essential Equipment Recommendations

To make your cooking experience smoother, here’s what you’ll need:

  • Mixing Bowl: For combining your ingredients.
  • Baking Sheet: A sturdy baking sheet lined with parchment for easy cleanup.
  • Piping Bag (Optional): Use this for shaping puffs if you prefer a uniform size.
  • Fork or Potato Masher: Essential for mashing your potatoes smoothly.

Serving Suggestions

These protein puffs are versatile:

  • Perfect Snack: Enjoy them as a quick snack on their own.
  • Appetizer: Serve as a starter at gatherings with various dips.
  • Meal Component: Pair with a salad or vegetables for a balanced meal.

Final Thoughts

With High-Protein Cheesy Mashed Potato Puffs, you can snack smart without compromising on flavor. These puffs are not only easy to make but also a fantastic way to hit your protein goals. So gear up, get cooking, and enjoy a snack that fuels your fitness journey!

High-Protein Cheesy Mashed Potato Puffs – Easy Protein-Packed Snack

Prep Time 10 minutes
Cook Time 15 minutes
Total Time 25 minutes
Servings 4 puffs
Calories 150
A delicious, protein-rich snack featuring cheesy mashed potato puffs that are quick to make and perfect for any time.

Ingredients

Main

  • 2 cups mashed potatoes
  • ½ cup shredded cheddar cheese
  • ¼ cup Greek yogurt
  • 2 egg whites egg whites
  • 1 scoop whey protein (optional)
  • ½ tsp garlic powder
  • Salt & pepper Salt & pepper
  • 2 tbsp flour or almond flour
  • Cooking spray or butter Cooking spray or butter

Instructions 

  • Preheat oven to 400°F (200°C).
  • Mash potatoes until smooth, then mix in Greek yogurt, egg whites, and whey protein (if using).
  • Add garlic powder, salt, pepper, and fold in flour.
  • Stir in shredded cheese, then shape mixture into small puffs on a parchment-lined sheet.
  • Bake for 15–20 minutes until golden, then serve warm.

Notes

For extra flavor, add herbs or spices of your choice.
Calories: 150kcal
Cost: $10
Course: Snack
Keyword: Cheese, mashed potatoes, protein

Sweet potatoes are not just a delicious comfort food; they’re also packed with nutrients that fuel your body. If you’re looking to elevate your holiday gatherings or simply want a tasty, healthy dish, this gluten-free sweet potato casserole is your answer. With a perfect blend of flavors and textures, this recipe is designed to meet your protein goals without sacrificing taste. Let’s dive into how to create a dish that’s not only satisfying but also nutritious!

Why You’ll Love This Recipe

This gluten-free sweet potato casserole is more than just another side dish; it’s a crowd-pleaser with remarkable benefits. Here’s why you’ll want to whip this up:

  • High in Nutrients: Sweet potatoes are rich in vitamins A and C, potassium, and fiber, making this casserole a health-conscious choice.
  • Flavor Explosion: With layers of maple syrup, cinnamon, and pecans, this dish is a sweet and savory delight that will have everyone asking for seconds.
  • Easy to Prepare: This recipe is straightforward, making it perfect for both beginner cooks and seasoned chefs alike.
  • Versatile for Any Occasion: Whether it’s Thanksgiving, a family get-together, or a cozy dinner, this casserole fits right in.
  • Meal Prep Friendly: You can make it ahead of time and simply reheat, saving you time on busy days.

Ingredients Breakdown

To make the ultimate gluten-free sweet potato casserole, gather the following ingredients:


5-Speed Electric Hand Mixer

★ Recommended Kitchen Tool

5-Speed Electric Hand Mixer

Make this recipe even easier with a quality 5-Speed Electric Hand Mixer — a must-have kitchen staple!


🛒 See Deals on Amazon →

As an Amazon Associate, we earn from qualifying purchases.
  • 3 lbs sweet potatoes (about 5 medium-large): Choose fresh, firm sweet potatoes for the best flavor.
  • 1 TB oil (extra virgin olive oil or avocado oil): A healthy fat to keep things moist.
  • 3 TB unsalted butter (melted): Adds richness; can be replaced with coconut oil for dairy-free.
  • 1/4 cup maple syrup: Natural sweetness that enhances the flavor profile.
  • 1/4 cup milk (almond, coconut, or cow’s milk): For creaminess; choose your favorite for dietary needs.
  • 1 egg: Acts as a binder; for a vegan option, use flaxseed meal mixed with water.
  • 1/2 tsp salt: Adjust to taste for the best flavor.
  • 1/2 tsp ground cinnamon: A warm spice that complements sweet potatoes perfectly.
  • 1/4 tsp ground nutmeg: Adds depth of flavor.
  • 1 1/2 tsp pure vanilla extract: For a sweet aroma and taste.
  • 1 cup chopped pecans (110g): Crunchy topping that enhances texture; can substitute with walnuts.
  • 1 cup blanched almond flour (104g): This gluten-free flour helps create a crisp topping.
  • 1 TB arrowroot starch (optional): Helps with binding and texture.
  • 3 TB maple syrup: For the topping; enhances sweetness.
  • 3 TB unsalted butter (melted): For a rich, buttery topping.
  • Pinch ground nutmeg: To sprinkle on top.
  • Pinch salt: For seasoning.

How to Make This Casserole, Step by Step

Now that your ingredients are ready, let’s get cooking!

  • Step 1: Preheat the Oven: Preheat your oven to 400°F (200°C).
  • Step 2: Prepare the Sweet Potatoes: Halve the sweet potatoes lengthwise and place cut-side down on a baking sheet. Roast for about 40 minutes, or until tender.
  • Step 3: Mix the Casserole Ingredients: Once the sweet potatoes are cool enough to handle, scoop out the flesh into a mixing bowl. Add oil, melted butter, maple syrup, milk, egg, salt, cinnamon, nutmeg, and vanilla extract. Blend until smooth.
  • Step 4: Prepare the Topping: In a separate bowl, mix chopped pecans, almond flour, melted butter, maple syrup, and a pinch of salt and nutmeg until combined.
  • Step 5: Assemble: Spread the sweet potato mixture into a greased baking dish. Evenly distribute the pecan topping over the sweet potato filling.
  • Step 6: Bake: Place the casserole in the oven and bake for 25–30 minutes, or until the topping is golden and crispy.
  • Step 7: Serve: Let it cool for a few minutes before serving. Enjoy your delicious, guilt-free casserole!

Pro Tips for Perfect Casserole

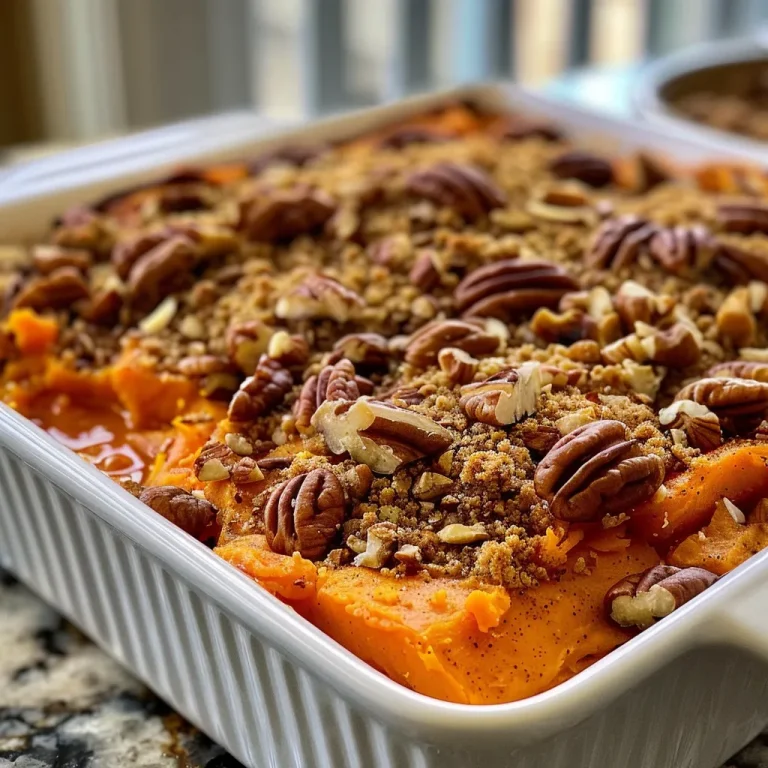
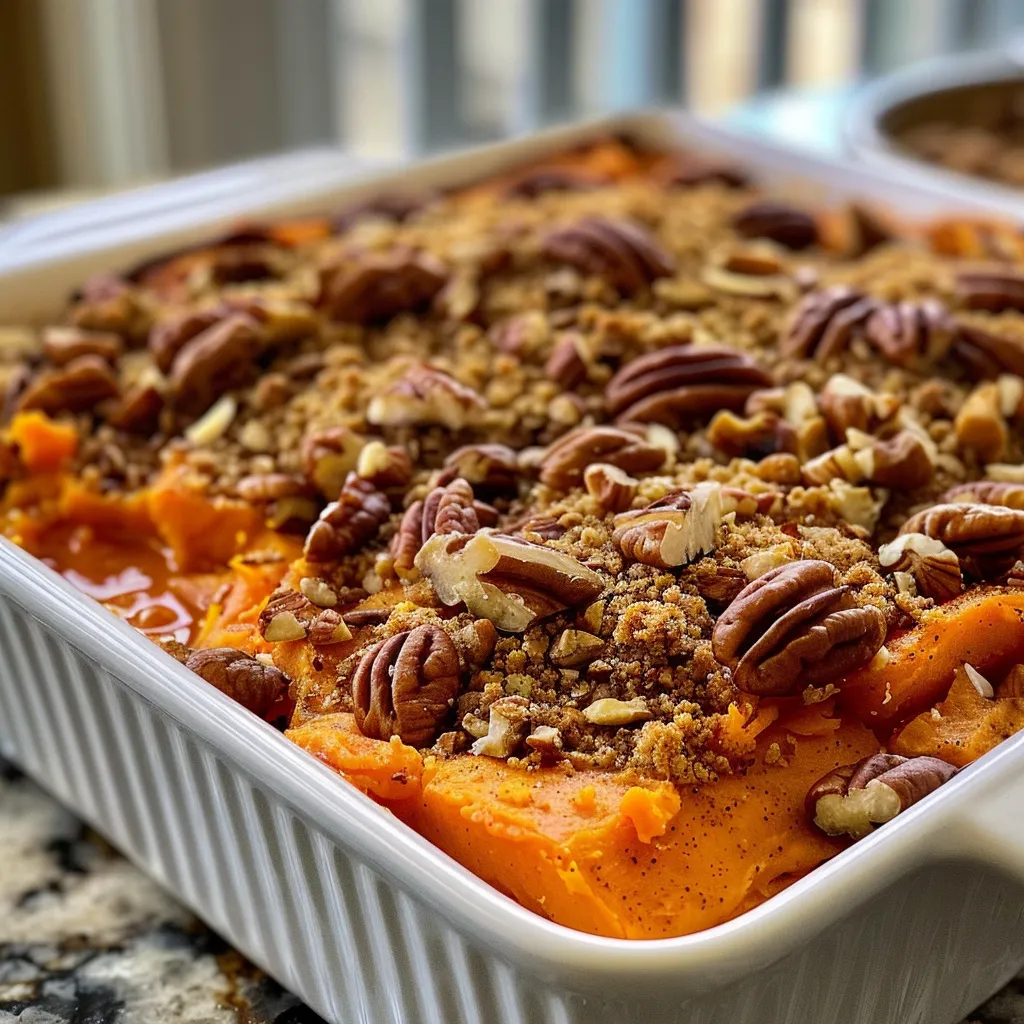
Portion of gluten-free sweet potato casserole featuring a creamy texture and a sprinkle of pecans on top.

Elevate your cooking game with these expert insights:

  • Choose Fresh Sweet Potatoes: Look for firm, blemish-free sweet potatoes for the best flavor and texture.
  • Don’t Overmix: When blending the sweet potato mixture, mix just until smooth to avoid a gummy texture.
  • Customize the Sweetness: Adjust the amount of maple syrup based on your taste preference or dietary needs.
  • Experiment with Toppings: Try adding coconut flakes or oats to the topping for added flavor and texture.
  • Let It Rest: Allow the casserole to sit for a few minutes after baking. This helps set the filling and makes it easier to serve.
  • Use a Kitchen Scale: For precise measurements, especially if you’re tracking macros!
  • Make It Ahead: Prepare the casserole a day in advance, cover it tightly, and refrigerate until ready to bake.
  • Check for Doneness: Insert a fork into the sweet potato filling; it should be soft and creamy.

Common Mistakes and Troubleshooting

Even the best chefs make mistakes! Here are some common pitfalls and how to avoid them:

  • Watery Casserole: If your sweet potatoes are too watery, drain excess liquid before mixing.
  • Topping Burnt: If the topping browns too quickly, cover the casserole with foil during the last 10 minutes of baking.
  • Underseasoned Filling: Taste before baking; add more salt or spices to suit your palate.

Variations to Try

Feel free to mix things up with these flavorful variations:

  • Vegan Option: Substitute the egg with a flaxseed meal mixture and use coconut oil instead of butter.
  • Spicy Kick: Add a pinch of cayenne pepper or chili powder to the sweet potato mixture for a spicy twist.
  • Maple-Pecan Crumble: Mix in some oats with the pecan topping for an irresistible crunch.
  • Fruit Fusion: Incorporate diced apples or pears into the sweet potato mixture for added sweetness and texture.

Storage and Make-Ahead Instructions

This casserole is perfect for meal prep. Here’s how to store it:

  • Refrigerate: Store leftovers in an airtight container in the fridge for up to 4 days.
  • Freezing: Freeze portions in airtight containers for up to 2 months. Thaw overnight in the fridge before reheating.
  • Reheat: Warm in the oven at 350°F (175°C) until heated through, about 20-25 minutes.

Frequently Asked Questions

Got questions? We’ve got answers! Here are some common queries about this sweet potato casserole:

  • Can I use canned sweet potatoes? It’s best to use fresh sweet potatoes for optimal flavor and texture, but if you’re in a pinch, canned can work; just drain well.
  • Is this recipe gluten-free? Absolutely! All ingredients are gluten-free, making it safe for those with gluten sensitivities.
  • Can I make this casserole dairy-free? Yes! Substitute the butter with coconut oil and use dairy-free milk for a completely dairy-free dish.
  • How do I know when it’s done? The casserole is done when the topping is golden brown and the filling is heated through. A fork should pierce the sweet potatoes easily.
  • Can I add other vegetables? Yes! Feel free to add cooked carrots or spinach for extra nutrients.
  • Is it suitable for freezing? Yes! This casserole freezes well for future meals.
  • How long does it take to bake? The baking time is approximately 25-30 minutes, but this can vary based on your oven.
  • What can I serve with this casserole? Pair it with roasted meats or a fresh salad for a balanced meal.

Nutrition Tips and Dietary Adaptations

This casserole not only delights the palate but also nourishes your body. Here are some nutrition tips:

  • Balance Your Plate: Pair this casserole with a protein source like grilled chicken or turkey for a complete meal.
  • Watch the Portions: While it’s healthy, the calories can add up, so be mindful of serving sizes if you’re tracking macros.
  • Boost Protein: Add cooked lentils or chickpeas to the sweet potato mixture for extra protein.

Equipment Recommendations

Here’s what you’ll need to make this recipe:

  • Mixing Bowls: For combining ingredients.
  • Baking Dish: A 9×13 inch dish works perfectly for this casserole.
  • Food Processor: Optional, for smooth blending of the sweet potatoes.
  • Measuring Cups and Spoons: Accurate measurements are key to success!

Serving Suggestions

To make your presentation pop, serve this casserole with:

  • Fresh Herbs: Top with chopped parsley or chives for a fresh touch.
  • Cranberry Sauce: A side of cranberry sauce complements the sweet flavors beautifully.
  • Green Salad: Pair with a light green salad to balance out the richness of the casserole.

Creating the ultimate gluten-free sweet potato casserole is a rewarding experience that brings flavor and nutrition to your table. With this guide, you’re equipped to impress your family and friends while hitting your protein goals without compromising on taste. So, roll up those sleeves, get cooking, and indulge in a dish that’s as nourishing as it is delicious!

Delicious Gluten-Free Sweet Potato Casserole

Prep Time 15 minutes
Cook Time 45 minutes
Total Time 1 hour
Servings 8 servings
Calories 350
A comforting and naturally gluten-free sweet potato casserole topped with pecans and a hint of cinnamon, perfect for any occasion.

Ingredients

Sweet Potatoes

  • 3 lbs sweet potatoes (about 5 medium-large sweet potatoes)

Oil

  • 1 TB oil (such as: extra virgin olive oil or avocado oil)

Butter

  • 3 TB unsalted butter (melted)

Maple Syrup

  • 1/4 cup maple syrup

Milk

  • 1/4 cup milk (such as: whole milk, almond milk, or coconut milk)

Egg

  • 1 egg

Salt

  • 1/2 tsp salt (or to taste)

Ground Cinnamon

  • 1/2 tsp ground cinnamon

Ground Nutmeg

  • 1/4 tsp ground nutmeg

Vanilla Extract

  • 1 1/2 tsp pure vanilla extract

Chopped Pecans

  • 1 cup chopped pecans (unsalted)

Almond Flour

  • 1 cup blanched almond flour

Arrowroot Starch

  • 1 TB arrowroot starch (optional)

Maple Syrup

  • 3 TB maple syrup

Butter

  • 3 TB unsalted butter (melted)

Ground Nutmeg

  • pinch ground nutmeg

Salt

  • pinch salt

Instructions 

  • Preheat oven to 375°F (190°C). Peel and mash sweet potatoes.
  • Mix mashed sweet potatoes with melted butter, maple syrup, milk, egg, salt, cinnamon, nutmeg, and vanilla until smooth.
  • Transfer mixture to a baking dish. Top with chopped pecans and almond flour.
  • Combine melted butter, maple syrup, arrowroot starch, nutmeg, and salt to make topping. Pour over casserole.
  • Bake for 45 minutes until golden and bubbly. Serve warm.

Notes

For extra flavor, add a sprinkle of cinnamon on top before baking.
Calories: 350kcal
Cost: $15
Course: Dessert
Cuisine: American
Keyword: Sweet Potato

Welcome to the ultimate guide for making Spiced Pears that not only satisfy your sweet tooth but also fit your nutritional goals! In this article, we’ll explore how to create a deliciously aromatic dish using just four simple ingredients. Perfect for autumn gatherings or as a delightful dessert, this recipe balances flavor and nutrition seamlessly. Let’s dive into why these spiced pears could become your new favorite treat!

Why You’ll Love This Recipe

  • Quick and Easy: With a prep time of just 10 minutes and a cooking time of 15 minutes, you can whip up this dish in under 30 minutes.
  • High-Protein Option: Pair these spiced pears with Greek yogurt or cottage cheese to boost your protein intake without sacrificing taste.
  • Versatile Dessert: Serve them warm over oatmeal, pancakes, or even as a topping for your favorite desserts.
  • Customizable Flavor: The basic recipe allows for endless variations—experiment with different spices or add a splash of vanilla.
  • Healthy Indulgence: Using brown sugar and natural spices keeps this treat guilt-free while still delivering on the sweetness.

Ingredients for Spiced Pears

Here’s what you’ll need to create these delicious spiced pears:

  • 1 can (16 ounces) pear halves: Look for pears packed in their own juice or light syrup for a healthier option.
  • 1/3 cup packed brown sugar: This adds a rich caramel flavor; try using dark brown sugar for a deeper taste.
  • 3/4 teaspoon ground nutmeg: A warm spice that complements the sweetness of the pears beautifully.
  • 3/4 teaspoon ground cinnamon: This classic spice adds warmth and aromatic appeal to the dish.

Directions: Crafting the Perfect Spiced Pears

Follow these simple steps to make your spiced pears:


Cake Decorating Set

★ Recommended Kitchen Tool

Cake Decorating Set

Make this recipe even easier with a quality Cake Decorating Set — a must-have kitchen staple!


🛒 Shop This Tool →

As an Amazon Associate, we earn from qualifying purchases.
  1. In a small saucepan, combine the reserved pear syrup, brown sugar, nutmeg, and cinnamon. Bring the mixture to a boil over medium heat, stirring occasionally to help dissolve the sugar and blend the spices. Editor’s Tip: If you prefer a thicker syrup, let it boil for an extra two to three minutes until it reduces slightly.
  2. Reduce the heat to low and carefully add the pear halves to the saucepan. Simmer the pears in the syrup for about five minutes, turning them gently to coat with the syrup, until they’re heated through and infused with flavor. Editor’s Tip: For extra flavor, try adding a splash of vanilla extract or cloves to the syrup while it simmers.

Pro Tips for Spiced Pear Success

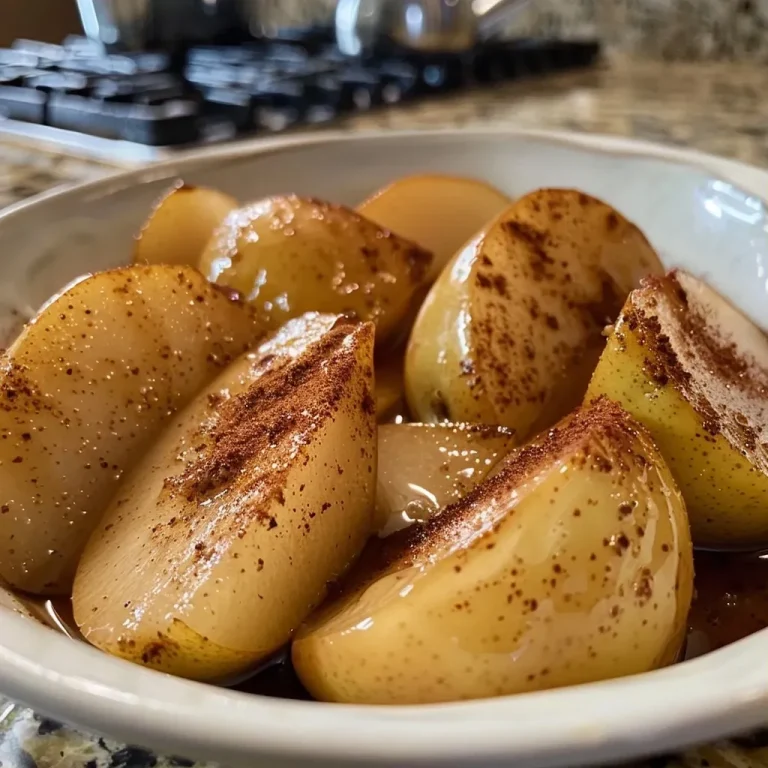
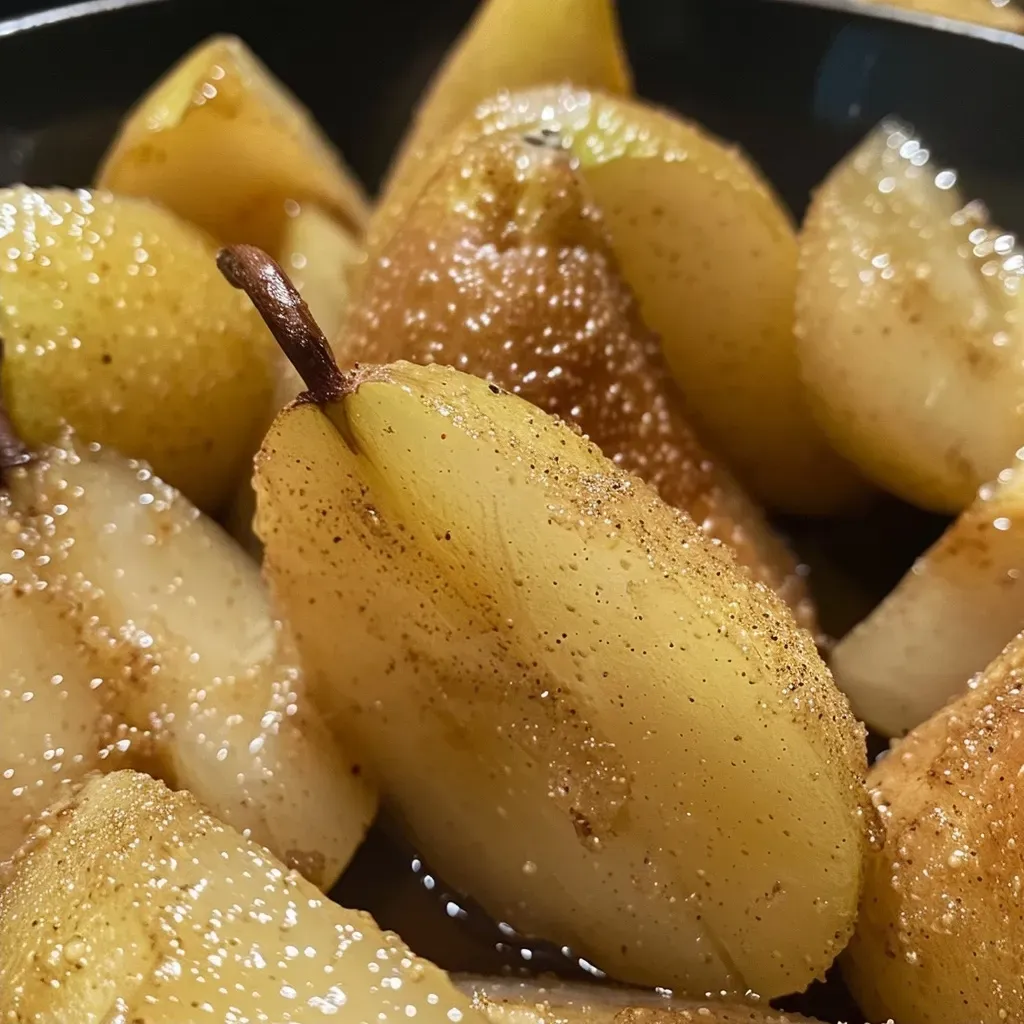
Side view of canned pear halves sprinkled with cinnamon and nutmeg.
  • Perfect Texture: For best results, use pears that are firm yet ripe. This ensures they hold their shape while cooking.
  • Prevent Browning: If you’re using fresh pears, soak them in lemon juice or a mixture of water and vinegar immediately after cutting to prevent browning.
  • Store Wisely: Keep leftover spiced pears in an airtight container in the fridge for up to one week. Reheat gently before serving.
  • Make Ahead: You can prepare the syrup ahead of time and store it separately. Combine with pears just before serving.
  • Experiment with Spices: Don’t hesitate to add other spices like allspice, cardamom, or even a pinch of cayenne for a kick!
  • Pairing Ideas: Serve these spiced pears over pancakes, oatmeal, or even alongside grilled meats for a sweet-savory combo.
  • Presentation Matters: For an impressive touch, serve pears in a dessert bowl with a dollop of whipped cream or yogurt on top.
  • Go Gourmet: Drizzle with a balsamic reduction for an upscale twist that will impress guests.

Common Mistakes and Troubleshooting

  • Overcooking: Be careful not to simmer the pears too long; they can become mushy. Aim for just enough time to heat through.
  • Too Sweet: If the syrup is too sweet for your taste, you can dilute it with a little water or add a splash of lemon juice.
  • Flavor Balance: If your spiced pears lack flavor, consider adjusting the spice amounts or adding a pinch of salt to enhance the sweetness.

Variations on Spiced Pears

Here are some creative ways to mix up this classic recipe:

  • Maple Spiced Pears: Replace brown sugar with maple syrup for a unique flavor profile.
  • Nutty Pears: Add chopped walnuts or pecans during the last minute of simmering for added texture and flavor.
  • Chocolate Dipped: Drizzle melted dark chocolate over the pears before serving for a decadent touch.
  • Fruit Medley: Combine pears with apples or peaches for a delightful fruit medley that celebrates the season.

Storage and Make-Ahead Instructions

To enjoy these spiced pears at your convenience, follow these storage tips:

  • Refrigeration: Store in an airtight container in the fridge for up to one week.
  • Freezing: You can freeze spiced pears for up to three months; however, the texture may change upon thawing.
  • Make-Ahead: Prepare the syrup and store it separately. Combine with pears just before serving for optimal freshness.

Frequently Asked Questions (FAQs) About Spiced Pears

  • Can I use fresh pears instead of canned? Yes, fresh pears are a fantastic option! Just peel, core, and slice them before cooking.
  • How do I prevent pears from browning? Soak sliced pears in a mixture of water and lemon juice to keep them fresh.
  • What can I do with extra syrup? Use it as a topping for yogurt, pancakes, or as a sweetener in your tea.
  • Can I make this recipe vegan? Yes, substitute brown sugar with coconut sugar or maple syrup.
  • How long do spiced pears last? Stored properly, they can last up to a week in the refrigerator.
  • Can I use other spices? Absolutely! Feel free to get creative with your spice blend.
  • How do I serve spiced pears? They’re great on their own, or as a topping for desserts, oatmeal, or pancakes.
  • What is the best way to heat leftover spiced pears? Gently warm them in the microwave or on the stovetop over low heat.

Nutrition Tips and Dietary Adaptations

This recipe can be easily adapted to meet various dietary needs:

  • Low Sugar: Use a sugar substitute to reduce the overall sugar content without sacrificing flavor.
  • Gluten-Free: This recipe is naturally gluten-free, making it suitable for those with gluten sensitivities.
  • Dairy-Free: Pair with plant-based yogurts for a dairy-free option.

Equipment Recommendations

Here’s what you’ll need for this recipe:

  • Small saucepan: For simmering the syrup and pears.
  • Spoon: A sturdy spoon for stirring and serving.
  • Measuring cups: To measure ingredients accurately.

Serving Suggestions

For a complete meal, pair these spiced pears with:

  • Greek Yogurt: The creaminess complements the sweet and spiced flavors.
  • Pancakes or Waffles: Perfect for a Sunday brunch or special occasion.
  • Oatmeal: Stir into your morning oats for added flavor and nutrition.

In conclusion, these spiced pears are not just a dessert; they’re a versatile addition to your culinary repertoire. With their ease of preparation and delicious flavor, you can enjoy them guilt-free while hitting your nutritional goals. Now, get in the kitchen and try this recipe today; your taste buds will thank you!

Spiced Pears

Prep Time 5 minutes
Cook Time 10 minutes
Total Time 15 minutes
Servings 4 servings
Calories 150
A delightful dessert featuring tender pear halves simmered in a warm spiced syrup, perfect for cozy occasions.

Ingredients

Canned Pears

  • 1 can pear halves (16 ounces)
  • 1/3 cup packed brown sugar
  • 3/4 teaspoon ground nutmeg
  • 3/4 teaspoon ground cinnamon

Instructions 

  • Combine pear syrup, brown sugar, nutmeg, and cinnamon in a saucepan and bring to a boil, stirring to dissolve sugar.
  • Add pear halves to the syrup, simmer for 5 minutes, turning gently to coat.
  • Remove from heat and serve warm, optionally garnished with vanilla or cloves.

Notes

For a thicker syrup, boil an extra 2-3 minutes.
Calories: 150kcal
Cost: $8
Course: Dessert
Cuisine: American
Keyword: pear, Spices

Mastering Homemade Potato Gnocchi: A Protein-Packed Culinary Adventure

Welcome to your go-to guide for making delicious, homemade potato gnocchi. This classic Italian dish is not only a comforting favorite but also a fantastic way to boost your protein intake, all while satisfying your taste buds. With just four simple ingredients, you can create light and fluffy pillows of goodness that pair beautifully with a variety of sauces or can be enjoyed on their own.

In this article, you will discover the secrets of crafting the perfect potato gnocchi, from selecting the right potatoes to achieving the ideal texture. Let’s dive into the world of gnocchi making, where flavor meets nutritional excellence!

Why You’ll Love This Recipe

  • Simplicity: With only four ingredients required, this gnocchi recipe is straightforward and easy to follow, making it perfect for beginners.
  • Protein Boost: By adding an egg, you enhance the protein content, making these gnocchi a nutritious choice for any meal.
  • Versatility: These delightful dumplings can be paired with various sauces, from classic marinara to rich pesto, or sautéed with vegetables for a quick meal.
  • Meal Prep Friendly: Gnocchi can be made ahead of time and frozen, allowing you to enjoy homemade pasta on a busy day without the hassle.
  • Flavorful & Fun: The process of making gnocchi is enjoyable and rewarding, resulting in a dish that’s sure to impress family and friends.

Ingredients for Easy Homemade Potato Gnocchi

Gather the following ingredients to make your potato gnocchi:


Meal Prep Container Set

★ Recommended Kitchen Tool

Meal Prep Container Set

Make this recipe even easier with a quality Meal Prep Container Set — a must-have kitchen staple!


🛒 Shop This Tool →

As an Amazon Associate, we earn from qualifying purchases.
  • 1 kg (2.2 lbs) potatoes: Use scrubbed but unpeeled potatoes, preferably starchy varieties like Russet or Yukon Gold.
  • 190 g plain flour: This will help bind the dough together; feel free to substitute with whole wheat flour for a healthier option.
  • 3/4 teaspoon salt: Essential for enhancing the flavor of the gnocchi.
  • 1 egg (lightly beaten): Adds richness and helps the gnocchi hold together.

Step-by-Step Instructions for Perfect Gnocchi

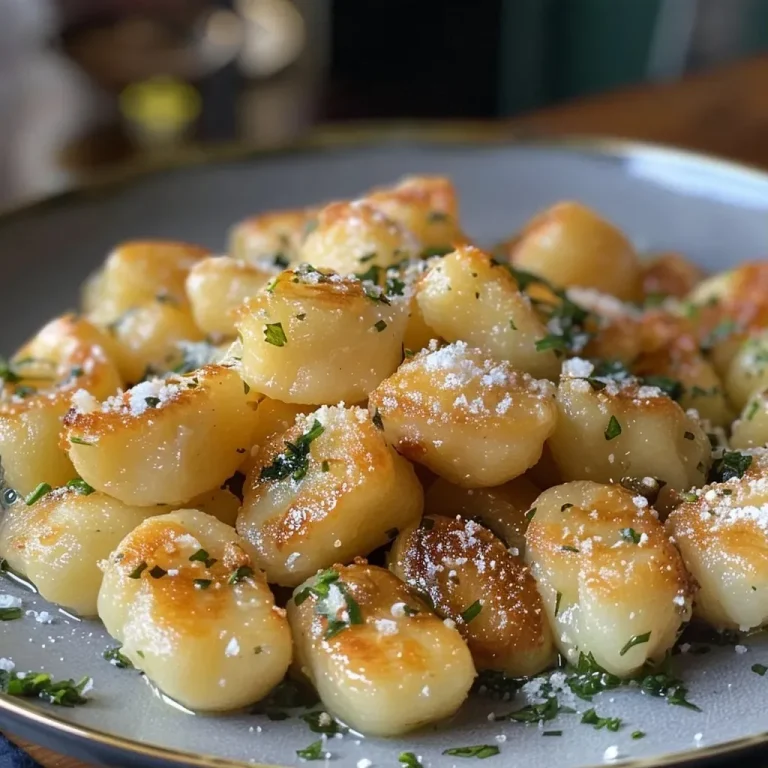
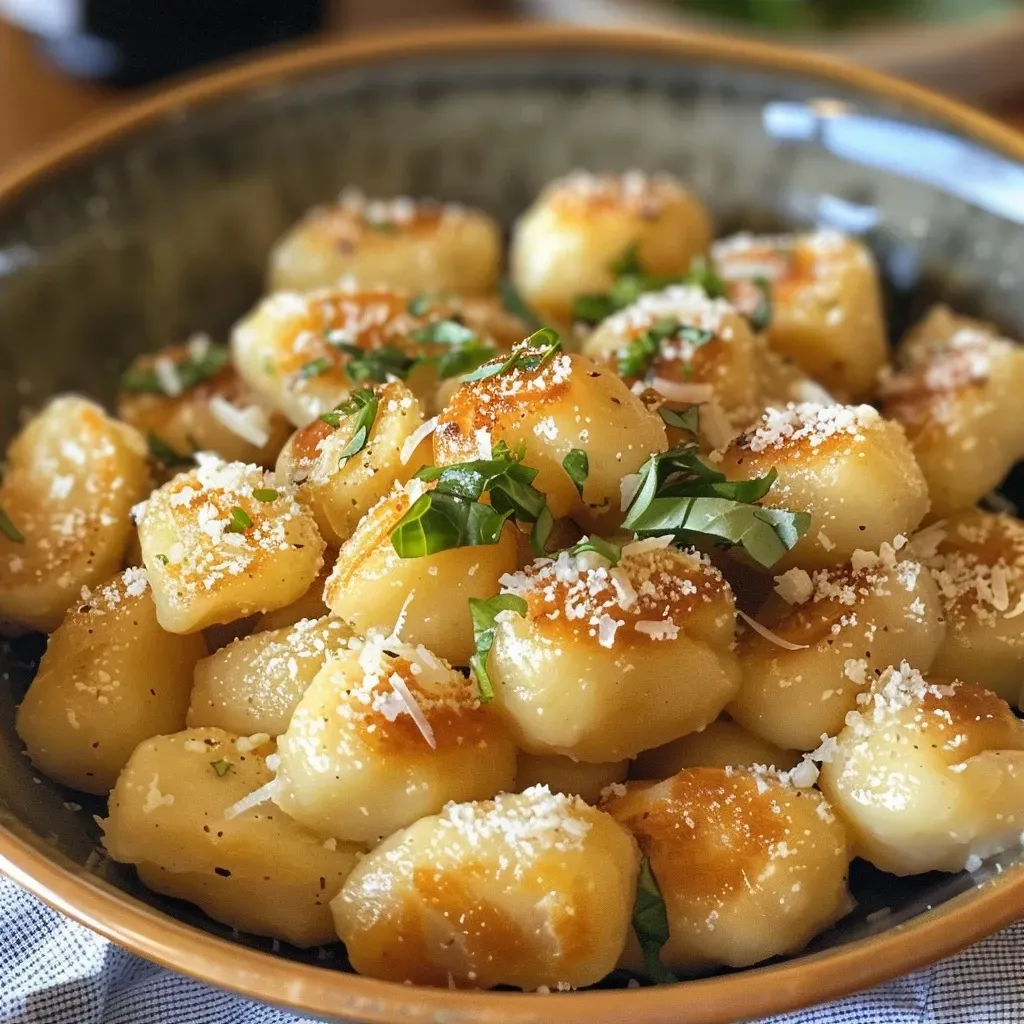
Side view of freshly made potato gnocchi, still warm, with a slightly rustic appearance.

Follow these steps to create your own potato gnocchi:

  1. Preheat the oven to 200°C (390°F).
  2. Bake the potatoes: Place the potatoes on a baking tray and bake for about 1 hour, or until easily pierced with a sharp knife. The skin should puff up nicely.
  3. Cool and peel: Allow the potatoes to cool for about 10 minutes. Cut them in half and peel the skins off. Push the pieces through a potato ricer onto a clean surface.
  4. Prepare the dough: Mix the flour and salt in a bowl. Add the riced potatoes and drizzle the beaten egg over the top. Gently mix to combine using your hands or a fork.
  5. Knead lightly: Scrunch the mixture into a ball and knead it lightly for 1-2 minutes. The dough should be slightly sticky but not overly so. Add more flour if necessary.
  6. Shape the gnocchi: Divide the dough into 6-8 pieces. Roll each piece into a log about 2 cm in diameter. Cut the logs into 2 cm pieces.
  7. Optional ridges: If desired, roll each piece on a gnocchi board or fork to create ridges that help sauce cling better.
  8. Cook the gnocchi: Boil a large pot of salted water. Cook the gnocchi in batches, removing them when they float to the surface (about 30 seconds).
  9. Serve or store: You can enjoy them immediately with your favorite sauce or pan-fry them for a crispy texture.

Pro Tips for Perfect Potato Gnocchi

  • Choose the right potatoes: Opt for starchy potatoes for the best texture; avoid waxy varieties.
  • Don’t overwork the dough: Knead just enough to bring it together. Over-kneading can lead to tough gnocchi.
  • Flour as needed: Keep extra flour on hand to prevent sticking, but be cautious not to add too much.
  • Cool the potatoes: Letting the potatoes cool slightly before ricing helps maintain the right moisture level.
  • Experiment with flavors: Consider adding herbs, garlic powder, or cheese to the dough for a flavor boost.
  • Test cook a piece: Before boiling the entire batch, test cook one gnocco to ensure the texture is right.
  • Use a gentle boil: Avoid a rolling boil when cooking gnocchi to prevent them from falling apart.
  • Pan-fry for texture: For a delicious twist, pan-fry the boiled gnocchi in olive oil or butter for added flavor and crispiness.

Common Mistakes and Troubleshooting

If your gnocchi don’t turn out as expected, here are some common issues and solutions:

  • Gnocchi falling apart: This usually means the dough was too wet. Add more flour, but do so gradually.
  • Tough gnocchi: Over-kneading or using the wrong type of potato can lead to a dense texture. Stick to starchy potatoes and knead gently.
  • Sticky dough: If the dough is sticky, sprinkle flour on your work surface and your hands as you shape it.

Delicious Variations of Potato Gnocchi

Here are some creative variations to try:

  • Sweet Potato Gnocchi: Substitute half the potatoes with roasted sweet potatoes for a sweeter flavor.
  • Spinach Gnocchi: Incorporate cooked, chopped spinach into the dough for added nutrition and color.
  • Beet Gnocchi: Use roasted beets to create vibrant pink gnocchi that are as beautiful as they are tasty.
  • Cheesy Gnocchi: Mix in grated Parmesan or ricotta cheese into the dough for a rich, cheesy flavor.

Storage and Make-Ahead Instructions

To make your gnocchi in advance:

  • Freezing uncooked gnocchi: Lay the shaped gnocchi on a baking sheet and freeze until solid. Then transfer to a freezer bag for up to 2 months.
  • Storing cooked gnocchi: Keep cooked gnocchi in an airtight container in the refrigerator for up to 3 days.

Frequently Asked Questions (FAQs)

  • Can I use different types of flour? Yes, while plain flour works best, you can experiment with whole wheat or gluten-free options.
  • What’s the best way to cook gnocchi? Boiling is traditional, but pan-frying gives a delightful crispy texture.
  • How long do I cook gnocchi? Cook them until they float, which usually takes about 30 seconds in boiling water.
  • Can I freeze gnocchi? Absolutely! Freeze uncooked gnocchi for later use, ensuring they don’t stick together.
  • What type of potatoes should I use? Starchy potatoes like Russet or Yukon Gold are ideal for making light and fluffy gnocchi.
  • How do I know when my gnocchi is done cooking? They are ready when they float to the top of the boiling water.
  • Can I make gnocchi without egg? Yes, you can create an egg-free version by adjusting the flour and potato ratio.
  • What sauces pair well with gnocchi? Gnocchi can be paired with marinara, pesto, Alfredo, or even a simple garlic butter sauce.

Nutritional Tips and Dietary Adaptations

This potato gnocchi recipe is already a great way to add protein to your meal. Here are some tips to enhance its nutritional value:

  • Add vegetables: Incorporate spinach, zucchini, or even mushrooms into your sauces for added vitamins and minerals.
  • Use whole grains: Substitute some of the plain flour with whole wheat flour to increase fiber content.
  • Protein-packed sauces: Top your gnocchi with a sauce made with lean meats or legumes for a complete meal.

Recommended Equipment

To make your gnocchi-making experience seamless, consider having the following tools on hand:

  • Potato ricer: For light and fluffy potatoes, a ricer is essential.
  • Large pot: To boil your gnocchi effectively.
  • Wooden board: Ideal for rolling out the dough.
  • Gnocchi board or fork: For adding ridges to your gnocchi (optional but recommended).

Serving Suggestions

Once your gnocchi are cooked, the possibilities for serving them are endless:

  • Classic marinara sauce: A simple and perfect pairing for potato gnocchi.
  • Pesto sauce: Toss gnocchi with homemade or store-bought pesto for a fresh flavor.
  • Brown butter and sage: Sauté cooked gnocchi in brown butter and fresh sage for a rich, nutty taste.
  • Vegetable medley: Sauté seasonal vegetables and mix them in for a colorful, nutritious dish.

In conclusion, homemade potato gnocchi is not only a rewarding culinary project but also a delicious way to meet your protein goals without sacrificing flavor. With this comprehensive guide, you have all the tools and knowledge necessary to create your own gnocchi at home. So roll up your sleeves, gather your ingredients, and get ready to impress your taste buds and those of your loved ones!

Easy Homemade Potato Gnocchi

Prep Time 20 minutes
Cook Time 15 minutes
Total Time 35 minutes
Servings 4 servings
Calories 250
Delight in these soft, pillowy homemade gnocchi made with simple ingredients and minimal effort. Perfect for a comforting meal with your favorite sauce.

Ingredients

Potatoes

  • 1 kg potatoes (scrubbed but skins left on)

Flour

  • 190 g plain flour

Salt

  • 0.75 teaspoon salt (3/4 teaspoon)

Egg

  • 1 egg egg (lightly beaten)

Instructions 

  • Bake potatoes at 200°C (390°F) for 1 hour until soft. Cool, peel, and push through a ricer.
  • Mix salt and flour in a bowl. Add potato, egg, and sifted flour. Gently combine into a soft dough.
  • Divide dough into 6-8 pieces, roll into 2cm logs, and cut into 2cm pieces. Shape as desired.
  • Cook gnocchi in salted boiling water until they float, about 30 seconds. Remove and serve or pan-fry.

Notes

Handle dough gently to keep gnocchi light and fluffy.
Calories: 250kcal
Cost: $10
Course: Main Course
Cuisine: Italian
Keyword: Gnocchi, Potato

Unlock the Flavor of Savory Turnip Curry: Your New High-Protein Go-To

Welcome to the world of high-protein cooking! If you’re on a mission to hit your protein goals without sacrificing flavor, you’re in the right place. Today, we’re diving into a deliciously satisfying turnip curry that’s packed with flavor and nutrition. This dish not only delivers on taste but also makes meal prep a breeze, allowing you to enjoy home-cooked meals that support your fitness journey.

The star of the show is shalgam—turnips that bring a unique taste and texture to your plate. Whether you’re a seasoned chef or a beginner in the kitchen, this turnip curry recipe is straightforward and rewarding. Let’s explore why you’ll love it, how to make it, and all the tips you’ll need to master this dish.

Why You’ll Love This Recipe

  • High Protein Content: Achieve your daily protein targets with this nutritious meal that supports muscle recovery and growth.
  • Flavorful Ingredients: With a blend of spices, including cumin and turmeric, this curry explodes with flavor, making every bite satisfying.
  • Meal Prep Friendly: Ideal for batch cooking, this dish stores well in the fridge or freezer, ensuring you always have a delicious meal on hand.
  • Versatile and Customizable: Easily adapt the recipe to suit your dietary preferences or ingredient availability, making it a flexible addition to your meal rotation.
  • Quick and Easy: With straightforward steps, you can whip up this curry in under an hour, perfect for busy weeknights.

Ingredients Breakdown

To make your turnip curry, you’ll need the following ingredients:


Meal Prep Container Set

★ Recommended Kitchen Tool

Meal Prep Container Set

Make this recipe even easier with a quality Meal Prep Container Set — a must-have kitchen staple!


🛒 View on Amazon →

As an Amazon Associate, we earn from qualifying purchases.
  • 1 kg Turnip: The main ingredient; choose firm, medium-sized turnips for the best flavor.
  • 50 ml Oil: Use mustard oil for an authentic taste; however, olive oil or coconut oil can be alternatives.
  • 1 Onion: Adds sweetness and depth; chop finely for quicker cooking.
  • 2 Tomatoes: Fresh tomatoes help create the curry’s base; canned tomatoes can work in a pinch.
  • 1 tsp Ginger Paste: Provides a warm, aromatic flavor.
  • 1 tsp Garlic Paste: Complements the ginger and enhances the overall taste.
  • 1 Green Chilli: Adjust according to your spice preference; you can remove the seeds for less heat.
  • 1 tsp Salt: Adjust to taste; remember that flavors intensify as they cook.
  • 1 tsp Chilli Powder: For added heat and color.
  • 1 tsp Turmeric Powder: Offers a beautiful golden hue and numerous health benefits.
  • 1 tsp Cumin Powder: Adds an earthy flavor profile.
  • Handful Fresh Coriander: Garnish for freshness and flavor.
  • 50 ml Water: To help cook the turnips and create the curry base.

Step-by-Step Instructions

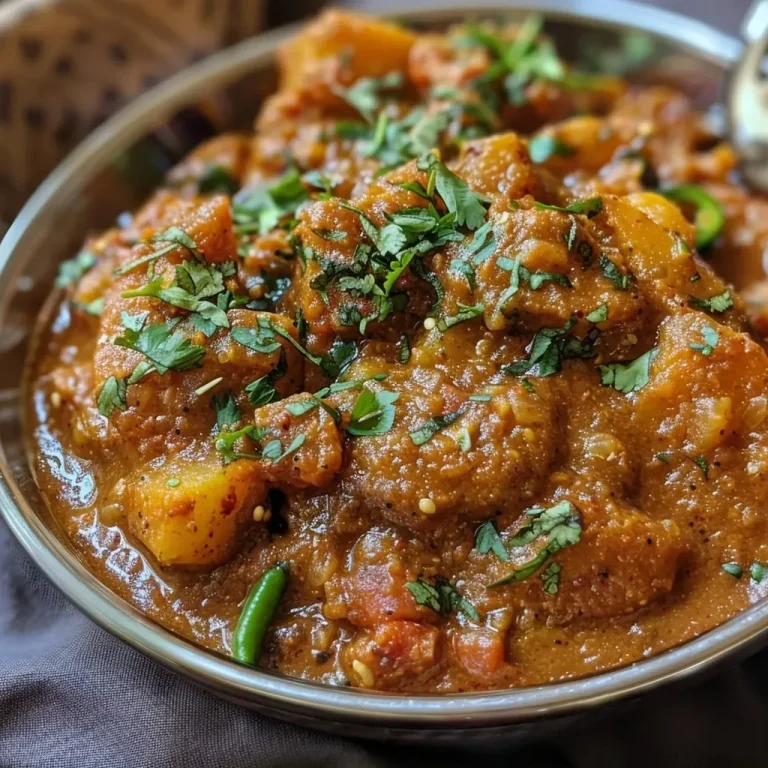
Side view of a steaming dish of Turnip Curry, showcasing its rich color and texture.

Now, let’s get cooking! Follow these simple steps to create your savory turnip curry:

  1. Add the oil to a pan and heat it over medium heat.
  2. Once hot, add the chopped onions and sauté for 4-5 minutes until softened.
  3. Mix in the ginger and garlic paste, cooking for an additional 1-2 minutes.
  4. Add the tomatoes and cook for 3-4 minutes until they soften.
  5. Incorporate salt, green chillies, chilli powder, turmeric, and cumin powder, cooking for another 2-3 minutes.
  6. Pour in 50 ml of water and stir to combine.
  7. Once the oil separates, add the peeled and chopped turnips, mixing thoroughly.
  8. Cover and cook on low-medium heat for about 30 minutes, stirring occasionally.
  9. When the turnips are fork-tender, mash them to your desired consistency.
  10. Finish with fresh coriander, mixing it into the curry.
  11. Serve hot with homemade naan or chapatti for a complete meal!

Pro Tips for Perfect Turnip Curry

  • Adjust Spice Levels: If you prefer a milder flavor, reduce the amount of green chili and chili powder.
  • Experiment with Cooking Oils: While mustard oil is traditional, feel free to experiment with oils like ghee or coconut oil for different flavor profiles.
  • Texture Matters: For a smoother curry, mash the turnips more thoroughly; for a chunkier texture, leave some pieces intact.
  • Don’t Rush the Cooking: Allow the spices to bloom by cooking them thoroughly; this enhances the overall flavor.
  • Store Leftovers Properly: Let the curry cool completely before transferring to an airtight container for refrigeration.
  • Balance the Flavors: Taste and adjust the salt and spices as needed during cooking for the best results.
  • Pair with Protein: Adding chickpeas or lentils can boost the protein content for a heartier meal.
  • Fresh Herbs: Garnishing with fresh coriander right before serving elevates the dish’s flavor profile.

Common Mistakes and Troubleshooting

Even the best cooks can make mistakes. Here’s how to avoid common pitfalls when making your turnip curry:

  • Overcooking Turnips: Keep an eye on your turnips; overcooked turnips can become mushy. Aim for fork-tender.
  • Underseasoning: Don’t be shy with the spices. Always taste as you cook to adjust flavors.
  • Skipping the Oil Separation Step: This step is crucial for developing flavor; don’t rush it!
  • Not Covering the Pan: Covering helps steam the turnips evenly, ensuring they cook properly.
  • Ignoring Leftover Storage: Ensure to store leftovers properly to maintain freshness.

Variations to Try

Feel free to get creative with your turnip curry by trying these delicious variations:

  • Vegetable Medley: Add carrots, peas, or potatoes for a colorful mix.
  • Protein Boost: Stir in cooked chickpeas or lentils for added protein.
  • Coconut Curry: Substitute some of the water with coconut milk for a creamy, rich flavor.
  • Spicy Twist: Add a pinch of garam masala or some cayenne pepper for an extra kick.

Storage and Make-Ahead Instructions

This turnip curry is perfect for meal prep! Here’s how to store and reheat it:

  • Refrigeration: Store in an airtight container in the fridge for up to 4 days.
  • Freezing: Freeze in portions for up to 3 months; thaw overnight in the fridge before reheating.
  • Reheating: Warm on the stove over low heat, adding a splash of water if needed to loosen the curry.

Comprehensive FAQ

Here are some common questions about making and enjoying your turnip curry:

  • Can I use other vegetables instead of turnips?
    Absolutely! Carrots or sweet potatoes can work well in this recipe.
  • Is this curry vegan?
    Yes, this recipe is entirely plant-based and vegan-friendly.
  • Can I make this in a slow cooker?
    Yes, combine all ingredients in a slow cooker and cook on low for 6-8 hours.
  • How do I make it spicier?
    Add more green chilies or a dash of cayenne pepper for heat.
  • What can I serve it with?
    Pair with naan, chapatti, or even rice for a complete meal.
  • Can I use frozen turnips?
    Yes, but fresh turnips yield a better texture and flavor.
  • How do I know when it’s done cooking?
    When the turnips are fork-tender and the flavors meld beautifully, it’s ready!
  • Can I double the recipe?
    Yes, just ensure your cooking vessel is large enough to accommodate the extra ingredients.

Nutritional Tips and Dietary Adaptations

This turnip curry is not only delicious but also packed with nutrients:

  • High in Fiber: Turnips are a great source of dietary fiber, aiding digestion.
  • Low in Calories: A great option for weight management while still being filling.
  • Vitamin Rich: Turnips provide essential vitamins like Vitamin C and folate.
  • Gluten-Free: Naturally gluten-free, making it suitable for various diets.

Equipment Recommendations

For making your turnip curry, you’ll need:

  • Non-stick Pan: For even cooking and easy cleanup.
  • Wooden Spoon: Perfect for stirring and mixing ingredients.
  • Knife and Cutting Board: Essential for chopping your vegetables.
  • Measuring Cups and Spoons: Ensure accurate ingredient measurements for consistent results.

Serving Suggestions

To elevate your meal, consider these serving suggestions:

  • With Roti or Chapatti: A classic pairing that complements the curry beautifully.
  • Top with Yogurt: A dollop of yogurt adds creaminess and balances the spices.
  • Garnish with Extra Herbs: Fresh coriander or mint can brighten the dish.
  • Serve with a Side Salad: A light cucumber salad can refresh the palate.

Conclusion

Your journey to hitting your protein goals just got a whole lot tastier with this savory turnip curry. Not only does it pack a punch in flavor, but it also offers versatility and ease, making it a perfect addition to your meal prep roster. Whether you’re enjoying it on a busy weeknight or serving it at a gathering, this dish is sure to impress. So grab your ingredients and get cooking—deliciousness awaits!

Turnip Curry

Prep Time 10 minutes
Cook Time 30 minutes
Total Time 40 minutes
Servings 4 servings
Calories 180
A flavorful and hearty turnip curry perfect for a comforting meal. Easy to prepare with simple ingredients.

Ingredients

Vegetables

  • 1 kg Turnip (peeled and chopped)
  • 50 ml Oil
  • 1 piece Onion (chopped)
  • 2 pieces Tomatoes (chopped)
  • 1 tsp Ginger Paste
  • 1 tsp Garlic Paste
  • 1 green chili Green Chili (slit)
  • 1 tsp Salt (adjust to taste)
  • 1 tsp Chilli Powder
  • 1 tsp Turmeric Powder
  • 1 tsp Cumin Powder
  • handful Fresh Coriander (chopped)
  • 50 ml Water

Instructions 

  • Heat oil and sauté chopped onions until softened.
  • Add ginger and garlic paste; cook for 1-2 minutes.
  • Add tomatoes and cook until soft, then add spices and water; cook until oil separates.
  • Add chopped turnips, cover, and simmer for 30 minutes, stirring occasionally.

Notes

Adjust salt and spice levels to taste. Serve with naan or chapatti for a complete meal.
Calories: 180kcal
Cost: $12
Course: Main Course
Cuisine: Indian
Keyword: Turnip

Why This Sweet Potato Casserole Will Become Your Go-To Recipe

If you’re looking for a deliciously indulgent yet guilt-free Sweet Potato Casserole, you’ve landed in the right place. This recipe beautifully balances the comforting sweetness of sweet potatoes with a delightful marshmallow topping, making it perfect for holiday gatherings or a cozy family dinner. Plus, it aligns with your macro goals without sacrificing flavor. Let’s dive into why this recipe is a must-try!

Why You’ll Love This Recipe

  • High in nutrients: Sweet potatoes are packed with vitamins A and C, fiber, and antioxidants, making this casserole a nutritious choice.
  • Low in calories: By using reduced-fat margarine and controlling sugar content, this dish is lighter than traditional casseroles.
  • Easy to prepare: With straightforward steps, you can whip this up quickly, making it ideal for busy weeknights or holiday feasts.
  • Great for meal prep: Make it ahead of time and simply reheat before serving, saving you time and effort.
  • Customizable: This recipe serves as a fantastic base, allowing you to add your favorite flavors or ingredients.

Ingredient Breakdown

Let’s take a closer look at the ingredients that make this casserole shine:

  • Sweet potatoes: The star of the dish! Aim for five medium sweet potatoes, peeled and sliced. They provide natural sweetness and a creamy texture.
  • Brown sugar: For a touch of sweetness, use 0.5 cup packed brown sugar. For a healthier alternative, consider coconut sugar or a sugar substitute.
  • Reduced-fat margarine: At 0.25 cup, it keeps the dish creamy without the extra calories of butter. You can also use coconut oil for a dairy-free version.
  • Orange juice: Three tablespoons add a subtle citrus zing. Freshly squeezed orange juice is preferred, but bottled will work too.
  • Ground cinnamon: A pinch enhances the flavor profile and complements the sweet potatoes beautifully.
  • Miniature marshmallows: One 10.5 ounce package creates a nostalgic topping that everyone loves. Look for sugar-free options if you’re watching your sugar intake.

Pro Tips for the Perfect Casserole

A delicious Sweet Potato Casserole served in a baking dish, featuring a toasted marshmallow topping.
  • Use fresh sweet potatoes: For the best flavor and texture, pick firm, unblemished sweet potatoes.
  • Don’t overcook the potatoes: Aim for tender but not mushy sweet potatoes to maintain a good structure in the casserole.
  • Adjust sweetness to taste: Feel free to experiment with the amount of brown sugar based on your preference.
  • Mix well: Ensure all ingredients are thoroughly mixed for a consistent flavor throughout.
  • Watch the marshmallows: Keep an eye on the oven during the last few minutes to prevent burning the marshmallows.
  • Let it rest: Allow the casserole to cool for a few minutes after baking for easier serving.
  • Experiment with spices: Add nutmeg or ginger for a deeper flavor profile if you like.
  • Garnish creatively: Consider topping with chopped pecans or walnuts for added crunch and flavor.

Common Mistakes and Troubleshooting

Even the best recipes can have hiccups. Here are some common mistakes to avoid:


Silicone Baking Cups Set

★ Recommended Kitchen Tool

Silicone Baking Cups Set

Make this recipe even easier with a quality Silicone Baking Cups Set — a must-have kitchen staple!


🛒 View on Amazon →

As an Amazon Associate, we earn from qualifying purchases.
  • Over-mashing the sweet potatoes: This can lead to a gluey texture. Aim for a smooth but textured mash.
  • Skipping the spices: Cinnamon is key! Don’t skip it, as it elevates the dish significantly.
  • Using stale marshmallows: Fresh marshmallows will ensure a fluffy topping. Old marshmallows can become hard and chewy.
  • Not preheating the oven: Make sure your oven is at the right temperature before baking to achieve that perfect golden top.

Variations to Try

Want to put your spin on this classic? Here are some variations:

  • Nutty Sweet Potato Casserole: Add chopped pecans or walnuts to the sweet potato mixture for extra crunch.
  • Coconut Sweet Potato Casserole: Substitute coconut milk for the orange juice and top with toasted coconut for a tropical twist.
  • Spicy Sweet Potato Casserole: Add a pinch of cayenne or chili powder to the sweet potato mixture for a spicy kick.
  • Maple Pecan Sweet Potato Casserole: Replace brown sugar with pure maple syrup and add a pecan streusel topping.

Storage and Make-Ahead Instructions

This Sweet Potato Casserole is perfect for making ahead of time:

  • Refrigerate: Store any leftovers in an airtight container in the fridge for up to 4 days.
  • Freeze: You can freeze the casserole before baking. Wrap it tightly and store it for up to 3 months. Thaw in the fridge overnight before baking.
  • Reheat: For best results, reheat in the oven at 350°F (175°C) until heated through, about 20-25 minutes.

Frequently Asked Questions

Got questions? We’ve got answers:

  • Can I use regular potatoes instead of sweet potatoes? While you can, sweet potatoes provide a unique flavor and nutritional benefits that regular potatoes lack.
  • Is this recipe gluten-free? Yes, all the ingredients are naturally gluten-free, making it a safe option for those with gluten sensitivities.
  • Can I make this vegan? Absolutely! Substitute the margarine with coconut oil and use vegan marshmallows.
  • How do I know when it’s done baking? The casserole is ready when it’s heated through and the marshmallows are puffed and golden brown.
  • Can this be made in advance? Yes! Prepare it a day ahead and store it in the fridge. Just bake it before serving.
  • What can I serve with this casserole? It pairs well with roasted meats, salads, or as a side for holiday meals.
  • Is it suitable for meal prep? Definitely! This casserole keeps well and can be easily portioned for lunches.
  • Can I use different toppings? Yes! Feel free to experiment with different toppings like crushed graham crackers or granola.

Nutrition Tips and Dietary Adaptations

Looking to make this casserole even healthier? Consider these tips:

  • Reduce sugar further: Use a sugar alternative or reduce the brown sugar amount.
  • Add protein: Mix in some cooked lentils or quinoa for added protein and fiber.
  • Increase vegetables: Toss in spinach or kale for an extra nutrient boost.
  • Control portions: Serve in smaller portions to enjoy without overindulging.

Essential Equipment Recommendations

To make this Sweet Potato Casserole efficiently, here’s what you’ll need:

  • Large saucepan: For boiling sweet potatoes.
  • Electric mixer: To blend the sweet potato mixture smoothly.
  • 9×13-inch baking dish: Choose a glass or ceramic dish for even cooking.
  • Oven mitts: Safety first, of course! Protect your hands when removing the hot dish.

Serving Suggestions

Wondering how to present your casserole? Here are some serving ideas:

  • Garnish: Top with fresh herbs like parsley or rosemary for a pop of color.
  • Pair with protein: Serve alongside roasted turkey, chicken, or ham for a balanced meal.
  • Make it a buffet: Set up a holiday buffet with various sides, allowing guests to choose their favorites.

In conclusion, this Indulgent Sweet Potato Casserole is not just a dish; it’s a celebration of flavor and nutrition that everyone can enjoy. With its balance of sweetness, creamy texture, and delightful marshmallow topping, it’s sure to become a staple in your home. So, roll up your sleeves, gather your ingredients, and let’s make this delicious casserole a part of your next meal plan!

Sweet Potato Casserole with Marshmallows

Prep Time 20 minutes
Cook Time 30 minutes
Total Time 50 minutes
Servings 8 servings
Calories 350
A comforting and sweet side dish perfect for holidays or family dinners, featuring tender sweet potatoes topped with toasted marshmallows.

Ingredients

Main

  • 5 sweet potatoes sweet potatoes, peeled and sliced
  • 0.5 cup packed brown sugar
  • 0.25 cup reduced-fat margarine
  • 3 tablespoons orange juice
  • 1 pinch ground cinnamon
  • 1 package (10.5 ounces) miniature marshmallows

Instructions 

  • Preheat oven to 350°F (175°C). Boil sweet potatoes until tender, then mash.
  • Mix mashed sweet potatoes with brown sugar, margarine, orange juice, and cinnamon.
  • Spread mixture into a 9x13-inch baking dish and top with marshmallows.
  • Bake for 25-30 minutes until marshmallows are golden and puffed.
  • Serve warm and enjoy!

Notes

For a richer flavor, add a sprinkle of nutmeg or vanilla extract.
Calories: 350kcal
Cost: $15
Course: Side Dish
Cuisine: American
Keyword: Sweet Potato

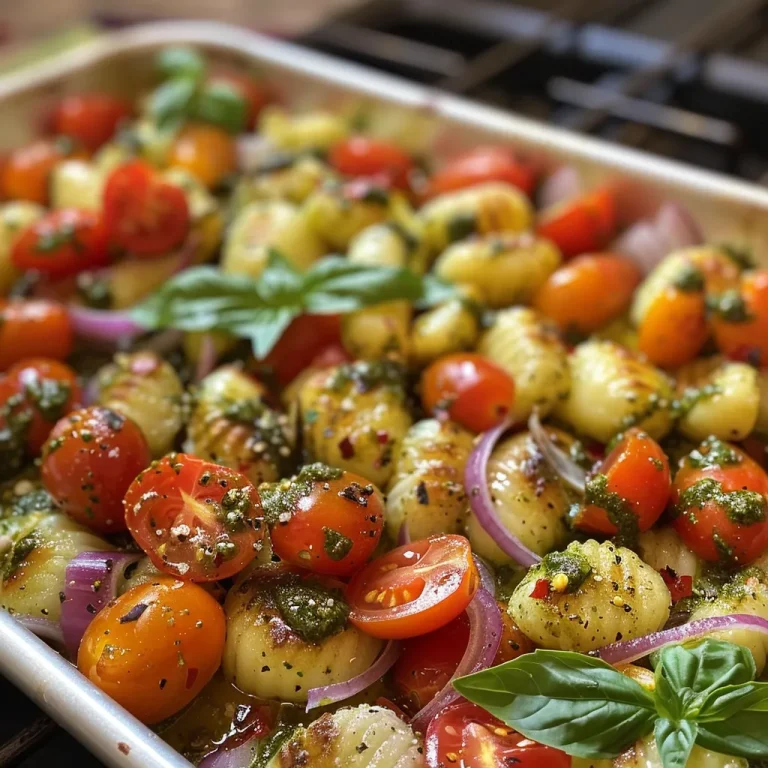
Unlocking the Flavor: Why This Pesto Gnocchi Tray Bake is a Game Changer

If you’re on a mission to hit your protein goals without sacrificing taste, look no further than this pesto gnocchi tray bake. As a self-taught foodie who’s navigated the tricky waters of macros and meal prep, I can assure you that this dish is both delicious and nourishing. Combining the chewy texture of gnocchi with the freshness of roasted vegetables, all drizzled in high-quality extra virgin sunflower oil, this recipe is not just another meal; it’s a culinary adventure.

In this article, we’ll explore everything you need to know to whip up this easy dinner, packed with flavors that make healthy eating a joy rather than a chore. From specific ingredient breakdowns to expert tips, you’ll find everything you need to make this dish a staple in your meal prep routine.

Why You’ll Love This Recipe

This pesto gnocchi tray bake isn’t just easy to make; it’s designed to meet your fitness and taste needs. Here’s why you’ll love it:


Professional Chef Knife Set

★ Recommended Kitchen Tool

Professional Chef Knife Set

Make this recipe even easier with a quality Professional Chef Knife Set — a must-have kitchen staple!


🛒 Shop This Tool →

As an Amazon Associate, we earn from qualifying purchases.
  • Quick & Easy Prep: Ready in just 30 minutes, making it the perfect choice for busy weeknights.
  • One-Pan Wonder: Minimal cleanup is required, as everything cooks on a single baking tray.
  • Protein-Packed: With fresh mozzarella and parmesan, this dish delivers a satisfying protein punch.
  • Flavor Explosion: The combination of roasted tomatoes, fresh basil, and aromatic pesto creates a taste sensation.
  • Customizable: Easily swap ingredients based on what’s in your pantry or your dietary preferences.

Ingredient Breakdown

To create this pesto veggie gnocchi tray bake, you’ll need the following ingredients:

  • 500g fresh gnocchi: Choose your favorite brand for the best texture. You can also use frozen gnocchi if needed.
  • 1 punnet (250g) cherry tomatoes: These will burst in the oven, adding a sweet and juicy element.
  • 1 small red onion, thinly sliced: Adds depth and sweetness when roasted.
  • 3 tbsp pesto: Use store-bought or homemade for maximum flavor.
  • 2 tbsp The Good Oil extra virgin sunflower oil: This oil not only enhances flavor but also provides healthy fats.
  • 1 tsp dried oregano: A classic herb that complements the other ingredients.
  • ½-1 tsp chili flakes (to taste): Adds a kick to the dish; adjust according to your preference.
  • 1 ball (125g) fresh mozzarella, torn: Melts beautifully over the gnocchi for a creamy texture.
  • 50g parmesan, shaved: Provides a salty, nutty flavor.
  • A large handful of rocket: Adds peppery freshness.
  • Fresh basil leaves, to serve: A must for that aromatic finish.
  • Juice of half a lemon: Brightens up the flavors in the dish.
  • Salt and cracked black pepper: Essential for seasoning.

Pro Tips for the Best Pesto Gnocchi Tray Bake

A delicious Pesto Gnocchi Tray Bake, showcasing vibrant ingredients like gnocchi, red onion, and basil, photographed from the side.

To take your dish to the next level, consider these expert insights:

  • Preheat the Oven: Make sure your oven is fully preheated to 220°C for optimal roasting.
  • Even Layering: Spread the gnocchi and vegetables evenly on the baking tray to ensure everything cooks uniformly.
  • Watch for Doneness: Check your gnocchi around the 25-minute mark. They should be golden and crisp.
  • Add Cheese Last: Scatter the mozzarella and parmesan on top towards the end of baking to achieve the perfect melt.
  • Experiment with Pesto: Try different types of pesto, like sun-dried tomato or walnut, for a unique twist.
  • Fresh Ingredients Matter: Use the freshest vegetables available for the best flavor and texture.
  • Chill & Store: Any leftovers can be stored in the fridge for up to three days.
  • Garnish Freely: Don’t skimp on the fresh basil and rocket when serving; they enhance both flavor and presentation.

Common Mistakes and Troubleshooting

Avoid these pitfalls to ensure your tray bake turns out perfectly:

  • Overcrowding the Tray: Too many ingredients can lead to steaming rather than roasting. Keep it spread out.
  • Not Seasoning Enough: Make sure to taste and adjust seasoning as needed before baking.
  • Skipping the Preheat: A hot oven is crucial for achieving that crispy texture on the gnocchi.

Variations to Try

Feel free to mix things up with these variations:

  • Vegan Version: Substitute cheese with nutritional yeast and use a dairy-free pesto.
  • Protein Boost: Add grilled chicken or chickpeas for an extra protein hit.
  • Different Veggies: Swap in zucchini, bell peppers, or asparagus based on your taste.
  • Spicy Kick: Include jalapeños or a dash of hot sauce for those who love heat.

Storage & Make-Ahead Instructions

This pesto gnocchi tray bake is perfect for meal prep:

  • Make-Ahead: Assemble the dish (without cheese) and cover it in the fridge for up to 24 hours before baking.
  • Storage: Store leftovers in an airtight container in the fridge for up to 3 days or freeze for up to 2 months.
  • Reheating: Reheat in the oven at 180°C until warmed through, or microwave for a quick option.

Comprehensive FAQ

Got questions? Here are some common inquiries:

  • Can I make this dish ahead of time? Absolutely! Prep it a day in advance and bake just before serving.
  • What can I substitute for pine nuts in the pesto? Walnuts or sunflower seeds work great as alternatives.
  • Can I use frozen gnocchi? Yes, frozen gnocchi is a convenient option; just add a minute or two to the cooking time.
  • How do I know when the veggies are done roasting? They should be tender and slightly caramelized.
  • Is there a gluten-free version of this recipe? You can use gluten-free gnocchi available at most grocery stores.
  • Can I add more vegetables? Absolutely! Feel free to pack in your favorites.
  • What if my gnocchi isn’t crispy? Ensure proper spacing on the baking tray and preheat your oven adequately.
  • How do I store leftovers? Keep in an airtight container in the fridge for up to 3 days.

Nutritional Tips and Dietary Adaptations

To enhance the nutritional profile of your dish:

  • Increase Veggie Intake: Add more vegetables to boost fiber and vitamins.
  • Opt for Whole Wheat Gnocchi: This will increase the fiber content and keep you fuller for longer.
  • Limit Cheese: Adjust the amounts of mozzarella and parmesan to lower calories if necessary.

Essential Equipment for Success

Here’s what you’ll need to make this recipe a success:

  • Large Baking Tray: A sturdy one will help in even cooking and crisping.
  • Baking Paper: Prevents sticking and makes cleanup easy.
  • Mixing Bowl: For tossing your ingredients before baking.
  • Sharp Knife: Essential for slicing vegetables accurately.

Serving Suggestions

Pair this tray bake with:

  • Side Salad: A simple green salad with a lemon vinaigrette complements the richness of the dish.
  • Crusty Bread: Perfect for soaking up any leftover pesto on your plate.
  • Wine Pairing: A crisp white wine like Sauvignon Blanc balances the flavors beautifully.

So there you have it: a comprehensive guide to creating a pesto gnocchi tray bake that fuels your fitness without sacrificing flavor. With simple ingredients, practical tips, and a passion for cooking, you’re now equipped to make a meal that you’ll want to repeat week after week. Remember, hitting your protein goals doesn’t have to be boring—it can be delicious, satisfying, and most importantly, fun!

Pesto Gnocchi Tray Bake

Prep Time 10 minutes
Cook Time 30 minutes
Total Time 40 minutes
Servings 4 servings
Calories 650
A quick and flavorful tray bake combining crispy gnocchi, cherry tomatoes, and fresh herbs, perfect for a comforting meal.

Ingredients

Main ingredients

  • 500 g fresh gnocchi
  • 250 g cherry tomatoes (1 punnet)
  • 1 small red onion (thinly sliced)
  • 3 tbsp pesto (plus extra to serve)
  • 2 tbsp The Good Oil extra virgin sunflower or rapeseed oil
  • 1 tsp dried oregano
  • 0.5 tsp chilli flakes (to taste)
  • 125 g fresh mozzarella (torn)
  • 50 g parmesan (shaved)
  • 1 large handful rocket
  • to taste Fresh basil leaves (to serve)
  • 0.5 lemon juice of half a lemon

Instructions 

  • Preheat oven to 220°C. Toss gnocchi and tomatoes with pesto, oil, oregano, chilli flakes, salt, and pepper. Spread on a tray with red onion slices.
  • Bake for 25-30 minutes until golden and tomatoes burst.
  • Top with torn mozzarella, shaved parmesan, rocket, basil, and a squeeze of lemon. Serve warm.

Notes

Feel free to add extra pesto or herbs for more flavor.
Calories: 650kcal
Cost: $15
Course: Main Course
Cuisine: Italian
Keyword: Gnocchi

Unlock the Power of Leftover Turkey: Your Ultimate Guide to High-Protein Turkey Soup

If you’re looking for a way to transform your leftover turkey into a delicious, high-protein meal, you’ve landed in the right place. This easy leftover turkey soup recipe is not just a way to use up holiday leftovers; it’s a game-changer for anyone aiming to hit their protein goals without sacrificing flavor. In this comprehensive guide, I’ll walk you through everything you need to know to create a soup that’s hearty, nutritious, and so satisfying that it’ll become a staple in your kitchen.

Why You’ll Love This Recipe

This turkey soup is more than just a recipe; it’s a solution for post-holiday meal planning. Here’s why you’ll adore it:

  • High-Protein Content: Packed with turkey and vegetables, this soup is a protein powerhouse, making it perfect for muscle recovery and everyday nutrition.
  • Easy to Make: With straightforward steps, you can whip this up in no time, ensuring you spend less time cooking and more time enjoying.
  • Versatile Ingredients: Use whatever vegetables you have on hand; this recipe is flexible and forgiving, allowing you to customize based on your preferences.
  • Great for Meal Prep: Make a big batch and store it for the week, making healthy eating convenient and stress-free.
  • Flavorful and Satisfying: With herbs and spices, this soup is anything but bland. It’s a comforting dish that you’ll want to make again and again.

Ingredients Breakdown

To make this delicious turkey soup, you’ll need the following ingredients. Here’s what to gather:


Professional Chef Knife Set

★ Recommended Kitchen Tool

Professional Chef Knife Set

Make this recipe even easier with a quality Professional Chef Knife Set — a must-have kitchen staple!


🛒 Check Price on Amazon →

As an Amazon Associate, we earn from qualifying purchases.
  • 2 tablespoons olive oil: Use plain or garlic-infused for extra flavor.
  • 1 medium onion: Diced for a sweet base.
  • 3 medium carrots: Peeled and sliced, they add natural sweetness and texture.
  • 3 celery ribs: Chopped for crunch and flavor.
  • 1 tablespoon herbes de Provence: This blend of herbs elevates the flavor profile.
  • 1 quart chicken or turkey stock: The base of your soup; homemade or store-bought works well.
  • 4 cups cooked turkey: Shredded or chopped, it’s the star of this dish.
  • Sea salt and fresh ground pepper: To taste, ensuring flavor is just right.

Feel free to substitute or add ingredients based on what you have:

  • Vegetable Variations: Use zucchini, bell peppers, or even leafy greens like spinach.
  • Protein Boost: Add beans or lentils for extra protein and fiber.
  • Spice It Up: Incorporate chili flakes or hot sauce if you like a kick.

Step-by-Step Instructions

Side view of a hearty bowl filled with shredded turkey and colorful veggies.

Let’s get cooking! Follow these simple steps to bring your soup to life:

  1. Dice the onion, carrots, and celery.
  2. Heat the olive oil in a large Dutch oven over medium heat.
  3. Add the diced vegetables and cook, stirring occasionally, until softened, about 5-7 minutes.
  4. Stir in the herbes de Provence and cook for another minute.
  5. Pour in the chicken stock and bring to a boil. Reduce the heat to simmer.
  6. Add the shredded turkey and let simmer on low for 10 minutes or until heated through.

Pro Tips for the Best Turkey Soup

Here are some expert insights to elevate your soup-making game:

  • Use Quality Stock: A good stock enhances the flavor significantly—opt for homemade if possible.
  • Don’t Rush the Vegetables: Allow them to soften properly for a richer flavor.
  • Season Gradually: Always taste and adjust seasoning as you go for a balanced flavor.
  • Simmer for Depth: Letting the soup simmer allows the flavors to meld beautifully.
  • Cool Before Storing: If you’re saving leftovers, let the soup cool down first to avoid condensation.
  • Reheat Gently: When reheating, do it on low to preserve texture and flavor.
  • Experiment with Herbs: Try adding fresh herbs like parsley or cilantro right before serving for freshness.
  • Think Ahead: Make a double batch and freeze portions for busy days.

Common Mistakes and Troubleshooting

Even the best cooks make mistakes! Here are some common pitfalls and how to avoid them:

  • Overcooking Turkey: If you add the turkey too early, it can become tough. Add it towards the end of cooking.
  • Too Watery?: If your soup is too thin, let it simmer uncovered to reduce the liquid.
  • Bland Flavor: Always taste your soup before serving. Adjust with salt, pepper, or a splash of vinegar for brightness.
  • Vegetables Not Cooked Enough?: Cut them smaller so they cook through quickly, or simmer longer if you like them soft.

Variations to Try

This turkey soup recipe is versatile. Here are some fun variations:

  • Spicy Turkey Soup: Add diced jalapeños or a spoonful of chipotle in adobo for heat.
  • Mexican-Inspired: Add corn, black beans, and cumin for a southwest twist.
  • Asian Flare: Use ginger, garlic, and soy sauce, and top with green onions.
  • Vegetable-Heavy: Add more veggies like peas or green beans for a nutrient boost.

Storage and Make-Ahead Instructions

Planning ahead is key for healthy eating. Here’s how to store your soup:

  • Refrigerate: Store in an airtight container for up to 4 days.
  • Freeze: Portion into freezer bags or containers for up to 3 months. Thaw in the refrigerator before reheating.
  • Reheat Safely: Reheat gently on the stove or in the microwave until warmed through.

FAQs About Leftover Turkey Soup

Here are some frequently asked questions to help you make the most of this recipe:

  • Can I use raw turkey?: Yes, but you’ll need to cook it through first before adding to the soup.
  • What can I add for extra flavor?: A splash of lemon juice or vinegar can brighten the taste.
  • Is this soup gluten-free?: Yes, just ensure your stock is gluten-free.
  • Can I make this vegetarian?: Absolutely, just substitute turkey with beans or lentils and use vegetable stock.
  • How do I thicken the soup?: Add a cornstarch slurry or blend a portion of the soup for a creamier texture.
  • What’s the best way to serve?: Serve with crusty bread or a side salad for a complete meal.
  • Can I add pasta or rice?: Yes! Just cook them separately and add at the end to avoid mushiness.
  • How do I know when it’s done?: Once the turkey is heated through and vegetables are tender, it’s ready!

Nutritional Tips and Dietary Adaptations

This soup can easily accommodate various dietary needs:

  • Low-Carb Option: Skip the starchy vegetables or use cauliflower instead of potatoes.
  • High-Fiber Adaptation: Add beans or lentils to increase fiber content.
  • Low-Sodium Version: Use low-sodium stock and adjust salt to taste.
  • Dairy-Free: This recipe is naturally dairy-free; just avoid dairy toppings.

Equipment Recommendations

To make this soup, you’ll need:

  • Large Dutch Oven: Perfect for even cooking and great for soups.
  • Cutting Board and Sharp Knife: For efficient chopping of vegetables.
  • Measuring Cups and Spoons: To ensure ingredient accuracy for the best results.

Serving Suggestions

When it comes to enjoying your turkey soup, consider these serving ideas:

  • Garnish with Fresh Herbs: Parsley or cilantro adds a fresh finish.
  • Serve with Crusty Bread: A slice of sourdough or a baguette pairs beautifully.
  • Add a Side Salad: A simple green salad can complement the soup nicely.

Now you’re ready to transform leftover turkey into a high-protein powerhouse soup that’s bursting with flavor. Enjoy the satisfaction of hitting your protein goals while savoring every spoonful of this comforting dish. Happy cooking!

Easy Leftover Turkey Soup

Prep Time 10 minutes
Cook Time 20 minutes
Total Time 30 minutes
Servings 4 servings
Calories 250
A comforting and quick soup perfect for using up leftover turkey, packed with vegetables and herbs.

Ingredients

olive oil

  • 2 tablespoons olive oil (plain or garlic infused)

vegetables

  • 1 medium onion
  • 3 medium carrots
  • 3 celery ribs celery ribs

herbes de Provence

  • 1 tablespoon herbes de Provence

liquid

  • 1 quart chicken stock (or turkey stock)

cooked turkey

  • 4 cups cooked turkey (removed from bones and shredded or chopped)

seasonings

  • to taste sea salt
  • to taste fresh ground pepper

Instructions 

  • Dice onion, carrots, and celery. Heat olive oil in a large Dutch oven.
  • Add vegetables and cook until soft, then stir in herbes de Provence.
  • Pour in chicken stock, bring to a boil, then reduce to simmer.
  • Add shredded turkey and simmer for 10 minutes until heated through.

Notes

Adjust seasoning to taste before serving.
Calories: 250kcal
Cost: $15
Course: Soup
Cuisine: American
Keyword: Turkey