Author

Ethan

Browsing

Why You’ll Crave This Creamy Parsnip & Potato Soup

If you’re on a mission to hit your protein goals without sacrificing flavor, this creamy parsnip and potato soup is your new best friend. Rich in nutrients yet incredibly satisfying, this soup is perfect for those chilly days or whenever you need a comforting meal. Made with wholesome ingredients that are both budget-friendly and delicious, this recipe will not only nourish your body but also tantalize your taste buds. Let’s dive into what makes this dish so special!

Top 5 Reasons to Love This Soup

  • Nutritious and Satisfying: Packed with parsnips and potatoes, this soup provides essential vitamins and minerals while keeping you full and energized.
  • Simple Ingredients: Using everyday pantry staples, you can whip this up quickly without a long shopping list.
  • Versatile for Dietary Needs: Easily adaptable for vegan or gluten-free diets by swapping heavy cream with coconut milk and using vegetable broth.
  • Deliciously Creamy: The combination of heavy cream or coconut milk creates a luxurious texture that feels indulgent without being heavy.
  • Meal Prep Friendly: Make a big batch and store it for easy meals throughout the week—this soup stays delicious for days!

Ingredient Breakdown: What You’ll Need

To make this creamy parsnip and potato soup, you’ll need the following ingredients:

  • 3 medium parsnips (peeled and chopped): These root vegetables add a natural sweetness and earthy flavor to the soup.
  • 2 medium potatoes (starchy varieties like Russets or Yukon Gold): Provides a creamy base when blended.
  • 1 medium onion (finely diced): For depth of flavor.
  • 2 cloves garlic (minced): Adds aromatic richness.
  • 4 cups vegetable broth (low-sodium preferred): The liquid base that enhances all the flavors.
  • 1 cup heavy cream or coconut milk (stirred in at the end): For that creamy finish—coconut milk offers a vegan option.
  • 2 tablespoons butter or olive oil (for sautéing vegetables): Choose based on your dietary preference.
  • 1 tablespoon fresh thyme or rosemary (optional): Fresh herbs elevate the flavor profile.
  • Salt and pepper: To taste—essential for seasoning your soup.

Substitutions and Variations
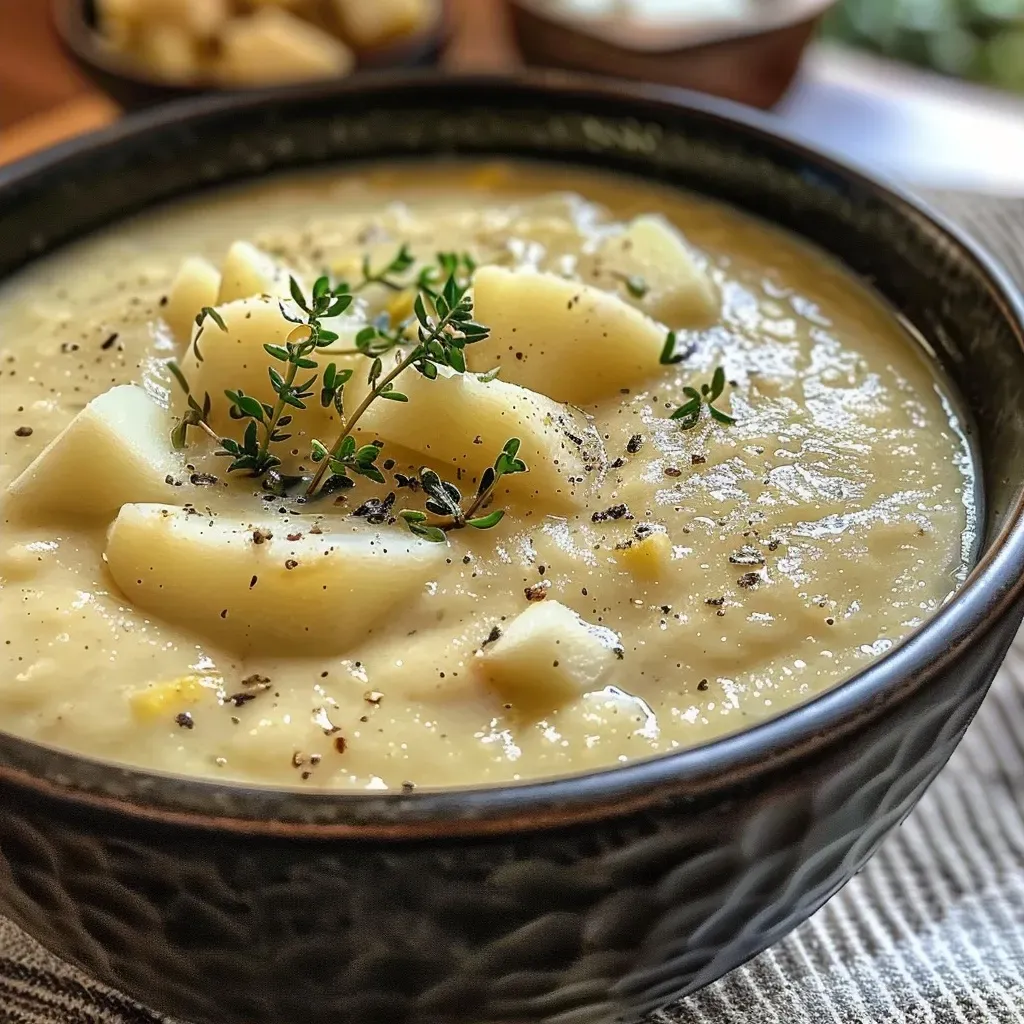
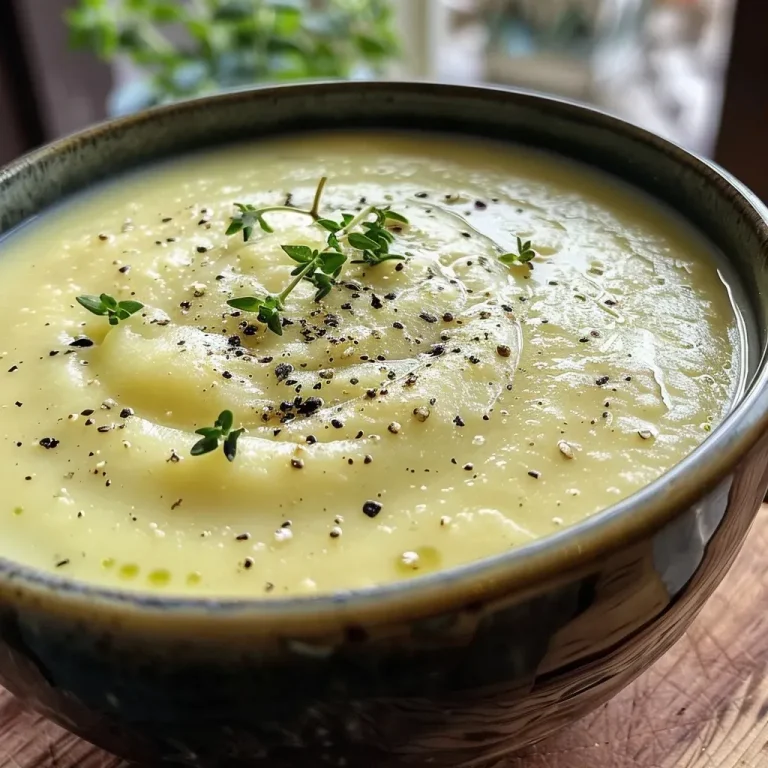
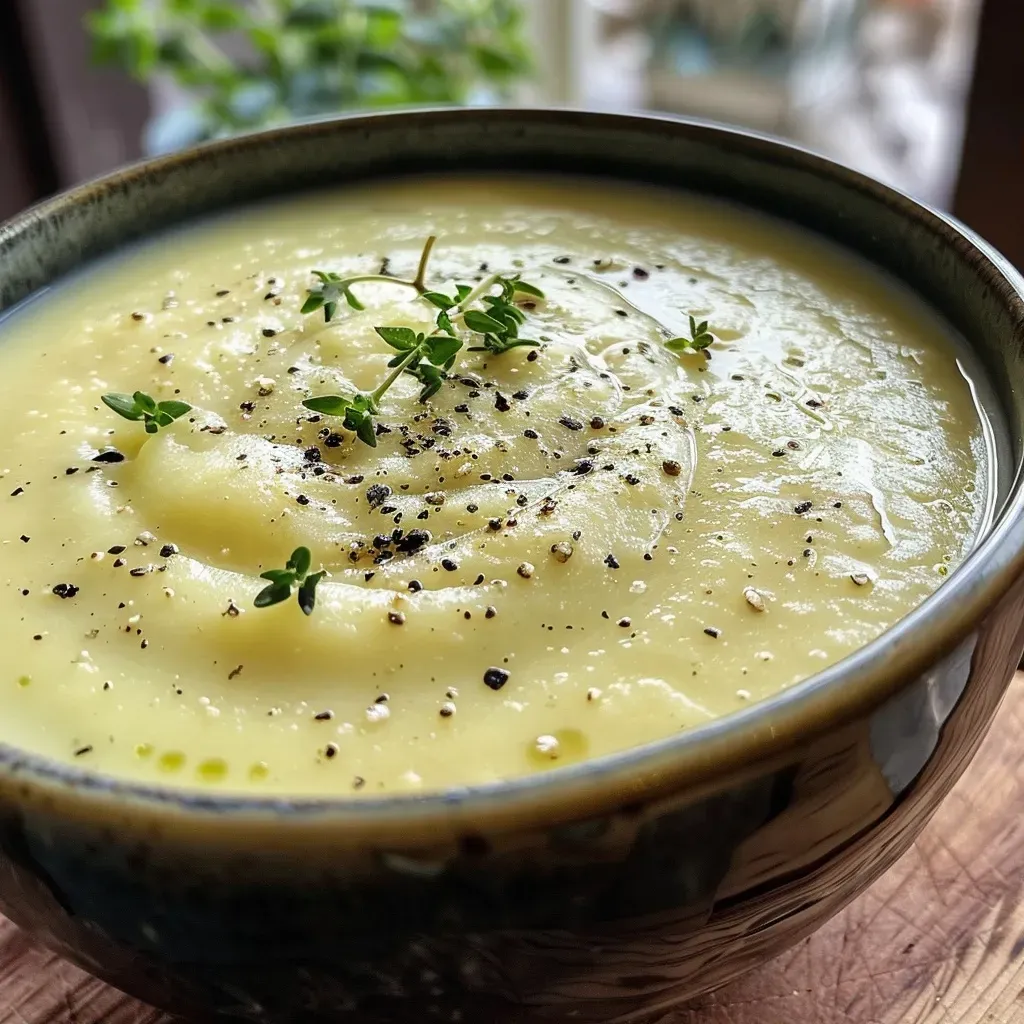
Side view of a steaming bowl of creamy parsnip and potato soup with a smooth texture.

If you’re looking to customize this soup, consider these substitutions:


Professional Chef Knife Set

★ Recommended Kitchen Tool

Professional Chef Knife Set

Make this recipe even easier with a quality Professional Chef Knife Set — a must-have kitchen staple!


🛒 See Deals on Amazon →

As an Amazon Associate, we earn from qualifying purchases.
  • Parsnips: If you can’t find parsnips, carrots can be a great substitute for a slightly different sweetness.
  • Potatoes: Sweet potatoes can add a different flavor and a nutrient boost.
  • Broth: Chicken broth can be used for a non-vegan version, adding a richer flavor.
  • Herbs: Experiment with different herbs like dill or sage to change the flavor profile.

How to Make Creamy Parsnip & Potato Soup

Follow these simple steps to create this comforting bowl of goodness:

  1. In a large pot, heat the butter or olive oil over medium heat. Add the diced onion and minced garlic; sauté until the onion is translucent.
  2. Add the chopped parsnips and potatoes, stirring to coat them in the oil. Cook for about 5 minutes.
  3. Pour in the vegetable broth, bringing the mixture to a boil. Reduce the heat and let it simmer for about 20 minutes, or until the vegetables are tender.
  4. Using an immersion blender, blend the soup until smooth. Alternatively, transfer to a blender in batches, blending until creamy.
  5. Stir in the heavy cream or coconut milk, and add salt, pepper, and herbs to taste. Heat through and serve warm.

Pro Tips for the Perfect Soup

  • Uniform Chopping: Ensure your parsnips and potatoes are cut into equal-sized pieces for even cooking.
  • Timing is Key: Add the cream at the end of cooking to keep it rich and prevent curdling.
  • Blending Techniques: For a creamier texture, blend longer and ensure no chunks remain.
  • Garnishing: Top with fresh herbs or a drizzle of olive oil for added flavor and presentation.
  • Adjust Consistency: If the soup is too thick, add a bit more broth to reach your desired consistency.
  • Store Properly: Allow the soup to cool before transferring to an airtight container for storage.
  • Reheat Gently: When reheating, do so slowly over low heat to avoid curdling the cream.
  • Flavor Development: This soup tastes even better the next day as the flavors meld!

Common Mistakes and Troubleshooting

Here are some common pitfalls to avoid:

  • Overcooking Vegetables: This can lead to a mushy texture. Keep an eye on cooking time.
  • Too Little Seasoning: Always taste and adjust your seasoning as needed—don’t skip the salt and pepper!
  • Blending Too Quickly: Ensure your blender is not too full to prevent splattering.

Storage and Make-Ahead Instructions

This soup is perfect for meal prep! Here’s how to store it:

  • Refrigeration: Store in an airtight container in the refrigerator for up to 5 days.
  • Freezing: This soup freezes well. Pour into freezer-safe containers and freeze for up to 3 months. Thaw in the refrigerator overnight before reheating.
  • Make-Ahead: You can prepare the soup base (without the cream) in advance and add the cream just before serving for the best texture.

Frequently Asked Questions

Here are some common questions about this soup:

  • Can I make this soup vegan? Yes! Just substitute the heavy cream with coconut milk and use vegetable broth.
  • How can I make this soup spicier? Add a pinch of cayenne pepper or some chopped jalapeños during cooking for heat.
  • What can I serve with this soup? It pairs well with crusty bread, salads, or a protein like grilled chicken.
  • Can I use other vegetables? Absolutely! Carrots, celery, or even greens can be added for variety.
  • How do I store leftovers? Keep in airtight containers in the refrigerator for up to 5 days.
  • Can I blend the soup in a regular blender? Yes, but be sure to let it cool slightly and blend in small batches.
  • How do I know when the parsnips are done? They should be fork-tender before blending.
  • Can I add protein to this soup? Yes! Shredded chicken or beans can be added for a protein boost.

Nutritional Insights and Dietary Adaptations

This creamy parsnip and potato soup is not only delicious but also offers a good balance of macronutrients:

  • Protein: The soup can be enhanced with added protein sources like cooked beans or chicken.
  • Fiber: Both parsnips and potatoes provide dietary fiber to support digestion.
  • Vitamins: Rich in vitamin C and potassium, this soup promotes overall health.

Essential Kitchen Equipment

For making this soup, here’s what you’ll need:

  • Large Pot: A heavy-bottomed pot works best for even cooking.
  • Immersion Blender: Ideal for blending the soup directly in the pot.
  • Chopping Knife: A sharp knife for chopping vegetables efficiently.

Serving Suggestions to Elevate Your Meal

This creamy parsnip and potato soup is delicious on its own, but you can elevate your meal with these serving suggestions:

  • Herb Garnish: Fresh herbs like parsley or chives add a pop of color and freshness.
  • Croutons: Homemade croutons can bring a delightful crunch.
  • Cheese: A sprinkle of grated cheese can enhance the creaminess of the soup.
  • Drizzle of Olive Oil: A finishing touch of high-quality olive oil can add richness.

Final Thoughts: Comfort in a Bowl

Indulging in a bowl of creamy parsnip and potato soup doesn’t just satisfy your hunger; it nourishes your body and warms your soul. Whether you’re enjoying it on a cold night or meal prepping for the week, this soup is versatile and delicious, making it a staple in any kitchen. So grab your ingredients, and let’s get cooking—your taste buds will thank you!
Creamy Parsnip & Potato Soup: The Easiest Comfort Bowl You’ll Love

Prep Time 10 minutes
Cook Time 30 minutes
Total Time 40 minutes
Servings 4 servings
Calories 250
This creamy and comforting soup combines tender parsnips and potatoes for a perfect cozy meal. Easy to prepare and full of flavor, it's ideal for a quick lunch or dinner.

Ingredients

Vegetables

  • 3 medium Parsnips (peeled and chopped)
  • 2 medium Potatoes (starchy varieties like Russets or Yukon Gold)
  • 1 medium Onion (finely diced)
  • 2 cloves Garlic (minced)
  • 4 cups Vegetable broth (low-sodium preferred)
  • 1 cup Heavy cream or coconut milk (stirred in at the end)
  • 2 tablespoons Butter or olive oil (used for sautéing vegetables)
  • 1 tablespoon Fresh thyme or rosemary (optional)
  • to taste Salt
  • to taste Pepper

Instructions 

  • Sauté diced onion and minced garlic in butter or olive oil until fragrant and translucent.
  • Add chopped parsnips and potatoes, cook for a few minutes.
  • Pour in vegetable broth, bring to a boil, then simmer until vegetables are tender (about 20 minutes).
  • Puree the soup until smooth, then stir in heavy cream or coconut milk.
  • Season with salt, pepper, and herbs if using. Serve hot.
Notes

This soup is best enjoyed with a slice of crusty bread for a complete meal.
Calories: 250kcal
Cost: $15
Course: Soup
Cuisine: comfort
Keyword: parsnip, Potato

Unlock the Secrets of Homemade Gnocchi

Welcome to your ultimate guide on how to make homemade gnocchi! This easy recipe combines just four simple ingredients, delivering a pillowy texture and delicious flavor that will elevate your meals while helping you meet your protein goals. By the end of this article, you’ll not only know how to craft these delightful little dumplings but also understand why they’re a fantastic addition to your diet. Let’s dive into the world of gnocchi and discover how you can transform your cooking!

Why You’ll Love This Recipe

  • High Protein Boost: With the addition of egg and proper portioning, this recipe provides a solid protein source, perfect for muscle repair and growth.
  • Quick and Easy: You can whip up this gnocchi in under an hour, making it an excellent choice for busy weeknight dinners.
  • Versatile Pairings: Serve your gnocchi with a variety of sauces, from classic marinara to creamy Alfredo, or even a light pesto for a fresh twist.
  • Customize Ingredients: This recipe allows for ingredient substitutions, accommodating dietary preferences and making it suitable for everyone.
  • Impressive Presentation: Homemade gnocchi showcases your culinary skills, impressing family and friends with minimal effort.

Ingredients Needed

Here’s what you’ll need to make your homemade gnocchi:

  • 2½ pounds russet potatoes (about 4 large or 8 small): Choose starchy potatoes for the best texture.
  • 1¼ cups all-purpose flour (plus more for dusting): Essential for binding the gnocchi together.
  • 2 teaspoons kosher salt: Enhances the flavor of the gnocchi.
  • 1 egg (whisked): Adds richness and helps bind the dough.

Which Potato to Use?

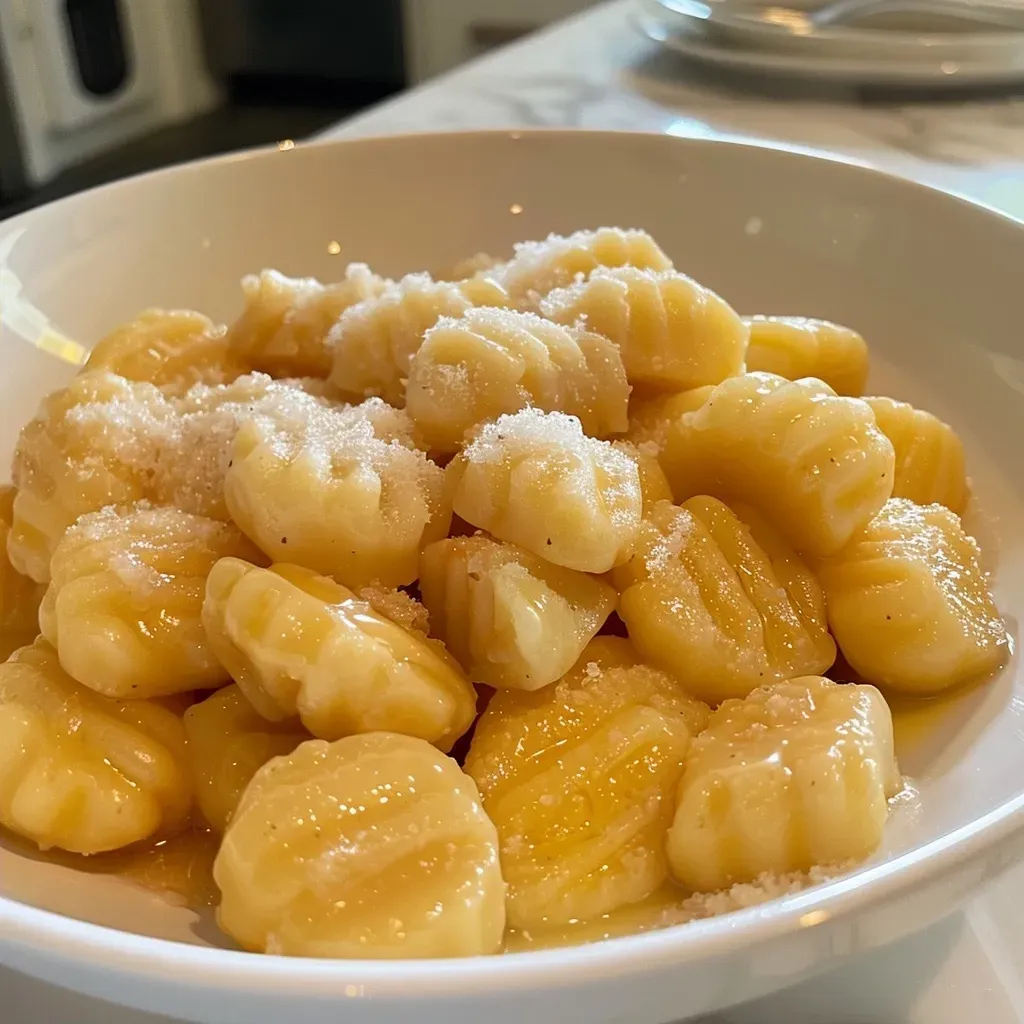
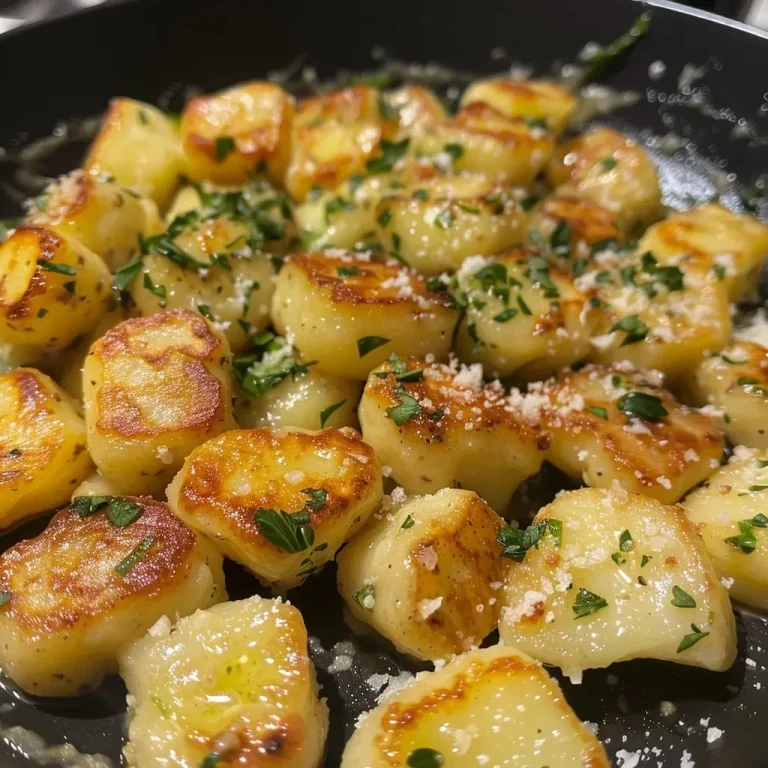
Juicy homemade gnocchi arranged neatly, showcasing their fluffy texture and light color.

When it comes to gnocchi, the type of potato matters. For the best results, opt for starchy varieties like russet or Idaho potatoes. These potatoes help create a light, fluffy texture. Avoid waxy potatoes, such as red or yellow potatoes, as they can lead to a dense gnocchi.


Professional Chef Knife Set

★ Recommended Kitchen Tool

Professional Chef Knife Set

Make this recipe even easier with a quality Professional Chef Knife Set — a must-have kitchen staple!


🛒 Shop This Tool →

As an Amazon Associate, we earn from qualifying purchases.

No Fancy Equipment Needed!

You don’t need specialized kitchen tools to make gnocchi. A simple box grater or potato masher will do the trick. The only other essentials include a baking sheet and a pot for boiling. Let’s keep this accessible!

How to Make Easy Homemade Gnocchi

  1. Prepare the Potatoes: Fill a large pot with cold water. Cut large potatoes in half, place them in the pot, and add salt. Bring to a boil and cook for 20-30 minutes, until tender.
  2. Cool and Peel: Remove the cooked potatoes and let them cool slightly. Once cool enough, peel the potatoes using a paring knife.
  3. Grate the Potatoes: Grate the potatoes finely using a box grater or potato ricer. This ensures a smooth dough.
  4. Mix the Dough: Spread the grated potatoes out to cool. Sprinkle flour and salt over the potatoes. Make a well in the center and pour in the whisked egg. Combine everything using your hands.
  5. Knead the Dough: Lightly flour your surface and knead the dough, adding flour as needed. Work until just smooth, about 2 minutes. Be careful not to overwork it!
  6. Shape the Gnocchi: Divide the dough into 8 pieces. Roll each piece into a 24-inch long rope about ½ inch thick. Cut into ½ inch pieces, dust with flour, and arrange on a baking sheet lined with parchment paper.

Cooking Your Gnocchi

Now that you’ve shaped your gnocchi, it’s time to cook them! Here are a couple of methods:

  • Boiled: Bring a large pot of salted water to a boil. Add the gnocchi in batches. Once they float to the surface, let them cook for an additional 1-2 minutes. Remove with a slotted spoon.
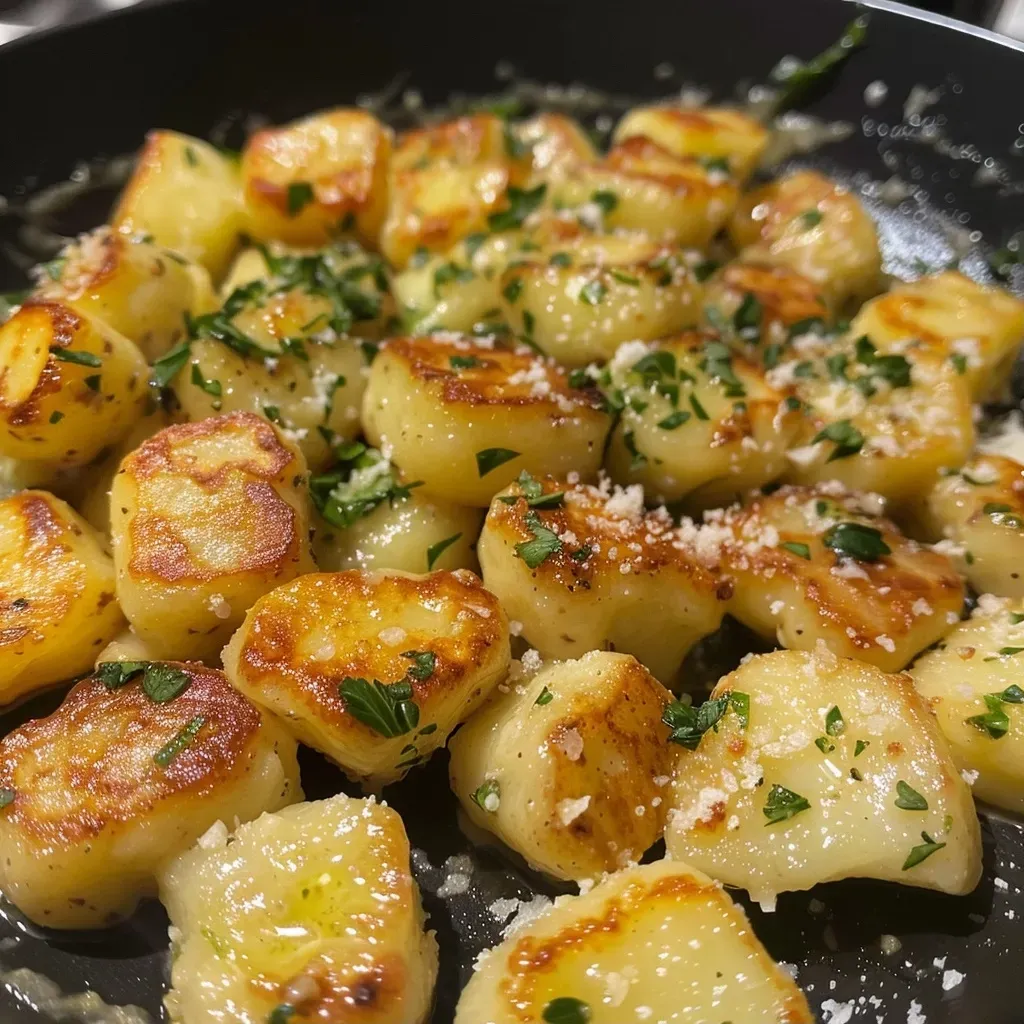
  • Pan-Seared: For a crispy finish, heat some olive oil in a skillet over medium heat. Add cooked gnocchi and sauté until golden and crispy.

Pro Tips for Perfect Gnocchi

  • Use a Potato Ricer: For even fluffier gnocchi, consider using a potato ricer instead of a grater.
  • Don’t Overwork the Dough: Overworking can lead to tough gnocchi; mix just until combined.
  • Flour Sparingly: Use just enough flour to prevent sticking. Too much can make the gnocchi dense.
  • Test Cooking: Boil a few test pieces first to ensure perfect texture before cooking the whole batch.
  • Chill Before Cooking: Allow the shaped gnocchi to chill for 30 minutes before cooking to help them hold their shape.
  • Experiment with Flavors: Consider adding herbs or spices to the dough for a unique twist.
  • Keep It Simple: Sometimes less is more; a drizzle of olive oil and a sprinkle of Parmesan can be all you need.
  • Use a Fork for Indentation: Create classic gnocchi shapes by rolling each piece over a fork, giving them ridges that hold sauce better.

Common Mistakes and Troubleshooting

Even the best chefs make mistakes! Here are some common pitfalls and how to avoid them:

  • Too Much Flour: If your gnocchi are dense, you may have added too much flour. Use just enough to bind without making the dough heavy.
  • Overcooking: If gnocchi are overcooked, they’ll become mushy. Pay attention to them as they cook—they should float to the top.
  • Underseasoned: Don’t forget to season the water generously; bland gnocchi will lack flavor.
  • Not Enough Resting Time: Allowing your dough to rest helps improve texture and makes it easier to work with.

Variations to Try

Gnocchi is incredibly versatile! Here are a few variations to consider:

  • Sweet Potato Gnocchi: Substitute sweet potatoes for russets for a sweeter, colorful twist.
  • Spinach Gnocchi: Incorporate blanched and chopped spinach into the dough for added nutrition and flavor.
  • Ricotta Gnocchi: Replace some of the potato with ricotta cheese for extra creaminess.
  • Herbed Gnocchi: Add fresh herbs like basil or rosemary directly into the dough for aromatic flavor.

Storage and Make-Ahead Instructions

Gnocchi can be made ahead of time and stored for later. Here’s how:

  • Refrigerate: Store uncooked gnocchi in an airtight container in the fridge for up to 2 days.
  • Freeze: To freeze, place the shaped gnocchi in a single layer on a baking sheet, freeze until solid, then transfer to a freezer bag for up to 3 months.
  • Cook from Frozen: You can cook gnocchi straight from the freezer; just add a couple of extra minutes to cooking time.

Comprehensive FAQ

  • Can I use other types of potatoes for gnocchi? Yes, but for best results, stick to starchy varieties like russet.
  • What sauce pairs best with homemade gnocchi? Marinara, pesto, and sage brown butter are all excellent choices!
  • Can I make gnocchi gluten-free? Absolutely! Substitute regular flour with a gluten-free blend.
  • How do I know when my gnocchi is done cooking? They are done when they float to the surface of the boiling water.
  • Can I reheat leftover gnocchi? Yes, sautéing in a bit of oil or butter gives them a great texture when reheating.
  • How long can I store cooked gnocchi? Cooked gnocchi can be stored in the refrigerator for 3-5 days.
  • Is gnocchi suitable for meal prep? Yes, it holds up well and can be reheated easily.
  • Can I add cheese to the gnocchi dough? Yes, grated Parmesan can be added for extra flavor.

Nutritional Tips and Dietary Adaptations

This gnocchi recipe can be adapted to fit various dietary needs:

  • High Protein: Use more egg or add protein powder to the dough for a protein boost.
  • Low Carb: Substitute potatoes with cauliflower for a lower-carb version.
  • Vegan: Replace egg with a flaxseed egg (1 tablespoon flaxseed meal + 2.5 tablespoons water) and use a gluten-free flour blend.

Equipment Recommendations

While you can keep it simple, here are a few tools that can make your gnocchi-making experience easier:

  • Potato Ricer: For achieving the best texture.
  • Box Grater: Great for grating potatoes if you don’t have a ricer.
  • Pasta Board: Optional, but helpful for rolling out dough.
  • Bench Scraper: Useful for cutting dough and scraping surfaces.

Serving Suggestions

Gnocchi can be served in various ways:

  • As a Main Dish: Toss with your favorite sauce and top with cheese.
  • As a Side: Serve alongside grilled meats or roasted vegetables.
  • In Soup: Add gnocchi to a hearty vegetable or chicken soup for a satisfying meal.
  • With Greens: Serve gnocchi over a bed of sautéed spinach or kale for added nutrition.

Conclusion

And there you have it! Your comprehensive guide to making homemade gnocchi that is both delicious and protein-packed. With the right ingredients, techniques, and a little practice, you can create a dish that not only satisfies your cravings but also supports your fitness goals. So roll up your sleeves, get in the kitchen, and enjoy the fruits of your labor—your taste buds will thank you!

Quick Homemade Gnocchi

Prep Time 15 minutes
Cook Time 30 minutes
Total Time 45 minutes
Servings 4 servings
Calories 250
Enjoy these soft, pillowy gnocchi made quickly at home with simple ingredients and minimal effort.

Ingredients

Potatoes

  • 2.5 pounds russet potatoes (about 4 large or 8 small)
  • 1.25 cups all-purpose flour (plus more for dusting)
  • 2 teaspoons kosher salt
  • 1 egg egg (whisked)

Instructions 

  • Boil potatoes in salted water until tender, then peel and grate.
  • Mix grated potatoes with flour, salt, and egg to form a dough.
  • Knead dough lightly, then divide into 8 pieces and roll into ropes.
  • Cut ropes into ½-inch pieces, dust with flour, and arrange on a baking sheet.

Notes

Be careful not to overwork the dough to keep gnocchi tender.
Calories: 250kcal
Cost: $10
Course: Main Course
Cuisine: Italian
Keyword: Gnocchi

Unlock the Secret to High-Protein Cranberry Pistachio Shortbread Cookies

Welcome to your next favorite treat—High-Protein Cranberry Pistachio Shortbread Cookies! If you’re on a mission to meet your protein goals without sacrificing flavor, this recipe is designed just for you. Packed with healthy fats and a delightful crunch, these cookies are not just delicious; they’re a guilt-free indulgence that fuels your gains. Whether you need a post-workout snack or a sweet addition to your meal prep, these cookies fit the bill perfectly.

Why You’ll Love This Recipe

Here are five compelling reasons to make these high-protein cookies:

  • Protein-Packed: Each cookie contains a significant amount of protein thanks to the almond flour and protein powder, making them a perfect snack for muscle recovery.
  • Flavorful and Satisfying: The combination of sweet cranberries and crunchy pistachios offers a taste explosion that makes every bite enjoyable.
  • Low in Sugar: Using sugar-free sweeteners means you can indulge without the guilt of excess sugar intake.
  • Easy to Make: With simple ingredients and straightforward steps, you can whip these up in no time, perfect for busy schedules.
  • Versatile Snack: These cookies can be easily adapted to different dietary needs, making them suitable for various lifestyles.

Ingredient Breakdown: What You’ll Need

To create these delicious cookies, gather the following ingredients:


Cake Decorating Set

★ Recommended Kitchen Tool

Cake Decorating Set

Make this recipe even easier with a quality Cake Decorating Set — a must-have kitchen staple!


🛒 View on Amazon →

As an Amazon Associate, we earn from qualifying purchases.
  • 1 cup almond flour: A gluten-free base that adds healthy fats and gives a wonderful texture.
  • 1/2 cup vanilla protein powder: Choose between whey or casein for a protein boost.
  • 1/3 cup powdered sugar-free sweetener: Opt for erythritol or stevia to keep things low-calorie.
  • 1/4 cup butter: Softened (not melted) for the right consistency.
  • 1/4 cup Greek yogurt: Adds creaminess and moisture while keeping the cookies tender.
  • 1 teaspoon vanilla extract: Enhances flavor and aroma.
  • 1/4 teaspoon salt: Balances the sweetness and enhances flavors.
  • 1/3 cup dried cranberries: Make sure they’re sugar-free and chopped if large.
  • 1/3 cup pistachios: Shelled and roughly chopped for a crunchy texture.

Ingredient Substitutions

Don’t have all the ingredients? Here are some substitutions you can make:

  • Almond Flour: Substitute with coconut flour, but reduce the amount to 1/3 cup as it’s more absorbent.
  • Protein Powder: Use plant-based protein powder for a vegan option.
  • Butter: Coconut oil can be used in equal amounts for a dairy-free alternative.
  • Greek Yogurt: Silken tofu or applesauce can serve as a substitute for a vegan version.
  • Cranberries: Dried cherries or raisins can also work if you prefer a different flavor.

Step-by-Step Instructions to Bake Your Cookies

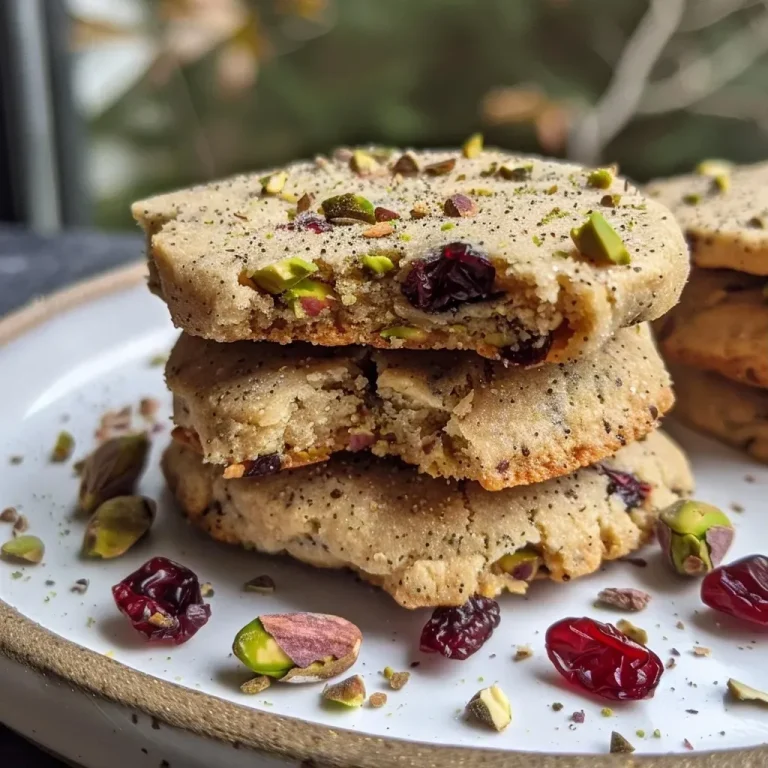
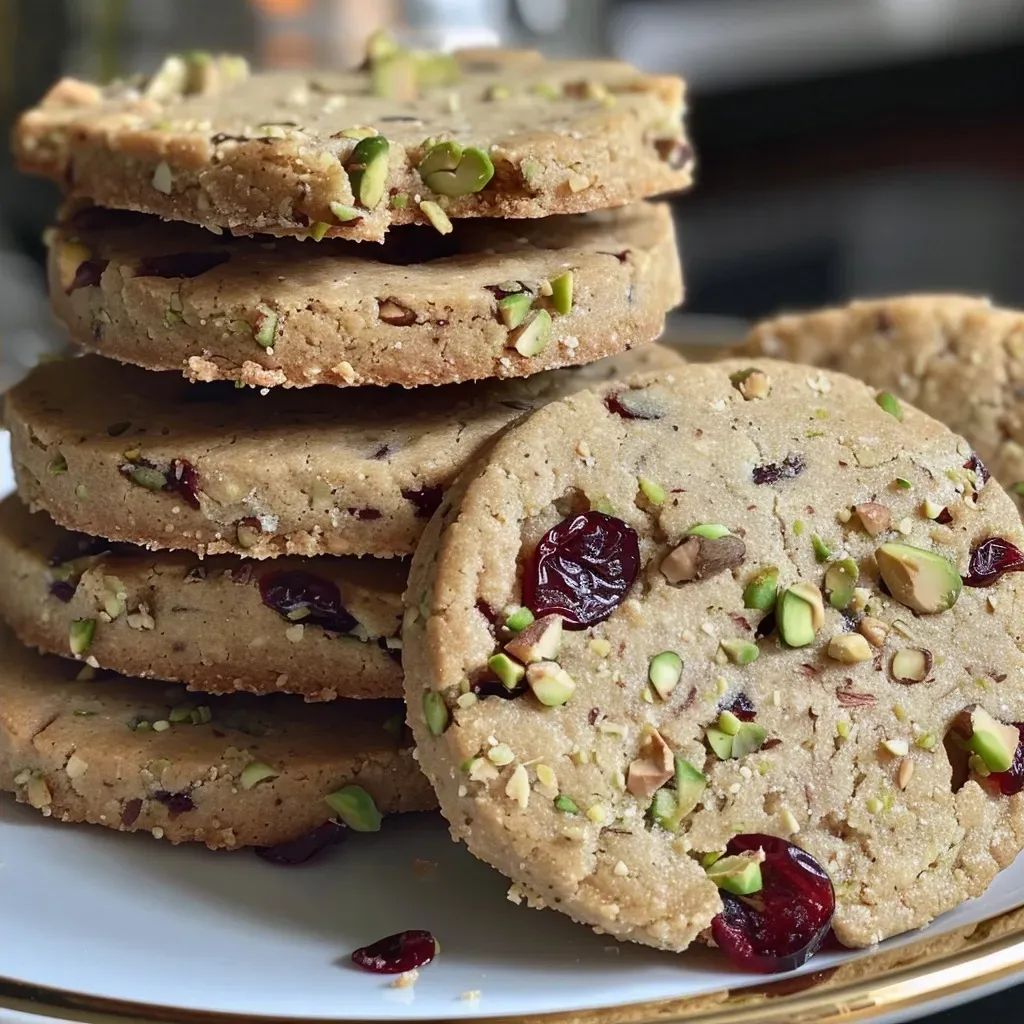
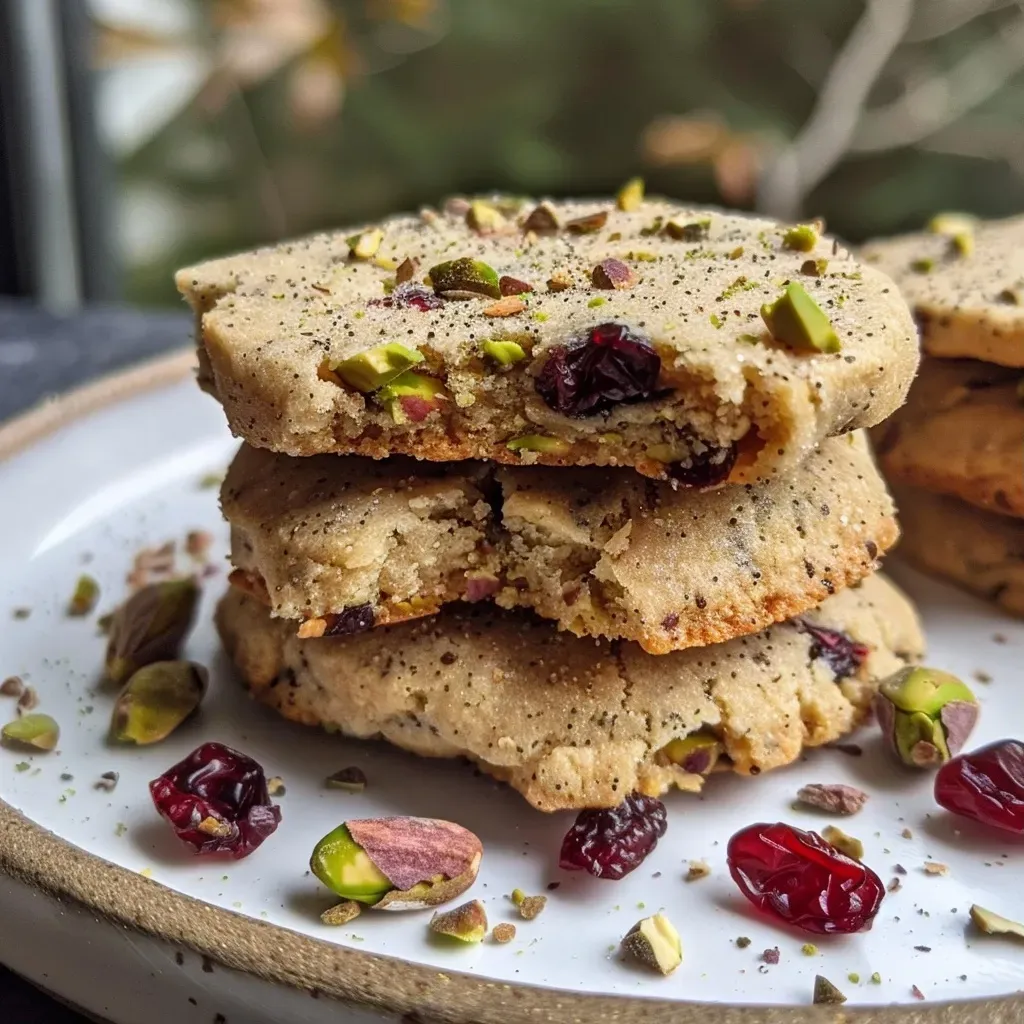
Side view of freshly baked High-Protein Cranberry Pistachio Shortbread Cookies with visible cranberries and pistachios.

Follow these detailed steps for perfect cookies every time:

  1. In a large mixing bowl, add almond flour, protein powder, and powdered sweetener, then mix thoroughly until all the dry ingredients are evenly combined.
  2. Add softened butter, Greek yogurt, and vanilla extract to the bowl, then mix gently until a soft dough begins to form.
  3. Continue mixing until the dough comes together completely, ensuring it is smooth, soft, and not overly sticky.
  4. Fold in the dried cranberries and chopped pistachios, distributing them evenly throughout the dough without overmixing.
  5. Shape the dough into a log or flatten it slightly depending on your preferred cookie shape.
  6. Wrap the dough in parchment paper and place it in the refrigerator for 20 to 30 minutes to firm up and make slicing easier.
  7. Preheat your oven to 180°C (350°F) and line a baking tray with parchment paper.
  8. Remove the chilled dough from the refrigerator and slice it into evenly sized cookies, placing them onto the prepared baking tray with slight spacing between each piece.
  9. Bake for 12 to 15 minutes, or until the edges turn lightly golden while the centers remain soft.
  10. Remove from the oven and allow the cookies to cool on the tray for a few minutes before transferring them to a cooling rack to set completely.

Pro Tips for Perfect Cookies

To ensure your high-protein cookies turn out perfectly, keep these expert insights in mind:

  • Don’t Overmix: Mixing too much can lead to tough cookies. Mix until just combined.
  • Chill the Dough: Chilling helps maintain the cookie shape while baking, preventing them from spreading too much.
  • Use Fresh Ingredients: Ensure your baking ingredients, especially the baking powder and sweeteners, are fresh for the best results.
  • Adjust Sweetness: Taste the dough before baking; you can always adjust the sweetness by adding more sweetener if needed.
  • Watch Baking Time: Ovens vary; keep an eye on your cookies to prevent overbaking.
  • Store Properly: To maintain freshness, store cookies in an airtight container at room temperature.

Common Mistakes and Troubleshooting

Even the best bakers can run into issues. Here’s how to troubleshoot:

  • Cookie Spread Too Much: This can happen if the dough is too warm or not chilled adequately. Always chill before baking.
  • Cookies Are Too Dry: If this occurs, try adding a bit more Greek yogurt or butter next time.
  • Flavor Lacks Depth: Ensure you’re using quality vanilla extract and consider adding a pinch of cinnamon for warmth.

Delicious Variations to Try

Feel free to get creative with these variations:

  • Chocolate Chip Addition: Add sugar-free dark chocolate chips for an extra indulgent treat.
  • Nut Butter Swirl: Incorporate a swirl of almond or peanut butter into the dough for added flavor.
  • Spiced Cookies: Add spices like cinnamon or nutmeg for a warm flavor profile.
  • Different Nuts: Substitute pistachios with walnuts or pecans for a change in texture and taste.

Storage and Make-Ahead Instructions

Want to plan ahead? Here’s how to store and prepare in advance:

  • Refrigerator Storage: Keep cookies in an airtight container for up to a week.
  • Freezer Storage: Freeze unbaked cookie dough for up to three months. Just slice and bake straight from the freezer, adding a couple of extra minutes to the bake time.
  • Make Ahead: You can prepare the dough a day in advance and keep it in the fridge until you’re ready to bake.

Frequently Asked Questions

Here are some common questions about this recipe:

  • Can I use a different protein powder? Yes, you can substitute with any protein powder you prefer, though it may slightly alter the texture.
  • Are these cookies gluten-free? Yes, using almond flour makes them naturally gluten-free.
  • Can I make these vegan? Absolutely! Substitute the butter with coconut oil and the Greek yogurt with silken tofu or applesauce.
  • How long do they last? These cookies can last up to a week in an airtight container.
  • Can I add more cranberries? Yes, feel free to increase the amount for a fruitier flavor.
  • What if my cookies are too crumbly? This could be due to too much flour; ensure you’re measuring correctly.
  • Can I bake them as bars? Yes! Spread the dough into a baking dish and increase the baking time.
  • What’s the best way to enjoy them? These cookies are delightful on their own or paired with a glass of milk or your favorite coffee.

Nutrition Tips and Dietary Adaptations

For a balanced approach to nutrition, consider these tips:

  • High Protein: These cookies are perfect for those looking to increase their protein intake while enjoying a treat.
  • Healthy Fats: Almond flour and pistachios provide essential fatty acids that support overall health.
  • Low Sugar: By using sugar-free sweeteners, you can enjoy a dessert without the sugar crash.

Recommended Equipment

Here’s what you’ll need to make these cookies:

  • Mixing Bowl: A large bowl to combine all your ingredients.
  • Measuring Cups and Spoons: For accurate measurements of your ingredients.
  • Whisk or Hand Mixer: To blend the ingredients thoroughly.
  • Baking Tray: For baking the cookies.
  • Parchment Paper: To line the baking tray and prevent sticking.

Serving Suggestions

These cookies can be served in various ways:

  • With Tea or Coffee: Perfect for an afternoon snack.
  • As a Post-Workout Snack: Pair with a protein shake for a balanced recovery meal.
  • Gift Them: Package in a beautiful box for a thoughtful homemade gift.

Conclusion

These High-Protein Cranberry Pistachio Shortbread Cookies are more than just a treat; they’re a step towards a healthier, protein-forward lifestyle without sacrificing flavor. With their satisfying crunch and delightful sweetness, they’re sure to become a staple in your kitchen. So roll up those sleeves, gather your ingredients, and get ready to enjoy a delicious snack that supports your fitness goals!

High-Protein Cranberry Pistachio Shortbread Cookies Recipe

Prep Time 15 minutes
Cook Time 15 minutes
Total Time 30 minutes
Servings 12 cookies
Calories 150
Delight in these protein-packed shortbread cookies with tart cranberries and crunchy pistachios, perfect for a healthy treat.

Ingredients

dry ingredients

  • 1 cup almond flour
  • 1/2 cup vanilla protein powder (whey or casein)
  • 1/3 cup powdered sugar-free sweetener

wet ingredients

  • 1/4 cup butter (softened, not melted)
  • 1/4 cup Greek yogurt
  • 1 teaspoon vanilla extract
  • 1/4 teaspoon salt

add-ins

  • 1/3 cup dried cranberries (sugar-free, chopped if large)
  • 1/3 cup pistachios (shelled and roughly chopped)

Instructions 

  • Mix almond flour, protein powder, and sweetener until combined.
  • Add butter, yogurt, and vanilla; mix into a soft dough.
  • Fold in cranberries and pistachios evenly.
  • Shape into a log or flatten; chill for 20-30 minutes.
  • Preheat oven to 180°C, slice dough, and place on baking sheet.
  • Bake for 12-15 minutes until edges are golden; cool before serving.

Notes

Chill the dough well for easier slicing.
Calories: 150kcal
Cost: $15
Course: Dessert
Cuisine: American
Keyword: High Protein

Elevate Your Dinner Game with This Sheet Pan Chicken Recipe

If you’re on a quest to hit your protein goals without sacrificing flavor, you’ve landed in the right spot. This Sheet Pan Chicken with Lemon & Rosemary is not just a meal; it’s an experience that brings together the best of nutrition and taste. Perfect for meal prep, this easy dinner recipe combines juicy chicken thighs, vibrant veggies, and aromatic herbs into a single dish that will leave you craving more.

Let’s dive into why this recipe deserves a prime spot in your weekly meal rotation!

Why You’ll Love This Recipe

This sheet pan chicken recipe checks all the boxes for a satisfying meal that fits seamlessly into your lifestyle. Here are five compelling reasons to give it a try:


Digital Meat Thermometer

★ Recommended Kitchen Tool

Digital Meat Thermometer

Make this recipe even easier with a quality Digital Meat Thermometer — a must-have kitchen staple!


🛒 See Deals on Amazon →

As an Amazon Associate, we earn from qualifying purchases.
  • High in Protein: Each serving is loaded with protein-rich chicken thighs, helping you meet your daily intake without resorting to bland meals.
  • Flavor Explosion: The combination of lemon juice, garlic, and rosemary creates a mouthwatering flavor profile that elevates the entire dish.
  • Minimal Cleanup: Cooking everything on one sheet pan means less time scrubbing pots and pans, making cleanup a breeze.
  • Customizable Ingredients: Feel free to swap in your favorite vegetables or adjust seasonings to suit your taste. This recipe is flexible!
  • Meal Prep Friendly: Perfect for planning ahead, this dish stores well in the fridge and reheats beautifully.

Ingredient Breakdown

Before you start cooking, let’s take a closer look at what you’ll need for this recipe, along with some substitutions if you want to mix things up.

  • Chicken Thighs: 4 bone-in, skin-on chicken thighs provide flavor and moisture. You can use chicken breasts or drumsticks if you prefer.
  • Olive Oil: Essential for cooking and adding richness. You can substitute with avocado oil or melted butter.
  • Lemon Juice and Zest: Brightens the dish. If fresh lemons aren’t available, bottled lemon juice works in a pinch.
  • Vegetables: Carrots, parsnips, red onion, and Brussels sprouts come together for a colorful medley. Swap in green beans or broccoli if you prefer.
  • Spices: A mix of kosher salt, mustard powder, paprika, and black pepper adds depth. Feel free to experiment with your favorite spice blends!

Step-by-Step Instructions

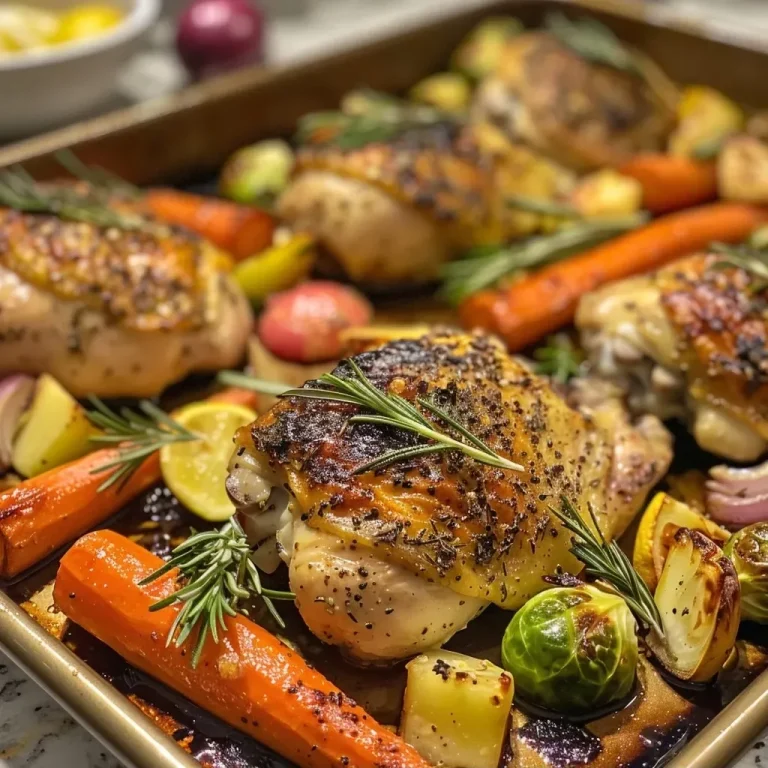
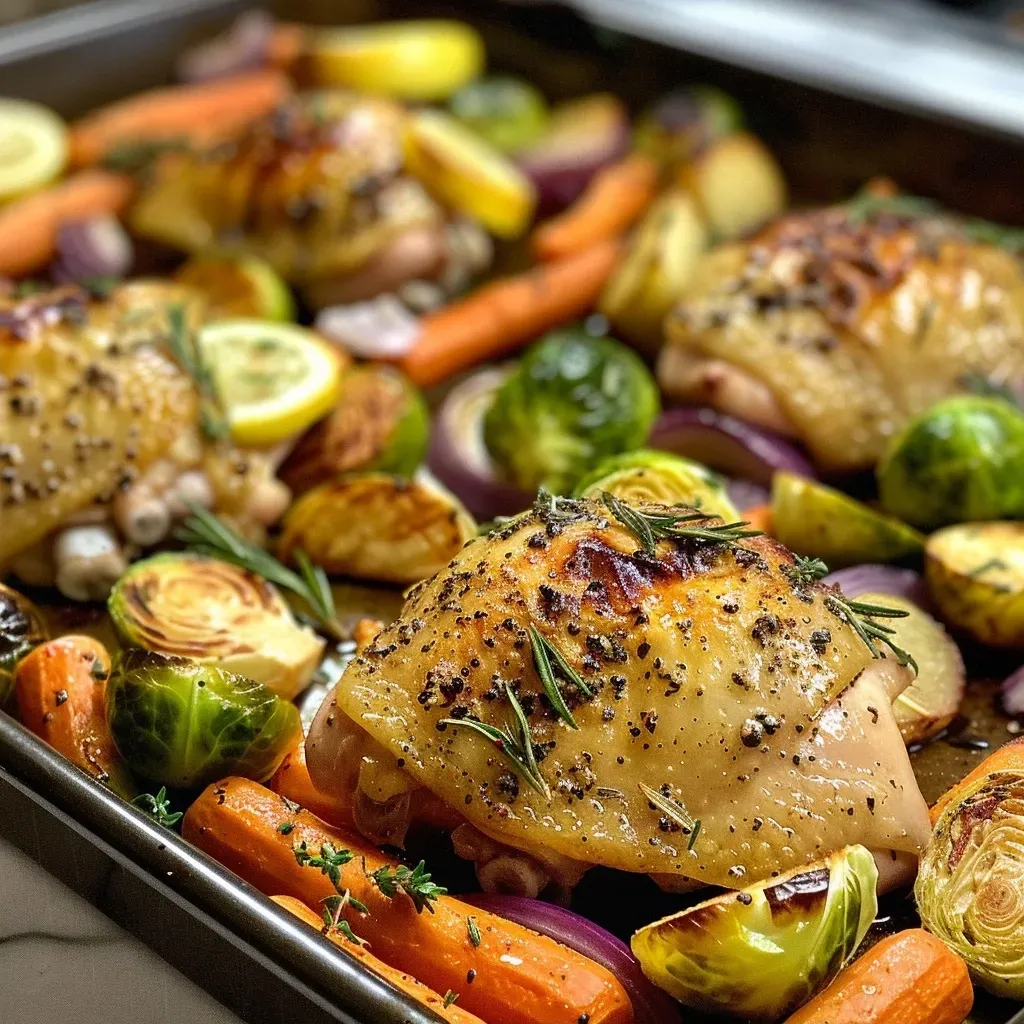
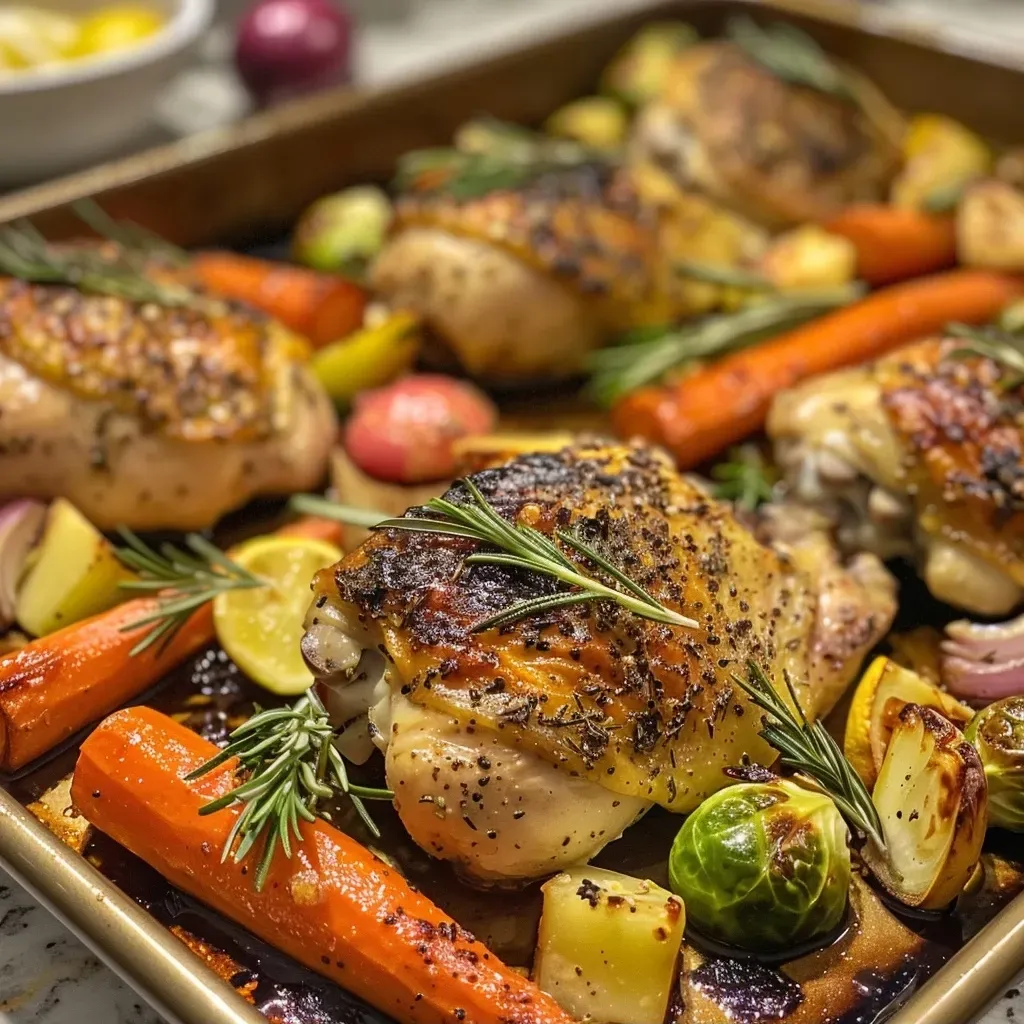
Close-up of a sheet pan featuring roasted chicken with lemon slices and fresh herbs.

Follow these straightforward steps to create your delicious sheet pan chicken:

  1. Preheat the Oven: Insert the wire rack into position 6 and place the roasting pan on the rack. Set the oven to Roast, Super Convection, 400°F for 25 minutes.
  2. Prepare the Chicken: Combine the kosher salt, mustard powder, paprika, and black pepper. Drizzle the chicken with lemon juice, spice mixture, and olive oil. Ensure it’s well coated.
  3. Cook the Chicken: Once the oven is preheated, place the chicken, skin side down, in the hot pan and cook for 25 minutes. Rotate the pan and turn the chicken over.
  4. Prepare the Vegetables: Cut carrots, parsnips, and onion into wedges. Halve the Brussels sprouts. Toss them in olive oil, salt, and pepper.
  5. Check Doneness: Ensure the chicken reaches an internal temperature of 165°F. If not, cook a little longer.
  6. Transfer and Toss: Move the chicken to a dish, skin side up. Drain excess fat from the pan, add vegetables, and toss.
  7. Roast the Vegetables: Place the vegetables back in the oven for 20 minutes.
  8. Make the Dressing: Heat olive oil in a saucepan, add minced garlic, cook for 1 minute. Stir in rosemary, lemon zest, and juice, then remove from heat.
  9. Final Touch: Once vegetables are tender, place the chicken on top, drizzle with juices, and broil for 2 minutes to crisp up the skin.
  10. Serve: Enjoy the dish drizzled with the flavorful dressing!

Pro Tips for Success

Want to ensure your sheet pan chicken turns out perfectly? Here are some expert insights:

  • Use a Meat Thermometer: This guarantees the chicken is perfectly cooked without guessing.
  • Don’t Overcrowd the Pan: Ensure there’s enough space for the chicken and veggies to roast evenly.
  • Let Chicken Rest: Allowing the chicken to rest for a few minutes after cooking keeps it juicy.
  • Experiment with Herbs: Try thyme, oregano, or even dill for a unique twist on flavor.
  • Meal Prep: Make extra chicken to use in salads or wraps throughout the week.
  • Roast Vegetables Separately: If you prefer extra crispy veggies, roast them on a separate pan.
  • Adjust Cook Time for Thinner Cuts: If using chicken breasts instead, reduce the cook time accordingly.
  • Save the Juices: Use any leftover juice from the pan as a sauce to enhance the flavor further.

Common Mistakes and Troubleshooting

Here are some pitfalls to avoid while making this recipe:

  • Not Preheating the Oven: This can result in soggy chicken skin. Always preheat for optimal crispiness.
  • Forgetting to Season: Under-seasoning can lead to bland flavors. Don’t skip the spices!
  • Using Cold Ingredients: Bring your chicken to room temperature before cooking for even cooking.
  • Ignoring Cooking Times: Cooking times may vary based on your oven and the size of your chicken pieces. Always check for doneness.

Variations to Consider

Not feeling like the original? Here are some variations you can try:

  • Sheet Pan Chicken with Potatoes: Add cubed potatoes for a heartier meal.
  • Spicy Chicken: Add red pepper flakes or chili powder for a kick.
  • Herb-Infused Chicken: Substitute rosemary with fresh basil or cilantro for a different flavor profile.
  • Vegetarian Option: Replace chicken with chickpeas and add more veggies for a protein-packed plant-based meal.

Storage and Make-Ahead Instructions

This dish is perfect for meal prep! Here’s how to store and reheat:

  • Refrigeration: Store leftovers in an airtight container for up to 4 days.
  • Freezing: You can freeze cooked chicken and vegetables for up to 2 months. Thaw overnight in the fridge before reheating.
  • Reheating: Reheat in the oven at 350°F until warmed through, about 15-20 minutes.

Frequently Asked Questions

Here are some common questions about this recipe:

  • Can I use boneless chicken thighs? Yes, but adjust cooking time for thinner cuts.
  • What if I don’t have fresh rosemary? Dried rosemary works, just use less (1 tsp).
  • Can I use other vegetables? Absolutely! Use what you have on hand.
  • How do I know when the chicken is done? A meat thermometer inserted into the thickest part should read 165°F.
  • Can I make this recipe in advance? Yes, it’s great for meal prep!
  • What can I serve with this dish? It pairs well with quinoa, rice, or a fresh green salad.
  • Is it gluten-free? Yes, all ingredients listed are gluten-free.
  • How can I add more flavor? Marinate the chicken overnight for deeper flavor.

Nutrition Tips and Dietary Adaptations

This recipe is naturally high in protein and can be adapted to fit various dietary needs:

  • Low-Carb Option: Increase the amount of non-starchy vegetables and reduce the carrots and parsnips.
  • Paleo-Friendly: This dish already fits within paleo guidelines; just ensure that your spices are compliant.
  • Keto Adaptation: Use fewer carrots and parsnips to lower the carb count.

Equipment Recommendations

To make this recipe, you’ll need the following equipment:

  • Sheet Pan: A sturdy baking sheet for roasting.
  • Meat Thermometer: Essential for checking doneness.
  • Mixing Bowls: For marinating the chicken and tossing veggies.
  • Sharp Knife: For cutting vegetables evenly.

Serving Suggestions

This dish is versatile and can be served in various ways:

  • With a Side Salad: Pair with a fresh arugula salad dressed in lemon vinaigrette.
  • On a Bed of Quinoa: Add a grain for a filling and nutritious meal.
  • With a Dollop of Yogurt: A touch of Greek yogurt adds creaminess and tang.

Conclusion

This Sheet Pan Chicken with Lemon & Rosemary is more than just dinner; it’s a way to elevate your cooking game while meeting your nutritional needs. With easy preparation, minimal cleanup, and a flavor profile that impresses, this dish is a win-win. So, gather your ingredients and get ready to enjoy a meal that’s as satisfying as it is healthy. Remember, hitting your protein goals doesn’t have to be boring—let’s make it delicious!

Chicken Sheet Pan with Lemon & Rosemary

Prep Time 15 minutes
Cook Time 50 minutes
Total Time 1 hour 5 minutes
Servings 4 servings
Calories 550
A flavorful and easy sheet pan dinner featuring crispy chicken thighs roasted with vegetables and a fragrant lemon-rosemary dressing.

Ingredients

Spice Mix

  • 2 tsp kosher salt
  • 0.5 tsp mustard powder
  • 0.25 tsp paprika
  • 0.25 tsp black pepper (freshly ground)

Chicken & Vegetables

  • 4 oz bone-in, skin-on chicken thighs
  • 1 tbsp fresh lemon juice
  • 1 tbsp olive oil
  • 2 small carrots (cut into wedges)
  • 2 small parsnips (cut into wedges)
  • 1 small red onion (cut into wedges)
  • 8 oz Brussels sprouts (halved)
  • 1 tsp kosher salt

Dressing & Seasoning

  • 2 cloves garlic (minced)
  • 1 tbsp finely chopped rosemary
  • 2 tsp grated lemon zest
  • 1 tbsp fresh lemon juice
  • 0.5 tsp kosher salt

Instructions 

  • Preheat oven to 400°F (200°C). Prepare the spice mixture and coat the chicken with lemon juice, spices, and oil.
  • Place chicken skin side down in a hot pan and cook for 25 minutes, then flip and cook until done. Meanwhile, prepare vegetables.
  • Toss vegetables with oil, salt, and pepper. Roast vegetables for 20 minutes.
  • Make the dressing by heating oil, cooking garlic, then adding lemon zest, juice, rosemary, and salt.
  • Arrange chicken over vegetables, drizzle with dressing, broil for 2 minutes until browned and crisp. Serve hot.
Notes

Ensure chicken reaches an internal temperature of 165°F for safety.
Calories: 550kcal
Cost: $15
Course: Main Course
Cuisine: American
Keyword: Chicken, lemon, rosemary

Welcome to the ultimate guide on making a delicious and nutritious Maple Pecan Smoothie Bowl. This bowl combines the rich flavors of pecans and maple syrup with the creaminess of frozen bananas, making it not only a feast for your taste buds but also a powerhouse of protein and healthy fats. Whether you’re looking for a quick breakfast, a post-workout snack, or a healthy treat, this recipe is perfect for you. Let’s dive into why you’ll love this smoothie bowl and how to whip it up in no time!

Why You’ll Love This Recipe

This Maple Pecan Smoothie Bowl is more than just a pretty dish; it’s packed with benefits that make it a must-try!

  • Quick and Easy: Made in just 5 minutes, it’s perfect for busy mornings when you need something nutritious without the hassle.
  • Protein-Packed: With the addition of pecans and optional protein powder, this bowl helps you hit your protein goals effortlessly.
  • Flavorful and Satisfying: The combination of sweet maple syrup, creamy bananas, and crunchy pecans creates a delightful flavor profile that satisfies your cravings.
  • Customizable: You can easily switch up the toppings and ingredients to keep things fresh and exciting every time you make it.
  • Health Benefits: This smoothie bowl is rich in antioxidants, healthy fats, and fiber, making it a nutritious choice that supports overall well-being.

Detailed Ingredient Breakdown

Here’s what you’ll need to create your Maple Pecan Smoothie Bowl, along with some simple substitutions to tailor it to your taste.


Glass Mason Jars for Oats

★ Recommended Kitchen Tool

Glass Mason Jars for Oats

Make this recipe even easier with a quality Glass Mason Jars for Oats — a must-have kitchen staple!


🛒 View on Amazon →

As an Amazon Associate, we earn from qualifying purchases.
  • 1 frozen banana: The base of your smoothie bowl. Freezing it beforehand ensures a creamy texture. For a lower-carb option, you can substitute with 1/2 an avocado.
  • 1/2 cup frozen cauliflower rice: Adds creaminess without compromising flavor. You can also use Greek yogurt for extra protein.
  • 1/4 cup pecan pieces: Packed with healthy fats and protein. If you’re allergic to nuts, sunflower seeds work well as a substitute.
  • 1/4 cup milk: Use your milk of choice—dairy, almond, or oat milk all work well. For a creamier texture, consider adding coconut milk.
  • 1 tablespoon maple syrup: Provides natural sweetness. If you’re looking for a sugar-free option, try stevia or monk fruit sweetener.
  • 1/2 teaspoon vanilla extract: Adds depth to the flavor. Feel free to skip it if you prefer a more straightforward taste.
  • Pinch of salt: Enhances sweetness and flavor. A pinch of cinnamon can also add warmth to the bowl.

How to Make a Maple Pecan Smoothie Bowl

Making this smoothie bowl is a breeze! Follow these simple steps:

  1. Combine all ingredients in a high-speed blender.
  2. Blend until smooth and creamy, adding more milk if needed to reach your desired consistency.
  3. Pour the mixture into a bowl.
  4. Top with additional pecans, a drizzle of maple syrup, or your favorite toppings.
  5. Serve immediately and enjoy!

Pro Tips for the Perfect Smoothie Bowl

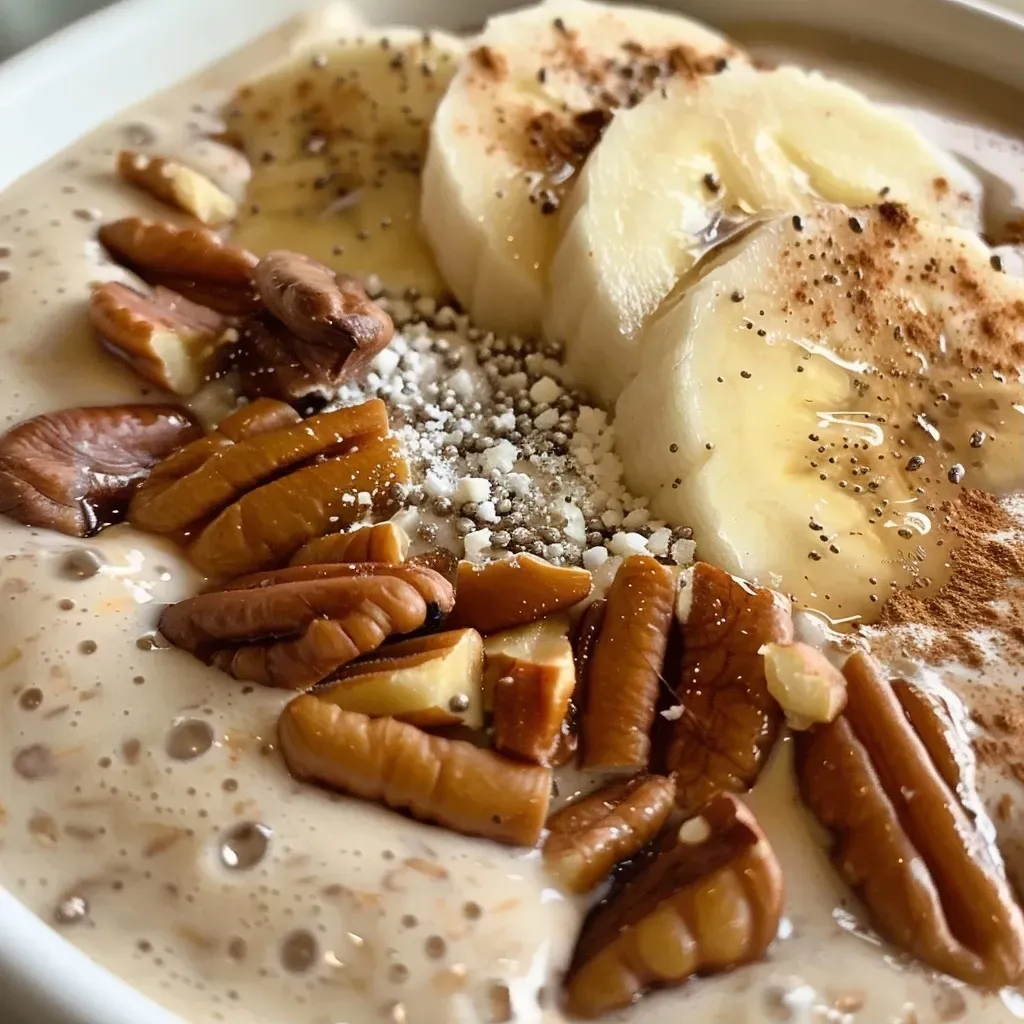
Side view of a delicious Maple Pecan Smoothie Bowl garnished with nuts and colorful toppings.

Here are some expert insights to elevate your smoothie bowl game:

  • Use Quality Ingredients: Fresh and high-quality ingredients will significantly affect the flavor and texture of your smoothie bowl.
  • Adjust Sweetness: Taste your smoothie before pouring it into the bowl. Add more maple syrup if you prefer a sweeter taste.
  • Experiment with Toppings: Try different nuts, seeds, fruits, or granola to add texture and flavor diversity.
  • Blend in Batches: If you’re making multiple servings, blend in batches to avoid overloading your blender.
  • Store Leftovers Wisely: If you have leftover smoothie, store it in an airtight container in the fridge. Consume within 24 hours for the best taste.
  • Mind the Consistency: If your smoothie is too thick, add a splash of milk; if it’s too thin, add more frozen banana or cauliflower rice.
  • Incorporate Protein: For additional protein, toss in a scoop of your favorite protein powder or Greek yogurt.
  • Garnish Creatively: Consider garnishing with fresh mint, berries, or a sprinkle of chia seeds for a touch of flair.

Common Mistakes and Troubleshooting

A few common pitfalls can occur when making your Maple Pecan Smoothie Bowl. Here’s how to avoid them:

  • Too Thick: If your smoothie is too thick to blend, add more milk gradually until you reach the desired consistency.
  • Too Sweet: If you accidentally made it too sweet, balance it out by adding more frozen cauliflower or a splash of lemon juice.
  • Inconsistent Texture: Make sure to blend thoroughly until you achieve a creamy, smooth texture. Stopping too early can leave chunks.
  • Not Enough Flavor: If the flavor is lacking, consider adjusting your toppings or adding a pinch of salt to enhance the overall taste.

Delicious Variations

Don’t be afraid to mix things up! Here are some variations to try:

  • Chocolate Maple Pecan: Add 1 tablespoon of cocoa powder for a chocolatey twist.
  • Berry Maple Pecan: Toss in some frozen mixed berries for a fruity flavor boost.
  • Spiced Maple Pecan: Add a pinch of nutmeg or pumpkin spice for a warm, cozy flavor.
  • Nut-Free Version: Substitute pecans with pumpkin seeds or sunflower seeds for a nut-free alternative.

Storage and Make-Ahead Instructions

If you want to prepare your smoothie bowl in advance, here are some tips:

  • Make Ahead: You can pre-pack your ingredients in a freezer bag and store them in the freezer. Just blend when you’re ready to eat.
  • Store Leftovers: If you have leftover smoothie, keep it in an airtight container in the fridge. It’s best consumed within 24 hours.
  • Refrigerate Toppings: Keep your toppings separated until serving to maintain their texture and freshness.

Frequently Asked Questions

Got questions? Here’s a quick FAQ to address common inquiries:

  • Can I use fresh bananas instead of frozen? Yes, but frozen bananas create a creamier texture. You can add ice cubes if using fresh bananas.
  • How many calories are in a Maple Pecan Smoothie Bowl? The calorie count varies based on ingredients but generally ranges from 300-400 calories per serving.
  • Is this smoothie bowl suitable for meal prep? Absolutely! Prepare the base ahead of time and blend when you’re ready to enjoy.
  • What’s the best way to top my smoothie bowl? Get creative! Fresh fruits, nuts, seeds, and a drizzle of honey or maple syrup are all great options.
  • Can I make this smoothie vegan? Yes! Just ensure that your milk and any additional toppings are plant-based.
  • What’s the best blender for making smoothie bowls? A high-speed blender works best for achieving a silky smooth consistency.
  • Can I add greens to this smoothie bowl? Definitely! Spinach or kale can be added without altering the flavor significantly.
  • How do I make this smoothie bowl thicker? Increase the amount of frozen banana or reduce the amount of liquid for a thicker consistency.

Nutrition Tips and Dietary Adaptations

This Maple Pecan Smoothie Bowl can be adapted to fit various dietary needs:

  • Low-Carb: Substitute the banana with avocado and use unsweetened almond milk.
  • High-Protein: Add a scoop of protein powder or Greek yogurt to boost your protein content.
  • Dairy-Free: Use plant-based milk and yogurt alternatives to make this recipe completely dairy-free.
  • Gluten-Free: All ingredients are naturally gluten-free, making this smoothie bowl a safe choice for those with gluten sensitivities.

Equipment Recommendations

To make your smoothie bowl, here are some recommended tools:

  • High-Speed Blender: Essential for achieving that creamy, smooth texture.
  • Measuring Cups: For accurate ingredient measurements to ensure consistency.
  • Serving Bowls: Choose deep bowls to hold all your toppings and make it visually appealing.

Serving Suggestions

Your Maple Pecan Smoothie Bowl can be enjoyed in various ways:

  • As a Breakfast: Pair it with a slice of whole-grain toast for a balanced breakfast.
  • Post-Workout Snack: A great recovery option with protein and carbs to fuel your body.
  • With Friends: Serve as a group breakfast option, allowing everyone to customize their toppings.

In conclusion, this Maple Pecan Smoothie Bowl is a delicious, nutritious, and easy-to-make dish that fits perfectly into any meal plan. With its rich flavors and customizable options, it’s sure to become a favorite in your kitchen. Give it a try, and you’ll see just how enjoyable healthy eating can be!

Maple Pecan Smoothie Bowl: Ridiculously Easy 5-Minute Joy

Prep Time 5 minutes
Total Time 5 minutes
Servings 1 bowl
Calories 250
This quick and delicious smoothie bowl combines bananas, cauliflower, and pecans for a nutritious treat in just minutes.

Ingredients

Main

  • 1 piece frozen banana
  • 0.5 cup frozen cauliflower rice
  • 0.25 cup pecan pieces
  • 0.25 cup milk
  • 1 tablespoon maple syrup
  • 0.5 teaspoon vanilla extract
  • Pinch salt

Instructions 

  • Combine all ingredients in a high-speed blender.
  • Blend until smooth, adding more milk if needed.
  • Pour into a bowl.
  • Top with pecans or maple syrup.
  • Serve immediately.

Notes

Use frozen ingredients for best texture.
Calories: 250kcal
Cost: $8
Course: Breakfast
Cuisine: American
Keyword: healthy, quick, Smoothie

Unlock the Flavor: The Brown Butter Sage Sauce That Transforms Any Dish

The rich and nutty profile of brown butter paired with the aromatic essence of sage creates an unforgettable sauce that can elevate any meal. In just a few simple steps, you can whip up this versatile sauce that not only tantalizes your taste buds but also packs a punch in protein-forward cooking. Whether you’re tossing it with pasta, drizzling it over roasted vegetables, or using it to enhance proteins like chicken or fish, this Brown Butter Sage Sauce is the culinary secret you’ve been waiting for.

Let’s explore why this sauce is a must-make, the detailed ingredient breakdown, troubleshooting tips, and creative variations to keep your meals exciting.

Why You’ll Love This Recipe

  • Quick and Easy: With just four ingredients and less than 10 minutes of active cooking time, this sauce is perfect for busy weeknights or last-minute dinner guests.
  • Flavor Explosion: The nutty aroma of brown butter combined with the earthy flavor of sage creates a complex taste that enhances any dish.
  • Versatile Pairing: This sauce works beautifully with pasta, gnocchi, roasted vegetables, and proteins, making it a staple in any kitchen.
  • Minimal Ingredients: You only need butter, sage leaves, salt, and pepper, allowing you to create a gourmet sauce without a long shopping list.
  • Health-Conscious: This sauce is rich in flavor without excessive calories, making it a great option for those tracking macros or seeking nutritious meals.

Ingredient Breakdown and Substitutions

Understanding your ingredients is key to mastering this Brown Butter Sage Sauce. Here’s a closer look at what you need and possible substitutions.


Digital Kitchen Scale

★ Recommended Kitchen Tool

Digital Kitchen Scale

Make this recipe even easier with a quality Digital Kitchen Scale — a must-have kitchen staple!


🛒 See Deals on Amazon →

As an Amazon Associate, we earn from qualifying purchases.
  • Butter: Use unsalted butter for the best flavor. If you’re in a pinch, salted butter can be used, but adjust the salt in the sauce accordingly.
  • Sage Leaves: Fresh sage is essential for this recipe, providing its unique flavor. If fresh is unavailable, dried sage can be substituted, though use only a third of the amount as it’s more concentrated.
  • Lemon Juice (optional): A splash of lemon juice brightens the sauce. If you prefer, you can use white wine or apple cider vinegar for a different acidity.
  • Salt and Black Pepper: To taste, but remember that the butter and sage will bring their own flavors, so adjust accordingly.

How to Make Brown Butter Sage Sauce: Step-by-Step Guide

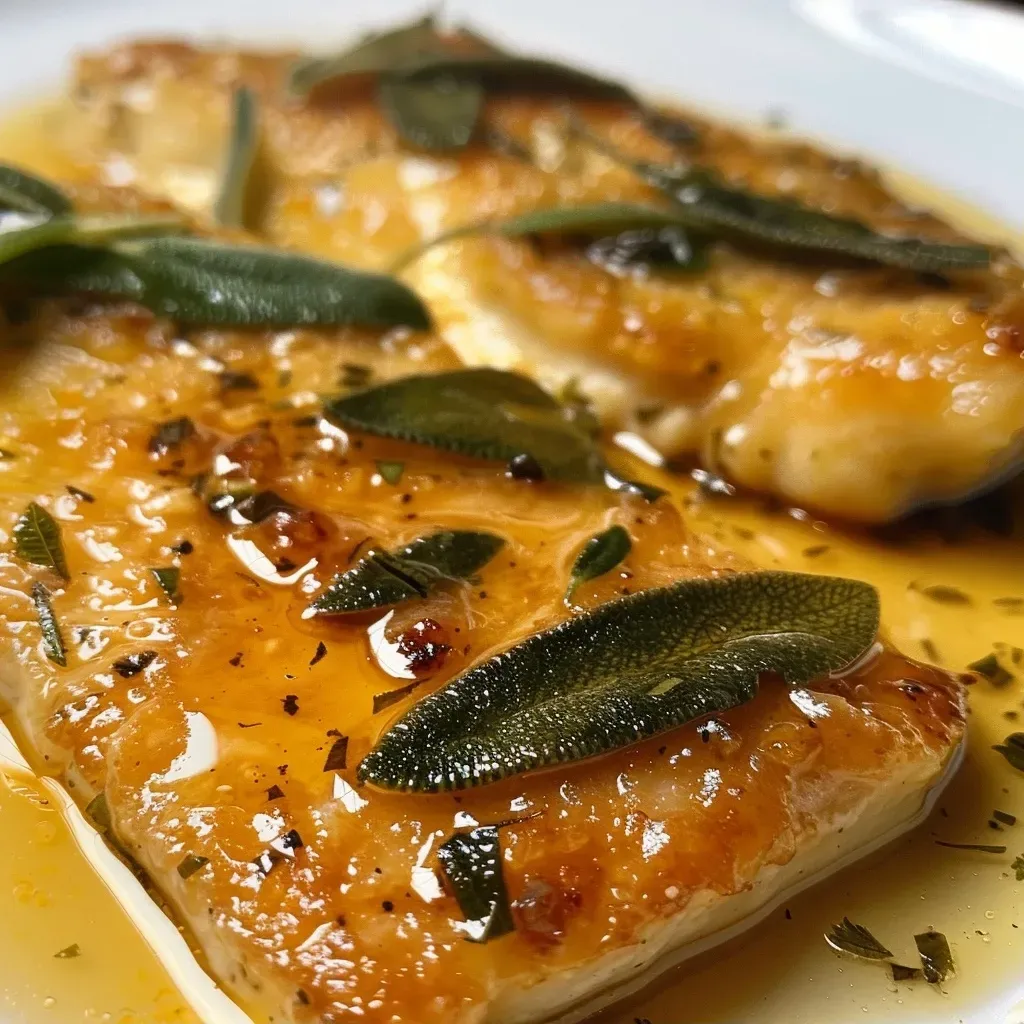
A side perspective of creamy brown butter sage sauce in a dish.

Follow these steps to create your Brown Butter Sage Sauce:

  1. Wash and thoroughly dry the sage leaves with paper towels. Any moisture will cause the hot butter to splutter. Have them ready beside the stove before you start.
  2. Cut the butter into even pieces and place in a light-colored pan over medium heat.
  3. Let the butter melt completely, then continue cooking. It will foam as the water evaporates.
  4. Swirl the pan gently and watch the color. After a few minutes, the foaming will subside and golden brown flecks will form at the bottom. The butter will smell nutty and toasty. This is your brown butter.
  5. Add the sage leaves in a single layer. They’ll sizzle and crisp in about 30 to 60 seconds. The edges will curl slightly and the leaves will become crisp and translucent. If using garlic, add it about 30 seconds before the sage.
  6. Remove from heat. Squeeze in the lemon juice (it will splutter), season with salt and pepper, and swirl gently.
  7. If serving with pasta, toss the cooked pasta directly into the pan with a few tablespoons of reserved pasta water until everything is coated and glossy.

Pro Tips for Perfecting Your Brown Butter Sage Sauce

  • Use a Light-Colored Pan: This helps you monitor the butter’s color as it browns, preventing burning.
  • Watch the Temperature: Keep the heat medium to avoid burning the butter. If the butter starts to smoke, lower the heat.
  • Don’t Rush the Browning: Allow the butter to develop that nutty flavor by cooking it until it’s golden brown, not just melted.
  • Fresh Sage is Key: Fresh sage leaves are non-negotiable for this recipe. They add a vibrancy that dried cannot replicate.
  • Adjust Consistency: If the sauce is too thick, add a bit of reserved pasta water or stock to loosen it to your desired consistency.
  • Experiment with Add-ins: Consider adding garlic, shallots, or even a splash of cream for a richer sauce.
  • Pair with the Right Dishes: This sauce is particularly delicious over butternut squash ravioli, grilled chicken, or simply drizzled over roasted vegetables.
  • Use Immediately: For the best flavor, use the sauce right after making it, as it can lose its crispiness if stored.

Common Mistakes and Troubleshooting

Even simple recipes can lead to mishaps. Here’s how to avoid common pitfalls:

  • Burnt Butter: If your butter turns too dark too quickly, lower the heat and remove it from the burner immediately.
  • Overcooked Sage: If the sage becomes too brown, it can taste bitter. Add it towards the end of the cooking process.
  • Not Enough Flavor: Ensure you season adequately with salt and pepper. Taste before serving!

Flavor Variations to Try

Not only is this Brown Butter Sage Sauce easy to make, but it also allows for creativity in the kitchen. Here are some variations to consider:

  • Garlic Brown Butter Sage Sauce: Add minced garlic to the butter just before it turns brown for added depth.
  • Lemon Brown Butter Sage Sauce: Increase the lemon juice for a zesty twist that pairs well with seafood.
  • Nutty Brown Butter Sage Sauce: Stir in toasted pine nuts or walnuts for a crunch and extra flavor.
  • Herb-Infused Brown Butter Sage Sauce: Combine with other herbs like thyme or rosemary for a more complex sauce.

Storage and Make-Ahead Instructions

This sauce is best enjoyed fresh but can be stored for later use. Here’s how:

  • Storing: Let the sauce cool completely before transferring it to an airtight container. It can be stored in the refrigerator for up to 4 days.
  • Reheating: Gently reheat on the stove over low heat, adding a splash of water or stock to restore its consistency.
  • Make-Ahead: You can prepare the brown butter in advance, but add the sage and seasonings just before use to maintain freshness.

Frequently Asked Questions

  • Can I use olive oil instead of butter? While olive oil can work, it won’t provide the same rich flavor as brown butter.
  • Is this sauce suitable for vegan diets? Yes, substitute butter with a vegan butter alternative.
  • What pasta goes best with this sauce? It pairs excellently with fettuccine, gnocchi, or any pasta that can hold onto the sauce.
  • Can I freeze this sauce? It’s not recommended, as the texture may change upon thawing.
  • What meats pair well with this sauce? Chicken, pork, and fish are excellent choices that complement the nutty flavor.
  • How can I make this sauce spicier? Add a pinch of red pepper flakes or a dash of hot sauce to elevate the heat.
  • How long does it take to make? The entire process takes about 5-10 minutes.
  • Can I add cheese to this sauce? Absolutely! Stir in grated Parmesan for an added layer of flavor.

Nutritional Considerations and Dietary Adaptations

This sauce is not only delicious but can also fit into various dietary plans:

  • Protein Boost: Pair it with high-protein foods like chicken or legumes to enhance your meal.
  • Low-Carb Option: Use it with zucchini noodles or cauliflower rice for a low-carb dish.
  • Dairy-Free Version: As mentioned earlier, use vegan butter for a dairy-free alternative.

Essential Equipment for Success

To make this Brown Butter Sage Sauce, you’ll need:

  • Light-Colored Pan: A stainless steel or light-colored non-stick pan helps monitor browning.
  • Spatula or Wooden Spoon: For stirring and swirling the butter.
  • Measuring Spoon: To measure lemon juice and seasonings accurately.

Serving Suggestions

Now that you’ve mastered the sauce, here’s how to serve it:

  • Pasta Dishes: Toss with your favorite noodles, adding vegetables or protein for a complete meal.
  • Drizzle Over Vegetables: Perfect for enhancing roasted Brussels sprouts or asparagus.
  • Pair with Proteins: Excellent over grilled chicken or fish for a delightful flavor contrast.

By mastering the Brown Butter Sage Sauce, you’re not just preparing a meal; you’re creating an experience. This sauce is a testament to the idea that cooking can be both simple and flavorful, allowing you to hit your protein goals without sacrificing taste. Let this sauce be your go-to for transforming everyday dishes into extraordinary meals.

Brown Butter Sage Sauce

Prep Time 5 minutes
Cook Time 10 minutes
Total Time 15 minutes
Servings 4 servings
Calories 150
A rich and aromatic sauce made by browning butter and crisping sage leaves, perfect for pasta or drizzling over dishes.

Ingredients

Butter

  • ½ cup butter

Sage leaves

  • 14 leaves sage leaves

Lemon juice (optional)

  • 1-2 tsp lemon juice (optional)

Salt and black pepper

  • to taste salt and black pepper

Instructions 

  • Melt butter over medium heat until golden brown and nutty.
  • Add sage leaves; cook until crisp, about 30-60 seconds.
  • Remove from heat, add lemon juice, salt, and pepper; swirl gently.
  • Serve over pasta or dishes of choice.

Notes

Use fresh sage for the best flavor and be careful not to burn the butter.
Calories: 150kcal
Cost: $10
Course: Sauce
Keyword: butter, pasta, sage

Why This Recipe Will Become Your Family’s Favorite

When it comes to comfort food, few dishes can compete with creamy, dreamy mashed potatoes. This kids’ favorite mashed potatoes recipe is not only delicious but also packed with nutrients to fuel your active family. Whether you’re serving it as a side dish for dinner or transforming it into a meal, this recipe offers a perfect balance of flavor and nutrition. Discover how to make mashed potatoes that everyone will love!

Why You’ll Love This Recipe

  • Kid-Friendly: This recipe is designed with kids in mind, ensuring that even the pickiest eaters will ask for seconds.
  • Simple Ingredients: With just a few wholesome ingredients, you can achieve creamy mashed potatoes that taste gourmet.
  • Easy to Customize: Feel free to add your favorite herbs or spices to make this dish uniquely yours.
  • Quick Preparation: This recipe can be made in under 30 minutes, making it perfect for busy weeknights.
  • Nutrient-Rich: Packed with potassium and vitamins, these mashed potatoes provide essential nutrients while satisfying your hunger.

🥘 Ingredients

To create the most delicious mashed potatoes, you’ll need the following ingredients:

  • 2 lbs potatoes: Russet or Yukon Gold are ideal for a fluffy texture.
  • 2 cups whole milk: You can substitute with oat milk for a dairy-free version.
  • 2 tbsp unsalted butter: Adds richness and flavor to the final product.
  • 3 tsp salt: Use about 2.5 tsp during boiling and 0.5 tsp for the final seasoning.

🔪 Step-By-Step Instructions

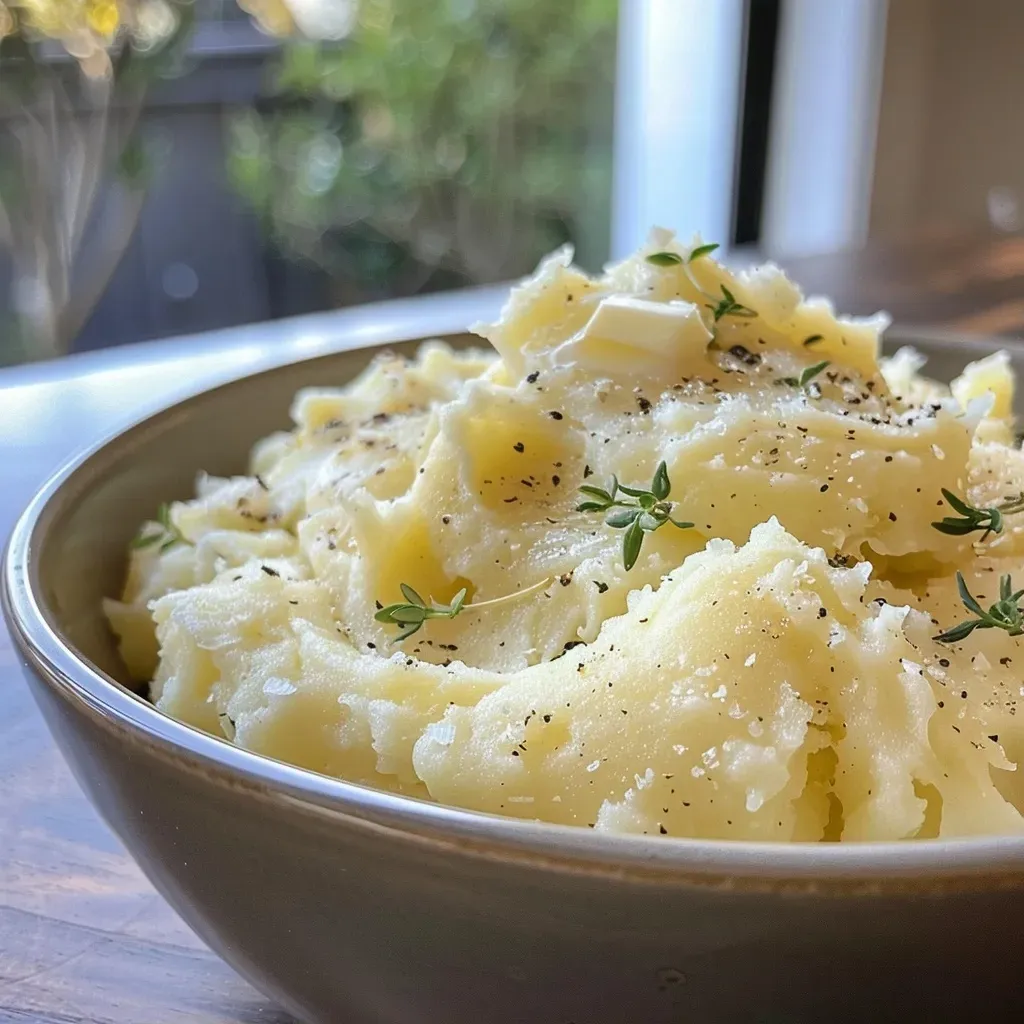
Side view of fluffy mashed potatoes, garnished and ready to serve.

Follow these simple steps to make perfect mashed potatoes:


Digital Kitchen Scale

★ Recommended Kitchen Tool

Digital Kitchen Scale

Make this recipe even easier with a quality Digital Kitchen Scale — a must-have kitchen staple!


🛒 Shop This Tool →

As an Amazon Associate, we earn from qualifying purchases.
  • Peel the potatoes and cut them into halves or smaller pieces to speed up cooking. Tip: Begin with cold water and generous salt to enhance flavor.
  • Bring to a simmer and cook until the potatoes are tender. Doneness test: A knife should slide in easily.
  • Drain the potatoes well to avoid excess moisture.
  • Using a potato masher, mash the potatoes until smooth with no large lumps remaining.
  • Add the butter and mix with a hand mixer just until melted, about 30–60 seconds.
  • Pour in the milk, season with remaining salt, and mix for another 30 seconds. Adjust seasoning to taste.

Pro Tips for the Perfect Mashed Potatoes

  • Quality Ingredients: Use fresh, high-quality potatoes and dairy for the best flavor.
  • Start Cooking in Cold Water: This technique ensures even cooking and avoids gummy potatoes.
  • Don’t Over-Mix: Over-mixing can lead to gluey potatoes; mix just until smooth.
  • Experiment with Flavors: Add garlic, herbs, or cheese for variations that excite your palate.
  • Check for Seasoning: Taste as you go to achieve the perfect balance of flavors.
  • Storage: Store leftovers in an airtight container in the fridge for up to 3 days.
  • Reheat Carefully: Add a splash of milk when reheating to restore creaminess.
  • Make Ahead: Prepare the potatoes and store them in the fridge; reheat gently before serving.

Common Mistakes and Troubleshooting

Even the best chefs can make mistakes! Here’s how to avoid common pitfalls:

  • Gluey Potatoes: Avoid over-mixing; mash until just smooth.
  • Too Watery: Ensure potatoes are drained well; add milk gradually.
  • Flavorless Mash: Season adequately during cooking and before serving.

Variations to Try

Not feeling traditional mashed potatoes? Here are some variations:

  • Garlic Mashed Potatoes: Add roasted garlic for a savory twist.
  • Herbed Mashed Potatoes: Stir in fresh herbs like chives or parsley.
  • Cheesy Mashed Potatoes: Mix in your favorite cheese, such as cheddar or Parmesan.
  • Loaded Mashed Potatoes: Top with bacon bits, sour cream, and green onions.

Storage and Make-Ahead Instructions

Want to save time? Here’s how to prepare in advance:

  • Refrigerate: Store cooled mashed potatoes in an airtight container for up to 3 days.
  • Freezing: Freeze in portions for up to a month. Thaw in the fridge before reheating.
  • Reheat: Add a splash of milk and gently reheat on the stove or in the microwave.

FAQs About Mashed Potatoes

  • What potatoes are best for mashed potatoes? Russet and Yukon Gold are ideal for their fluffy texture.
  • Can I make mashed potatoes ahead of time? Yes, prepare in advance and reheat gently before serving.
  • How do I make mashed potatoes creamy? Use enough milk and butter, and avoid over-mixing.
  • Can I use dairy-free milk? Oat milk or almond milk work well as substitutes.
  • What can I add to mashed potatoes for flavor? Roasted garlic, herbs, cheese, or even sour cream can enhance flavor.
  • How do I fix gluey mashed potatoes? Add a bit of hot milk and mix gently to restore texture.
  • How long do leftovers last? Store in the refrigerator for up to 3 days.
  • Can I freeze leftovers? Yes, freeze in portions for up to a month and reheat when needed.

Nutrition Tips and Dietary Adaptations

For a healthier version of this recipe, consider these tips:

  • Reduce Butter: Cut down on butter and substitute with olive oil for a heart-healthy option.
  • Use Low-Fat Milk: Swap whole milk for low-fat or non-dairy options to lower calories.
  • Add Vegetables: Incorporate steamed cauliflower or carrots for extra nutrients and flavor.

Equipment Recommendations

To achieve the best results, consider using:

  • Potato Masher: A hand-held masher works best for achieving a smooth texture.
  • Hand Mixer: For a creamier finish, a hand mixer can help mix the ingredients thoroughly.
  • Large Pot: A heavy-bottomed pot ensures even cooking and prevents sticking.

Serving Suggestions

Pair your mashed potatoes with a variety of dishes:

  • Meat Dishes: Serve alongside roasted chicken or grilled steak for a hearty meal.
  • Vegetarian Options: Pair with sautéed greens or a hearty salad for a balanced vegetarian meal.
  • As a Base: Use mashed potatoes as a base for shepherd’s pie or a savory casserole.

Now that you know how to make creamy, dreamy mashed potatoes, it’s time to roll up your sleeves and get cooking! With simple ingredients and a few expert tips, you’ll create a dish that satisfies both kids and adults alike. Don’t forget to experiment with flavors and variations to keep things exciting. Happy cooking!

Kids' Favorite Mashed Potatoes

Prep Time 10 minutes
Cook Time 20 minutes
Total Time 30 minutes
Servings 4 servings
Calories 210
A creamy and comforting mashed potatoes recipe perfect for kids, with simple ingredients and easy steps.

Ingredients

Potatoes

  • 2 lbs potatoes (peeled and cut into pieces)
  • 2 cups whole milk (or oat milk for dairy-free)
  • 2 tbsp unsalted butter
  • 3 tsp salt (about 2.5 tsp for boiling water and 0.5 tsp for final seasoning)

Instructions 

  • Peel and cut potatoes, then boil in salted water until tender.
  • Drain potatoes and mash until smooth.
  • Mix in butter until melted and incorporated.
  • Pour in milk, season with salt, and stir until creamy.

Notes

Adjust seasoning to taste and serve warm.
Calories: 210kcal
Cost: $10
Course: Side Dish
Cuisine: American
Keyword: Potatoes

Unlock the Flavor and Nutrition of a Masala Barley Buddha Bowl

Are you ready to elevate your protein game while enjoying a delicious meal? This Masala Barley Buddha Bowl packs a punch with vibrant flavors, wholesome ingredients, and plenty of protein to fuel your day. In this comprehensive guide, we’ll explore what makes this dish a standout, from its nutritious components to practical cooking tips. Let’s dive in!

Why You’ll Love This Recipe

  • Protein Power: With paneer and barley, you’re getting a great protein boost in every serving, helping you hit your daily goals without sacrificing taste.
  • Wholesome Ingredients: Pearl barley is a whole grain that provides a rich source of fiber, keeping you full and satisfied.
  • Vibrant Flavors: The blend of spices and fresh veggies creates a symphony of flavors that will excite your palate.
  • Easy Customization: This recipe can be tailored to suit your dietary needs, making it perfect for vegans, vegetarians, or anyone looking for a healthy meal.
  • Meal Prep Friendly: Ideal for meal prepping, this Buddha bowl can be made ahead of time, saving you time during busy weekdays.

Understanding the Key Ingredients

Let’s break down the ingredients to see what makes this recipe not just nutritious, but also a flavor powerhouse.

Pearl Barley

Pearl barley is a whole grain that offers numerous health benefits:


Digital Kitchen Scale

★ Recommended Kitchen Tool

Digital Kitchen Scale

Make this recipe even easier with a quality Digital Kitchen Scale — a must-have kitchen staple!


🛒 View on Amazon →

As an Amazon Associate, we earn from qualifying purchases.
  • High in Fiber: Aids in digestion and keeps you feeling full longer.
  • Low Glycemic Index: Helps regulate blood sugar levels, making it a smart choice for sustained energy.
  • Versatile: Can be used in soups, salads, and as a base for various bowls.

Paneer

This fresh cheese adds not only protein but also a creamy texture. You can substitute it with tofu for a vegan option.

Fresh Vegetables

Your choice of vegetables—like bell peppers, carrots, and tomatoes—adds essential vitamins and minerals. Feel free to mix it up based on what you have on hand.

Ingredients List

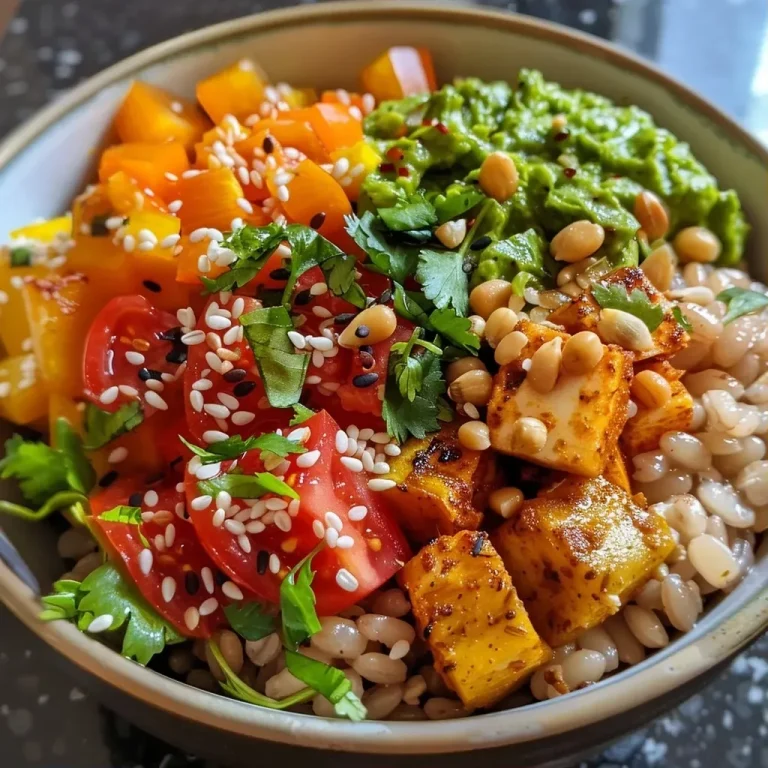
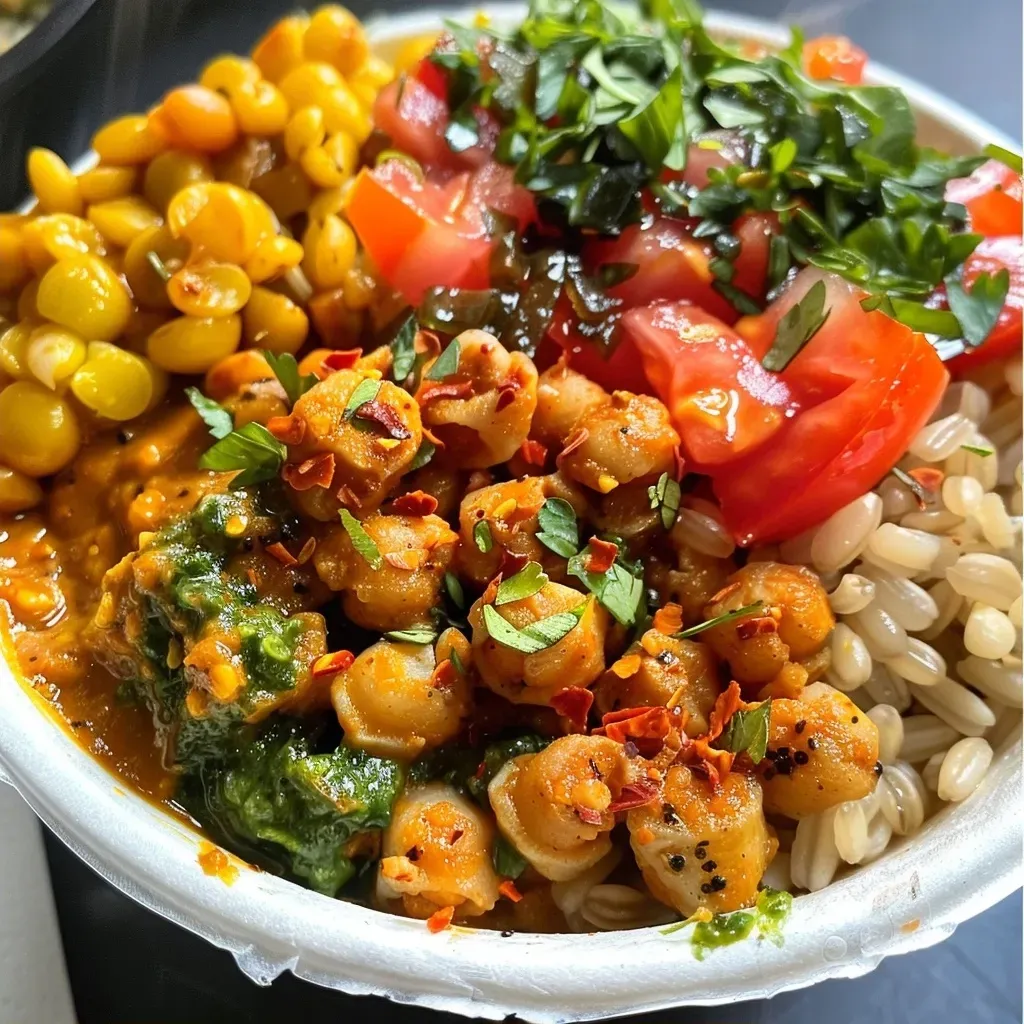
A vibrant Buddha Bowl featuring barley and masala spices, showcasing a variety of vegetables.

Here’s what you’ll need to create your Masala Barley Buddha Bowl:

  • 1/2 cup Pearl Barley
  • 1¼ cup water
  • Pinch of salt
  • 1 tablespoon cooking oil
  • ¼ cup chopped onion
  • ¼ cup carrots (chopped)
  • ¼ cup bell peppers (chopped)
  • 1 Roma tomato, finely chopped
  • 1 teaspoon ginger (paste or grated)
  • 2 teaspoons garlic (grated or paste)
  • ½ teaspoon red chili powder (or finely chopped green chillies)
  • ½ teaspoon coriander powder
  • ¼ teaspoon turmeric
  • 1 teaspoon pav bhaji masala (or garam masala)
  • Salt to taste
  • 1 fresh lemon
  • Chopped cilantro (optional)
  • 16 rectangular pieces of paneer (1-2” long)
  • 2 tablespoons mustard oil (or of choice)
  • 3 tablespoons yogurt
  • 1.5 teaspoon roasted besan
  • ½ teaspoon grated garlic
  • ½ teaspoon red chili powder
  • Pinch of turmeric
  • ½ teaspoon coriander powder
  • ½ teaspoon chaat masala
  • Salt to taste (only if needed)
  • 3 cups packed spring mix
  • 12-16 cherry tomatoes
  • Salt and pepper
  • Squeeze of lemon juice
  • 1 cup yogurt (or more if desired)
  • Pinch of paprika
  • Pinch of rock salt
  • Pinch of cumin

Mastering the Cooking Process

Let’s break down the steps to ensure your Buddha Bowl turns out perfectly every time.

Step-by-Step Instructions

1. **Rinse the Barley**: Start by rinsing the pearl barley under cold water to remove excess starch.

2. **Cook the Barley**: In a pot, combine rinsed barley with water and a pinch of salt. Bring to a boil, then simmer for 30-40 minutes until tender. Alternatively, you can use an Instant Pot for quicker cooking.

3. **Sauté the Vegetables**: In a skillet, heat the cooking oil over medium heat. Add chopped onions, garlic, and ginger, and sauté until fragrant. Add in carrots and bell peppers, cooking until softened.

4. **Add the Spices**: Stir in turmeric, coriander powder, red chili powder, and pav bhaji masala. Mix well to coat the veggies.

5. **Combine Barley and Vegetables**: Once the barley is cooked, fold it into the sautéed vegetables and mix thoroughly.

6. **Prepare the Paneer**: In a separate pan, heat mustard oil and sauté the paneer pieces until golden brown on all sides. Season with salt and pepper.

7. **Assemble Your Bowl**: Start with a base of barley and vegetable mixture, top with sautéed paneer, fresh spring mix, and cherry tomatoes. Drizzle with yogurt and a squeeze of lemon juice.

Pro Tips for Perfecting Your Buddha Bowl

  • Cooking Barley: Always rinse your barley to achieve the perfect texture. Overcooked barley can become mushy.
  • Spice it Up: Adjust the spices according to your heat preference. Start with less chili and add more as desired.
  • Use Fresh Ingredients: Fresh vegetables not only taste better but also provide more nutrients.
  • Make Ahead: Prepare the barley and sauté the vegetables in advance to save time during the week.
  • Experiment with Sauces: Add a variety of sauces or dressings to keep the dish exciting—think tahini, sriracha, or even a peanut sauce.
  • Keep it Balanced: Aim for a balance of protein, healthy fats, and carbs for a well-rounded meal.
  • Garnish Wisely: Fresh herbs like cilantro or parsley can elevate the flavors significantly.
  • Storage Tips: Store leftovers in airtight containers in the fridge for up to three days.

Common Mistakes and Troubleshooting

  • Barley Too Chewy: Make sure to cook it long enough; undercooked barley will be tough.
  • Too Spicy: If you find it too spicy, add a dollop of yogurt to balance the heat.
  • Overcooked Vegetables: Sauté just until tender; they should retain some crunch.
  • Missing Flavor: Ensure you season adequately and taste as you go.

Variations to Try

Here are some fun twists on the Masala Barley Buddha Bowl:

  • Vegan Version: Substitute paneer with tofu and use almond or coconut yogurt for a dairy-free option.
  • Grain Swap: Try quinoa or farro instead of barley for different textures and flavors.
  • Seasonal Veggies: Use whatever fresh vegetables are in season to keep it exciting.
  • Protein Boost: Add grilled chicken, chickpeas, or lentils for extra protein.

Storage and Make-Ahead Instructions

This Masala Barley Buddha Bowl is perfect for meal prep:

  • Store components separately (barley, veggies, paneer) in airtight containers.
  • Refrigerate for up to three days. Reheat the barley and vegetables before serving.
  • Top with fresh ingredients like greens and yogurt just before eating to maintain freshness.

Comprehensive FAQ

  • Can I use a different grain? Yes, you can substitute pearl barley with quinoa or brown rice.
  • Is this recipe gluten-free? Barley is not gluten-free. For gluten-free options, consider quinoa or millet.
  • How can I make this dish spicier? Add more chili powder or include chopped green chilies during cooking.
  • What can I use instead of paneer? Tofu or tempeh work great as protein alternatives.
  • Can I freeze leftovers? Yes, but it’s best to freeze the components separately to maintain texture.
  • How do I make this dish dairy-free? Use plant-based yogurt and skip the paneer.
  • What are the best vegetables to use? Use a mix of your favorites! Bell peppers, zucchini, and spinach are great options.
  • How long does it take to prepare? Expect about 15 minutes for prep and 30-40 minutes for cooking.

Nutritional Tips and Dietary Adaptations

This recipe is highly adaptable to fit various dietary needs:

  • High Protein: The combination of barley and paneer ensures a balanced protein intake.
  • Low Carb Option: Substitute barley with cauliflower rice for a low-carb version.
  • Rich in Fiber: The whole grains and fresh veggies contribute to your daily fiber intake.

Equipment Recommendations

Here’s what you’ll need in your kitchen to whip up this Buddha Bowl:

  • Instant Pot: For perfectly cooked barley without the hassle.
  • Non-stick Skillet: Ideal for sautéing vegetables and paneer without sticking.
  • Measuring Cups and Spoons: Accurate measurements ensure consistent results.

Serving Suggestions

Serve your Masala Barley Buddha Bowl warm or at room temperature, garnished with:

  • Fresh herbs: Like cilantro or parsley for an added flavor boost.
  • Extra lemon wedges: A squeeze of lemon brightens each bite.
  • Chilled Yogurt: For a creamy finish, drizzling yogurt over the top brings everything together.

Conclusion: Your New Go-To Recipe

Incorporating this Masala Barley Buddha Bowl into your weekly meal prep not only ensures you’re hitting your protein goals but does so without sacrificing flavor. With its customizable nature, vibrant ingredients, and ease of preparation, it’s a recipe you’ll want to return to time and again. Get ready to enjoy a nutritious, satisfying meal that fuels your fitness journey while tantalizing your taste buds!

Masala Barley Buddha Bowl

Prep Time 15 minutes
Cook Time 30 minutes
Total Time 45 minutes
Servings 4 servings
Calories 450
A nutritious and flavorful bowl combining hearty pearl barley with fresh vegetables and spiced paneer, perfect for a wholesome meal.

Ingredients

Grains

  • 0.5 cup Pearl Barley
  • 1.25 cup water
  • Pinch salt

Vegetables

  • 0.25 cup chopped onion
  • 0.25 cup carrots (chopped)
  • 0.25 cup bell peppers (chopped)
  • 1 Roma tomato finely chopped tomato
  • 1 teaspoon ginger (paste or grated)
  • 2 teaspoons garlic (grated or paste)
  • 0.5 teaspoon red chili powder (or green chillies)
  • 0.5 teaspoon coriander powder
  • 0.25 teaspoon turmeric
  • 1 teaspoon pav bhaji masala (or garam masala)

Paneer

  • 16 rectangular pieces paneer (1-2” long)
  • 2 tablespoons mustard oil (or of choice)
  • 3 tablespoons yogurt
  • 1.5 teaspoons roasted besan
  • 0.5 teaspoon grated garlic
  • 0.5 teaspoon red chili powder
  • Pinch turmeric
  • 0.5 teaspoon coriander powder
  • 0.5 teaspoon chaat masala

Salad & Garnish

  • 3 cups packed Spring mix
  • 12-16 Cherry Tomatoes Cherry Tomatoes
  • to taste Salt and pepper
  • squeeze lemon juice
  • 1 cup yogurt (or more if desired)
  • Pinch paprika
  • Pinch rock salt
  • Pinch cumin

Instructions 

  • Cook pearl barley with water and a pinch of salt until tender, about 25 minutes.
  • Sauté chopped vegetables and spices in oil until soft, then add chopped tomato and cook for 5 minutes.
  • Grill or pan-fry paneer pieces until golden brown.
  • Assemble the bowl with cooked barley, sautéed vegetables, paneer, and fresh greens. Drizzle with yogurt and lemon juice, then garnish with cherry tomatoes and spices.
  • Serve immediately and enjoy a wholesome, flavorful meal.

Notes

You can customize the spice level and add your favorite vegetables for variety.
Calories: 450kcal
Cost: $15
Course: Main Course
Cuisine: Indian-inspired
Keyword: Barley, Paneer, vegetables

Welcome to your next kitchen adventure! This cranberry orange bread recipe is not only a delightful way to kick-start your day, but it’s also packed with nutrients that help meet your macro goals. In this comprehensive guide, you will discover how to make a wholesome loaf that perfectly balances fruity flavors with whole grains. Whether you’re looking for a nutritious breakfast option or a tasty snack, this recipe will not disappoint. Let’s dive in!

Why You’ll Love This Recipe

This cranberry orange bread isn’t just delicious; it comes with a host of benefits:

  • Nutrient-packed: Made with whole wheat pastry flour and oats, this recipe provides essential vitamins and minerals.
  • Protein-rich: The addition of egg and almond milk helps boost the protein content for a satiating snack.
  • Versatile: Enjoy it fresh, toasted, or even as a base for French toast—this bread adapts to your cravings!
  • Easy to make: With simple ingredients and straightforward instructions, this recipe is suitable for cooks of all skill levels.
  • Great for meal prep: Make a batch at the beginning of the week for quick breakfasts or snacks on-the-go.

Ingredients Breakdown

Here’s what you’ll need to whip up this delectable cranberry orange bread:


Professional Chef Knife Set

★ Recommended Kitchen Tool

Professional Chef Knife Set

Make this recipe even easier with a quality Professional Chef Knife Set — a must-have kitchen staple!


🛒 Check Price on Amazon →

As an Amazon Associate, we earn from qualifying purchases.
  • 2 cups whole wheat pastry flour: This flour provides a nutty flavor and is rich in fiber.
  • 1 cup uncooked rolled oats: Adds texture and heartiness.
  • 1 tbsp baking powder: Essential for helping the bread rise.
  • 1/2 tsp ground cinnamon: Adds warmth and depth of flavor.
  • 1/4 tsp sea salt: Enhances the overall taste.
  • 1 cup dried cranberries: These provide sweetness and tartness, elevating the flavor profile.
  • 1 cup unsweetened almond milk: A great dairy-free option that keeps the bread moist.
  • 1/2 cup orange juice: Adds natural sweetness and balances the tart cranberries.
  • 1 egg: Binds the ingredients together and contributes to the bread’s structure.
  • 2 tsp orange zest: Infuses the bread with a vibrant citrus flavor.
  • 1 tbsp coconut oil: Enhances moisture and adds a subtle coconut flavor.

Substitutions & Modifications

If you need to make adjustments, here are some options:

  • Flour: Substitute with all-purpose flour if whole wheat isn’t available, but expect a lighter texture.
  • Sweeteners: Use maple syrup or honey instead of dried cranberries for a different sweetness.
  • Milk: Any plant-based or regular milk can work in place of almond milk.
  • Egg replacement: For a vegan option, use flaxseed meal mixed with water (1 tbsp flaxseed + 2.5 tbsp water = 1 egg).

How to Make Cranberry Orange Bread

Step-by-Step Instructions

Ready to get started? Follow these simple steps:

  1. Preheat your oven to 375°F (190°C) and grease a loaf pan with coconut oil or line it with parchment paper.
  2. In a large mixing bowl, combine the whole wheat pastry flour, oats, baking powder, cinnamon, sea salt, and dried cranberries. Stir to combine.
  3. In another bowl, whisk together the almond milk, orange juice, egg, orange zest, and coconut oil.
  4. Pour the wet mixture into the dry ingredients, and stir until just combined. The batter will be thick and lumpy.
  5. Spread the batter evenly into the prepared loaf pan.
  6. Bake for 25-30 minutes, or until the sides pull away from the pan and a knife inserted into the center comes out clean.
  7. Allow to cool on a rack. Serve warm or at room temperature, and slice into thick pieces.

Pro Tips for Perfecting Your Bake

A moist slice of cranberry orange bread highlighting the texture and ingredients, captured from the side.

To ensure your cranberry orange bread turns out perfectly every time, consider these tips:

  • Don’t overmix: Stir until just combined to keep the bread light and fluffy.
  • Check for doneness: Oven temperatures can vary; start checking a few minutes before the timer goes off.
  • Let it cool: Cooling helps develop the flavors and makes slicing easier.
  • Add nuts: For added crunch, fold in chopped nuts like walnuts or pecans before baking.
  • Use fresh cranberries: If you prefer a tart flavor, substitute dried cranberries with fresh ones, but increase the sugar slightly.

Common Mistakes & Troubleshooting

Even the best bakers can encounter challenges. Here are some common mistakes and how to fix them:

  • Dense bread: This often results from overmixing. Mix just until combined.
  • Too dry: If your bread is dry, consider adding a splash more almond milk or orange juice next time.
  • Burnt edges: Use a light-colored loaf pan to prevent the edges from browning too quickly.
  • Flavorless bread: Always taste your batter and adjust sweetness or seasoning before baking.

Variations to Try

Looking to switch things up? Here are several variations of your cranberry orange bread to keep it exciting:

  • Chocolate Chip Cranberry Bread: Fold in dark chocolate chips for an indulgent twist.
  • Nutty Orange Bread: Add a mix of nuts for crunch and added nutrition.
  • Spiced Pumpkin Bread: Substitute pumpkin puree for half of the wet ingredients and add pumpkin spice.
  • Gluten-Free Version: Replace the flour with a gluten-free blend and adjust the moisture as needed.

Storage & Make-Ahead Instructions

Want to enjoy your bread later? Here’s how to store it:

  • Room Temperature: Keep the bread in an airtight container at room temperature for up to 3 days.
  • Refrigerator: Store in the fridge for up to a week, but expect it to dry out slightly.
  • Freezer: Wrap slices in plastic wrap and place them in a freezer bag for up to 3 months. Thaw at room temperature or warm in the oven.

Frequently Asked Questions

Here are some common questions about cranberry orange bread:

  • Can I use fresh cranberries? Yes, but increase the sugar content to balance the tartness.
  • How can I make this bread vegan? Substitute the egg with a flaxseed meal egg and use plant-based milk.
  • Is this bread suitable for breakfast? Absolutely! It’s a great source of energy to kick-start your day.
  • What can I serve with it? Try it with almond butter or a spread of cream cheese for added flavor.
  • Can I add other fruits? Yes, diced apples or pears can add moisture and sweetness.
  • Can I double the recipe? Definitely! Just ensure you use a larger pan or bake in batches.
  • What if my bread comes out too crumbly? This could mean the flour was overmeasured or too dry. Measure carefully next time.
  • How do I make a glaze? Mix powdered sugar with a bit of orange juice and drizzle it over the cooled bread.

Nutrition Tips & Dietary Adaptations

This cranberry orange bread is not only delicious but also nutritious. Here’s how to adapt it for various dietary needs:

  • High-Protein: Add protein powder to the flour mixture to boost protein content.
  • Low-Sugar: Use unsweetened applesauce in place of some of the sugar for a healthier option.
  • Gluten-Free: Ensure you use certified gluten-free ingredients.

Equipment Recommendations

To achieve the best results, having the right tools is essential:

  • Loaf Pan: A good quality non-stick loaf pan ensures easy release of the bread.
  • Mixing Bowls: Use large bowls for mixing dry and wet ingredients separately.
  • Measuring Cups & Spoons: Accurate measurements are crucial for baking success.
  • Cooling Rack: Helps cool the bread evenly and prevents sogginess.

Serving Suggestions

Once your cranberry orange bread is baked and cooled, consider serving it:

  • Warm: Enjoy fresh out of the oven as a comforting treat.
  • Toasted: Slice and toast for a crispy exterior that complements the soft interior.
  • With Spreads: Serve with almond butter or cream cheese for added flavor.
  • As French Toast: Dip slices in egg mixture and fry for a delicious breakfast twist.

In conclusion, this cranberry orange bread is your ticket to delicious, nutritious eating that fits seamlessly into your lifestyle. It’s time to grab your ingredients and get baking! You’ve got this!

Cranberry Orange Bread

Prep Time 10 minutes
Cook Time 30 minutes
Total Time 40 minutes
Servings 8 slices
Calories 180
A wholesome and flavorful bread combining the tartness of cranberries with the bright citrus notes of orange, perfect for breakfast or a snack.

Ingredients

Dry ingredients

  • 2 cups whole wheat pastry flour
  • 1 cup uncooked rolled oats
  • 1 tbsp baking powder
  • 1/2 tsp ground cinnamon
  • 1/4 tsp sea salt

Wet ingredients

  • 1 cup dried cranberries
  • 1 cup unsweetened almond milk
  • 1/2 cup orange juice
  • 1 egg egg
  • 2 tsp orange zest
  • 1 tbsp coconut oil (melted, plus more for greasing)

Instructions 

  • Preheat oven to 375°F (190°C) and grease a loaf pan with coconut oil.
  • Mix dry ingredients and cranberries in a bowl.
  • Whisk wet ingredients including egg, orange zest, and coconut oil.
  • Combine wet and dry mixtures until just mixed; batter will be thick.
  • Pour batter into pan and bake for 25-30 minutes until golden and a toothpick comes out clean.
  • Cool slightly before slicing and serving.

Notes

Store in an airtight container for up to 3 days or freeze for longer storage.
Calories: 180kcal
Cost: $15
Course: Breakfast
Cuisine: American
Keyword: Bread, cranberry, Orange

Unlock the Secrets of Pecan Pie Cobbler

Welcome to your new favorite dessert: Pecan Pie Cobbler! This recipe combines the indulgent flavors of traditional pecan pie with the comforting texture of a cobbler, creating a deliciously satisfying treat that fits perfectly into your high-protein lifestyle. In this comprehensive guide, you’ll discover how to make this delightful dessert while keeping your nutritional goals in check. Whether you’re a seasoned home cook or just starting your culinary journey, this recipe will empower you to create something truly special.

With a blend of rich flavors, easy preparation, and the ability to customize, this Pecan Pie Cobbler is a must-try. Let’s dive into why you’ll love this recipe and how it can become a staple in your kitchen!

Why You’ll Love This Recipe

  • High Protein Content: Packed with pecans, this dessert is not only delicious but also offers a significant protein boost, making it a great post-workout treat.
  • Quick Preparation: With simple ingredients and straightforward steps, you can whip up this cobbler in no time, perfect for last-minute gatherings or sweet cravings.
  • Customizable Flavors: Add your favorite spices or swap ingredients to suit your taste. From chocolate chips to a dash of cinnamon, the possibilities are endless.
  • Guilt-Free Indulgence: Enjoy the sweetness without the guilt! This recipe allows you to satisfy your sweet tooth while staying within your dietary goals.
  • Versatile Serving Options: Serve warm with a scoop of ice cream, or enjoy it cold as a snack. This dish is delicious any time of day!

Ingredients Breakdown

Before you start cooking, let’s break down the ingredients you’ll need for this Pecan Pie Cobbler. Each component plays a vital role in achieving the perfect balance of flavor and texture.


Digital Kitchen Scale

★ Recommended Kitchen Tool

Digital Kitchen Scale

Make this recipe even easier with a quality Digital Kitchen Scale — a must-have kitchen staple!


🛒 See Deals on Amazon →

As an Amazon Associate, we earn from qualifying purchases.
  • 1/3 cup butter (melted): Adds richness and moisture to the cobbler. You can substitute with coconut oil for a dairy-free option.
  • 1 ¼ cups all-purpose flour: The base for the cobbler. Whole wheat flour can be used for a healthier alternative.
  • ¾ cup granulated sugar: Sweetens the cobbler; consider using a sugar substitute like stevia if you’re cutting back on sugar.
  • ½ teaspoon baking powder: Helps the cobbler rise and achieve that fluffy texture.
  • ½ teaspoon salt: Balances the sweetness; essential for flavor.
  • 1 cup milk: Provides moisture. Almond milk or oat milk works well for a dairy-free version.
  • 1 teaspoon vanilla extract: Enhances flavor—never skip this!
  • 2 cups chopped pecans: The star of the dish! Use fresh pecans for optimal flavor and texture.
  • 1 cup packed brown sugar: Offers a deeper sweetness and caramel-like flavor.
  • ¼ cup corn syrup: Traditionally used in pecan pie, it adds a distinct texture and sweetness.
  • 1 cup boiling water: This is poured over the layered ingredients before baking, creating a unique texture.

Pro Tips for Perfect Pecan Pie Cobbler

Juicy Pecan Pie Cobbler slice viewed from the side, highlighting earthy pecans and rich caramel layers.

Here are some expert insights to help you achieve the best results with your Pecan Pie Cobbler:

  • Use Fresh Ingredients: Fresh pecans and high-quality vanilla extract can elevate the flavor of your cobbler.
  • Don’t Overmix: When combining your ingredients, mix just until combined to maintain a light texture.
  • Layer Properly: Ensure you layer the pecans and batter correctly for the best texture and flavor contrast.
  • Keep an Eye on Baking Time: Ovens vary, so start checking for doneness a few minutes before the recommended baking time.
  • Let It Rest: Allow your cobbler to cool slightly before serving; this helps it set and enhances the flavors.
  • Experiment with Nuts: Try mixing in walnuts or hazelnuts for a different texture and flavor profile.
  • Serve with Toppings: Top with Greek yogurt or whipped cream for added protein and creaminess.
  • Adjust Sweetness: Taste your filling before baking; you can always add more sugar or sweetness to suit your preference.
  • Keep Leftovers Stored Properly: Store any leftovers in an airtight container in the fridge to maintain freshness.
  • Use a Kitchen Scale: For precision in measurements, especially when dealing with flour and sugar.

Avoid These Common Mistakes

To ensure your Pecan Pie Cobbler turns out perfectly, be aware of these common pitfalls:

  • Skipping the Boiling Water: This step is crucial for achieving the right texture; don’t skip it!
  • Using Old Ingredients: Expired baking powder or stale pecans can ruin your dessert.
  • Not Preheating the Oven: Always preheat your oven to ensure even baking.
  • Overbaking: Keep an eye on your cobbler to avoid a dry texture; it should be golden brown and slightly firm to the touch.

Variations to Try

Want to mix things up? Here are some delicious variations to customize your Pecan Pie Cobbler:

  • Chocolate Pecan Cobbler: Add 1 cup of chocolate chips to the filling for a rich, decadent twist.
  • Coconut Pecan Cobbler: Incorporate 1/2 cup of shredded coconut for a tropical flair.
  • Maple Pecan Cobbler: Substitute maple syrup for corn syrup for a unique flavor profile.
  • Spiced Pecan Cobbler: Add 1 teaspoon of cinnamon or nutmeg to the batter for a warm, spiced flavor.

Storage and Make-Ahead Instructions

This Pecan Pie Cobbler is easy to make ahead and store:

  • Storing: Keep in an airtight container in the fridge for up to 4 days. Reheat individual portions in the microwave.
  • Freezing: You can freeze the baked cobbler for up to 3 months. Thaw overnight in the fridge before reheating.
  • Make-Ahead: Prepare the filling and assemble the cobbler a day in advance. Just bake when ready to serve.

Frequently Asked Questions (FAQs)

Here are some common questions about Pecan Pie Cobbler:

  • Can I use other nuts?: Absolutely! Feel free to substitute with walnuts or hazelnuts.
  • Is this recipe gluten-free?: You can use a gluten-free flour blend to make it gluten-free.
  • How do I know when it’s done?: The top should be golden and set, and a toothpick inserted should come out clean.
  • Can I make this cobbler in advance?: Yes, it can be made ahead and stored in the fridge for a few days.
  • What’s the best way to serve it?: Warm with a scoop of ice cream or a dollop of whipped cream for extra indulgence.
  • Can I add fruit?: Yes! Sliced bananas or berries can be added for a fruity twist.
  • Will it be too sweet?: You can adjust the sugar to your taste preference. Start with less and add if needed.
  • How do I prevent the filling from being too runny?: Ensure you mix your ingredients well and use the correct ratios for the best texture.

Nutritional Tips and Dietary Adaptations

Maintaining your nutrition goals while enjoying dessert is crucial. Here are some tips:

  • Protein Boost: Add a scoop of protein powder to the batter for an extra protein kick.
  • Lower Sugar Options: Use monk fruit or erythritol as sweeteners to reduce sugar content.
  • Healthy Fats: Substitute half of the butter with Greek yogurt for lower fat content without compromising flavor.

Essential Equipment Recommendations

To make your Pecan Pie Cobbler, you’ll need a few essential tools:

  • Mixing Bowls: Use a large mixing bowl for combining wet and dry ingredients thoroughly.
  • Whisk: A good whisk helps mix your batter evenly.
  • Measuring Cups and Spoons: Accurate measurements are crucial for baking success.
  • Baking Dish: A 9×13-inch baking dish is perfect for this recipe.
  • Oven Mitts: Always protect your hands when handling hot dishes!

Serving Suggestions

To enhance your Pecan Pie Cobbler experience, consider these serving suggestions:

  • With Ice Cream: A scoop of vanilla or caramel ice cream pairs wonderfully with the warm cobbler.
  • With Whipped Cream: Top with freshly whipped cream for added richness.
  • With Nuts and Fruits: Garnish with additional pecans or fresh fruits for a delightful crunch and flavor contrast.

Wrapping It Up

Making Pecan Pie Cobbler is not just about creating a dessert; it’s an opportunity to indulge in flavors while sticking to your protein goals. With this comprehensive guide, you have everything you need to create a delicious, satisfying dessert that you’ll want to share with friends and family. So roll up your sleeves, gather your ingredients, and get ready to impress with this guilt-free Pecan Pie Cobbler recipe!

Pecan Pie Cobbler

Prep Time 15 minutes
Cook Time 45 minutes
Total Time 1 hour
Servings 8 pieces
Calories 350
A deliciously sweet dessert combining the richness of pecans with a buttery cobbler topping, perfect for any occasion.

Ingredients

Dough and Topping

  • 1/3 cup butter (melted)
  • 1 ¼ cups all-purpose flour
  • ¾ cup granulated sugar
  • 1/2 teaspoon baking powder
  • ½ teaspoon salt
  • 1 cup milk
  • 1 teaspoon vanilla extract
  • 2 cups chopped pecans
  • 1 cup packed brown sugar
  • 1/4 cup butter (melted)
  • 1 cup boiling water
  • 1/4 cup corn syrup

Instructions 

  • Preheat oven to 350°F (175°C). Mix melted butter, flour, sugar, baking powder, salt, milk, and vanilla to make the batter.
  • Pour the batter into a greased baking dish. Spread chopped pecans evenly over the batter.
  • In a separate bowl, combine brown sugar, melted butter, boiling water, and corn syrup. Pour over the pecans.
  • Bake for 45 minutes or until bubbly and golden brown.

Notes

Serve warm with a scoop of vanilla ice cream for extra indulgence.
Calories: 350kcal
Cost: $12
Course: Dessert
Cuisine: American
Keyword: Pecans