Author

Ethan

Browsing

Are you ready to enjoy the festive flavors of gingerbread while hitting your fitness goals? These gingerbread protein muffins are not just a treat for your taste buds; they are a powerhouse of nutrition! With 20g of protein per muffin, they’re perfect for a post-workout snack, breakfast on the go, or an afternoon pick-me-up. This recipe is easy to make and uses wholesome ingredients that support your health without sacrificing flavor. Let’s dive into why these muffins are a must-try!

Why You’ll Love This Recipe

  • Protein-packed: Each muffin contains 20g of protein, making them a great addition to your fitness regimen.
  • Flavorful and satisfying: The warm spices of ginger and cinnamon create a comforting taste that evokes holiday memories.
  • Simple ingredients: Made with clean, high-quality ingredients like almond flour and protein powder, these muffins are easy to whip up.
  • Versatile: Enjoy them as a snack, breakfast, or even dessert. They’re perfect any time of day!
  • Make-ahead friendly: These muffins store well, making them perfect for meal prep!

Detailed Ingredient Breakdown

Now, let’s look at each ingredient you’ll need to create these delightful gingerbread protein muffins:

  • 1 cup blanched almond flour (100g): A low-carb, gluten-free flour that adds moisture and flavor.
  • 3/4 cup Nuzest Vanilla Protein Powder (70g): Provides the essential protein boost. You can substitute with another brand if preferred.
  • 1/3 cup tapioca flour (40g): Helps with texture and provides chewiness. You can use arrowroot flour as an alternative.
  • 1/4 cup coconut flour (30g): Adds fiber and absorbs moisture, keeping the muffins from being too wet.
  • 1 + 1/2 tsp baking soda: Acts as a leavening agent to help the muffins rise.
  • 2 tsp ground cinnamon: Adds warmth and depth of flavor.
  • 2 tsp ground ginger: The star spice of gingerbread, providing that classic flavor.
  • 1/2 tsp nutmeg: Enhances the warmth and aroma.
  • 1/2 tsp salt: Balances the sweetness and enhances flavors.
  • 1 + 1/4 cup water: To hydrate the dry ingredients and create the batter.
  • 4 large eggs: Provides structure and moisture.
  • 2 Tbsp molasses: Adds sweetness and a rich flavor, quintessential for gingerbread.

Step-by-Step Instructions: Making Gingerbread Protein Muffins

Follow these simple steps to create your own batch of protein muffins:


5-Speed Electric Hand Mixer

★ Recommended Kitchen Tool

5-Speed Electric Hand Mixer

Make this recipe even easier with a quality 5-Speed Electric Hand Mixer — a must-have kitchen staple!


🛒 Shop This Tool →

As an Amazon Associate, we earn from qualifying purchases.
  1. Preheat the oven to 350 degrees F (175 degrees C).
  2. In a large mixing bowl, combine all the dry ingredients, including almond flour, tapioca flour, coconut flour, protein powder, baking soda, cinnamon, ginger, nutmeg, and salt.
  3. In a separate bowl, mix the wet ingredients: water, eggs, and molasses. Stir well until combined.
  4. Pour the wet mixture into the dry ingredients and stir until just combined. Avoid over-mixing.
  5. Pour the batter into a silicone-lined muffin pan (or grease it well) and fill each cup about 3/4 full.
  6. Place the muffins in the middle rack of the oven and bake at 350 degrees F for 20-22 minutes, or until a toothpick inserted in the center comes out clean.
  7. Cool in the pan for about 5 minutes, then transfer to a cooling rack to cool completely. Store in the fridge for best freshness.

Pro Tips for Success
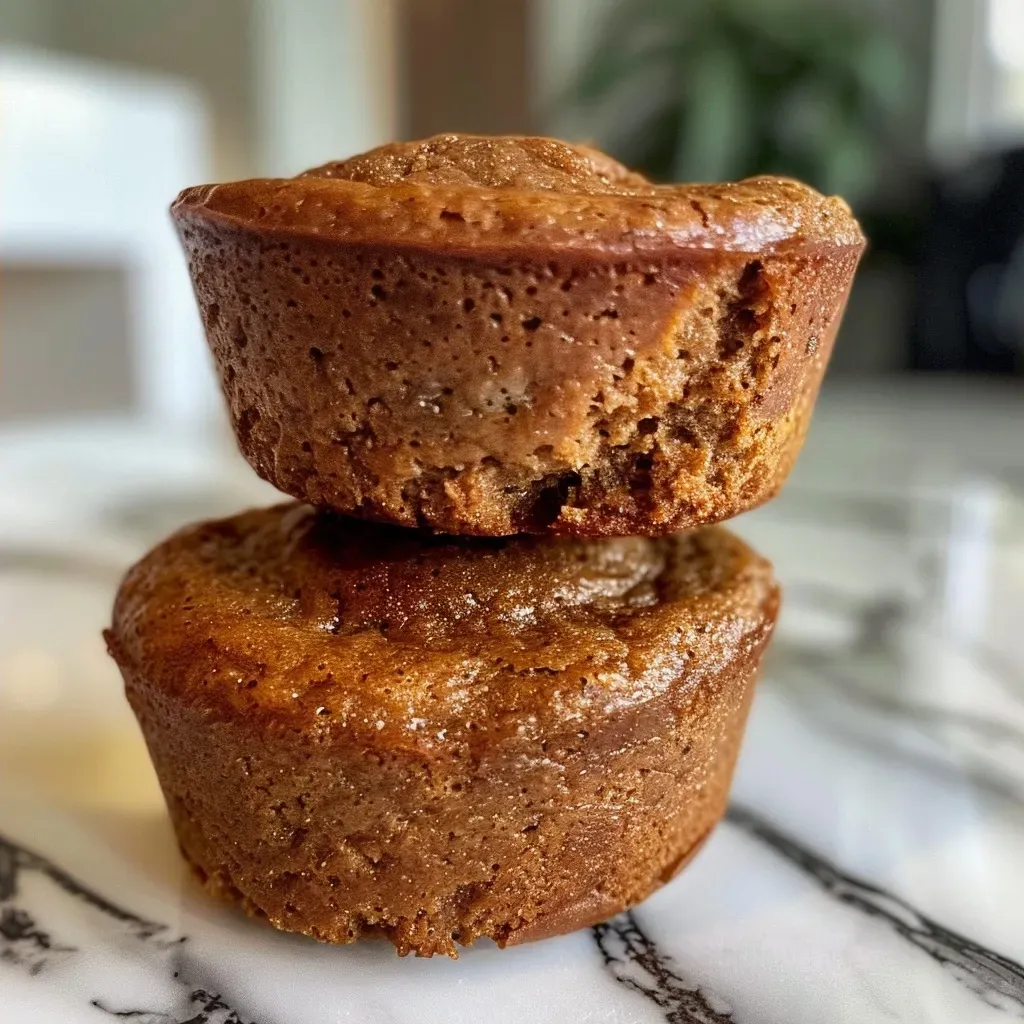
Side view of freshly baked gingerbread protein muffins in a rustic setting.

To ensure your gingerbread protein muffins come out perfectly, keep these tips in mind:

  • Measure accurately: Use a kitchen scale for precise measurements, especially for the flours.
  • Don’t overmix: Overmixing can lead to dense muffins. Mix just until combined.
  • Check for doneness: Use a toothpick to check if the muffins are done; they should come out clean.
  • Cool properly: Let the muffins cool completely before storing to prevent them from becoming soggy.
  • Experiment with flavors: Feel free to add nuts, chocolate chips, or dried fruit for extra flavor and texture.
  • Use silicone liners: They make it easier to remove the muffins without sticking.
  • Don’t skip the molasses: It’s crucial for that traditional gingerbread flavor and moisture.
  • Store properly: Keep in an airtight container in the fridge for up to a week, or freeze for longer storage.

Common Mistakes and Troubleshooting

Encountering issues while baking? Here are some common mistakes and how to fix them:

  • Muffins are too dry: Ensure you’re measuring the flour correctly and not overbaking them.
  • Muffins don’t rise: Check that your baking soda is fresh; it’s essential for rising.
  • Muffins are too dense: This can happen from overmixing the batter. Mix just until combined.
  • Flavor is lacking: Consider adding extra spices or a touch of vanilla extract to enhance flavor.

Delicious Variations to Try

Want to mix things up? Here are some delicious variations of the gingerbread protein muffins:

  • Chocolate Chip Gingerbread Muffins: Add mini chocolate chips to the batter before baking for a sweet twist.
  • Nutty Gingerbread Muffins: Fold in chopped walnuts or pecans for added crunch and nutrition.
  • Fruit-Infused Muffins: Add dried cranberries or raisins for a fruity burst of flavor.
  • Spiced Pumpkin Muffins: Replace some of the wet ingredients with canned pumpkin for a seasonal spin.

Storage and Make-Ahead Instructions

These muffins are excellent for meal prep! Here’s how to store them:

  • Refrigerate: Store in an airtight container in the fridge for up to a week.
  • Freeze: Freeze muffins in a single layer on a baking sheet, then transfer to a zip-top bag for up to 3 months. Thaw in the fridge or at room temperature.
  • Reheat: Warm in the microwave for about 15-20 seconds before enjoying.

Frequently Asked Questions

Got questions? Here are some common inquiries about gingerbread protein muffins:

  • Can I substitute the protein powder? Yes, you can use any protein powder you prefer, but the flavor may vary.
  • How long do these muffins last? They can be stored in the fridge for up to one week or frozen for three months.
  • Can I make these muffins vegan? Yes, replace eggs with flax eggs or a plant-based egg substitute and ensure your protein powder is vegan.
  • What can I use instead of almond flour? You can use oat flour or a gluten-free all-purpose blend, but texture may vary.
  • Are these muffins gluten-free? Yes, as long as you use gluten-free certified ingredients.
  • Can I add additional spices? Absolutely! Feel free to experiment with spices like allspice or cardamom.
  • What if my batter is too thick? Add a little more water to reach the desired consistency.
  • Can I use sweetener instead of molasses? You can, but molasses adds unique flavor that’s hard to replicate.

Nutritional Tips and Dietary Adaptations

These muffins are already packed with protein, but here are additional tips to enhance their nutritional profile:

  • Add seeds: Incorporate flaxseeds or chia seeds for added omega-3 fatty acids.
  • Use less sugar: If you prefer a less sweet muffin, consider reducing the molasses slightly.
  • Experiment with different protein sources: Try using pea protein or casein for varied nutritional benefits.

Equipment Recommendations

Here’s what you’ll need to make these gingerbread protein muffins:

  • Mixing bowls: A set of mixing bowls in various sizes for your ingredients.
  • Silicone muffin pan: This makes for easy muffin removal and cleanup.
  • Measuring cups and spoons: Essential for accurate ingredient measurements.
  • Whisk: For combining dry and wet ingredients thoroughly.

Serving Suggestions

These muffins are delicious on their own, but you can elevate the experience with these serving suggestions:

  • Spread some nut butter: Almond or peanut butter makes a great topping for added protein and flavor.
  • Pair with yogurt: Serve alongside Greek yogurt for a balanced meal.
  • Enjoy with coffee: These muffins make a cozy pairing with your morning brew.

In conclusion, these gingerbread protein muffins are a fantastic way to enjoy a healthy treat that satisfies your cravings while supporting your fitness goals. So preheat that oven and get baking — your taste buds and body will thank you! Remember, eating high-protein meals doesn’t have to be boring. Embrace the flavors, enjoy the process, and hit those protein goals with confidence!

Gingerbread Protein Muffins

Prep Time 10 minutes
Cook Time 20 minutes
Total Time 30 minutes
Servings 12 muffins
Calories 150
Enjoy these healthy, protein-packed gingerbread muffins perfect for a festive breakfast or snack.

Ingredients

Dry ingredients

  • 1 cup blanched almond flour ((100g))
  • 3/4 cup Nuzest Vanilla Protein Powder ((70g)*)
  • 1/3 cup tapioca flour ((40g))
  • 1/4 cup coconut flour ((30g))
  • 1 1/2 tsp baking soda
  • 2 tsp ground cinnamon
  • 2 tsp ground ginger
  • 1/2 tsp nutmeg
  • 1/2 tsp salt

Wet ingredients

  • 1 1/4 cup water
  • 4 large eggs
  • 2 Tbsp molasses

Instructions 

  • Preheat oven to 350°F (175°C).
  • Mix dry ingredients in a large bowl.
  • Add water, eggs, and molasses; stir well.
  • Pour batter into lined muffin pan and bake for 20-22 minutes.
  • Cool for 5 minutes, then transfer to rack to cool completely.

Notes

Store in fridge for best freshness.
Calories: 150kcal
Cost: $15
Course: Breakfast
Cuisine: American
Keyword: gingerbread, Muffins, protein

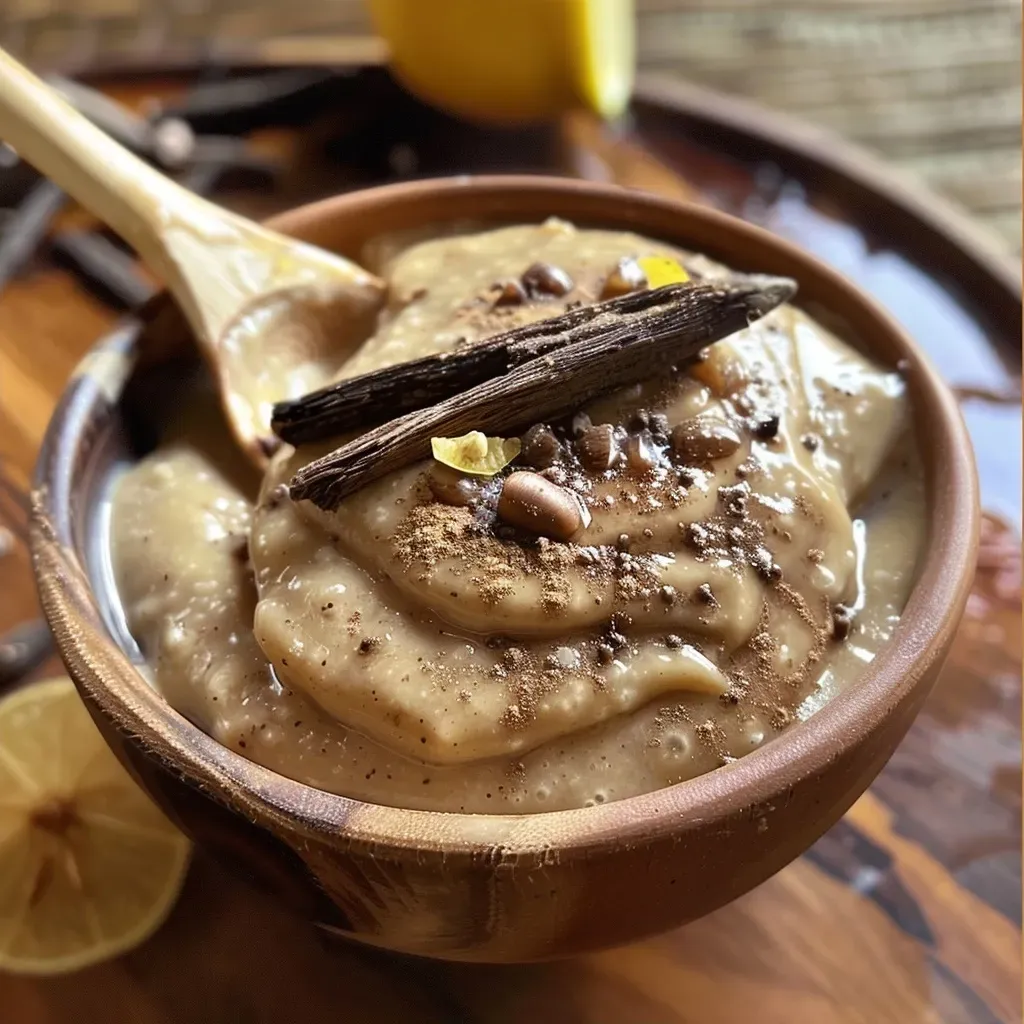
Unlock the Flavor: Your Guide to Decadent Chestnut Cream

If you’re looking for a way to satisfy your sweet tooth while hitting your protein goals, look no further than this delightful chestnut cream recipe. Rich, creamy, and packed with flavor, this treat not only elevates your dessert game but also provides nutritional benefits that align with your fitness journey. In this comprehensive guide, you’ll learn how to create a **chestnut cream** that can be enjoyed on its own or as a versatile ingredient in various dishes.

Why You’ll Love This Recipe

  • High in Protein: This chestnut cream packs a protein punch that helps fuel your workouts and recovery.
  • Versatile Ingredient: Use it as a topping, filling, or even in savory dishes, making it a staple in your kitchen.
  • Natural Ingredients: Made with simple, wholesome ingredients that you can feel good about consuming.
  • Easy to Make: With step-by-step instructions, this recipe is perfect for home cooks of any skill level.
  • Kid-Friendly: A delicious treat that kids will love, making it an ideal addition to family baking sessions.

Ingredient Breakdown

Understanding your ingredients is crucial for the best results. Here’s a breakdown of what you need to make the perfect chestnut cream:

  • Chestnuts (4.4 lbs): Fresh or frozen, chestnuts are the star of this recipe. Ensure they are peeled for the best texture.
  • Sugar (3 cups): Regular granulated sugar works best, but feel free to experiment with alternatives like coconut sugar for a healthier option.
  • Water (2¾ cups): This creates the right consistency for your cream.
  • Lemon Peel (1, untreated): Adds a refreshing zing that complements the sweetness of the chestnuts.
  • Vanilla Bean (1): The seeds from the vanilla pod bring an aromatic richness that elevates the flavor.

Step-by-Step Instructions

Side view of a glossy chestnut cream spread with chestnuts scattered around.

Let’s dive into the preparation of this delectable chestnut cream:


Digital Kitchen Scale

★ Recommended Kitchen Tool

Digital Kitchen Scale

Make this recipe even easier with a quality Digital Kitchen Scale — a must-have kitchen staple!


🛒 Shop This Tool →

As an Amazon Associate, we earn from qualifying purchases.
  1. Start by washing the **chestnuts** under running water, then place them whole in a pot full of water and boil for at least 15 minutes. Drain and let them cool slightly.
  2. Once cooled, peel the **chestnuts** with a sharp knife.
  3. Transfer the peeled **chestnuts** into a food mill to obtain a sandy mixture. Alternatively, use a potato masher; this yields about 3.5 lbs of pulp.
  4. Cut the **vanilla pod** lengthwise and extract the seeds.
  5. In a high-sided pan, combine the **vanilla pod**, seeds, **sugar**, and **water**. Melt the **sugar** over medium heat, stirring for about 10 minutes until fully dissolved.
  6. Remove the **vanilla pod** and add the **chestnut** mixture, stirring to combine.
  7. Grate the zest of an untreated lemon and add it to the mixture. Cook over low heat for about 1 hour, stirring occasionally until the cream thickens to a smooth puree.
  8. Transfer the chestnut cream into jars using a spoon, and your chestnut cream is ready!

Pro Tips for Perfect Chestnut Cream

  • Choose Quality Chestnuts: Fresh chestnuts will yield the best flavor and texture. Look for firm, unblemished nuts.
  • Be Patient: Cooking the cream slowly allows flavors to meld beautifully, resulting in a richer taste.
  • Experiment with Sweetness: Adjust the sugar based on your preference; you can use less for a less sweet cream.
  • Storage Matters: Store in sterilized jars to prolong shelf life; it can last several weeks in the fridge.
  • Use the Right Tools: A food mill or potato masher is essential for achieving the perfect texture.
  • Make it Ahead: This recipe can be prepared in advance, making it a convenient dessert option.
  • Pairing Suggestions: Serve with whipped cream or use it as a filling for pastries for an indulgent treat.
  • Mind the Consistency: If the cream is too thick, simply add a little more water until desired consistency is reached.

Common Mistakes and Troubleshooting

Even the best home cooks can run into issues. Here’s how to avoid common pitfalls:

  • Overcooking: If the cream becomes too thick, it may become grainy. Stir frequently and remove from heat once it reaches a smooth consistency.
  • Insufficient Sweetness: Taste as you go! You can always add more sugar if it’s not sweet enough for your liking.
  • Poor Storage: Ensure jars are sterilized to prevent spoilage; keep refrigerated and use within a few weeks.

Variations to Elevate Your Chestnut Cream

Looking to mix things up? Here are some exciting variations to try:

  • Chocolate Chestnut Cream: Add melted dark chocolate for a rich, decadent treat.
  • Cinnamon Spice: Incorporate cinnamon or nutmeg for a warm, cozy flavor perfect for fall.
  • Maple Chestnut Cream: Swap sugar for maple syrup for a unique twist that enhances sweetness.
  • Nutty Addition: Stir in crushed hazelnuts or almonds for added texture and flavor.

Storage and Make-Ahead Instructions

Chestnut cream can be made ahead and stored for future use:

  • Refrigeration: Store in airtight containers in the refrigerator for up to 2-3 weeks.
  • Freezing: You can freeze the chestnut cream in freezer-safe containers for up to 3 months. Thaw in the refrigerator before use.

Frequently Asked Questions

  • Can I use frozen chestnuts? Yes, frozen chestnuts work well. Just let them thaw before use.
  • What can I do with leftover chestnut cream? Use it as a topping for pancakes, in pastries, or even as a filling for cakes.
  • Is chestnut cream healthy? It can be part of a balanced diet, providing natural sweetness and protein.
  • Can this recipe be doubled? Absolutely! Just adjust cooking time as needed to accommodate the larger batch.
  • How do I know when the cream is ready? The cream should be smooth and thick, resembling a spreadable consistency.
  • Is there a nut-free alternative? You can substitute chestnuts with cooked sweet potatoes for a different flavor profile.
  • How long does chestnut cream last? When stored properly, it can last up to 3 weeks in the fridge.
  • Can I add alcohol to the recipe? Yes, a splash of rum or bourbon can be added for an adult version of this dessert.

Nutritional Tips and Dietary Adaptations

Want to make this recipe fit your dietary needs? Here are some suggestions:

  • Low-Sugar Option: Use a sugar substitute like erythritol or monk fruit to reduce sugar content.
  • Vegan Version: The recipe is naturally vegan; just ensure your sugar is bone-char free.
  • Gluten-Free: This recipe is gluten-free as it contains no wheat or gluten products.

Essential Equipment Recommendations

To make this chestnut cream, you’ll need the right tools:

  • Food Mill: For achieving a smooth texture.
  • Sharp Knife: Essential for peeling and cutting the chestnuts.
  • High-Sided Pan: For cooking the mixture evenly.
  • Whisk: Useful for stirring the sugar and water mixture.

Serving Suggestions

Now that you’ve mastered chestnut cream, here are some delicious ways to serve it:

  • As a Spread: Slather it on toast or pancakes for a delightful breakfast treat.
  • In Desserts: Use it as a filling for cakes or pastries.
  • With Ice Cream: Drizzle over vanilla ice cream for a decadent dessert.

Conclusion

Creating your own decadent chestnut cream is not just a rewarding culinary experience but also a step towards hitting your protein goals without sacrificing flavor. Whether enjoyed straight from the jar or as part of a larger dish, this chestnut cream recipe will become a staple in your kitchen. So roll up your sleeves, gather your ingredients, and get ready to impress your taste buds. Enjoy your culinary journey!

Chestnut Cream

Prep Time 30 minutes
Cook Time 1 hour
Total Time 1 hour 30 minutes
Servings 4 cups
Calories 250
A rich and creamy chestnut dessert perfect for spreading or filling. Made with roasted chestnuts, sugar, water, lemon peel, and vanilla for a delightful flavor.

Ingredients

Main ingredients

  • 4.4 lbs Chestnuts (roasted and peeled)
  • 3 cups Sugar
  • 2.75 cups Water
  • 1 untreated lemon peel Lemon peel (untreated)
  • 1 vanilla bean Vanilla bean

Instructions 

  • Wash the chestnuts, boil for 15 minutes, then peel with a knife.
  • Puree the peeled chestnuts using a food mill or potato masher, yielding about 3.5 lbs of pulp. Cut the vanilla bean lengthwise and extract seeds.
  • In a pan, combine vanilla pod, seeds, sugar, and water. Melt sugar over medium heat for 10 minutes.
  • Remove vanilla pod, add chestnut pulp, and cook over low heat for 1 hour, stirring occasionally until creamy.
  • Grate lemon peel and add to the mixture. Transfer to jars and let cool.

Notes

Store in airtight jars and enjoy within a week.
Calories: 250kcal
Cost: $15
Course: Dessert
Cuisine: European
Keyword: chestnut

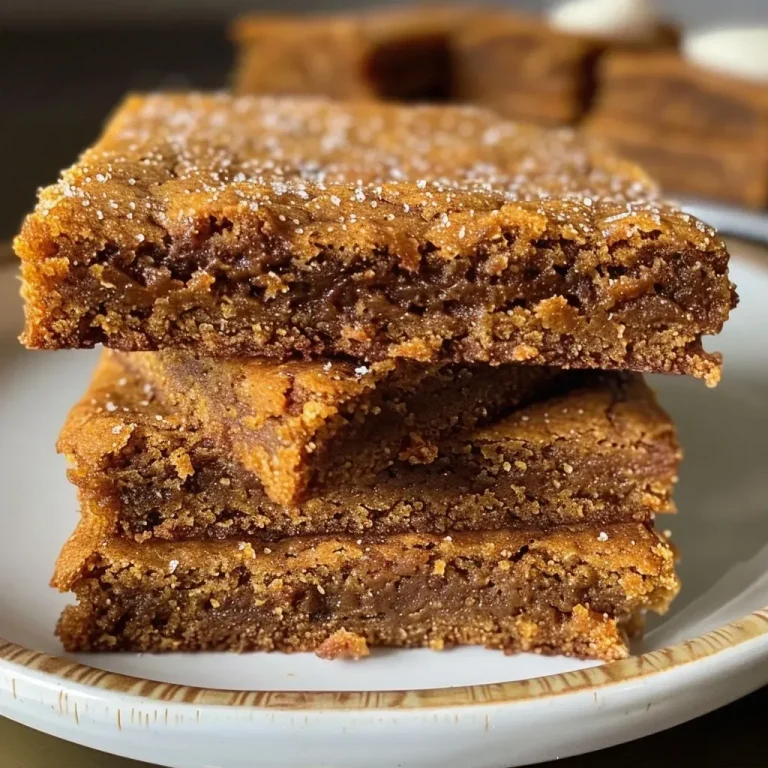
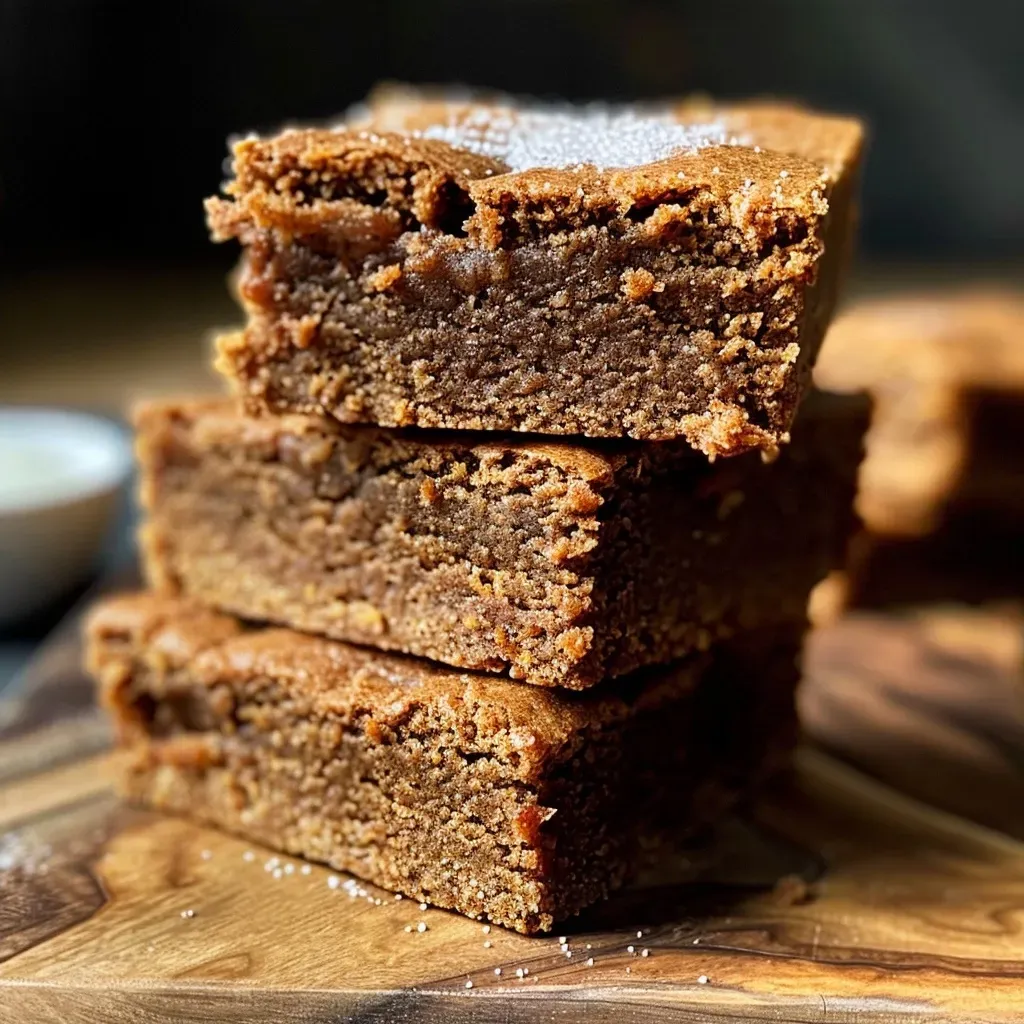
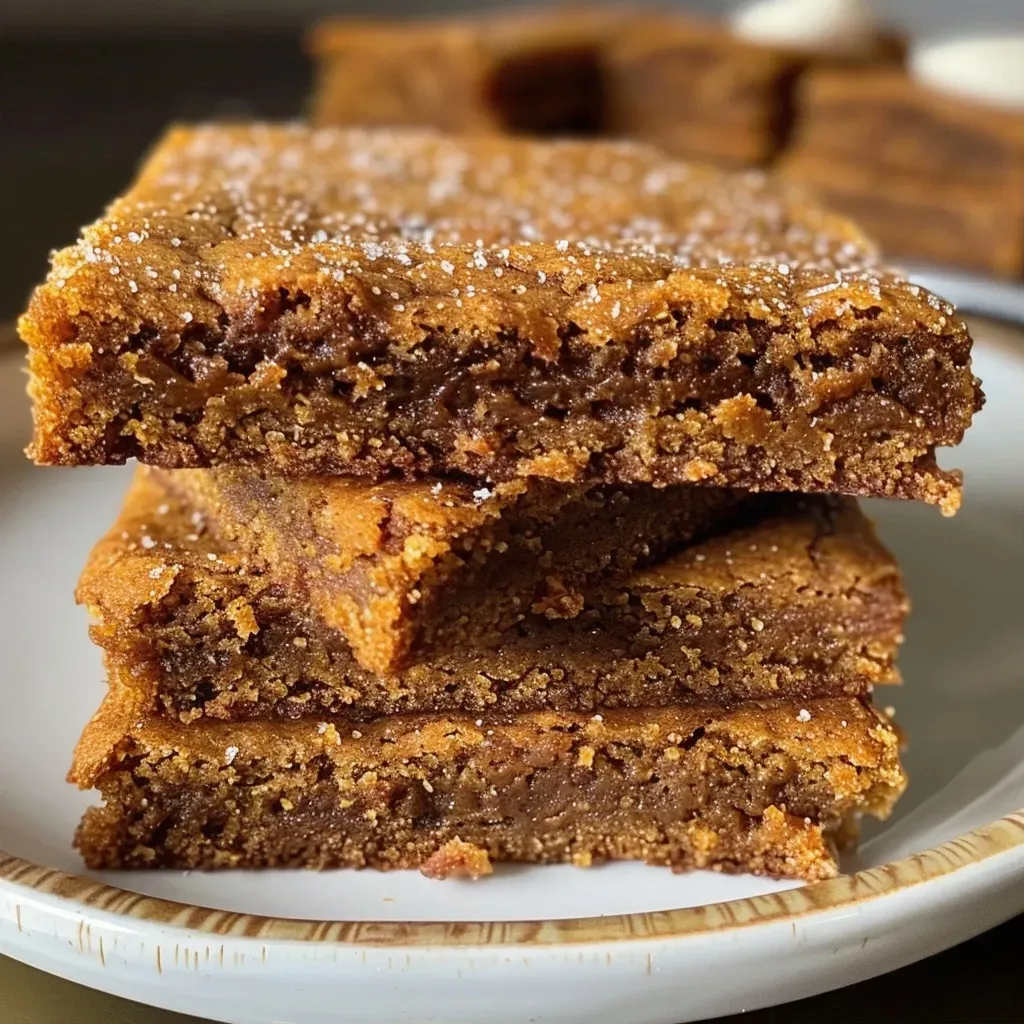
Why You’ll Crave These Gingerbread Bars

If you’re on the hunt for a dessert that delivers big on flavor while keeping your protein intake in check, look no further than these gingerbread bars. Packed with spices that warm the soul and enriched with protein, these bars are perfect for satisfying your sweet tooth without derailing your fitness goals. Let’s dive into what makes this recipe a must-try!

Why You’ll Love This Recipe

  • High in Protein: Each bar is loaded with protein, making them a great post-workout snack or a meal prep dessert.
  • Flavor Explosion: The combination of warm spices like ginger and cinnamon creates a flavor profile that screams holiday cheer.
  • Easy to Make: With simple steps and no complicated techniques, this recipe is perfect for both novice and seasoned bakers.
  • Versatile Treat: Enjoy them as a standalone snack, or add a scoop of vanilla ice cream for an indulgent dessert.
  • Make Ahead: These bars store well, making them an excellent option for meal prep or holiday gatherings.

Essential Ingredients for Gingerbread Bars

Before we get into the recipe, let’s break down the ingredients you’ll need and some potential substitutions.

  • All-Purpose Flour (3 cups / 360g): Essential for structure. You can substitute with whole wheat flour for added fiber.
  • Cornstarch (1 tablespoon): Helps achieve a lighter texture. For a gluten-free version, use arrowroot powder.
  • Baking Soda (1 teaspoon): The leavening agent that makes the bars rise.
  • Salt (1 teaspoon): Enhances flavors. Sea salt works well here.
  • Ground Ginger (1 tablespoon): The star spice that gives gingerbread its signature flavor.
  • Ground Cinnamon (2 teaspoons): Adds warmth and depth.
  • Ground Allspice (½ teaspoon): Introduces a hint of sweetness and complexity.
  • Ground Cloves (¼ teaspoon): A little goes a long way in flavoring these bars.
  • Ground Nutmeg (¼ teaspoon): Complements the other spices beautifully.
  • Brown Sugar (1 cup / 220g): For sweetness and moisture. Light or dark brown sugar works.
  • Unsalted Butter (1 cup / 226g, melted): Adds richness. Can be substituted with coconut oil for a dairy-free option.
  • Granulated Sugar (⅔ cup / 133g): Balances the flavors. You can use coconut sugar for a lower glycemic index.
  • Unsulphured Molasses (⅓ cup / 80mL): Gives the bars a deep, rich flavor.
  • Large Eggs (2, room temperature): Binds the mixture. Flax eggs can be used for a vegan version.
  • Vanilla Extract (1 tablespoon): Enhances the overall flavor.
  • Cream Cheese (6 ounces / 170g, room temperature): For the frosting that takes these bars to the next level.
  • Unsalted Butter (¼ cup / 56g, softened): Adds creaminess to the frosting.
  • Powdered Sugar (3 cups / 360g): Sweetens the frosting. Adjust to taste.
  • Salt (¼ teaspoon): Balances the sweetness in the frosting.
  • Chopped, Candied Ginger or Sprinkles: For garnishing, adding texture and visual appeal.

How to Make Gingerbread Bars

Side view of gingerbread bars topped with a layer of cream cheese icing and sprinkled with candied ginger.

Now that you have your ingredients ready, let’s get baking!


Professional Chef Knife Set

★ Recommended Kitchen Tool

Professional Chef Knife Set

Make this recipe even easier with a quality Professional Chef Knife Set — a must-have kitchen staple!


🛒 Check Price on Amazon →

As an Amazon Associate, we earn from qualifying purchases.

Step-by-Step Instructions

  1. Preheat your oven to 350°F (175°C) and grease a 9×13 inch baking pan.
  2. In a large bowl, whisk together the flour, cornstarch, baking soda, salt, and spices until evenly combined.
  3. In another bowl, mix the melted butter, brown sugar, granulated sugar, molasses, eggs, and vanilla extract until smooth.
  4. Gradually add the dry ingredients to the wet mixture, stirring until just combined. Be careful not to overmix.
  5. Pour the batter into the prepared baking pan, spreading it evenly.
  6. Bake for 25-30 minutes, or until a toothpick inserted in the center comes out clean.
  7. Allow the bars to cool completely before frosting.

Making the Cream Cheese Frosting

  1. In a mixing bowl, beat the cream cheese and softened butter until smooth and creamy.
  2. Gradually add the powdered sugar, vanilla extract, and salt, mixing until fully incorporated.
  3. Frost the cooled gingerbread bars generously with the cream cheese frosting.
  4. Garnish with chopped candied ginger or sprinkles for that festive touch.

Pro Tips for Perfect Gingerbread Bars

  • Room Temperature Ingredients: Ensure that your eggs and cream cheese are at room temperature for a smoother batter.
  • Don’t Overbake: Keep an eye on them during the last few minutes of baking to prevent drying out.
  • Let Them Cool: Allow the bars to cool completely before frosting for the best texture.
  • Texture Check: The bars should spring back when lightly pressed in the center.
  • Frosting Tips: For a thicker frosting, add more powdered sugar gradually until you reach the desired consistency.
  • Chill Before Cutting: For cleaner cuts, refrigerate the bars for about an hour before slicing.
  • Experiment with Spices: Don’t hesitate to adjust spices based on your preference for a personalized touch.
  • Flavor Boosting: Adding a dash of espresso powder can enhance the flavors of the spices.

Common Mistakes and Troubleshooting

  • Dense Bars: This could be due to overmixing. Mix until just combined!
  • Dry Bars: Overbaking is a common culprit. Always check for doneness a few minutes before the timer goes off.
  • Frosting Too Runny: If your frosting is too thin, add more powdered sugar until it thickens up.
  • Uneven Baking: Ensure your oven is preheated and that you rotate the pan halfway through baking.

Delicious Variations to Try

Feel free to get creative with these variations:

  • Chocolate Chip Gingerbread Bars: Fold in 1 cup of chocolate chips for a rich twist.
  • Nutty Addition: Add 1 cup of chopped walnuts or pecans to the batter for a crunchy texture.
  • Fruit Forward: Incorporate ½ cup of dried cranberries or raisins for a fruity flavor surprise.
  • Gluten-Free Gingerbread: Substitute the all-purpose flour with a 1:1 gluten-free flour blend.

Storage and Make-Ahead Instructions

These gingerbread bars are perfect for meal prep or holiday gatherings!

  • Storing: Keep them in an airtight container in the refrigerator for up to 5 days.
  • Freezing: Freeze unfrosted bars for up to 2 months. Thaw and frost before serving.
  • Make Ahead: You can prepare the batter a day in advance and store it in the fridge before baking.

Frequently Asked Questions

  • Can I use whole wheat flour? Yes, it will make them denser but adds more fiber.
  • How do I know when they’re done? A toothpick inserted into the center should come out clean or with a few moist crumbs.
  • Can I make these bars vegan? Substitute eggs with flax eggs and use coconut oil instead of butter.
  • What’s the best way to cut the bars? Use a sharp knife and make smooth, even slices. Chilling them helps!
  • Can I add more spices? Absolutely! Feel free to adjust spices to your preference.
  • What’s the difference between these and traditional gingerbread? These bars are softer, easier to prepare, and have a richer flavor due to the cream cheese frosting.
  • Can I double the recipe? Yes, just use a larger pan and adjust the baking time as needed.
  • How can I make this gluten-free? Use a gluten-free flour blend and ensure all other ingredients are also gluten-free.

Nutrition Tips and Dietary Adaptations

To keep these bars on the healthier side:

  • Reduce Sugar: You can cut back on sugar by using a sugar substitute if desired.
  • Add Protein Powder: Mix in a scoop of vanilla protein powder to boost protein content without changing the flavor significantly.
  • Incorporate Healthy Fats: Use avocado or nut butter in the frosting for added health benefits.

Essential Equipment for Baking

  • Mixing Bowls: Medium and large bowls for mixing ingredients.
  • Measuring Cups and Spoons: Accurate measurements are key to baking success.
  • Whisk: For mixing dry and wet ingredients thoroughly.
  • Baking Pan: A 9×13 inch pan is ideal for this recipe.
  • Cooling Rack: To cool the bars evenly after baking.

Serving Suggestions

These gingerbread bars can be served in various delightful ways:

  • Warm with Ice Cream: A scoop of vanilla or ginger ice cream pairs perfectly.
  • With a Dusting of Powdered Sugar: For a simple yet elegant presentation.
  • Accompanied by a Hot Beverage: Serve with coffee, tea, or hot cider for a cozy treat.

Final Thoughts

Whether you’re prepping for the holidays or simply looking to satisfy a sweet craving while staying on track with your macros, these gingerbread bars deliver on all fronts. With their rich flavor and high protein content, they’re a delicious reminder that healthy eating doesn’t have to be boring or bland. So, roll up your sleeves, gather your ingredients, and get ready to enjoy a delightful treat that fuels your fitness journey!

Gingerbread Bars Recipe

Prep Time 20 minutes
Cook Time 25 minutes
Total Time 45 minutes
Servings 12 bars
Calories 250
Delight in these spiced gingerbread bars, perfect for holiday gatherings or cozy treats.

Ingredients

Dough

  • 3 cups all-purpose flour (360g)
  • 1 tablespoon cornstarch
  • 1 teaspoon baking soda
  • 1 teaspoon salt
  • 1 tablespoon ground ginger
  • 2 teaspoons ground cinnamon
  • ½ teaspoon ground allspice
  • ¼ teaspoon ground cloves
  • ¼ teaspoon ground nutmeg
  • 1 cup packed light brown sugar (220g)
  • 1 cup unsalted butter (melted) (226g)
  • ⅔ cup granulated sugar (133g)
  • ⅓ cup unsulphured molasses (80mL)
  • 2 large eggs (room temperature)
  • 1 tablespoon vanilla extract

Frosting

  • 6 ounces cream cheese (170g, room temperature)
  • ¼ cup unsalted butter (softened) (56g)
  • 3 cups powdered sugar (360g)
  • 1 teaspoon vanilla extract
  • ¼ teaspoon salt

Garnish

  • to taste chopped, candied ginger or sprinkles (for garnish)

Instructions 

  • Preheat oven to 350°F (175°C) and line a baking pan with parchment paper.
  • Mix dry ingredients in a bowl. In another bowl, combine wet ingredients and then mix into dry ingredients to form dough.
  • Press dough into the prepared pan and bake for 25 minutes. Let cool completely.

  • Prepare frosting by beating cream cheese, butter, powdered sugar, vanilla, and salt until smooth.
  • Spread frosting over cooled bars and garnish with candied ginger or sprinkles. Slice and serve.

Notes

Store in an airtight container for up to 3 days for best freshness.
Calories: 250kcal
Cost: $15
Course: Dessert
Cuisine: American
Keyword: bars, gingerbread, Spice

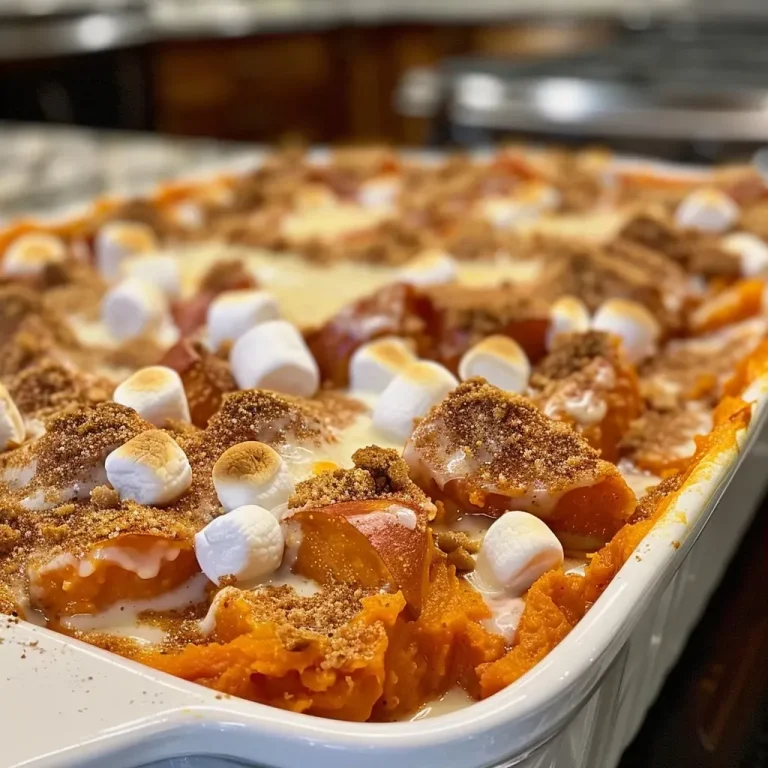
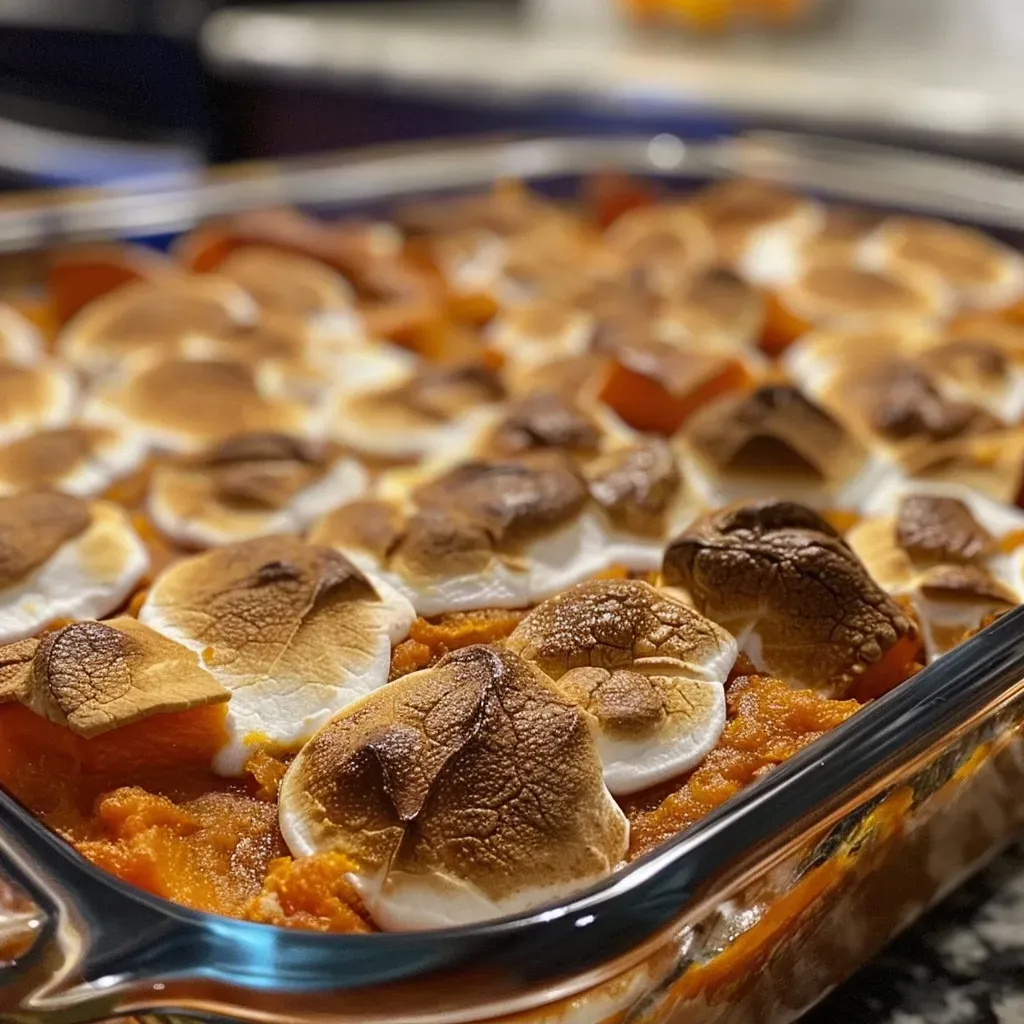
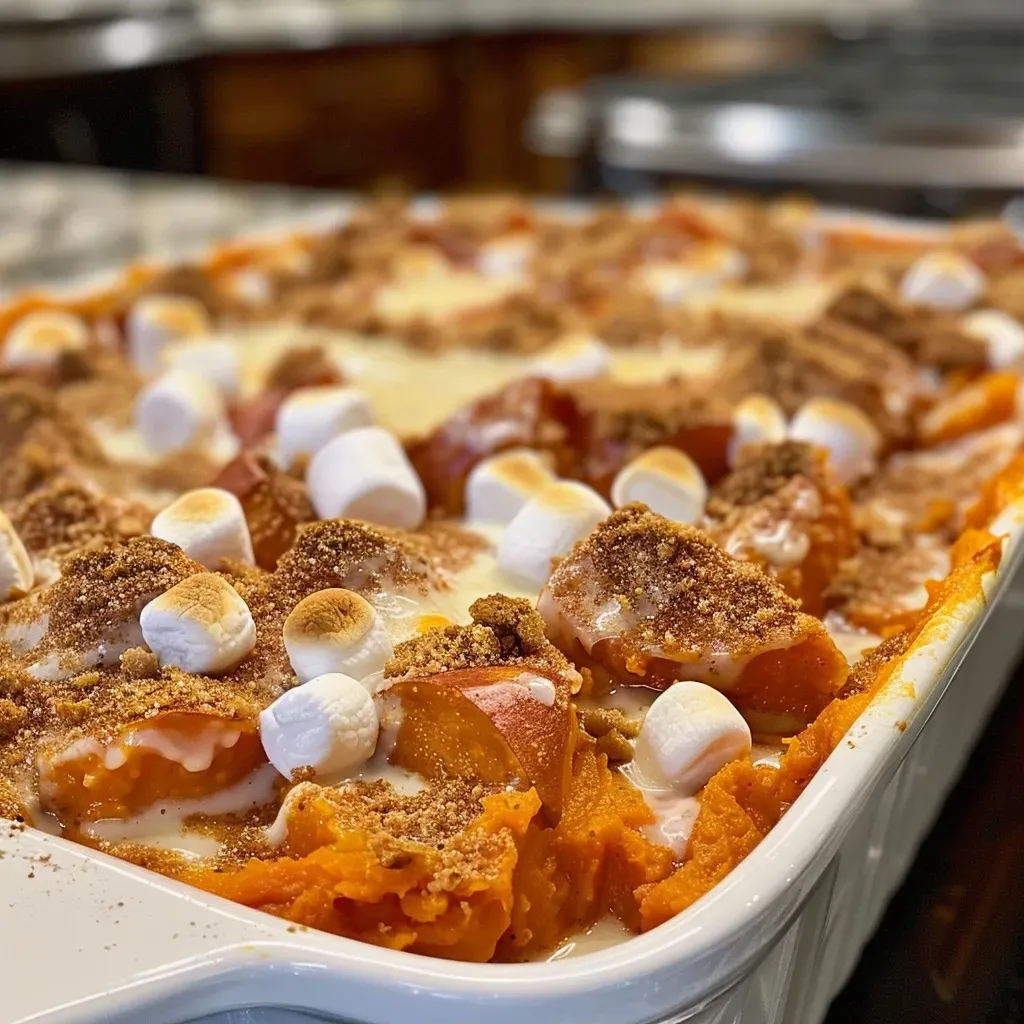
When it comes to satisfying your cravings while meeting your nutritional targets, a sweet potato casserole is a game changer. This dish combines the natural sweetness and nutrition of sweet potatoes with a delightful crunch from a pecan topping, making it an ideal choice for any occasion, especially during the holidays. Not only does this potato casserole provide a hearty and delicious meal, but it also serves as a versatile side dish that complements various entrees. Let’s dive into why you’ll love this recipe and how it can help you stay on track with your protein goals.

Why You’ll Love This Recipe

This sweet potato casserole isn’t just about taste; it’s about maximizing your nutrition without compromising flavor. Here are five compelling reasons to add this recipe to your meal rotation:

  • High in nutrients: Sweet potatoes are rich in vitamins A and C, fiber, and antioxidants, making this dish a powerhouse of nutrition.
  • Protein-packed: With the addition of eggs and optional protein-rich toppings, this casserole helps you meet your daily protein needs.
  • Customizable: Whether you prefer a crunchy pecan topping or a more traditional marshmallow layer, this recipe can easily adapt to your taste.
  • Make-ahead friendly: Prepare this dish in advance for easy meal planning during busy weeks or festive gatherings.
  • Deliciously satisfying: This casserole strikes the perfect balance between sweet and savory, ensuring no one will miss the bland traditional alternatives.

Ingredient Breakdown

Understanding the ingredients is key to mastering this recipe. Let’s break down what you need and explore possible substitutions:


Silicone Baking Cups Set

★ Recommended Kitchen Tool

Silicone Baking Cups Set

Make this recipe even easier with a quality Silicone Baking Cups Set — a must-have kitchen staple!


🛒 See Deals on Amazon →

As an Amazon Associate, we earn from qualifying purchases.
  • Sweet Potatoes: 4 lbs (about 6 cups mashed). Choose firm potatoes with smooth skin for the best flavor and texture.
  • Eggs: 3 large eggs are essential for binding and providing a fluffy texture.
  • Granulated Sugar: 1/2 cup adds sweetness, but feel free to adjust based on your taste preferences.
  • Unsalted Butter: 6 Tbsp melted and slightly cooled enhances richness. Substitute with coconut oil for a dairy-free option.
  • Vanilla Extract: 1/2 Tbsp introduces a lovely aroma and flavor.
  • Sea Salt: Just a pinch (1/8 tsp) balances flavors.
  • Dried Cranberries: 1 cup is optional but adds a tangy bite. Consider raisins or chopped dates as alternatives.
  • Brown Sugar: 2/3 cup packed provides depth and caramel flavor.
  • All-Purpose Flour: 1/3 cup for thickening. Use gluten-free flour for a gluten-free version.
  • Pecans: 1 cup coarsely chopped for the topping. Almonds or walnuts can be used as substitutes.

Pro Tips for Perfecting Your Casserole

To ensure your sweet potato casserole turns out perfectly every time, keep these expert tips in mind:

  • Prep your sweet potatoes: Bake or steam them until tender before mashing for a smoother texture.
  • Let it cool: Allow melted butter to cool before adding to prevent cooking the eggs prematurely.
  • Whip it good: Whisk the egg mixture until frothy to incorporate air, resulting in a fluffier casserole.
  • Layer it right: Spread the sweet potato mixture evenly in the dish to ensure even cooking.
  • Don’t skip the topping: A crunchy pecan topping adds texture and balances the soft filling.
  • Make it ahead: Assemble the casserole a day before and refrigerate. Just pop it in the oven when you’re ready!
  • Check for doneness: The casserole is ready when the edges are golden and a toothpick inserted in the center comes out clean.
  • Chill and serve: Let it sit for 10 minutes after baking to set up for easier serving.

Common Mistakes and Troubleshooting

Side angle of a creamy Sweet Potato Casserole with a crunchy topping.

Even the best cooks can make mistakes. Here are some common pitfalls and how to avoid them:

  • Overmixing: Mixing too much can lead to a dense casserole. Mix just until combined.
  • Underbaking: Ensure your casserole is fully baked to avoid a soggy bottom. Use a thermometer to check internal temperature (should reach 160°F).
  • Too much moisture: If your sweet potatoes are watery, drain excess moisture before mashing.
  • Burnt topping: If the pecans brown too quickly, cover the casserole with foil for part of the baking time.

Variations to Try

This sweet potato casserole is versatile! Here are four variations to consider:

  • Marshmallow Topping: Swap the pecans for mini marshmallows for a sweet, gooey layer.
  • Cinnamon Spice: Add 1 tsp of cinnamon and 1/2 tsp of nutmeg to the sweet potato mixture for a warm, spiced flavor.
  • Savory Spinach: Mix in 1 cup of cooked spinach for a savory twist.
  • Maple Pecan: Replace brown sugar with maple syrup for a unique sweetener.

Storage and Make-Ahead Instructions

This casserole is perfect for meal prep! Here’s how to store and reheat it:

  • Refrigeration: Store in an airtight container for up to 4 days after baking.
  • Freezing: Freeze unbaked casserole for up to 3 months. Thaw overnight in the fridge before baking.
  • Reheating: Bake at 350°F until heated through, about 20-30 minutes.

Frequently Asked Questions

Got questions? I’ve got answers! Here are some common inquiries about this sweet potato casserole:

  • Can I use canned sweet potatoes? Yes, but drain well and adjust sugar accordingly.
  • Is this recipe gluten-free? Use gluten-free flour and ensure all ingredients are certified gluten-free.
  • Can I make this vegan? Substitute eggs with flaxseed meal and use plant-based butter.
  • How do I know when it’s done? The casserole should be firm to the touch and slightly golden on top.
  • Can I double this recipe? Absolutely! Just use a larger baking dish and adjust baking time accordingly.
  • What can I serve with this casserole? It pairs well with roasted meats, veggie dishes, and salads.
  • How long does it take to make? Prep time is about 20 minutes, with baking taking approximately 45 minutes.
  • Can I add protein powder? Yes, just adjust the liquid ingredients slightly to accommodate the powder.

Nutritional Tips and Dietary Adaptations

To make this casserole even more nutritious:

  • Add protein: Incorporate Greek yogurt into the sweet potato mixture for additional protein.
  • Reduce sugar: Use a sugar substitute to lower calorie content while keeping sweetness.
  • Boost fiber: Add oats or flaxseeds to the mix for added fiber and texture.

Equipment Recommendations

To make your cooking experience easier, here are some recommended tools:

  • High-powered blender: Great for achieving a smooth potato mixture.
  • Baking dish: A 9×13 inch dish is ideal for this casserole size.
  • Measuring cups and spoons: Accurate measurements guarantee the best results.
  • Mixing bowls: A variety of sizes for easy mixing and prep.

Serving Suggestions

This sweet potato casserole is a fantastic addition to any meal. Here are some ideas for serving:

  • As a side dish: Perfect alongside roasted turkey or ham during holiday meals.
  • For brunch: Serve with scrambled eggs and turkey sausage for a hearty breakfast.
  • At potlucks: Always a crowd-pleaser—just make sure to bring a serving spoon!

In conclusion, this sweet potato casserole is not just a dish; it’s a celebration of flavor and nutrition. With its rich ingredients and high protein content, you can enjoy every bite while confidently hitting your macronutrient goals. So get in the kitchen, roll up your sleeves, and make this flavorful casserole that your taste buds and body will thank you for!

Sweet Potato Casserole

Prep Time 15 minutes
Cook Time 45 minutes
Total Time 1 hour
Servings 8 servings
Calories 250
A comforting and flavorful sweet potato casserole perfect for holiday gatherings or cozy dinners.

Ingredients

Main

  • 4 lbs sweet potatoes (6 cups mashed)
  • 3 large eggs large eggs
  • 1/2 cup granulated sugar
  • 6 Tbsp unsalted butter (melted and slightly cooled)
  • 1/2 Tbsp vanilla extract
  • 1/8 tsp fine sea salt (or a pinch of salt)
  • 1 cup dried cranberries (optional)
  • 2/3 cup brown sugar (packed)
  • 1/3 cup all-purpose flour (or gluten-free flour substitute)
  • 3 Tbsp unsalted butter (cold, diced)
  • 1 cup pecans (coarsely chopped, optional)

Instructions 

  • Preheat oven to 350°F (175°C). Mash cooked sweet potatoes until smooth.
  • Mix mashed sweet potatoes with eggs, sugar, melted butter, vanilla, and salt.
  • Transfer mixture to a baking dish. Combine brown sugar, flour, and cold diced butter to make topping; sprinkle over casserole.
  • Top with cranberries and pecans if using. Bake for 45 minutes until golden and bubbly.

Notes

For a dairy-free version, substitute butter with coconut oil.
Calories: 250kcal
Cost: $15
Course: Side Dish
Cuisine: American
Keyword: Sweet Potatoes

Unlock the Flavor and Nutrition of Mushroom Salad

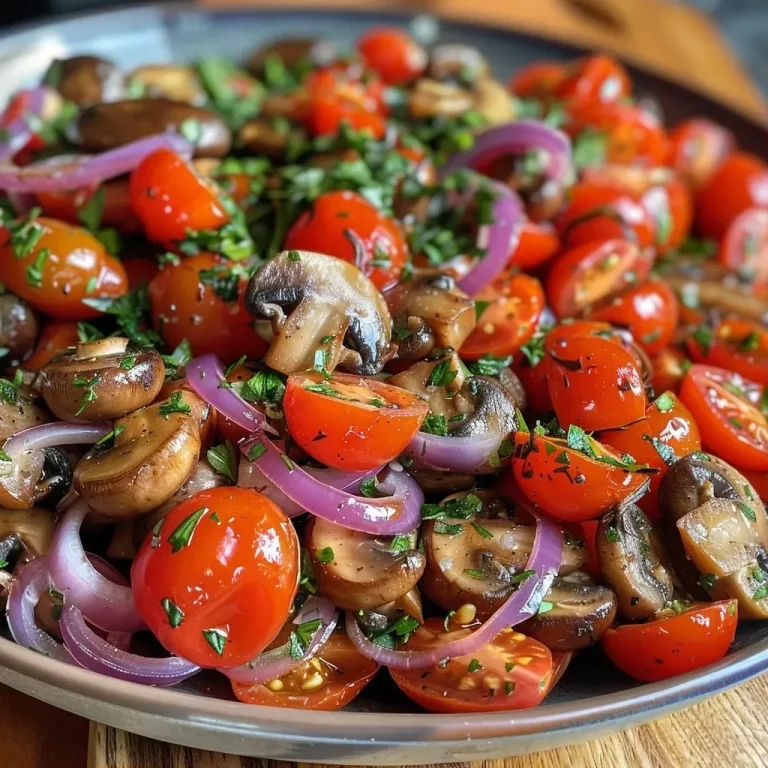
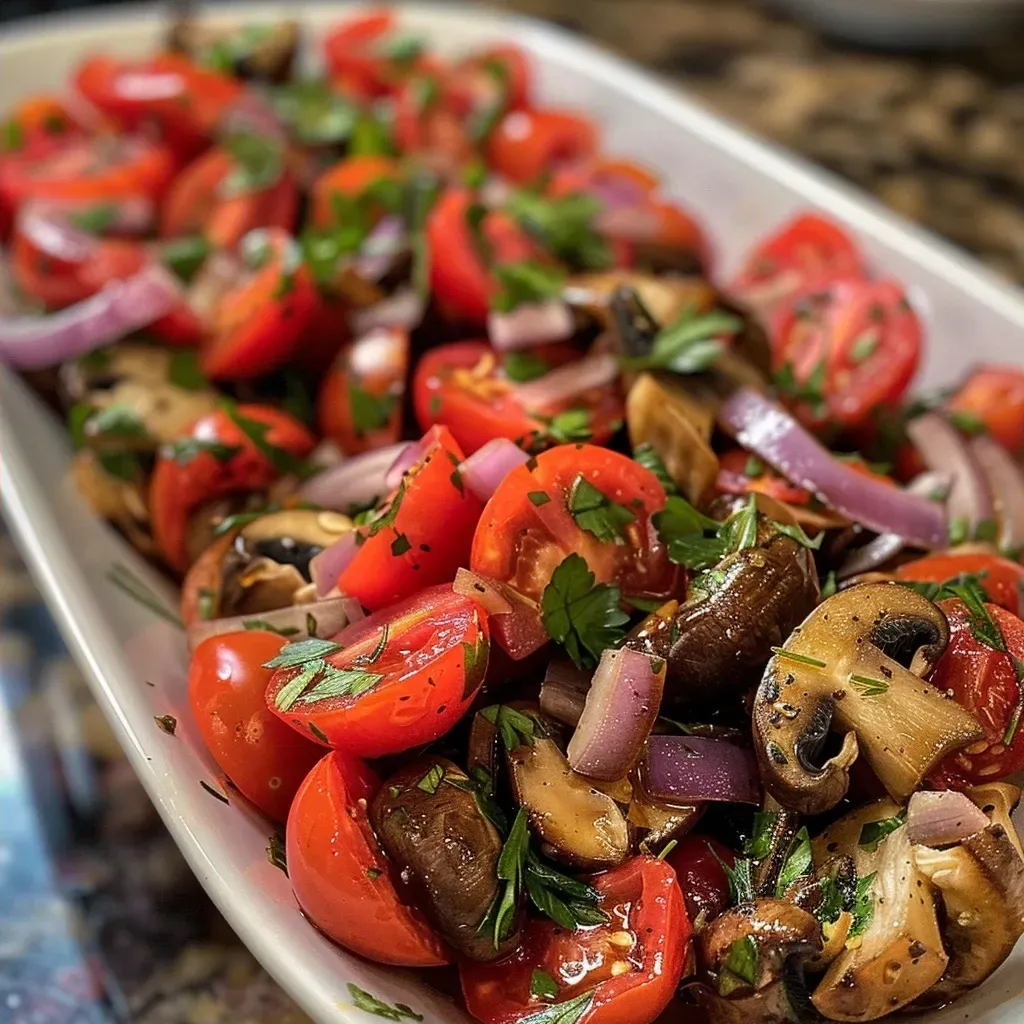
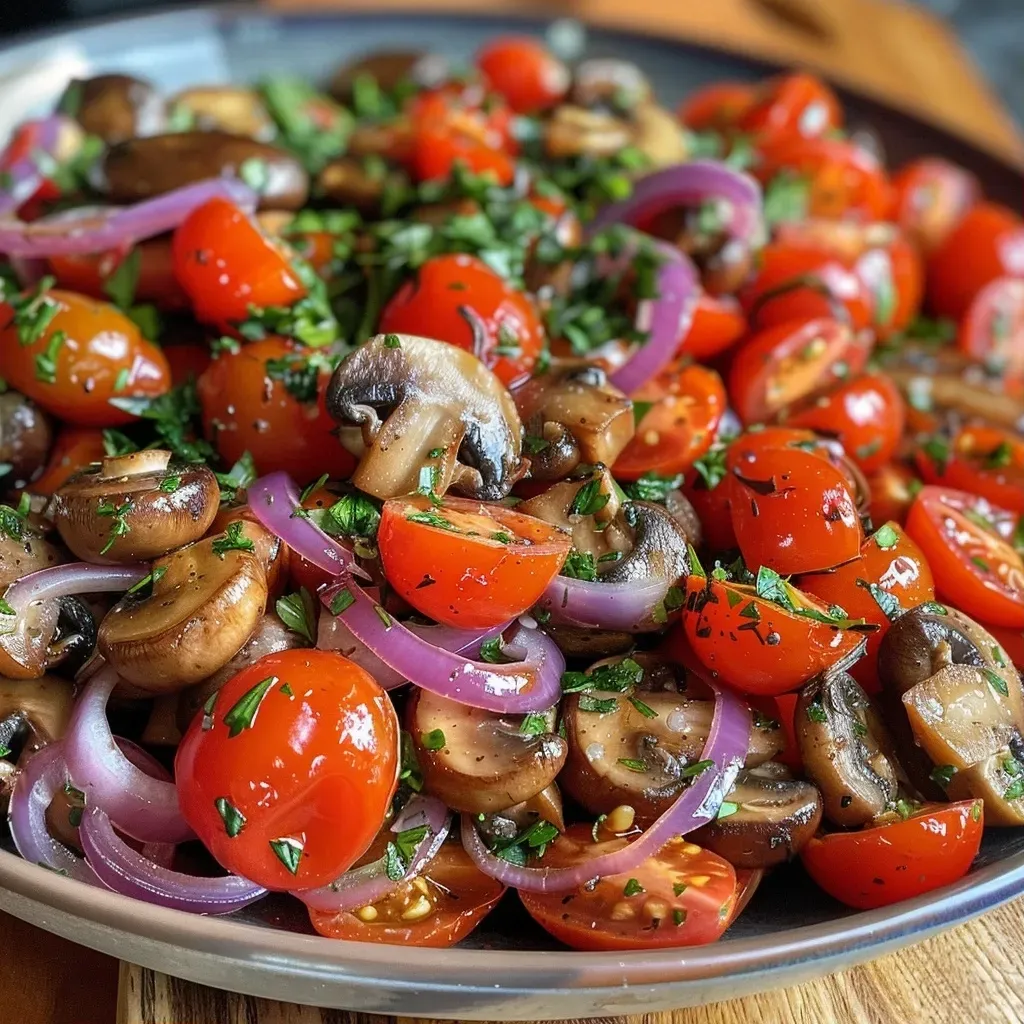
Are you looking to elevate your meal prep with a delicious and nutritious option? This mushroom salad recipe is an ideal choice for those striving to meet their protein goals without sacrificing flavor. With its robust ingredients and easy preparation, this salad is perfect for anyone who wants to enjoy a healthy meal that satisfies both the palate and the body. Packed with fresh vegetables and seasoned mushrooms, this dish is not just a salad; it’s a culinary experience that you can enjoy any time of the year.

In this article, we’ll explore why you’ll love this recipe, give you detailed insights into the ingredients, provide pro tips, and even offer variations to keep your meals exciting. Let’s dive into the delicious world of mushroom salad.

Why You’ll Love This Recipe

  • Protein-Packed: With cremini mushrooms and a variety of other ingredients, this salad is a great source of protein, helping you stay full and satisfied.
  • Quick and Easy: This recipe takes less than 30 minutes to prepare, making it perfect for quick lunch ideas or dinner on a busy weeknight.
  • Rich in Flavors: The combination of balsamic vinegar, garlic, and fresh herbs creates a delightful taste that complements the earthy flavors of the mushrooms.
  • Meal Prep Friendly: This cold marinated mushroom salad can be made ahead of time and stored in the refrigerator, making it an ideal meal prep option for the week.
  • Versatile Ingredients: You can easily customize this salad with your favorite vegetables or proteins, making it a flexible dish that can suit any dietary need.

Ingredients Breakdown

Here’s a detailed breakdown of the ingredients for this mushroom salad. Understanding what goes into your food can help you make informed choices, especially if you’re aiming for a specific nutritional profile.


Meal Prep Containers

★ Recommended Kitchen Tool

Meal Prep Containers

Make this recipe even easier with a quality Meal Prep Containers — a must-have kitchen staple!


🛒 Check Price on Amazon →

As an Amazon Associate, we earn from qualifying purchases.
  • Cherry Tomatoes: 1 (10-ounce) container, halved. These provide a burst of sweetness and are rich in vitamins A and C.
  • Roasted Red Peppers: 3/4 cup, sliced. Packed with antioxidants, they add a smoky flavor and vibrant color.
  • Red Onion: 1/2, halved through the root and thinly sliced. This adds a sharpness that balances the sweetness of the peppers and tomatoes.
  • Olive Oil: 1/2 cup. A healthy fat source that helps absorb the fat-soluble vitamins from the vegetables.
  • Cremini Mushrooms: 1 lb, trimmed and quartered. These mushrooms are not only delicious but also provide essential nutrients like selenium.
  • Kosher Salt: 2 tsp. Enhances the flavors of the ingredients.
  • Balsamic Vinegar: 1/4 cup. Adds a tangy depth that complements the dish beautifully.
  • Honey: 2 tsp. Balances the acidity of the vinegar with a touch of sweetness.
  • Fresh Rosemary: 2 tsp, chopped. This herb brings a fragrant aroma and pairs well with mushrooms.
  • Crushed Red Pepper Flakes: 1/2 tsp. Adds a hint of heat to wake up the flavors.
  • Black Pepper: 1/2 tsp. A common seasoning that adds mild spice.
  • Garlic: 2 cloves, finely chopped. Provides a robust flavor and numerous health benefits.
  • Fresh Parsley: 1/4 cup, chopped. This herb brightens the dish and adds freshness.

Pro Tips for Making the Best Mushroom Salad

Side view of a vibrant mushroom salad with sliced red onion and olives, garnished with parsley.

To ensure your mushroom salad turns out perfectly every time, consider these expert insights:

  • Timing is Key: Allow the salad to marinate for at least 30 minutes at room temperature for the flavors to meld beautifully.
  • Don’t Skip the Drippings: After cooking the mushrooms, be sure to use the drippings in the marinade for added flavor.
  • Experiment with Herbs: Feel free to use dried herbs if fresh ones aren’t available, but remember that fresh herbs will yield a more vibrant flavor.
  • Chill Before Serving: For an even more refreshing experience, chill the salad for an hour before serving.
  • Use a Quality Olive Oil: The quality of your olive oil can make a big difference in taste; opt for extra virgin for the best flavor.
  • Balance Your Ingredients: Adjust the amount of salt and vinegar to suit your taste, especially if you prefer a sweeter or tangier salad.
  • Storage Matters: Store in an airtight container in the refrigerator to keep it fresh for longer.
  • Try Other Mushrooms: While cremini mushrooms are great, feel free to experiment with shiitake or portobello for different textures and flavors.

Common Mistakes and Troubleshooting

Even the best chefs make mistakes! Here are some common pitfalls and how to avoid them:

  • Overcooking the Mushrooms: If you cook them too long, they may become mushy. Aim for 3-5 minutes until just tender.
  • Ignoring the Marinade: Don’t rush the marinating process; it’s crucial for flavor development.
  • Not Seasoning Enough: Taste as you go. You may need to adjust the seasoning based on your preference.
  • Skipping the Garlic: This ingredient adds depth; don’t leave it out!
  • Using Dull Ingredients: Freshness matters! Ensure your vegetables are at their peak for the best results.

Variations to Keep It Interesting

Feel free to mix things up with these delicious variations:

  • Protein Boost: Add grilled chicken, tofu, or chickpeas for extra protein.
  • Grains Included: Toss in some cooked quinoa or farro for a heartier meal.
  • Different Vegetables: Substitute with zucchini, bell peppers, or spinach for added nutrition and flavor.
  • Nutty Texture: Add toasted walnuts or almonds for crunch and healthy fats.

Storage and Make-Ahead Instructions

This mushroom salad is perfect for meal prep. Here’s how to store it:

  • Refrigerate: Store in an airtight container for up to 5 days.
  • Make Ahead: Prepare the salad a day in advance; flavors will improve overnight.
  • Freeze: If you want to freeze it, consider storing the mushrooms separately to maintain texture.

Comprehensive FAQ

Got questions? We’ve got answers!

  • Can I use other types of mushrooms? Absolutely! Shiitake, oyster, or even portobello mushrooms can work beautifully.
  • Is this salad vegan? Yes, it’s naturally vegan unless you add items like cheese or honey.
  • What can I substitute for balsamic vinegar? Red wine vinegar or apple cider vinegar can also work, but adjust the sweetness.
  • How can I add more protein? Try adding beans, grilled chicken, or a sprinkle of feta cheese.
  • Is this salad gluten-free? Yes, all the ingredients are gluten-free, making it safe for those with gluten intolerances.
  • Can I add dressing later? Yes, you can serve the dressing on the side if you prefer.
  • What’s the best way to serve it? This salad is great as a main dish or a side. Pair it with grilled meat or fish for a balanced meal.
  • Can I make it spicy? Definitely! Increase the amount of crushed red pepper flakes to your liking.

Nutritional Tips and Dietary Adaptations

This mushroom salad can fit into various dietary needs:

  • Low-Carb: Perfect for low-carb diets; just watch the honey if you’re monitoring sugar intake.
  • High-Protein: Add protein sources like beans or chicken to boost the protein content even further.
  • Low-Fat Option: Use less olive oil and skip the honey for a lighter version.

Essential Equipment Recommendations

To make this mushroom salad, you’ll need:

  • Large Mixing Bowl: For combining your ingredients easily.
  • Skillet: A good quality non-stick skillet makes cooking the mushrooms a breeze.
  • Measuring Cups and Spoons: Essential for accurate ingredient measurements.
  • Sharp Knife: For slicing vegetables efficiently.

Serving Suggestions

To make your meal even more satisfying, consider pairing this salad with:

  • Grilled Chicken Breast: For a complete protein meal.
  • Whole-Grain Bread: A slice of whole-grain bread on the side makes for a hearty lunch.
  • Cheese Crumbles: Add feta or goat cheese for a creamy contrast.
  • Fresh Fruit: A side of fresh fruit can add a sweet balance to the meal.

In conclusion, this mushroom salad recipe is not just a dish; it’s a stepping stone toward a healthier lifestyle. With its vibrant flavors, nutritional benefits, and versatility, hitting your protein goals has never been so delicious. So roll up your sleeves, grab those fresh ingredients, and get ready to enjoy a meal that fuels your body and excites your taste buds!

Mushroom Salad

Prep Time 15 minutes
Cook Time 10 minutes
Total Time 25 minutes
Servings 4 servings
Calories 250
A vibrant and flavorful mushroom salad featuring roasted red peppers, cherry tomatoes, and a balsamic rosemary marinade.

Ingredients

Vegetables

  • 1 container cherry tomatoes (halved)
  • 3/4 cup sliced jarred roasted red peppers
  • 1/2 red onion red onion (halved and thinly sliced)
  • 1 lb cremini mushrooms (trimmed and quartered)
  • 2 tsp kosher salt
  • 1/4 cup balsamic vinegar
  • 2 tsp honey
  • 2 tsp fresh rosemary (chopped)
  • 1/2 tsp crushed red pepper flakes
  • 1/2 tsp black pepper
  • 2 cloves garlic (finely chopped)
  • 1/4 cup fresh parsley (chopped)

Instructions 

  • Combine cherry tomatoes, roasted peppers, and onion in a large bowl.
  • Cook mushrooms in 2 tbsp olive oil with ½ tsp salt until liquid is released, 3-5 minutes. Add to bowl.
  • In the skillet, add balsamic vinegar, honey, rosemary, red pepper flakes, black pepper, garlic, and remaining olive oil. Bring to a boil, then pour over mushrooms and vegetables.
  • Cover and let sit for 30 minutes at room temperature or refrigerate up to 5 days. Fold in parsley before serving.

Notes

This salad is best enjoyed fresh but can be stored refrigerated for up to 5 days.
Calories: 250kcal
Cost: $12
Course: Salad
Cuisine: International
Keyword: Mushrooms

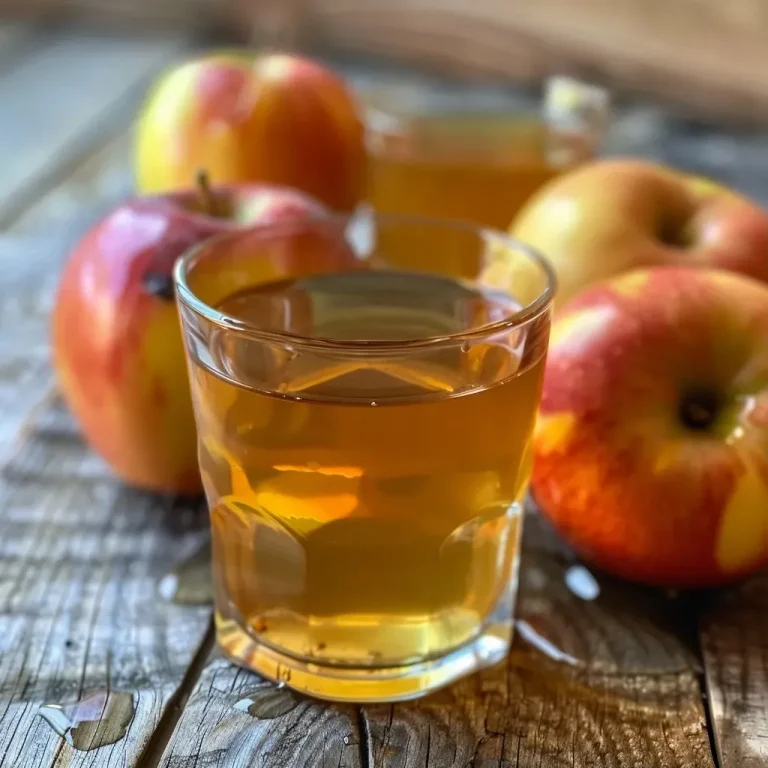
Unlock the Secrets of Homemade Apple Cider Vinegar

Making your own apple cider vinegar (ACV) at home is not just a culinary adventure; it’s a way to elevate your meals, boost your health, and save money. In this comprehensive guide, you’ll learn the step-by-step process to create flavorful and functional apple cider vinegar with just a few ingredients. Whether you’re a seasoned chef or a beginner in the kitchen, this article will empower you to craft your very own ACV, packed with flavor and beneficial properties.

Apple cider vinegar is renowned for its myriad health benefits and culinary versatility. From salad dressings to marinades, to natural remedies, the uses are nearly endless. Plus, making it at home means you control the quality of the ingredients, ensuring a product free from preservatives and artificial additives.

Why You’ll Love This Recipe

This homemade apple cider vinegar recipe is not just about fermentation; it’s about enhancing your culinary repertoire and health. Here are five compelling reasons to dive into this project:


Meal Prep Container Set

★ Recommended Kitchen Tool

Meal Prep Container Set

Make this recipe even easier with a quality Meal Prep Container Set — a must-have kitchen staple!


🛒 Shop This Tool →

As an Amazon Associate, we earn from qualifying purchases.
  • Cost-Effective: Save money compared to store-bought options by using leftover apple scraps or inexpensive apples.
  • Health Benefits: ACV is known for aiding digestion, supporting weight loss, and having antimicrobial properties.
  • Flavorful Boost: Homemade ACV has a fresher, more vibrant taste than commercial varieties, enhancing your dishes significantly.
  • Customizable: Adjust the sweetness or acidity to suit your personal taste preferences.
  • Eco-Friendly: Reduce food waste by using apple cores and peels that would otherwise be discarded.

Ingredients Breakdown

This simple recipe requires just three main ingredients:

  • Apples: Use any variety of apples—sweet, tart, or a mix. You can also utilize apple scraps like cores and peels.
  • Water: Filtered water is preferred to avoid impurities that could affect fermentation.
  • Sugar or Honey: While optional, adding about 1/4 cup of sugar or honey can speed up the fermentation process.

Step-by-Step Guide to Making Apple Cider Vinegar

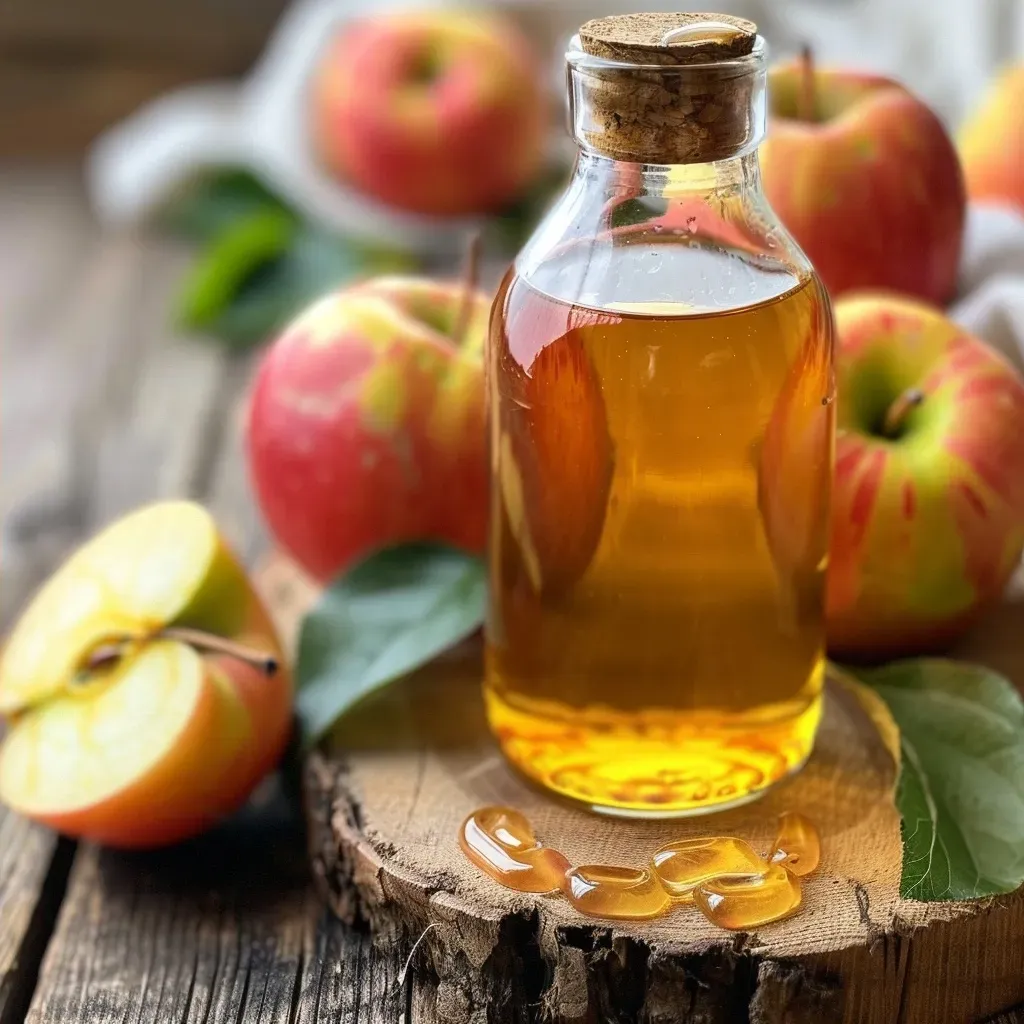
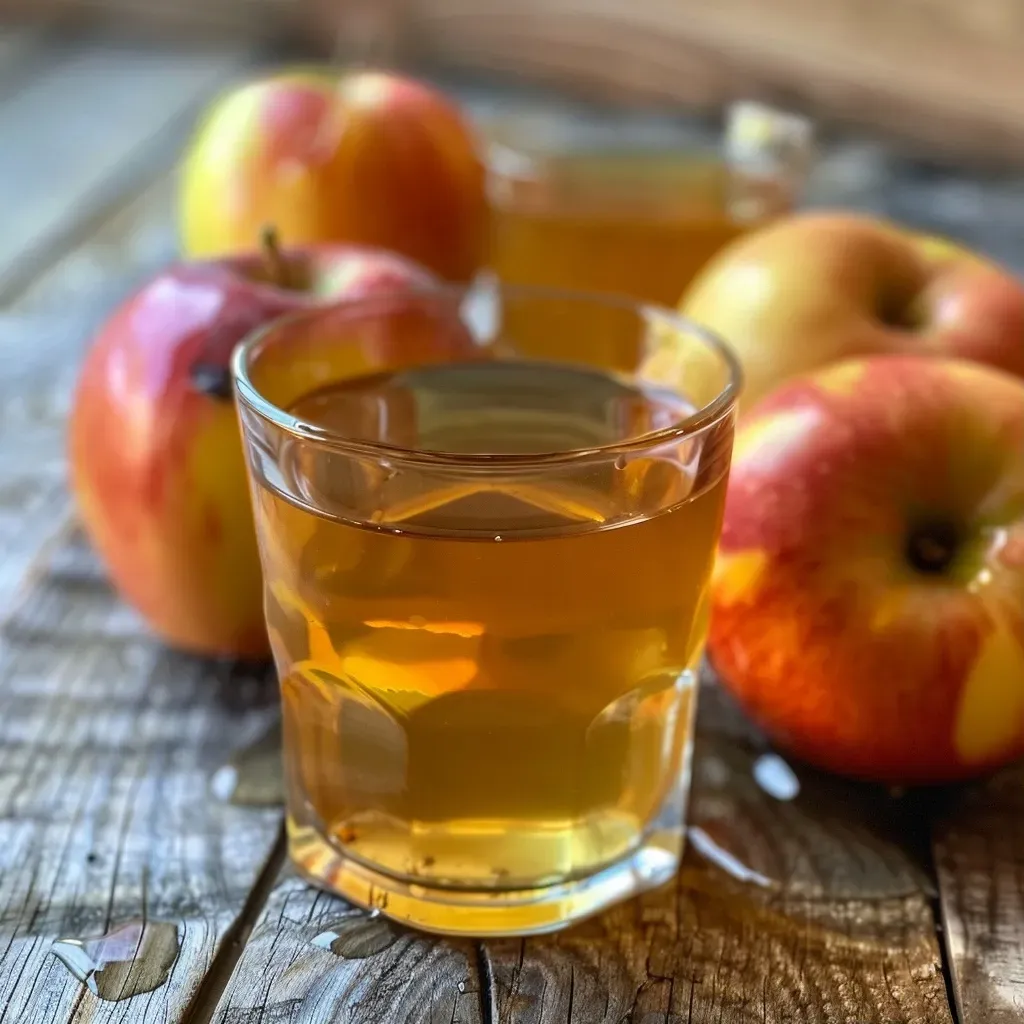
A side view of homemade apple cider vinegar in a glass jar, surrounded by ripe apples.

Follow these detailed steps to create your own apple cider vinegar:

  • Chop Your Apples: Take 4-5 rinsed apples and chop them into roughly 1-2 inch pieces. If using scraps, gather about 1-1.5 cups (120-180 g) of cores and peels.
  • Prepare Your Jar: Place the chopped apples in a sterilized 64 oz (~2 L) glass jar, filling it ¾ full. Pour cool, filtered water over the apples until they are submerged.
  • Cover and Secure: Cover the jar with cheesecloth, secured with a rubber band. This allows for air circulation while keeping contaminants out.
  • Fermentation Process: Store the jar in a warm, dark place (60-80 °F or 16-27 °C) for 3-4 weeks. Stir the mixture daily to encourage fermentation.
  • Strain the Mixture: Once it smells like vinegar, strain out the solids using cheesecloth or a coffee filter.
  • Second Fermentation: Return the liquid to the jar and allow it to ferment for another 2 weeks. The “mother” will form during this time, which is a natural byproduct of fermentation.
  • Store Your Vinegar: After 2 weeks, strain out the mother and pour the finished vinegar into a sterilized jar. Seal and store in the refrigerator, where it can last up to a year.

Pro Tips for Perfecting Your Apple Cider Vinegar

Here are some expert insights to ensure your vinegar-making process goes smoothly:

  • Use Organic Apples: If possible, choose organic apples to avoid pesticides that could interfere with fermentation.
  • Maintain Cleanliness: Ensure all equipment, including jars and utensils, are sterilized to prevent unwanted bacteria.
  • Monitor Temperature: Keep the jar in a stable environment, avoiding fluctuations in temperature.
  • Patience is Key: Fermentation times can vary based on conditions. Taste periodically to find the perfect flavor.
  • Store Properly: Use dark-colored jars to protect the vinegar from light, which can degrade its quality.
  • Experiment: Don’t hesitate to try different apple varieties or add spices like cinnamon or cloves for unique flavors.
  • Keep Notes: Document your process, including measurements and fermentation times, to replicate your best batches.
  • Use a Hydrometer: For precision, consider using a hydrometer to measure the specific gravity before and after fermentation.

Common Mistakes and Troubleshooting

Even seasoned cooks can encounter issues during fermentation. Here’s how to avoid common pitfalls:

  • Problem: Vinegar smells off or has mold.
    Solution: Ensure cleanliness and proper covering. If mold appears, remove it immediately.
  • Problem: Vinegar is too weak.
    Solution: Extend the fermentation time to allow for more acidity development.
  • Problem: The mixture doesn’t ferment.
    Solution: Ensure the jar is in a warm environment and that apples are fully submerged.

Variations to Try

Once you’ve mastered the basic recipe, explore these exciting variations:

  • Spiced Apple Cider Vinegar: Add whole spices like cinnamon sticks, cloves, or star anise during fermentation for a cozy flavor.
  • Herbal Infusion: Incorporate fresh herbs such as rosemary or thyme for a unique twist.
  • Fruit-Infused Vinegar: Experiment with other fruits like pears or berries alongside apples for a different profile.
  • Sweetened Vinegar: For a sweeter finish, add extra honey or sugar during the second fermentation.

Storage and Make-Ahead Instructions

Once your apple cider vinegar is ready, here’s how to store it:

  • Storage: Store in a sealed jar in the refrigerator for up to a year. Keep it in a cool, dark place for optimal preservation.
  • Make-Ahead: You can start the fermentation process well in advance, allowing you to have homemade vinegar ready for your culinary needs.

Comprehensive FAQ

Here are some frequently asked questions about making and using apple cider vinegar:

  • Can I use any type of apple? Yes, any apple variety works, but a mix of sweet and tart apples yields the best flavor.
  • How long does the fermentation process take? The initial fermentation takes 3-4 weeks, followed by an additional 2 weeks for flavor development.
  • What if my vinegar has a cloudy appearance? This is normal and indicates the presence of the vinegar mother, which is beneficial.
  • Is homemade vinegar safe to consume? Absolutely, as long as you follow proper sanitation and fermentation practices.
  • Can I use vinegar for cleaning? Yes, homemade ACV can be used as an eco-friendly cleaner!
  • What are some culinary uses for ACV? Use it in dressings, marinades, beverages, or as a natural preservative.
  • Can I ferment with other fruits? Yes, feel free to experiment with other fruits and herbs for unique flavors.
  • How can I tell when my vinegar is ready? It should have a strong, tangy smell and taste distinctly acidic.

Nutritional Tips and Dietary Adaptations

Apple cider vinegar is low in calories and can be a great addition to various diets:

  • Low-Carb Diets: Incorporating ACV can help with blood sugar regulation.
  • Paleo and Keto: Use it in dressings and marinades without adding unnecessary carbs.
  • Vegan-Friendly: ACV is a plant-based product, making it suitable for vegan diets.

Equipment Recommendations

Here’s what you’ll need to make your homemade apple cider vinegar:

  • Glass Jar: A large, sterilized glass jar (64 oz) is ideal for fermentation.
  • Cheesecloth: For covering the jar and allowing air circulation.
  • Rubber Band: To secure the cheesecloth over the jar.
  • Measuring Cup: For measuring water and sugar accurately.

Serving Suggestions

Here are some delicious ways to incorporate your homemade apple cider vinegar into your meals:

  • Salad Dressings: Mix with olive oil, mustard, and herbs for a zesty vinaigrette.
  • Marinades: Use as a base for marinades to tenderize meats and add flavor.
  • Drinks: Dilute in water with honey for a refreshing drink or add to cocktails.
  • Pickling: Use as a pickling agent for vegetables for added flavor and preservation.

In conclusion, making your own apple cider vinegar is not just rewarding; it’s a practical way to enhance your kitchen skills, health, and sustainability practices. With this guide, you can confidently embark on your fermentation journey. Enjoy the process and the delicious results!

How to Make Apple Cider Vinegar at Home: Best Recipe

Prep Time 10 minutes
Cook Time 28 minutes
Total Time 38 minutes
Servings 1 bottle
Calories 10
Learn how to craft your own apple cider vinegar at home with this simple, step-by-step guide. Perfect for adding a tangy flavor to your dishes or for health benefits.

Ingredients

Main

  • 4-5 pieces Apples (Rinsed and chopped into 1-2 inch pieces)
  • Water cups Water (Filtered, enough to cover apples)
  • Sugar or honey tablespoons Sugar or honey (Optional, for fermentation)

Instructions 

  • Chop apples into 1-2 inch pieces and place in a sterilized jar, filling ¾ full.
  • Add apples to a sterilized jar, cover with filtered water, and weigh down with a smaller jar if needed.
  • Cover the jar with cheesecloth secured with a rubber band and place in a warm, dark spot for 3-4 weeks, stirring daily.
  • Strain out the apples once it smells like vinegar, discarding solids and scum, then return the liquid to the jar.
  • Let the vinegar ferment for another 2 weeks, stirring every few days and observing the formation of the vinegar mother.
  • Strain the vinegar, remove the mother if desired, and store in a sterilized jar in the refrigerator for up to 1 year.

Notes

Use filtered water for best results and ensure the jar is properly sterilized to prevent spoilage.
Calories: 10kcal
Cost: $15
Course: Condiment
Cuisine: homemade
Keyword: apple

Unleash the Flavor: The Ultimate Rustic Grain Cranberry Orange Sourdough Recipe

Welcome, fellow bread enthusiasts! Are you ready to elevate your baking game with a **Rustic Grain Cranberry Orange Sourdough** that’s not just delicious but also nutritious? This recipe combines the tangy sweetness of dried cranberries with the citrusy brightness of orange, all wrapped in a warm, crusty loaf. Perfect for any occasion—from a cozy breakfast to a festive gathering—this bread is your ticket to impressing friends and family while meeting your protein goals. Let’s dive into the details and make bread that’s as satisfying to eat as it is to bake!

Why You’ll Love This Recipe

This isn’t just another sourdough recipe. Here’s why you’ll absolutely love making this loaf:

  • Quick Fermentation: With a total preparation time of just 2 hours, you can enjoy freshly baked bread without the long wait.
  • Flavor Explosion: The combination of tangy cranberries and zesty orange creates a delightful balance of sweet and tart in every bite.
  • Wholesome Ingredients: Packed with heirloom grains and healthy add-ins, this bread supports your nutritional goals without sacrificing flavor.
  • Versatile Usage: This loaf pairs beautifully with cheese, spreads, or can be enjoyed on its own—perfect for breakfast, lunch, or as a snack!
  • Impressive Presentation: The rustic appearance and aromatic crust make this sourdough a showstopper on any table.

Ingredient Breakdown

Let’s break down the ingredients you’ll need to create your **Rustic Grain Cranberry Orange Sourdough**. Understanding each component will help you appreciate their roles in achieving the perfect loaf.


Digital Kitchen Scale

★ Recommended Kitchen Tool

Digital Kitchen Scale

Make this recipe even easier with a quality Digital Kitchen Scale — a must-have kitchen staple!


🛒 Shop This Tool →

As an Amazon Associate, we earn from qualifying purchases.
  • 3 cups heirloom whole wheat flour: Provides a nutty flavor and rich texture.
  • 1 ½ cups bread flour: Essential for gluten development, giving your loaf structure.
  • 1 cup all-purpose flour: Enhances the softness of the crumb while balancing the whole wheat flour.
  • 1 ¼ cups warm water (about 85°F): Activates the yeast and helps the dough come together.
  • ½ cup active sourdough starter: The heart of your bread, responsible for leavening and flavor.
  • 2 tbsp freshly squeezed orange juice: Adds moisture and a hint of sweetness.
  • 1 tbsp orange zest (about 1 large orange): Infuses the dough with vibrant citrus flavor.
  • 1 cup dried cranberries (unsweetened): Provides natural sweetness and chewy texture.
  • 2 tsp sea salt: Enhances the overall flavor of the bread.
  • 1 tbsp honey or maple syrup (optional): For additional sweetness, if desired.

Pro Tips for Perfect Sourdough

Side view of a freshly baked Rustic Grain Cranberry Orange Sourdough showcasing its crust and interior texture.

Mastering sourdough requires practice, but these expert insights will give you the edge you need:

  • Temperature Control: Ensure your water is at the right temperature to activate your sourdough starter effectively.
  • Hydration Levels: Adjust the water content based on your flour’s absorption ability for optimal dough consistency.
  • Stretch and Fold Technique: Use this technique during the first rise to develop gluten strength without over-kneading.
  • Timing is Key: Pay attention to the fermentation time; over-proofing can lead to a dense loaf.
  • Use a Dutch Oven: Baking in a Dutch oven traps steam, helping you achieve a crusty exterior and soft interior.
  • Cooling Time: Allow the bread to cool completely before slicing to ensure the crumb sets perfectly.
  • Storage: Store in a bread bag or wrap in a kitchen towel to maintain freshness.
  • Experiment with Flavors: Feel free to incorporate nuts, seeds, or different dried fruits to make this recipe your own.

Common Mistakes & Troubleshooting

Even the best bakers encounter issues. Here are some common pitfalls and how to avoid them:

  • Dough Too Sticky: Add a little more flour during mixing, but be cautious not to overdo it.
  • Loaf Collapses: This may be due to over-proofing; watch the dough closely during the final rise.
  • Dense Texture: Ensure your sourdough starter is active and bubbly before using.
  • Uneven Crust Color: Rotate the loaf halfway through baking for even browning.
  • Dry Bread: Make sure to store it properly and avoid baking for too long.

Variations to Try

Want to switch things up? Here are some delicious variations to consider:

  • Nutty Addition: Mix in ½ cup of walnuts or pecans for a crunchy contrast.
  • Herbed Delight: Add 1 tbsp of dried rosemary or thyme for a savory twist.
  • Spiced Version: Incorporate 1 tsp of cinnamon or nutmeg for a seasonal flavor boost.
  • Cheesy Blend: Fold in 1 cup of shredded sharp cheddar cheese for a savory bread.

Storage & Make-Ahead Instructions

Planning ahead? Here’s how to store and prep your **Rustic Grain Cranberry Orange Sourdough**:

  • Room Temperature: Keep the bread in a cool, dry place, wrapped in a towel or in a bread box for up to 3 days.
  • Freezing: Slice your bread and wrap in plastic wrap, then foil. Freeze for up to 3 months. Thaw at room temperature or toast for a quick snack.
  • Make-Ahead Starter: You can prepare your sourdough starter a day in advance and keep it in the fridge until needed.

Frequently Asked Questions

Got questions? Here are some common inquiries about baking this sourdough:

  • Can I use all-purpose flour instead of bread flour? Yes, but the texture may be softer and less chewy.
  • What if my dough doesn’t rise? Your sourdough starter may not be active enough; try feeding it and letting it ferment longer before use.
  • How do I know when my bread is done baking? The crust should be golden brown, and tapping the bottom should sound hollow.
  • Can I add fresh cranberries? Fresh cranberries might add more moisture, so reduce the water slightly if you choose to use them.
  • What’s the best way to reheat sourdough? A quick toast or reheating in the oven will refresh the crust and crumb.
  • Can I use whole grain flour instead of heirloom? Yes, just note that it may result in a denser loaf.
  • How do I maintain my sourdough starter? Feed it regularly with equal parts water and flour, and keep it at room temperature for active baking.
  • Is this recipe suitable for vegan diets? Yes, simply omit the honey or maple syrup, or use alternatives like agave syrup.

Nutritional Tips & Dietary Adaptations

When aiming for a healthy diet, consider these nutritional insights:

  • Protein Boost: Add seeds like chia or flaxseed for an extra protein punch.
  • Gluten-Free Option: Substitute with a gluten-free flour blend, but note that it may require additional binding agents.
  • Lower Sugar: Skip the optional sweetener or reduce the amount of cranberries for a lower-sugar version.

Essential Equipment

To achieve the best results, gather these tools before you start:

  • Dutch Oven: Essential for achieving a perfect crust and moisture retention during baking.
  • Banneton (Proofing Basket): Helps shape your dough and provides structure during the final rise.
  • Kitchen Scale: For precise measurements, especially important in baking.
  • Sharp Blade or Lame: For scoring the bread before baking, allowing for proper expansion and beautiful designs.

Serving Suggestions

This bread is incredibly versatile! Here are a few serving ideas:

  • Breakfast Toast: Spread with cream cheese, a drizzle of honey, and topped with sliced oranges.
  • Brunch Pairing: Serve alongside a cheese platter featuring brie or goat cheese.
  • Snack Option: Enjoy as is or with a smear of peanut butter and banana slices.
  • Gifting Idea: Wrap in parchment and twine for a charming homemade gift for friends and family.

With this **Rustic Grain Cranberry Orange Sourdough** recipe, you’re not just making bread; you’re creating a delicious experience. Whether you’re a seasoned baker or trying sourdough for the first time, you’ll find joy in the process and satisfaction in the results. So roll up your sleeves, put on your apron, and let’s bake some bread that’s as nutritious as it is flavorful!

Rustic Grain Cranberry Orange Sourdough: Quick 2-Hour Delight for Perfectly Tangy Loaves

Prep Time 30 minutes
Cook Time 40 minutes
Total Time 1 hour 10 minutes
Servings 8 slices
Calories 220
Enjoy a quick, tangy sourdough bread packed with whole grains, dried cranberries, and bright orange flavor, ready in just 2 hours.

Ingredients

Flours

  • 3 cups heirloom whole wheat flour
  • 1.5 cups bread flour
  • 1 cup all-purpose flour

Water and Starter

  • 0.75 cups warm water (about 85°F)
  • 0.5 cup active sourdough starter
  • 2 tbsp freshly squeezed orange juice
  • 1 tbsp orange zest (about 1 large orange)

Add-ins

  • 1 cup dried cranberries (unsweetened)
  • 2 tsp sea salt
  • 1 tbsp honey or maple syrup (optional)

Instructions 

  • Mix ½ cup sourdough starter, 1 cup bread flour, and ¾ cup warm water; ferment 6-8 hours until bubbly.
  • Combine flours, salt, and orange zest; add levain, remaining water, and orange juice; mix into a shaggy dough.
  • Add cranberries and honey (if using); knead 5-7 minutes until elastic.
  • Let dough rise at room temperature for 4-5 hours, performing stretch and folds every 30 minutes in the first 2 hours.
  • Shape into a boule, proof 2-3 hours or overnight in fridge; score and bake at 450°F in a Dutch oven for 20 min covered, then 15-20 min uncovered.
  • Cool completely on wire rack before slicing.

Notes

For best flavor, proof in the refrigerator overnight.
Calories: 220kcal
Cost: $15
Course: bread
Cuisine: American
Keyword: cranberry, Orange, Sourdough

Get ready to satisfy your sweet tooth with these indulgent caramel apples! This classic treat, made with just three ingredients, is perfect for any occasion, especially during the fall and Halloween. In this comprehensive guide, we’ll explore everything you need to know about crafting the perfect caramel apples, from the best ingredients to expert tips and variations. Whether you’re an experienced home cook or just starting your culinary journey, hitting your protein goals with tasty food is achievable. Let’s dive in!

Why You’ll Love This Recipe

There are countless reasons to love caramel apples, but here are five that stand out:

  • Quick & Easy: With only three ingredients, you can whip up these treats in no time, making them perfect for impromptu gatherings or fall festivities.
  • Customizable: The toppings are entirely up to you! From nuts to sprinkles, there’s no limit to how you can personalize your caramel apples.
  • Fun for Everyone: This is a great recipe for kids and adults alike. Get the family involved in dipping and decorating for a fun kitchen activity.
  • Great for Entertaining: Impress your guests with this delightful dessert that looks as good as it tastes, making it a hit at parties.
  • Perfect Fall Treat: There’s nothing quite like enjoying a caramel apple during the fall season. The combination of sweet caramel and crisp apples captures the essence of autumn.

Ingredients You’ll Need

Here’s what you’ll need to create your delicious caramel apples:


Digital Kitchen Scale

★ Recommended Kitchen Tool

Digital Kitchen Scale

Make this recipe even easier with a quality Digital Kitchen Scale — a must-have kitchen staple!


🛒 Shop This Tool →

As an Amazon Associate, we earn from qualifying purchases.
  • 6 unwaxed apples: Ensure they are completely dry and free from any wax coating. This helps the caramel stick better.
  • 6 candy sticks: These will serve as the handles for your caramel apples.
  • 14 oz (400g) chewy caramel candies: Use high-quality caramel for the best flavor and texture.
  • 2 tbsp cream, milk, or water: This helps to melt the caramel smoothly.
  • Toppings (optional): Consider sprinkles, chopped nuts, or crushed candy bits for additional flavor and texture.

Step-by-Step Directions

Follow these simple steps to create your caramel apples:

  • Prepare the apples: Remove the stems from the apples and insert the candy sticks into the center. Line a baking tray with a silicone mat or wax paper and lightly spray with non-stick cooking spray.
  • Prepare the caramel: Unwrap the caramel candies and place them in a small saucepan. Add the cream (or milk) and heat over medium-low, stirring constantly until completely melted and smooth (about 3-4 minutes).
  • Dip the apples: Tilt the pot or bowl to make dipping easier. Rotate each apple until fully coated in caramel, then hold it upright to let the excess drip off. Scrape the bottom against the pot’s edge to prevent a puddle of caramel.
  • Add toppings: If you’re using toppings, roll the caramel-dipped apples immediately after dipping. This ensures they stick well.
  • Chill: Transfer the decorated apples to the prepared baking sheet and place them in the fridge for about 30 minutes to allow the caramel to set.

Pro Tips for Perfect Caramel Apples

Close-up view of juicy caramel apples with various toppings, resting on a wooden table.

Level up your caramel apple game with these expert insights:

  • Use unwaxed apples: Wax can prevent the caramel from sticking properly. Make sure to wipe them down with a paper towel to remove any residue.
  • Heat carefully: If you’re using a microwave to melt the caramel, do so in short bursts and stir frequently to prevent burning.
  • Choose tart apples: The contrast between sweet caramel and tart apples creates a delightful balance of flavors. Varieties like Granny Smith work wonderfully.
  • Don’t rush the chilling: Allow enough time for the caramel to set in the fridge. This not only improves texture but also enhances the flavor.
  • Experiment with flavors: Feel free to add spices to your caramel or use flavored coatings for a unique twist.

Common Mistakes and Troubleshooting

Even the best can encounter hiccups when making caramel apples. Here’s how to avoid common pitfalls:

  • Caramel won’t stick: If your caramel isn’t adhering to the apples, ensure they are dry and unwaxed. A quick wipe with a paper towel can help.
  • Caramel is too hard: If the caramel sets too hard, try adjusting the cream or milk ratio. A little extra moisture can help achieve the right consistency.
  • Apples fall off the sticks: Ensure the sticks are inserted deep enough and that you let the caramel cool slightly before dipping.

Variations to Try

Want to mix things up? Here are some fun variations on the classic caramel apple:

  • Chocolate-Covered Caramel Apples: After dipping in caramel, coat the apples in melted chocolate for an extra layer of decadence.
  • Nutty Caramel Apples: Roll your caramel-coated apples in chopped nuts like pecans or almonds for a crunchy texture.
  • Spiced Caramel Apples: Add cinnamon or pumpkin spice to the caramel mixture for a warm, autumnal flavor.
  • Mini Caramel Apples: Use small apple varieties for bite-sized treats, perfect for parties or kids.

Storage and Make-Ahead Instructions

Caramel apples are best enjoyed fresh, but you can store them if needed:

  • Refrigeration: Store in an airtight container in the fridge for up to 5 days. Allow them to come to room temperature before serving.
  • Make ahead: You can prepare the apples a day in advance; just be cautious with toppings that may get soggy.

Comprehensive FAQ

Got questions? Here are some answers that might help:

  • How long do caramel apples last? They can last up to 5 days in the fridge, but they’re best enjoyed fresh.
  • What are the best apples to use? Tart varieties like Granny Smith are ideal as they balance the sweetness of the caramel.
  • Can I use store-bought caramel? Absolutely! Many brands offer ready-to-use caramel for convenience.
  • How do I prevent caramel from hardening? Monitor the heat carefully and add a bit more cream or milk if it thickens too quickly.
  • What toppings go well with caramel apples? Sprinkles, crushed cookies, nuts, and candies all make excellent toppings.
  • Can I make these vegan? Use dairy-free caramel and plant-based milk to create a vegan version.
  • What if I don’t have candy sticks? Skewers or even sturdy toothpicks can serve as alternatives.
  • How do I store leftover apples? Keep them in an airtight container in the fridge to maintain freshness.

Nutritional Tips and Dietary Adaptations

While caramel apples are a treat, you can make them a bit healthier:

  • Choose organic apples: They are typically free from pesticides and wax, making them a healthier choice.
  • Consider sugar-free caramel: For a lower-sugar option, look for sugar-free caramel candies.
  • Add protein: Consider sprinkling some protein powder into your toppings for an extra nutritional punch.

Equipment Recommendations

To make your caramel apple-making experience seamless, consider these essential tools:

  • Silicone baking mat: Prevents sticking and makes cleanup a breeze.
  • Small saucepan: Ideal for melting the caramel evenly.
  • Spatula: Use a spatula to help scrape excess caramel and for smooth dipping.

Serving Suggestions

Caramel apples are fantastic on their own, but you can elevate the experience:

  • Pair with ice cream: Serve alongside vanilla or cinnamon ice cream for a decadent dessert.
  • Serve at parties: Create a caramel apple bar with various toppings for guests to customize their own.
  • Include in dessert platters: Add them to dessert trays for a beautiful and colorful presentation.

Conclusion

With this complete guide to making indulgent caramel apples, you’re now equipped to create a delightful treat that everyone will love. Whether it’s for a special occasion or just a fun family activity, these caramel apples are sure to impress. Remember, hitting your protein goals doesn’t mean sacrificing taste—get creative, enjoy the process, and most importantly, have fun in the kitchen!

Caramel Apples {Just 3 Ingredients}

Prep Time 10 minutes
Cook Time 10 minutes
Total Time 20 minutes
Servings 6 pieces
Calories 250
Enjoy homemade caramel apples with minimal ingredients and simple steps. Perfect for a sweet treat or party favor.

Ingredients

Fruits

  • 6 pieces apples, unwaxed and completely dry (see notes below)
  • 6 pieces candy sticks
  • 14 oz chewy caramel candies
  • 2 tbsp cream, milk, or water
  • toppings such as sprinkles, chopped nuts, and candy bits optional toppings (optional)

Instructions 

  • Remove stems from apples, insert candy sticks, and prepare toppings.
  • Unwrap caramels, add cream or water, and melt in a saucepan over medium-low heat, stirring until smooth.
  • Dip apples into the melted caramel, rotate to coat evenly, then let excess drip off.
  • Roll caramel-coated apples in toppings if desired, then place on a prepared tray.
  • Refrigerate for 30 minutes to set the caramel.

Notes

Ensure apples are completely dry to help the caramel stick better.
Calories: 250kcal
Cost: $10
Course: Dessert
Keyword: apples, caramel, sweet

Discover the Creamy Comfort of Buttered Rutabagas

If you’ve never cooked with rutabagas, you’re in for a treat! This creamy, flavorful side dish not only elevates your meals but also helps you hit your protein goals without sacrificing taste. Packed with nutrients and easy to make, buttered rutabagas are a fantastic addition to any high-protein meal prep. In this guide, we’ll walk you through everything you need to know about making this delicious dish, from ingredients to serving suggestions.

Why You’ll Love This Recipe

Buttered rutabagas are more than just a side dish; they come with numerous benefits that make them a must-try:

  • Deliciously Creamy: The combination of butter and milk creates a rich, smooth texture that complements the natural sweetness of rutabagas.
  • Nutrient-Dense: Rutabagas are low in calories but high in vitamins C and E, making them a great addition to your diet.
  • Versatile Pairing: This dish pairs well with a variety of proteins, from grilled chicken to roasted fish, making it a flexible option for any meal.
  • Budget-Friendly: Rutabagas are often inexpensive and can feed a crowd without breaking the bank.
  • Easy to Prepare: With just a few simple ingredients, you can whip up this dish in no time, making it perfect for busy weeknights.

Ingredients Breakdown

Here’s what you’ll need to make buttered rutabagas:


Professional Chef Knife Set

★ Recommended Kitchen Tool

Professional Chef Knife Set

Make this recipe even easier with a quality Professional Chef Knife Set — a must-have kitchen staple!


🛒 View on Amazon →

As an Amazon Associate, we earn from qualifying purchases.
  • 4 large rutabagas: Look for firm rutabagas without soft spots. If you can’t find rutabagas, turnips are a great substitute.
  • 1 cup milk (or cream): For a richer flavor, use heavy cream. Alternatively, almond milk or oat milk can be used for a dairy-free option.
  • 2 tbsp butter: Unsalted butter is recommended to control the saltiness of the dish.
  • 3/4 tsp kosher salt: Adjust according to taste.
  • 1/2 tsp black pepper: Freshly ground pepper enhances the flavor.

Step-by-Step Instructions

Side angle of delicious, creamy rutabagas topped with melted butter, showing their rich appearance.

Follow these simple steps to create your buttered rutabagas:

  1. Carefully peel the rutabaga with a paring knife. Cut them into one-inch pieces.
  2. Place the pieces in a medium-sized pan. Cover with enough water and bring to a boil over medium-high heat.
  3. Boil until fork-tender, about 15 minutes.
  4. Drain the cooked rutabaga. Add the butter and milk, then season with salt and black pepper. Serve warm.

Pro Tips for Perfect Buttered Rutabagas

Make your buttered rutabagas even better with these expert insights:

  • Peeling Technique: Use a vegetable peeler for a smoother finish, but if you prefer the rustic look, carefully use a knife.
  • Texture Check: Ensure the rutabagas are fork-tender; overcooking can lead to mushiness.
  • Flavor Boost: Add fresh herbs like thyme or rosemary for an aromatic twist.
  • Make It Zesty: A squeeze of lemon juice before serving can brighten the flavors.
  • Leftover Magic: Use leftovers in soups or as a filling for savory pies.
  • Pairing Suggestions: Serve with grilled meats or as part of a vegetarian platter.
  • Cooking Method: For a smoky flavor, try roasting the rutabagas instead of boiling.
  • Storage: Keep leftovers in an airtight container in the fridge for up to 3 days.

Common Mistakes and Troubleshooting

Here are some common pitfalls to avoid when making buttered rutabagas:

  • Overcooking: Keep an eye on the cooking time to prevent mushiness.
  • Insufficient Seasoning: Don’t skimp on salt and pepper; they enhance the rutabaga’s natural sweetness.
  • Using Waxy Rutabagas: Choose firm ones without blemishes to ensure the best texture.

Flavor Variations to Try

Feeling adventurous? Here are some tasty variations of buttered rutabagas:

  • Garlic Buttered Rutabagas: Add minced garlic to the butter for a savory kick.
  • Cheesy Rutabagas: Stir in grated Parmesan or cheddar cheese for a cheesy twist.
  • Spicy Rutabagas: Incorporate a pinch of cayenne pepper or red pepper flakes for heat.
  • Maple-Glazed Rutabagas: Drizzle with maple syrup before serving for a sweet finish.

Storage and Make-Ahead Instructions

Want to prepare your buttered rutabagas in advance? Here’s how:

  • Make Ahead: You can peel and cut the rutabagas a day in advance; just store them in water to prevent browning.
  • Storing Leftovers: Keep leftovers in an airtight container in the refrigerator for up to 3 days.
  • Reheating: Reheat in the microwave or on the stovetop, adding a splash of milk to restore creaminess.

Frequently Asked Questions

Here are some common questions about buttered rutabagas:

  • Can I use frozen rutabagas? Yes, but they may have a different texture compared to fresh.
  • What do rutabagas taste like? Rutabagas have a slightly sweet and earthy flavor, resembling a mix of turnips and carrots.
  • Are rutabagas healthy? Absolutely! They are low in calories and high in nutrients like fiber and vitamins.
  • How can I tell if a rutabaga is ripe? Choose rutabagas that are firm and heavy for their size, avoiding any with soft spots.
  • Can I make this recipe vegan? Yes! Substitute butter with olive oil and use plant-based milk.
  • What can I serve with buttered rutabagas? They pair well with roasted meats, hearty salads, and other root vegetables.
  • How long do cooked rutabagas last? Cooked rutabagas can be stored in the fridge for 3-5 days.
  • What’s the best way to reheat leftovers? Reheat on low heat in a pan with a bit of liquid to maintain moisture.

Nutritional Tips and Dietary Adaptations

For those tracking macros, here’s how to adapt this dish:

  • Protein Boost: Add cooked, shredded chicken or turkey to the rutabagas for a protein-packed meal.
  • Low-Carb Option: Replace milk with unsweetened almond milk for fewer carbs.
  • High-Fiber Focus: Mix in cooked lentils or beans for added fiber and protein.

Essential Kitchen Equipment

Here’s what you’ll need to make buttered rutabagas:

  • Sharp Knife: For peeling and chopping the rutabagas.
  • Medium-Sized Pot: To boil the rutabagas.
  • Colander: For draining the rutabagas after cooking.
  • Measuring Cups and Spoons: To measure your ingredients accurately.

Serving Suggestions

Complete your meal with these serving ideas:

  • With Protein: Serve alongside grilled chicken thighs or baked salmon for a balanced meal.
  • On a Bed of Greens: Place buttered rutabagas over a bed of sautéed greens for added nutrition.
  • As Part of a Feast: Include them in a holiday spread with other seasonal vegetables.

Wrapping It Up

Buttered rutabagas are a delicious, nutritious, and versatile side dish that can enhance any meal. Whether you follow the classic recipe or try one of the exciting variations, you’ll discover that hitting your protein goals can be both achievable and enjoyable. So, roll up your sleeves, grab those rutabagas, and let’s get cooking!

Buttered Rutabagas

Prep Time 10 minutes
Cook Time 15 minutes
Total Time 25 minutes
Servings 4 servings
Calories 150
A simple and comforting side dish featuring tender rutabagas enriched with butter and cream.

Ingredients

Vegetables

  • 4 large rutabaga (peeled and cut into one-inch pieces)
  • 1 cup milk (or cream)
  • 2 tbsp butter
  • 3/4 tsp kosher salt
  • 1/2 tsp black pepper

Instructions 

  • Peel rutabaga and cut into one-inch pieces.
  • Place in a pan, cover with water, and boil until fork-tender, about 15 minutes.
  • Drain and add butter, milk, salt, and pepper. Serve warm.

Notes

For a richer flavor, use heavy cream instead of milk.
Calories: 150kcal
Cost: $8
Course: Side Dish
Cuisine: American
Keyword: Rutabaga

If you’re looking for a way to pack more protein into your lunches without sacrificing flavor, you’ve landed in the right spot. These high protein wraps are not just nutritious; they’re also incredibly easy to make and customizable to fit your taste preferences. Whether you’re meal prepping for the week or need something quick and satisfying on the go, these wraps are here to save the day. In this article, we’ll explore the components of a successful high-protein wrap, tips for preparation, variations, and much more!

Why You’ll Love This Recipe

  • High Protein Content: Each wrap is designed to deliver optimal protein levels, helping you meet your daily macronutrient goals.
  • Flavorful Combinations: From savory chicken to creamy cottage cheese, you can mix and match flavors to keep your lunches exciting.
  • Convenient Meal Prep: These wraps can be made ahead of time and stored in the fridge, perfect for busy weekdays.
  • Customizable Ingredients: Easily swap out proteins and veggies based on what you have on hand or your dietary preferences.
  • Great for On-the-Go: Wrapped in parchment, these wraps are easy to transport and eat anywhere, ensuring you stay fueled throughout the day.

Ingredient Breakdown

Here’s a detailed look at what you’ll need to create these high protein wraps, along with some suggested substitutions.

  • Protein Source: Choose from 8 oz cooked chicken breast, 1 cup cottage cheese + 2 hard-boiled eggs, or 1 can chickpeas (mashed). Each option provides a solid dose of protein.
  • Tortillas: Opt for whole-grain, high-protein, or gluten-free tortillas to wrap all your yummy fillings.
  • Veggies: Fresh ingredients like spinach, shredded carrots, sliced cucumber, and bell peppers add crunch and nutrients.
  • Spreads: Use 2 tbsp of hummus or mashed avocado to enhance flavor and keep moisture in check.
  • Dressings: A drizzle of olive oil or a dollop of low-fat Greek yogurt adds creaminess. Don’t forget a squeeze of lemon juice and spices like paprika, cumin, salt, and pepper for added taste.

Pro Tips for Perfect High Protein Wraps

  • Layer Wisely: Always layer your greens between the protein and the tortilla to prevent sogginess.
  • Use Parchment Paper: Wrap your creations in parchment paper for easy transport and to maintain freshness.
  • Experiment with Flavors: Don’t hesitate to customize spices or add fresh herbs to elevate your wraps.
  • Keep Wet Ingredients Separate: Store wet ingredients (like dressings or moist veggies) in a separate container to keep your wraps from getting soggy.
  • Chill Before Serving: For the best texture and flavor, refrigerate your wraps for at least 30 minutes before eating.
  • Mind the Fold: Roll your wraps tightly to prevent fillings from spilling out.
  • Batch Prep: Consider making multiple wraps at once to save time during the week.
  • Add Crunch: Include nuts or seeds for an added crunch and extra nutrients.
  • Mind Your Portions: Measure out your ingredients to maintain balanced macros.
  • Make It a Meal: Serve your wraps with a side of fruit or a light salad for a complete meal.

Common Mistakes and Troubleshooting

Close-up of a colorful high protein wrap displaying ingredients like spinach, carrots, and chicken.

Even the best of us make mistakes in the kitchen. Here are some common pitfalls and how to avoid them:


Professional Chef Knife Set

★ Recommended Kitchen Tool

Professional Chef Knife Set

Make this recipe even easier with a quality Professional Chef Knife Set — a must-have kitchen staple!


🛒 View on Amazon →

As an Amazon Associate, we earn from qualifying purchases.
  • Overstuffing: It’s tempting to load up on fillings, but this can make rolling tricky. Stick to a balanced amount of each ingredient.
  • Using Wet Ingredients: If you use too many wet ingredients, your wrap will get soggy quickly. Keep sauces and dressings minimal.
  • Skipping the Greens: Always include some greens for added nutrients and to help absorb excess moisture.
  • Not Cooling Proteins: If you’re using cooked proteins, let them cool before assembling to avoid wilting your veggies.

Variations to Try

Feeling adventurous? Here are some variations to customize your high protein wraps:

  • Turkey and Spinach Wrap: Replace chicken with sliced turkey breast and add a layer of mustard for zing.
  • Vegetarian Wrap: Use grilled tofu or tempeh with roasted veggies and a tahini sauce.
  • Mexican-Inspired Wrap: Incorporate black beans, corn, diced avocado, and a sprinkle of cilantro for a fiesta flavor.
  • Breakfast Wrap: Fill with scrambled egg whites, sautéed peppers, and a sprinkle of feta cheese for a protein-packed breakfast option.

Storage and Make-Ahead Instructions

These wraps are ideal for meal prep and can be stored in the fridge for up to 3 days. Here’s how to do it:

  • Wrap Individually: Each wrap should be tightly rolled and wrapped in parchment paper.
  • Refrigerate: Store wrapped in an airtight container or bag to maintain freshness.
  • Keep Wet Ingredients Separate: Store any wet ingredients in a separate container to keep everything crisp.

Comprehensive FAQ

Here are some frequently asked questions about high protein wraps:

  • Can I freeze these wraps? Yes, but it’s best to freeze them without wet ingredients to maintain texture.
  • What’s the best protein source? It depends on your dietary preference; chicken and cottage cheese are great options.
  • How can I make these gluten-free? Use gluten-free tortillas and ensure all other ingredients are gluten-free.
  • Can I use leftover proteins? Absolutely! Leftover chicken, turkey, or even steak works great.
  • How many grams of protein are in each wrap? Depending on your protein choice, each wrap can contain 20-40 grams of protein.
  • Are these wraps suitable for kids? Definitely! Kids love them, especially when you let them customize their own.
  • What are some good side dishes? Pair with a light salad or fresh fruit for a balanced meal.
  • How do I add more flavor? Experiment with different spices and herbs to find your perfect combination.

Nutritional Tips and Dietary Adaptations

These wraps can be tailored to fit various dietary needs:

  • Low-Carb Option: Use lettuce leaves instead of tortillas for a low-carb wrap.
  • Dairy-Free: Substitute cottage cheese with mashed avocado or a dairy-free yogurt.
  • Vegan Version: Replace all animal proteins with legumes, tofu, or tempeh.
  • Healthy Fats: Add nuts or seeds for healthy fats and additional protein.

Equipment Recommendations

To make your wrap-making process seamless, consider these tools:

  • Sharp Knife: For slicing fresh veggies and proteins cleanly.
  • Cutting Board: A sturdy cutting board will keep your workspace organized.
  • Measuring Cups: Use these to ensure you’re hitting your macro goals.
  • Parchment Paper: Essential for wrapping and storing your creations.

Serving Suggestions

Enjoy your high protein wraps with a variety of accompaniments:

  • Side Salad: A fresh side salad with a light vinaigrette complements the wraps well.
  • Fruit: Fresh fruit adds a sweet touch and balances the meal.
  • Healthy Dips: Pair with a yogurt-based dip or hummus for added flavor and nutrition.

In conclusion, these high protein wraps are a versatile, flavorful, and nutritious option for anyone looking to boost their protein intake. With the tips and variations provided, you’ll have everything you need to take your lunch game to the next level. So get cooking and enjoy the journey of creating meals that fuel your body and tantalize your taste buds!

High Protein Wraps

Prep Time 15 minutes
Cook Time 10 minutes
Total Time 25 minutes
Servings 4 wraps
Calories 450
A nutritious and high-protein wrap packed with lean chicken, cottage cheese, chickpeas, and fresh vegetables, perfect for a quick and healthy meal.

Ingredients

Protein

  • 8 oz cooked chicken breast (sliced)
  • 1 cup cottage cheese
  • 2 hard-boiled eggs hard-boiled eggs
  • 1 can chickpeas, mashed
  • 4 whole-grain or high-protein tortillas tortillas
  • 1 cup spinach (chopped)
  • ½ cup shredded carrots
  • ½ sliced cucumber
  • ½ sliced bell pepper
  • 2 tbsp hummus or mashed avocado
  • 2 tbsp low-fat Greek yogurt
  • to taste Lemon juice, paprika, cumin, salt, pepper, fresh herbs (for seasoning)

Instructions 

  • Season chicken and sear for 6–8 mins per side. Cool and slice. Prep vegetables by chopping spinach, carrots, and cucumber.
  • Mash cottage cheese, eggs, lemon juice, salt, and pepper. Use greens between filling and tortilla to prevent sogginess.
  • Warm tortilla. Spread hummus, add protein and veggies, drizzle olive oil, sprinkle herbs, and roll tightly.
  • Wrap in parchment paper and refrigerate up to 3 days. Store wet ingredients separately.

Notes

For extra flavor, add fresh herbs or a squeeze of lemon before serving.
Calories: 450kcal
Cost: $15
Course: Main Course
Cuisine: Healthy
Keyword: High Protein