Author

Ethan

Browsing

Unlock the Power of Spinach: A Nutritional Marvel

Welcome to your new favorite side dish: sautéed spinach. This quick spinach recipe is not just easy to make but also packed with essential vitamins and minerals. In under 10 minutes, you can have a healthy side that elevates any meal. Spinach is a nutritional powerhouse, loaded with antioxidants and dietary fiber, making it a staple for anyone looking to boost their intake of greens without compromising on flavor. Whether you’re meal prepping for the week or whipping up a fast dinner, this dish is your go-to.

Why You’ll Love This Recipe

  • Quick and Easy: Ready in less than 10 minutes, this recipe is perfect for busy weeknights.
  • Health Booster: Spinach is rich in iron and vitamins A, C, and K, supporting your immune system and overall health.
  • Simple Ingredients: Uses pantry staples such as extra virgin olive oil and garlic, making it accessible to everyone.
  • Versatile Side: Pairs beautifully with protein sources like chicken, fish, or as part of a vegetarian meal.
  • Meal Prep Friendly: Easily doubles or triples for batch cooking, ensuring you have healthy sides ready to go.

Ingredient Breakdown

Let’s take a look at the ingredients you’ll need for this quick sautéed spinach recipe:

  • Spinach (650g): Fresh spinach is best as it retains nutrients and flavor. You can also use frozen spinach; just make sure to thaw and drain it well before cooking.
  • Extra Virgin Olive Oil: This oil adds richness and helps in nutrient absorption. You can substitute it with avocado oil for a different flavor profile.
  • Garlic Clove (1): Fresh garlic adds depth to the dish. If you’re in a pinch, garlic powder can work, but fresh is always better.
  • Salt: Enhances the overall flavor. Experiment with different salts like sea salt or Himalayan pink salt for a unique taste.

How to Prepare Sautéed Spinach
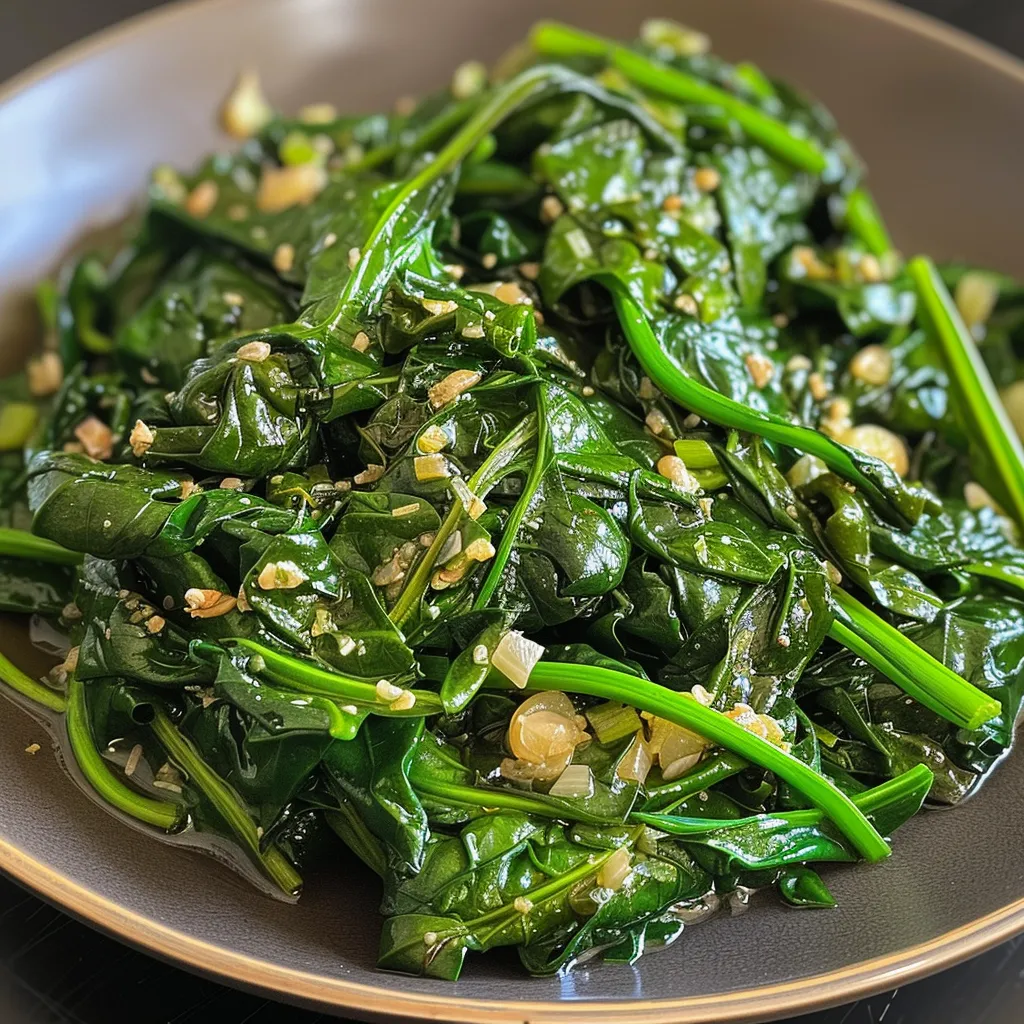
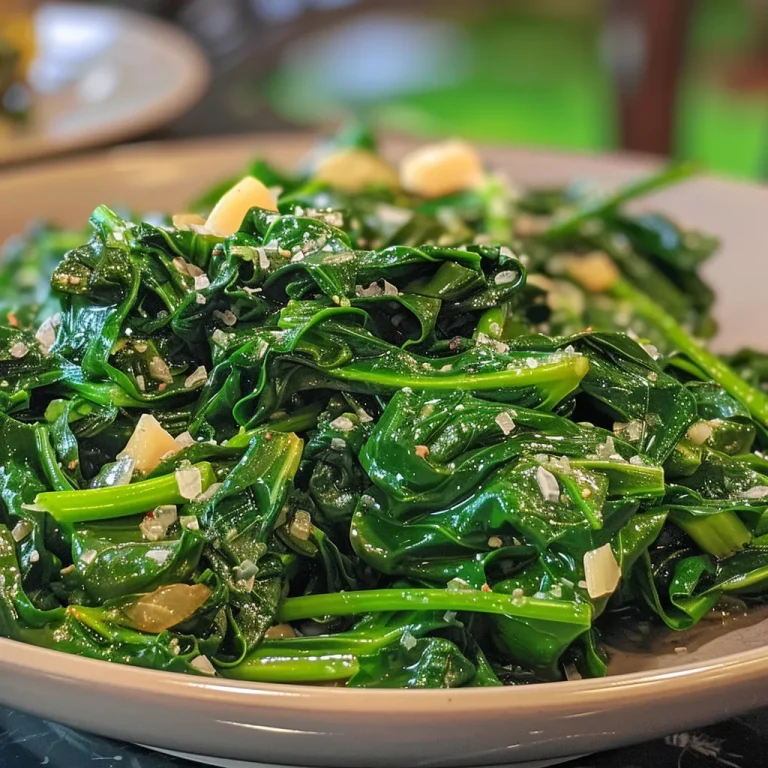
Close-up of sautéed spinach glistening with olive oil and minced garlic.

Follow these simple steps to create your perfect sautéed spinach:

  • Step 1: In a large pan, add extra virgin olive oil over medium heat. Once hot, add the minced garlic and sauté for about 30 seconds until fragrant.
  • Step 2: Add the wash and well-dried fresh spinach to the pan. It might seem like a lot, but spinach wilts down significantly.
  • Step 3: Cover with a lid and let it cook for about 5 minutes. This steams the spinach, allowing it to cook evenly.
  • Step 4: Remove the lid, season with salt, and stir for a few more minutes over low heat until the spinach is wilted but still vibrant green.
  • Step 5: Remove from heat and serve immediately.

Pro Tips for Perfect Sautéed Spinach

Here are some expert insights to elevate your sautéed spinach game:

  • Temperature Control: Always sauté over medium heat to avoid burning the garlic while ensuring even cooking of the spinach.
  • Keep It Fresh: For the best flavor, use fresh spinach rather than frozen. If using frozen, ensure it’s thoroughly drained.
  • Garlic Variations: Experiment by adding minced garlic at different stages; adding it after the spinach can yield a stronger garlic flavor.
  • Acidity Boost: A splash of lemon juice or a sprinkle of vinegar at the end enhances the flavor profile.
  • Nutty Flavor: Consider adding a sprinkle of toasted nuts like pine nuts or almonds for a crunch and extra nutrition.
  • Cheese It Up: A sprinkle of feta or Parmesan cheese can add a delicious creamy texture and flavor.
  • Herbal Infusion: Fresh herbs like parsley or basil can be stirred in just before serving to brighten the dish.
  • Oil Alternatives: If you’re watching calories, you can use a non-stick spray instead of oil.

Common Mistakes and Troubleshooting

Even simple recipes can have hiccups. Here’s how to avoid common mistakes:

  • Watery Spinach: If the spinach releases too much water, ensure it’s well-dried before cooking and avoid adding salt until the end.
  • Burnt Garlic: If your garlic burns, start over. Burnt garlic can impart a bitter taste that ruins the dish.
  • Overcooked Spinach: Spinach cooks quickly; keep an eye on it to retain its bright color and nutrients.

Variations on Sautéed Spinach

Mix it up with these tasty variations:

  • Garlic and Lemon: Add a squeeze of fresh lemon juice before serving for a refreshing zing.
  • Spinach with Nuts: Toss in some toasted pine nuts or walnuts for added crunch and healthy fats.
  • Cheesy Spinach: Stir in some grated Parmesan or feta cheese just before serving for creaminess.
  • Spicy Spinach: Add a pinch of red pepper flakes for a kick of heat.

Storage and Make-Ahead Instructions

Planning ahead? Here’s how to store and reheat your sautéed spinach:

  • Refrigerate: Store in an airtight container for up to 3 days. Reheat gently in a pan with a splash of water or broth.
  • Freezing: While not ideal for sautéed spinach, if necessary, freeze in small portions. To use, thaw completely and reheat.
  • Make-Ahead: You can pre-cook spinach and add it to other dishes like pasta, omelets, or grain bowls for a quick nutrient boost.

Frequently Asked Questions

Got questions? We’ve got answers:

  • Can I use frozen spinach? Yes, but make sure to thaw and drain it thoroughly. Fresh is preferred for texture and flavor.
  • How do I keep spinach from becoming watery? Ensure spinach is well-dried and avoid adding salt until the end of cooking.
  • Can I add other seasonings? Absolutely! Try adding a splash of soy sauce or balsamic vinegar for a twist.
  • Is sautéed spinach healthy? Yes, it’s low in calories and high in vitamins and antioxidants.
  • What can I serve with sautéed spinach? Pairs well with proteins like grilled chicken or fish, or as a bed for roasted veggies.
  • How long does sautéed spinach last? It can last in the fridge for up to 3 days when stored properly.
  • Can you freeze sautéed spinach? It’s not recommended, but if needed, you can freeze it in small portions.
  • How do you reheat sautéed spinach? Reheat gently in a pan with a bit of water to prevent it from drying out.

Nutritional Tips and Dietary Adaptations

To make this dish even more aligned with your fitness goals, consider the following:

  • Protein Boost: Add cooked chicken, shrimp, or chickpeas for a protein-packed meal.
  • Low-Carb Option: This dish is already low in carbs, making it a great addition to a keto or low-carb diet.
  • Vegan Friendly: The recipe is naturally vegan; just ensure any cheese used is dairy-free.

Essential Equipment

Here’s what you’ll need:

  • Large Pan: A non-stick skillet works best for even cooking and easy cleanup.
  • Spatula: Essential for stirring without damaging your pan.
  • Measuring Spoons: For accurate measurements, especially if you’re tracking macros.

Serving Suggestions

Here are some ideas to serve this delicious sautéed spinach:

  • As a Side Dish: Perfect next to grilled meats or roasted vegetables.
  • In Salads: Add to a grain salad for extra nutrients and flavor.
  • With Eggs: Serve alongside scrambled or poached eggs for a hearty breakfast.

In summary, sautéed spinach is not just a side dish; it’s a versatile, nutrient-dense addition to your meals. With a few simple ingredients and quick preparation, you’re on your way to hitting those protein goals while enjoying a flavorful, satisfying dish. So, roll up your sleeves and enjoy the nutritional punch of sautéed spinach today!
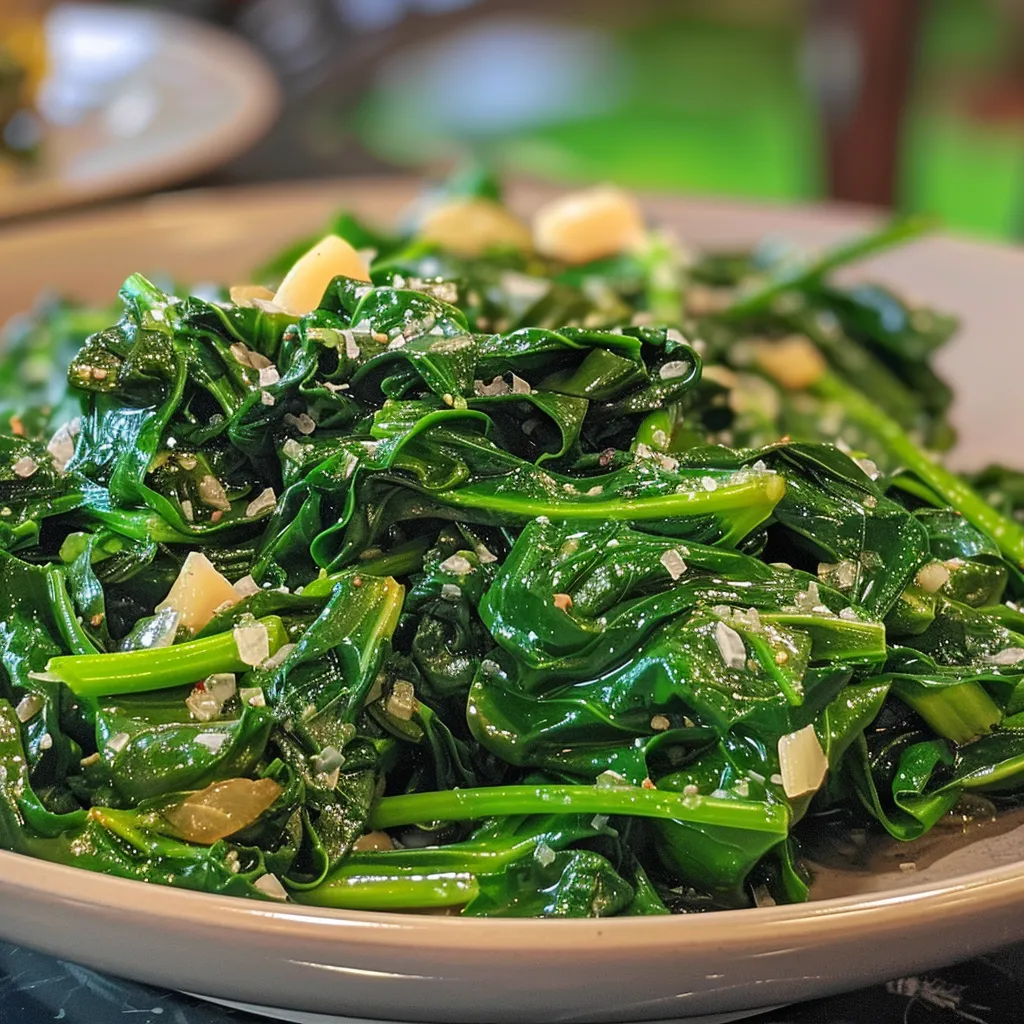
Quick and Easy Sautéed Spinach Recipe

Prep Time 5 minutes
Cook Time 5 minutes
Total Time 10 minutes
Servings 2 servings
Calories 150
A simple and nutritious side dish that comes together in minutes, perfect for a quick healthy meal.

Ingredients

Main

  • 650 g Spinach (washed and well-dried)
  • 15 ml extra virgin olive oil
  • 1 clove Garlic
  • 1 tsp salt

Instructions 

  • Add olive oil to a pan with garlic.
  • Add spinach and cover; cook for 5 minutes.
  • Season with salt and stir over low heat for a few minutes.
  • Remove from heat and serve.
Notes

Use fresh spinach for best flavor and texture.
Calories: 150kcal
Cost: $8
Course: Side Dish
Cuisine: International
Keyword: Spinach

Elevate Your Pasta Game with Garlic Parmesan Kale

If you’re looking for a delicious and nutritious way to boost your protein intake, you’ve come to the right place. This Garlic Parmesan Kale Pasta is not just another recipe; it’s a culinary experience that combines rich flavors with high nutritional value. Packed with protein, fiber, and vitamins, this dish is perfect for meal prep or a quick weeknight dinner. With a few simple ingredients, you can whip up a meal that satisfies your taste buds and helps you hit your fitness goals effortlessly.

Why You’ll Love This Recipe

  • Protein Power: This recipe uses protein-rich ingredients like Parmesan cheese and can be easily customized with additional protein sources like chicken, tofu, or lentils.
  • Quick and Easy: Ready in under 30 minutes, making it perfect for busy weeknights or meal prep.
  • Flavor Explosion: The combination of garlic, Parmesan, and sautéed kale creates a savory dish that’s bursting with flavor.
  • Versatile: Easily customizable with your favorite vegetables and proteins, making it a suitable option for various dietary preferences.
  • Health Benefits: Kale is packed with vitamins A, C, and K, and this recipe ensures you enjoy all its health benefits.

Detailed Ingredient Breakdown

Let’s dive into the ingredients you’ll need for this Garlic Parmesan Kale Pasta, along with some substitutions you can make to suit your tastes or dietary needs.

Main Ingredients

  • Kale: 1/2 lb of fresh kale is the star of this dish. If you prefer, you can substitute it with spinach or Swiss chard for a different flavor profile.
  • Angel Hair Pasta: 1/2 lb of angel hair pasta provides a light texture that complements the kale. You can also use whole wheat pasta or gluten-free alternatives like quinoa or brown rice pasta.
  • Olive Oil: 2 Tbsp of olive oil helps sauté the garlic and kale. Feel free to use avocado oil for a different flavor or to increase the healthy fat content.
  • Butter: 2 Tbsp of butter adds richness. You can substitute it with a plant-based butter or coconut oil for a dairy-free version.
  • Garlic: 2 cloves of minced garlic elevate the dish. Adjust the amount to your taste; more garlic leads to a stronger flavor.
  • Parmesan Cheese: 1/4 cup grated Parmesan gives the dish its creamy texture and umami flavor. Nutritional yeast can be used for a dairy-free option.
  • Salt, Pepper, and Red Pepper Flakes: Season to taste with a pinch of salt and pepper. Red pepper flakes add a kick; adjust based on your spice tolerance.

Pro Tips for Perfect Garlic Parmesan Kale Pasta

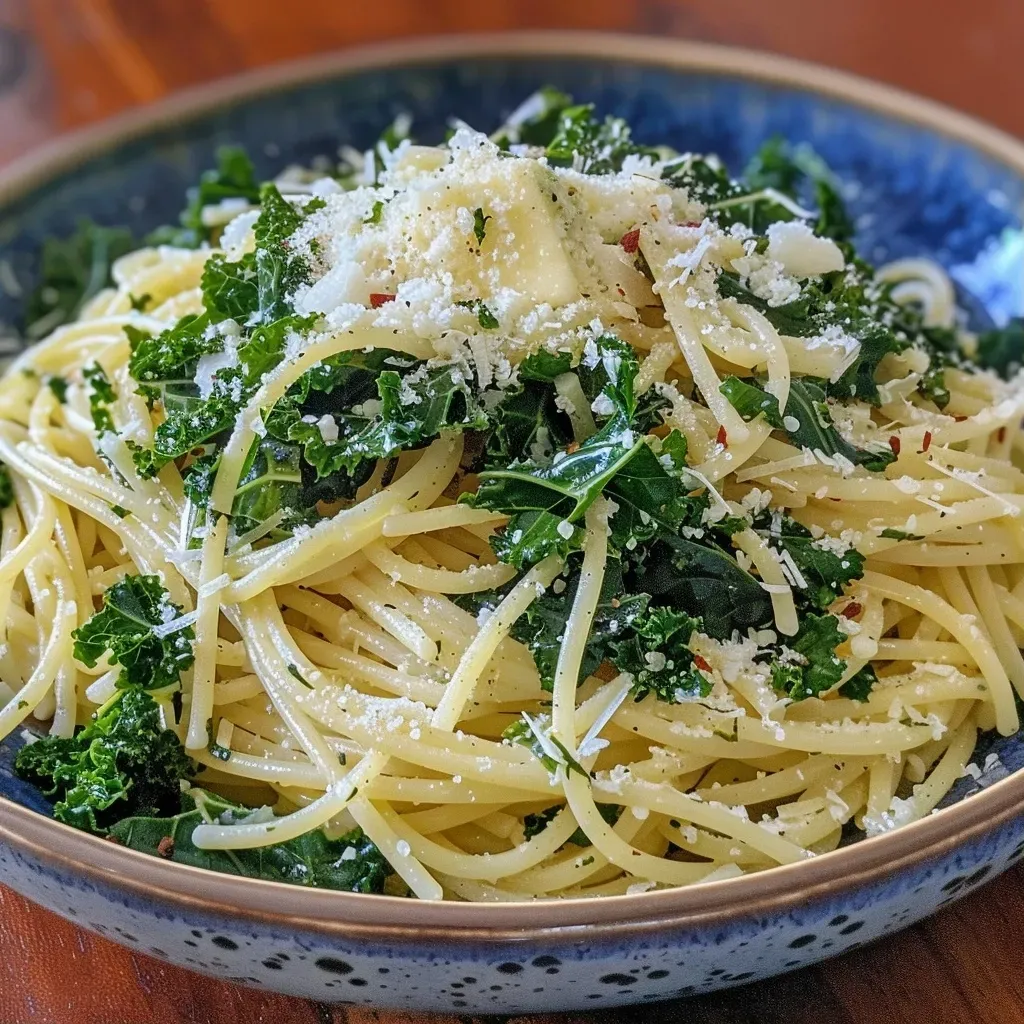
Close-up side view of a bowl of Garlic Parmesan Kale Pasta with vibrant green kale and golden pasta.
  • Don’t Overcook the Kale: Sauté just until wilted to preserve its nutrients and avoid bitterness.
  • Use Fresh Ingredients: Fresh garlic and kale enhance the flavor significantly compared to dried or frozen alternatives.
  • Don’t Skip the Pasta Water: Adding a splash of reserved pasta water can help create a creamy sauce without extra fat.
  • Experiment with Herbs: Fresh herbs like basil or parsley can be added for extra flavor and freshness.
  • Adjust the Cheese: Vary the amount of Parmesan based on your taste preference; more cheese equals more creaminess!
  • Make it Ahead: This dish can be made ahead and stored in the fridge for up to 3 days, making it great for meal prep.
  • Use a Large Pot: A large skillet or pot ensures even cooking and prevents overcrowding the ingredients.
  • Toss in Extras: Feel free to add in other veggies like cherry tomatoes or bell peppers for additional nutrition and flavor.

Common Mistakes and Troubleshooting

Even the best recipes can run into issues. Here are some common mistakes to avoid and solutions to keep your Garlic Parmesan Kale Pasta flawless:

  • Overcooking the Pasta: Always refer to package instructions for al dente pasta. Test a piece before draining.
  • Bitterness from Kale: If your kale becomes too bitter, try blanching it in boiling water for a minute before sautéing.
  • Too Dry: If the dish seems dry, add a bit more olive oil or a splash of pasta water to achieve the desired consistency.
  • Too Salty: Always taste before adding more salt. Adjust seasonings gradually to avoid over-seasoning.

Variations to Try

1. Creamy Garlic Parmesan Kale Pasta

Add a splash of heavy cream or a dollop of Greek yogurt at the end for a creamy texture.

2. Protein-Packed Option

Add grilled chicken, shrimp, or chickpeas to increase the protein content and make it a complete meal.

3. Vegan Option

Substitute butter with coconut oil, Parmesan with nutritional yeast, and add a plant-based protein source.

4. Spicy Variation

Increase the amount of red pepper flakes or add sliced jalapeños for an extra kick.

Storage and Make-Ahead Instructions

This Garlic Parmesan Kale Pasta is perfect for meal prep! Here’s how to store it:

  • Refrigeration: Store in an airtight container in the refrigerator for up to 3 days. Reheat in the microwave or on the stovetop.
  • Freezing: While it can be frozen, it’s best enjoyed fresh. If freezing, store in a freezer-safe container for up to 2 months. Thaw in the refrigerator before reheating.

Comprehensive FAQ

1. Can I make this dish gluten-free?

Yes! Use gluten-free pasta options like brown rice or quinoa pasta.

2. How do I store leftovers?

Store leftovers in an airtight container in the refrigerator for up to 3 days.

3. Can I use frozen kale?

Yes, but make sure to sauté it until any excess moisture evaporates.

4. Is this dish suitable for meal prep?

Absolutely! It’s quick to make and stores well for future meals.

5. What can I substitute for Parmesan cheese?

Nutritional yeast is a great dairy-free alternative that adds a cheesy flavor.

6. Can I make this vegan?

Yes! Substitute butter with coconut oil and Parmesan with nutritional yeast.

7. How do I make it more filling?

Add a protein source like grilled chicken, shrimp, or beans.

8. What additional vegetables can I add?

Cherry tomatoes, bell peppers, or zucchini are great additions for extra nutrition and flavor.

Nutritional Tips and Dietary Adaptations

  • Caloric Control: Adjust the amount of pasta and cheese based on your caloric needs.
  • Protein Boost: Incorporate lean proteins like chicken or plant-based proteins to meet your dietary goals.
  • Healthy Fats: Use olive oil and butter in moderation to keep the dish flavorful yet healthy.

Equipment Recommendations

  • Large Pot: For boiling pasta.
  • Skillet: For sautéing kale and garlic.
  • Colander: For draining pasta.
  • Measuring Cups and Spoons: For accurate ingredient measurements.

Serving Suggestions

Serve your Garlic Parmesan Kale Pasta with a side salad or garlic bread for a complete meal. Sprinkle with extra Parmesan and fresh herbs for a delightful finishing touch. Pair it with a protein shake for a post-workout meal that satisfies both taste and nutritional needs.

This Garlic Parmesan Kale Pasta is more than just a meal; it’s a step toward achieving your dietary goals without sacrificing flavor. So, roll up your sleeves, gather your ingredients, and get ready to enjoy a dish that’s wholesome, satisfying, and downright delicious!


Garlic Parmesan Kale Pasta

Prep Time 10 minutes
Cook Time 15 minutes
Total Time 25 minutes
Servings 2 servings
Calories 450
A quick and flavorful vegetarian pasta dish combining tender kale, garlic, and Parmesan cheese for a satisfying meal.

Ingredients

Vegetables

  • 1/2 lb kale (torn into small pieces)
  • 1/2 lb angel hair pasta
  • 2 Tbsp olive oil
  • 2 Tbsp butter
  • 2 cloves garlic (minced)
  • 1/4 cup Parmesan (grated)
  • Pinch salt and pepper
  • Pinch red pepper flakes (optional)

Instructions 

  • Tear kale into small pieces and rinse well.
  • Cook pasta until al dente, then drain.
  • Saute garlic in olive oil and butter until fragrant, then add kale and cook until wilted.
  • Add drained pasta to the kale mixture and toss to combine.
  • Season with salt, pepper, and Parmesan; top with red pepper flakes if desired.

Notes

Use fresh Parmesan for best flavor and adjust seasoning to taste.
Calories: 450kcal
Cost: $3.62
Course: Main Course
Cuisine: Italian
Keyword: kale, pasta, Vegetarian

Unleash the Power of Protein with This Cauliflower Egg Bake

Are you ready to transform your breakfast routine with a dish that hits your protein goals without sacrificing flavor? The Cauliflower Egg Bake is not just another recipe; it’s a meal that brings together nutritious ingredients in a delicious, satisfying way. Packed with protein, this breakfast bake is perfect for anyone looking to fuel their day while keeping their macros on track. Let’s dive into why this dish is a game-changer.

Why You’ll Love This Recipe

This Cauliflower Egg Bake isn’t just easy to make; it’s also incredibly versatile and packed with benefits. Here are five reasons to whip it up:

  • High in Protein: With eight large eggs and a generous amount of cheese, this dish offers a protein punch that sets you up for a productive day.
  • Low-Carb Delight: The cauliflower base keeps carbs low while providing essential nutrients and fiber, making it suitable for various dietary preferences.
  • Meal Prep Friendly: This bake can be made ahead of time, allowing you to enjoy a nutritious breakfast throughout the week without the hassle.
  • Flavorful and Satisfying: The combination of spices and cheeses ensures that every bite is delicious, so you won’t feel deprived of flavor.
  • Customizable: With numerous variations and substitutions, you can tailor this recipe to suit your taste or dietary needs.

Ingredient Breakdown

Let’s take a closer look at the ingredients that make this dish shine:

  • Cauliflower: Use one head of cauliflower, half grated and half chopped into florets. This gives the dish a nice texture while adding important vitamins and minerals.
  • Eggs: Eight large eggs provide the bulk of the protein and structure for this bake.
  • Milk: Three-quarters of a cup of milk helps create a creamy consistency. You can substitute with almond milk or oat milk for a dairy-free version.
  • Cheese: A 3-cheese blend (1-1/2 cups for filling and 1/2 cup for topping) enhances flavor and adds richness. Opt for low-fat cheese to reduce calories.
  • Spices: Garlic powder, paprika, cayenne pepper (optional), salt, and black pepper bring this dish to life, adding depth and warmth.

Pro Tips for Perfecting Your Cauliflower Egg Bake

A close-up view of a golden-brown cauliflower egg bake topped with melted cheese.

Maximize your success with these expert insights:

  • Pre-cook your cauliflower: Boiling the florets for five minutes softens them and ensures they blend seamlessly with the egg mixture.
  • Whisk thoroughly: Beating the eggs and milk until smooth is crucial for a fluffy texture.
  • Don’t skip the cheese topping: Adding cheese on top creates a beautiful, golden crust that elevates the dish.
  • Check your oven temperature: Ovens can vary; it’s best to monitor your bake to avoid overcooking or undercooking.
  • Let it rest: Allow the dish to sit for a few minutes after baking. This helps it set and makes it easier to slice.
  • Experiment with spices: Feel free to add herbs like parsley or chives for added flavor.
  • Use non-stick spray: Spraying your baking dish ensures easy removal and cleanup.
  • Adjust for serving size: This recipe is easily scalable; simply adjust ingredients based on your needs.

Avoid These Common Mistakes

Even the best recipes can go awry. Here’s what to watch out for:

  • Overcooking the cauliflower: Boil only until tender, or your bake will be mushy.
  • Skipping the seasoning: This dish needs flavor; don’t skimp on spices!
  • Too much liquid: Ensure your cauliflower is well-drained to avoid a soggy bake.
  • Not enough eggs: The eggs are the backbone of this recipe; make sure you use the correct amount for the best texture.

Variations to Try

Want to mix things up? Here are some delicious variations:

  • Mexican Style: Add black beans, corn, and taco seasoning for a southwest twist.
  • Italian Flair: Incorporate diced tomatoes, spinach, and Italian herbs for a Mediterranean flavor.
  • Meat Lovers: Mix in cooked bacon, sausage, or ham for an extra protein boost.
  • Veggie Packed: Add your favorite vegetables like bell peppers, mushrooms, or spinach for added nutrients.

Storage and Make-Ahead Instructions

This dish is perfect for meal prep! Here’s how to store it effectively:

  • Refrigerate: Store leftovers in an airtight container in the fridge for up to 4 days.
  • Freeze: You can freeze portions for up to 3 months. Thaw overnight in the fridge before reheating.
  • Reheat: Simply warm it in the oven or microwave until heated through.

Frequently Asked Questions

Here are some common questions about the Cauliflower Egg Bake:

  • Can I use frozen cauliflower? Yes, just ensure it’s thawed and drained well before use.
  • Is this recipe gluten-free? Absolutely, all the ingredients are naturally gluten-free.
  • What can I serve with this dish? It pairs well with a side salad or fresh fruit for a complete meal.
  • Can I use egg substitutes? Yes, feel free to use egg replacements for a vegan version.
  • How do I know when it’s done? The bake is ready when the eggs are set and the cheese is golden brown.
  • What’s the best way to cut it? Use a sharp knife after it has rested for easier slicing.
  • Can I add spices? Yes, customize to your taste with herbs and spices.
  • How long does it take to bake? Typically, it takes about 30-40 minutes at 375°F.

Nutrition Tips and Dietary Adaptations

This dish is naturally high in protein and low in carbs, making it suitable for various diets, including:

  • Keto: Low in carbohydrates, this dish fits perfectly into a ketogenic lifestyle.
  • Paleo: With whole ingredients, it aligns well with paleo principles.
  • Vegetarian: Keep it vegetarian by omitting meat and loading up on veggies.

Essential Equipment Recommendations

To make the best Cauliflower Egg Bake, consider having these tools handy:

  • 9-inch round or 9×9-inch baking dish: Essential for even cooking and easy serving.
  • Mixing bowl: A large bowl for whisking eggs and combining ingredients.
  • Measuring cups and spoons: For precision in your ingredients.
  • Sharp knife: For cutting vegetables and serving your bake.

Serving Suggestions

To elevate your Cauliflower Egg Bake experience:

  • Garnish: Top with fresh herbs like parsley or chives for a burst of flavor.
  • Accompaniments: Serve with avocado slices or a dollop of Greek yogurt for creaminess.
  • Pairing drinks: Enjoy with a glass of freshly squeezed orange juice or a protein smoothie.

In conclusion, the Cauliflower Egg Bake is a fantastic way to kickstart your day with a meal that is both nutritious and delicious. Whether you’re meal prepping or looking for a satisfying breakfast, this recipe will help you achieve your protein goals while keeping your taste buds happy. So roll up your sleeves, gather your ingredients, and get ready to enjoy a dish that fuels your gains!

Cauliflower Egg Bake

Prep Time 10 minutes
Cook Time 35 minutes
Total Time 45 minutes
Servings 4 servings
Calories 250
A delicious and healthy baked dish combining cauliflower and cheesy eggs, perfect for a nutritious meal.

Ingredients

Cauliflower

  • 1 head cauliflower, half grated and half chopped into florets
  • 8 large eggs
  • 0.75 cup milk
  • 1.5 cups shredded 3-cheese blend, divided (1-1/2 cups for filling)
  • 0.5 cup shredded 3-cheese blend, for topping
  • 0.5 teaspoon garlic powder
  • 1 teaspoon paprika
  • 0.5 teaspoon cayenne pepper (optional)
  • pinch salt
  • pinch black pepper

Instructions 

  • Preheat oven to 375°F (190°C). Boil cauliflower florets for 5 minutes, drain, and place in a baking dish with grated cauliflower.
  • Mix eggs, milk, 1-1/2 cups cheese, garlic powder, paprika, salt, and pepper until smooth.
  • Pour egg mixture over cauliflower and top with remaining cheese.
  • Bake for 30-40 minutes until eggs are set and cheese is golden.

Notes

For extra flavor, add herbs or spices as desired.
Calories: 250kcal
Cost: $15
Course: Main Course
Cuisine: American
Keyword: Cauliflower

If you’re looking for a quick, delicious dessert that also aligns with your health goals, this apple mug cake is the answer. In just a few minutes, you can whip up a satisfying treat that’s not only easy to make but packed with flavor and nutrition. With wholesome ingredients and customizable macros, hitting your protein goals has never tasted better!

Why You’ll Love This Recipe

  • Quick and Easy: This recipe takes less than 10 minutes from start to finish, making it perfect for those late-night cravings.
  • Protein-Packed: Incorporating protein sources into your diet is easy with this mug cake, especially if you opt for protein-enriched flour or add protein powder.
  • Single Serving: Ideal for portion control, this recipe is designed for one, so you can enjoy without overindulging.
  • Customizable: Feel free to adapt the ingredients to suit your dietary preferences or what you have on hand, making it versatile.
  • Flavorful and Nutritious: The combination of apples and cinnamon not only tastes great but also provides beneficial nutrients and fiber.

Ingredients Breakdown

To make the perfect apple mug cake, you’ll need the following ingredients:

  • 4 tbsp all-purpose flour (or gluten-free flour mix): This forms the base of your cake. For a low-carb option, you can use almond flour.
  • 2 tbsp sugar: Any kind works, including brown sugar, coconut sugar, erythritol, or monk fruit for a sugar-free version.
  • ¼ tsp baking powder: This is essential for leavening, ensuring your cake rises nicely.
  • 1 ½ tbsp oil or melted butter: I used olive oil here, but feel free to substitute with coconut oil or melted vegan butter.
  • 2 tbsp applesauce: This adds moisture and sweetness, making the cake tender.
  • ¼ cup diced apple: I keep the peel on for added fiber and nutrients—use any apple variety you like!
  • ¼ tsp cinnamon: A must for that warm, autumn flavor.

Step-by-Step Instructions

Follow these simple steps to create your delicious apple mug cake:

  1. In a small bowl, mix together the flour, sugar, cinnamon, and baking powder until well combined.
  2. Add the diced apple and stir to incorporate.
  3. Measure out the oil (or melted butter) and the applesauce; pour these into the dry ingredients.
  4. Mix until everything is well combined—don’t overmix!
  5. Pour the batter into a sprayed microwave-safe mug or ramekin.
  6. Microwave on high for 1 minute; if not fully cooked, add in 15-second increments until a toothpick comes out clean.
  7. Top with your favorite additions—ice cream, whipped cream, or simply dig in!

Pro Tips for the Best Apple Mug Cake

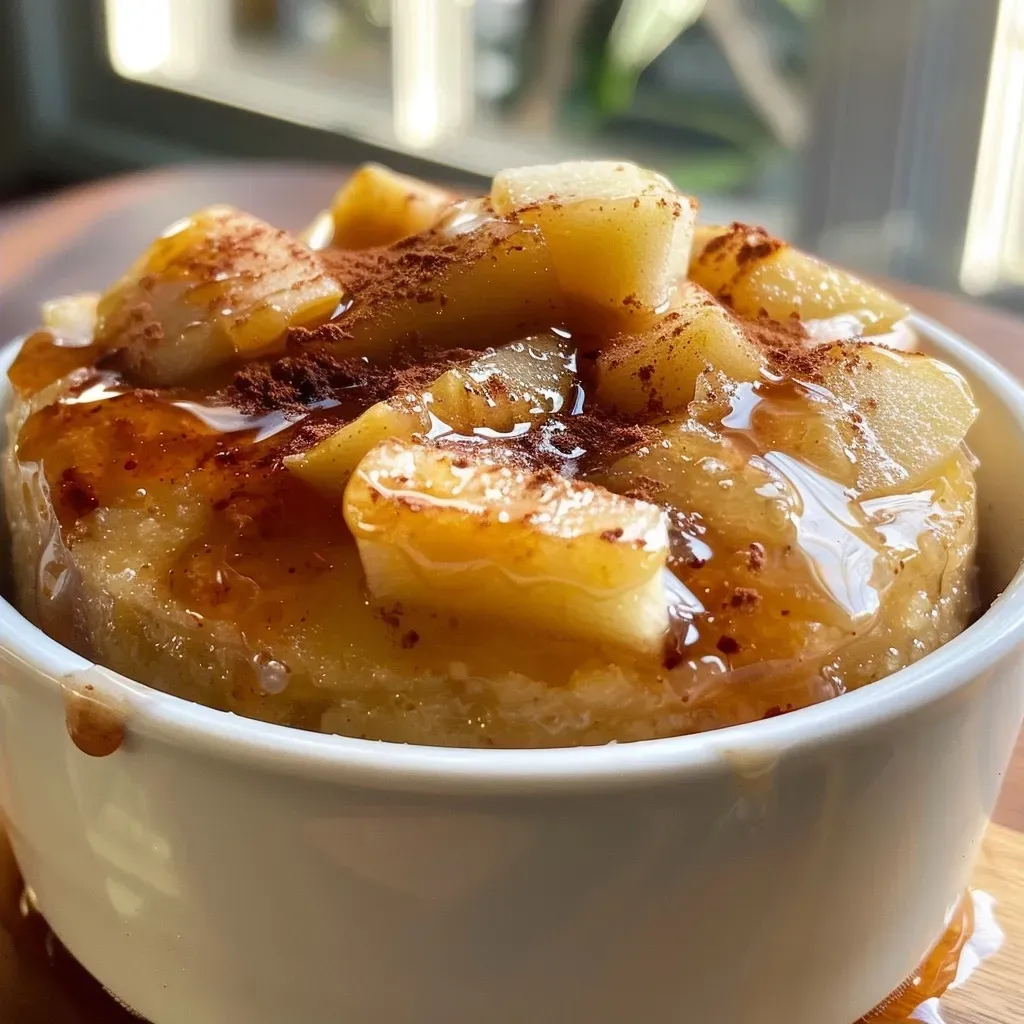
Close-up view of a delicious apple mug cake on a wooden table.
  • Don’t Overmix: Mixing too much can make the cake dense. Stir until just combined.
  • Microwave Variations: Depending on your microwave’s wattage, cooking times may vary—keep an eye on it!
  • Flavor Boost: Add a splash of vanilla extract or a pinch of nutmeg for an extra layer of flavor.
  • Fruit Choices: While this recipe features apples, you can substitute with mashed bananas, pears, or even berries.
  • Make it Vegan: Substitute the butter with coconut oil and ensure the milk is plant-based.
  • Protein Boost: Mix in a scoop of your favorite protein powder to elevate the nutrition.
  • Texture Variations: For a chewy texture, add in some oats or nuts.
  • Sweetness Level: Adjust the amount of sugar based on your taste preference or dietary needs.

Common Mistakes to Avoid

Here are some pitfalls to watch out for when making your apple mug cake:

  • Too Much Liquid: Adding too much oil or applesauce can lead to a soggy cake. Stick to the measurements!
  • Inadequate Cooking Time: If your mug cake is undercooked, it will be gummy. Cook it until a toothpick comes out clean.
  • Using Cold Ingredients: Room temperature ingredients mix better, leading to a smoother batter.
  • Ignoring the Mug Size: Ensure your mug is large enough to allow the cake to rise without overflowing.

Variations to Try

  • Chocolate Chip Apple Mug Cake: Add a tablespoon of dark chocolate chips for a sweet twist.
  • Nutty Apple Mug Cake: Incorporate chopped walnuts or pecans for added crunch and healthy fats.
  • Spiced Apple Mug Cake: Experiment with different spices like ginger or allspice for a unique flavor profile.
  • Caramel Apple Mug Cake: Swirl in some caramel sauce before microwaving for a decadent treat.

Storage and Make-Ahead Instructions

This apple mug cake is best enjoyed fresh, but if you have leftovers, here’s how to store them:

  • Refrigeration: Store any uneaten cake in an airtight container in the refrigerator for up to 2 days.
  • Reheating: To reheat, microwave for 10-15 seconds. Be cautious not to overheat, as it can dry out.
  • Make-Ahead: You can prepare the dry ingredients in advance and store them in a jar. Just add wet ingredients when you’re ready to cook!

Frequently Asked Questions

  • Can I double the recipe? Yes, you can double the ingredients, but you will need to cook it in separate mugs or increase the cooking time accordingly.
  • What type of apples work best? Honeycrisp or Granny Smith are great choices for their sweetness and texture.
  • Can I use a different sweetener? Absolutely! Feel free to use any sweetener you prefer, keeping in mind that liquid sweeteners may alter the consistency.
  • Is this recipe gluten-free? Yes, by substituting all-purpose flour with a gluten-free flour mix, this recipe can easily be made gluten-free.
  • How can I make it lower in calories? Use less sugar, a sugar substitute, or reduce the oil quantity to lower the calorie count.
  • What if I don’t have a microwave? You can bake it in a small oven-safe dish at 350°F for about 15-20 minutes.
  • Can I add other fruits? Yes! Feel free to experiment with other fruits like blueberries or raspberries for a different flavor.
  • What are the nutritional benefits? This mug cake is high in fiber from the apples and can be tailored to be higher in protein and lower in sugar depending on your ingredient choices.

Nutritional Tips and Dietary Adaptations

This apple mug cake can be adjusted to meet various dietary needs:

  • For a Protein Boost: Use protein powder or high-protein flour.
  • Low-Carb Version: Substitute all-purpose flour with almond flour or coconut flour.
  • Dairy-Free: Use a plant-based milk and coconut oil instead of butter.
  • Lower Sugar: Use sugar substitutes like stevia or monk fruit sweetener.

Equipment Recommendations

Here’s what you’ll need to successfully make your apple mug cake:

  • Microwave-Safe Mug: A sturdy mug is essential for even cooking.
  • Mixing Bowl: A small bowl for combining ingredients.
  • Measuring Cups and Spoons: Accurate measurements are key for success.
  • Whisk or Spoon: For mixing your batter smoothly.

Serving Suggestions

Enjoy your apple mug cake on its own, or elevate your dessert with these toppings:

  • Ice Cream: A scoop of vanilla or caramel ice cream pairs beautifully.
  • Whipped Cream: A dollop adds a creamy texture and sweetness.
  • Chopped Nuts: Sprinkle some nuts on top for added crunch and nutrition.
  • Drizzle of Honey: A little honey or maple syrup can enhance the sweetness.

With this comprehensive guide, you’re well-equipped to create a delicious, nutritious apple mug cake that satisfies your sweet tooth while keeping your fitness goals on track. Remember, cooking is about experimenting and having fun, so feel free to make this recipe your own. Enjoy your journey to hitting those protein goals with flavor and confidence!

Apple Mug Cake

Prep Time 2 minutes
Cook Time 1 minute
Total Time 3 minutes
Servings 1 serving
Calories 180
A quick and delicious apple-flavored mug cake perfect for a cozy treat in minutes.

Ingredients

dry ingredients

  • 4 tbsp all-purpose flour (or gluten-free flour mix)
  • 2 tbsp sugar (brown, coconut, erythritol or monk fruit for sugar-free)
  • ¼ tsp baking powder

wet ingredients

  • 1 ½ tbsp oil or melted butter (olive oil or any oil works)
  • 2 tbsp apple sauce
  • ¼ cup diced apple (with peel)
  • ¼ tsp cinnamon

Instructions 

  • Mix flour, sugar, cinnamon, and baking powder in a small bowl.
  • Add diced apple and stir to combine.
  • Pour in oil and applesauce; stir until smooth.
  • Pour batter into a sprayed microwave-safe mug.
  • Microwave on high for 1 minute; add 15 sec if needed until cooked.
  • Top with desired toppings and enjoy!

Notes

Use a microwave-safe mug for best results.
Calories: 180kcal
Cost: $3
Course: Dessert
Cuisine: American
Keyword: apple, mug cake

Introducing a Deliciously Energizing Black Bean Pasta

If you’re on a quest to hit your protein goals without sacrificing flavor, Black Bean Pasta is your culinary ally. This dish marries the robust flavor of black beans with the comforting texture of pasta, making it a high-protein powerhouse perfect for busy weeknights. In this article, we’ll explore how to create a quick and delicious black bean pasta that’s not only healthy but also a delight to your taste buds. Let’s dive in!

Why You’ll Love This Black Bean Pasta Recipe

  • Protein-Packed: With black beans and whole wheat pasta, you’ll get a substantial protein boost, helping you stay full and energized.
  • Quick and Easy: This recipe comes together in under 30 minutes, perfect for those busy evenings when you need a healthy meal fast.
  • Flavorful Ingredients: Fresh vegetables, aromatic herbs, and spices create a deliciously satisfying dish that never feels boring.
  • Versatile Base: Customize the pasta by adding your favorite proteins, vegetables, or sauces to suit your taste and dietary needs.
  • Meal Prep Friendly: Make a big batch at the beginning of the week for quick lunches or dinners, ensuring you hit your macros effortlessly.

Ingredient Breakdown for Black Bean Pasta

Here’s what you’ll need to create this energizing dish:

  • 8 oz pasta: Any shape works, but whole wheat is recommended for added fiber and nutrients.
  • 2 tbsp olive oil: Extra virgin is preferred for its rich flavor and health benefits.
  • 1 medium onion: Finely diced for a sweet and aromatic base.
  • 1 medium carrot: Grated for a touch of sweetness and vibrant color.
  • 1 medium red bell pepper: Finely chopped to add crunch and freshness.
  • 3 cloves garlic: Freshly chopped garlic infuses the dish with robust flavor.
  • 2 tbsp fresh rosemary: Chopped for a fragrant herbal note.
  • 1 tbsp fresh thyme: Adds a warm, earthy taste.
  • 1 tsp red chili flakes: Adjust according to your spice preference.
  • 1 tsp salt: To taste, enhancing all the flavors.
  • 2 tbsp tomato paste: Concentrated flavor that enriches the sauce.
  • 14 oz crushed tomatoes: The base of the sauce, adding moisture and tang.
  • 1 can black beans: Drained and rinsed; they are the star of the dish!
  • 1 tbsp fresh parsley: Chopped for garnish and a fresh finish.
  • 1 tsp black pepper: For seasoning.

How to Make Black Bean Pasta

Close-up of a bowl of black bean pasta with colorful vegetables.

Follow these steps to create your energizing black bean pasta:

  1. In a large pot, bring salted water to a boil. Add the pasta and cook until al dente, following package instructions. Reserve 1 cup of pasta water before draining.
  2. In a large skillet, heat the olive oil over medium heat. Sauté the onion and carrot until softened, about 5 minutes.
  3. Add the garlic, red bell pepper, rosemary, thyme, red chili flakes, salt, and black pepper. Cook for another 2-3 minutes until fragrant.
  4. Stir in the tomato paste and crushed tomatoes. Allow the sauce to simmer for 5-7 minutes, stirring occasionally.
  5. Add the black beans and a splash of reserved pasta water to the skillet, stirring to combine. Let it simmer for an additional 5 minutes to meld the flavors.
  6. Combine the cooked pasta with the sauce, tossing to coat. If the mixture seems dry, add more reserved pasta water until you achieve your desired consistency.
  7. Serve hot, garnished with fresh parsley.

Pro Tips for Perfect Black Bean Pasta

  • Choose the Right Pasta: Whole wheat pasta is recommended for its nutritional benefits, but gluten-free options are available too.
  • Don’t Skip the Pasta Water: Adding reserved pasta water can create a silkier sauce that clings beautifully to the pasta.
  • Season Generously: Don’t be shy with the herbs and spices; they enhance the overall flavor profile.
  • Mix and Match: Feel free to swap in different vegetables or proteins to keep things interesting.
  • Make Ahead: This dish stores well, making it ideal for meal prep. Just reheat on the stovetop or in the microwave.
  • Storage Tips: Store leftovers in an airtight container in the fridge for up to 4 days.
  • Freezing Option: You can freeze this dish for up to 2 months. Just reheat thoroughly before serving.
  • Fresh Herbs: Always consider adding fresh herbs at the end of cooking for a burst of flavor.
  • Topping Ideas: Consider adding avocado slices or a sprinkle of feta cheese for extra creaminess and depth.
  • Adjusting Spice Levels: If you prefer a milder dish, reduce the amount of red chili flakes or omit them altogether.

Common Mistakes and Troubleshooting

Even the best cooks make mistakes. Here are some common pitfalls to avoid:

  • Overcooking the Pasta: Keep an eye on your pasta to ensure it stays al dente. Cook it just until tender.
  • Too Much Sauce: If the sauce is too watery, simmer it longer to thicken.
  • Not Enough Seasoning: Always taste your sauce and adjust salt and spices as necessary.
  • Skipping the Herbs: Fresh herbs can elevate the dish, so try not to leave them out!

Variations to Elevate Your Black Bean Pasta

Here are some variations to keep your meals exciting:

  • Protein Boost: Add grilled chicken, shrimp, or tofu for additional protein.
  • Vegetable Medley: Include zucchini, spinach, or kale for extra nutrients and color.
  • Spicy Twist: Add jalapeños or a dash of hot sauce for heat.
  • Cheesy Delight: Stir in some shredded cheese or nutritional yeast for a cheesy flavor.

Storage and Make-Ahead Instructions

This dish is perfect for meal prep! Store leftovers in an airtight container in the fridge for up to 4 days. For longer storage, freeze portions in freezer-safe bags for up to 2 months. Reheat on the stovetop with a splash of water to revive its original texture.

Frequently Asked Questions

  • Can I make this recipe gluten-free? Yes! Use gluten-free pasta and ensure your other ingredients are also gluten-free.
  • How do I store leftovers? Keep in an airtight container in the fridge for up to 4 days.
  • Can I freeze black bean pasta? Yes, it freezes well! Store in freezer-safe containers for up to 2 months.
  • What can I serve with black bean pasta? This dish pairs well with a simple side salad or steamed vegetables.
  • Is black bean pasta nutritious? Absolutely! It offers a great balance of protein, fiber, and essential nutrients.
  • How can I make it vegan? This recipe is already vegan-friendly, just ensure any toppings are also plant-based.
  • What’s the best way to reheat it? Reheat on the stovetop with a splash of water for even heating.
  • Can I use canned beans? Yes! Canned black beans work perfectly; just rinse and drain before use.

Nutrition Tips and Dietary Adaptations

This black bean pasta is naturally high in protein and fiber, making it a filling option. To further enhance its nutritional value, consider adding a variety of colorful vegetables. If you’re watching your carb intake, you can substitute traditional pasta with spiralized vegetables like zucchini or use a legume-based pasta for an even higher protein content.

Recommended Equipment

  • Large Pot: For boiling pasta efficiently.
  • Skillet: A large skillet is essential for sautéing your aromatic ingredients.
  • Wooden Spoon: For easy stirring and mixing without scratching your cookware.
  • Measuring Cups and Spoons: To ensure accurate ingredient measurements.

Serving Suggestions

Serve your black bean pasta hot, garnished with fresh parsley and perhaps a sprinkle of cheese or nutritional yeast for a savory finish. Pair it with a crisp green salad or roasted vegetables for a complete meal that’s as nutritious as it is delicious!

Conclusion

This energizing black bean pasta is not just a meal; it’s a strategy to hit your protein goals without sacrificing flavor or satisfaction. With its quick prep time and versatile ingredients, it’s a recipe worth adding to your regular rotation. Get cooking, and enjoy a delicious path towards your fitness goals!

Energizing Black Bean Pasta for a Quick Healthy Dinner

Prep Time 10 minutes
Cook Time 15 minutes
Total Time 25 minutes
Servings 4 servings
Calories 450
A nutritious and flavorful pasta dish packed with black beans and fresh herbs, perfect for a quick and healthy dinner.

Ingredients

Pasta

  • 8 oz pasta (any shape, whole wheat recommended)

Olive Oil

  • 2 tbsp olive oil (extra virgin recommended)

Vegetables

  • 1 medium onion (finely diced)
  • 1 medium carrot (grated)
  • 1 medium red bell pepper (finely chopped)

Garlic and Herbs

  • 3 cloves garlic (freshly chopped)
  • 2 tbsp fresh rosemary
  • 1 tbsp fresh thyme

Spices and Seasonings

  • 1 tsp red chili flakes (adjust to spice preference)
  • 1 tsp salt (to taste)

Tomato Base

  • 2 tbsp tomato paste
  • 14 oz crushed tomatoes

Beans and Herbs

  • 1 can black beans (drained and rinsed)
  • 1 tbsp fresh parsley (chopped)
  • 1 tsp black pepper (to taste)

Instructions 

  • Cook pasta according to package instructions, then drain and set aside.
  • In a large pan, heat olive oil and sauté diced onion, grated carrot, and chopped bell pepper until tender.
  • Add chopped garlic, rosemary, thyme, red chili flakes, and salt; cook for 1 minute.
  • Stir in tomato paste and crushed tomatoes; simmer for 5 minutes.
  • Add black beans and cooked pasta; toss to combine and heat through. Garnish with chopped parsley and black pepper before serving.

Notes

For extra flavor, sprinkle with grated cheese or a squeeze of lemon before serving.
Calories: 450kcal
Cost: $12
Course: Main Course
Cuisine: Healthy
Keyword: Black Bean, pasta, Vegetarian

Transform Your Dinner with This Shrimp and Spinach Stir Fry

If you’re looking for a quick, nutritious, and flavorful meal that packs a protein punch, look no further than this shrimp and spinach stir fry. With vibrant ingredients and a zesty sauce, this dish is perfect for busy weeknights or meal prep. In just about 30 minutes, you can whip up a high-protein, low-carb dinner that satisfies your taste buds and meets your nutritional goals.

Why You’ll Love This Recipe

  • Quick Prep Time: This shrimp and spinach stir fry can be ready in under 30 minutes, making it a perfect choice for weeknight dinners.
  • High Protein: With shrimp as the primary protein source, this dish provides a substantial amount of protein to fuel your workouts and recovery.
  • Low Carb: Packed with fresh vegetables and lean protein, this stir fry is a great option for low-carb diets.
  • Versatile Ingredients: Feel free to customize the vegetables or add different proteins based on what you have at home.
  • Delicious Flavor: The combination of garlic, lemon, and sautéed vegetables creates a dish that is both savory and vibrant, ensuring you’ll want to make it again and again.

Ingredient Breakdown

Here’s what you need to make this shrimp and spinach stir fry, along with some substitution options:

  • Shrimp (150 grams): Fresh or frozen shrimp can be used—just ensure they are peeled and deveined.
  • Spinach (100 grams): Fresh spinach adds flavor and nutrients; you can substitute with kale or Swiss chard if needed.
  • Onion (1 unit): Any variety works, but yellow or red onions add sweetness.
  • Bell Pepper (1 unit): Use any color for added sweetness and crunch; green bell peppers provide a slightly bitter flavor.
  • Garlic (2 cloves): Fresh garlic is essential for flavor; garlic powder can be used in a pinch.
  • Olive Oil (2 tablespoons): For sautéing; feel free to use avocado oil for a higher smoke point.
  • Lemon (0.5 unit): Fresh lemon juice brightens the dish; lime can be a good substitute.
  • Salt (1 teaspoon) and Pepper (0.5 teaspoon): Adjust to taste.

Cooking Steps: A Quick Guide

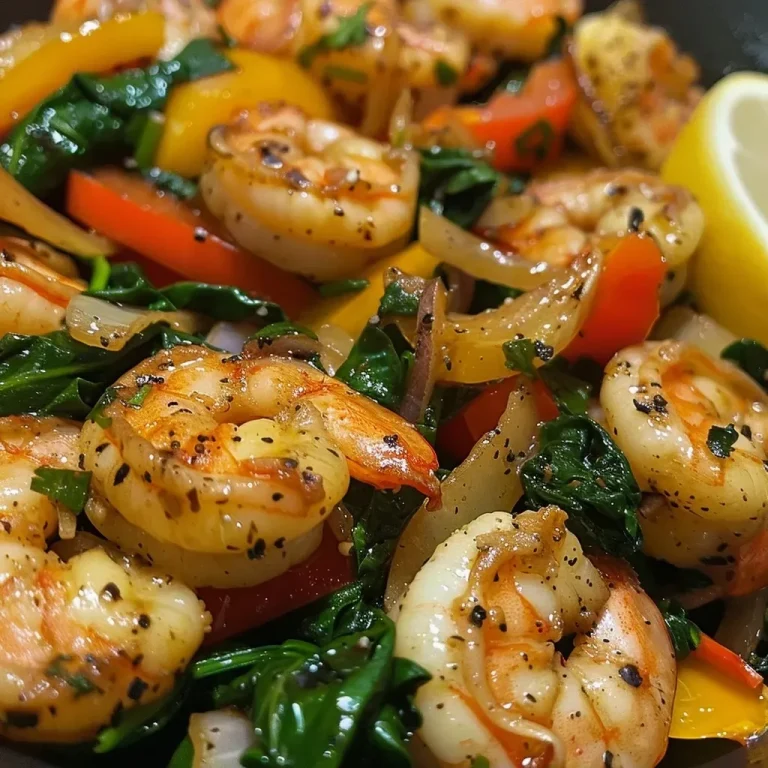
Close-up view of a shrimp and spinach stir fry with colorful vegetables.

Follow these simple steps to create your shrimp and spinach stir fry:

  1. Heat olive oil in a pan over medium heat until shimmering.
  2. Add chopped onion and bell pepper, sauté until soft and caramelized.
  3. Mix in minced garlic, cooking for about a minute until fragrant.
  4. Stir in shrimp, cooking until they turn pink and opaque (about 3-4 minutes).
  5. Add spinach, stirring gently until it wilts but retains its vibrant color.
  6. Season with salt, pepper, and a squeeze of lemon juice, tossing to combine.

Pro Tips for Perfect Stir Fry

  • High Heat is Key: Always cook stir fry on high heat to ensure a good sear on the shrimp and vegetables.
  • Prep Ingredients Ahead: Chop vegetables and marinate shrimp in advance to save time during cooking.
  • Don’t Overcrowd the Pan: Cook in batches if necessary to avoid steaming the ingredients.
  • Customize Your Sauce: Add soy sauce or a splash of sesame oil for extra flavor.
  • Fresh Ingredients Matter: Use the freshest shrimp and vegetables for the best taste and nutrition.
  • Experiment with Spices: Try adding a pinch of red pepper flakes for heat or ginger for a zing.
  • Use a Non-Stick Pan: This helps prevent sticking and makes cleanup easier.
  • Garnish for Presentation: A sprinkle of sesame seeds or green onions can elevate the dish visually.

Avoid These Common Mistakes

To ensure your stir fry turns out perfectly every time, keep these tips in mind:

  • Not Preheating the Pan: Always let the pan get hot before adding oil and ingredients to achieve the right texture.
  • Overcooking the Shrimp: Shrimp cooks quickly; remove them from the heat as soon as they are pink and opaque.
  • Skipping the Garlic: Garlic adds essential flavor; don’t skip it or substitute with powder alone.
  • Using Frozen Vegetables: Fresh vegetables yield the best texture and flavor in stir fry.

Variations to Try

Mix things up with these variations of shrimp and spinach stir fry:

  • Spicy Shrimp and Spinach: Add chili paste or red pepper flakes for some heat.
  • Teriyaki Shrimp Stir Fry: Use teriyaki sauce instead of lemon juice for a sweet and savory twist.
  • Garlic Butter Shrimp: Replace olive oil with butter for a rich flavor.
  • Vegetarian Option: Substitute shrimp with tofu or chickpeas for a plant-based meal.

Storage and Make-Ahead Instructions

You can prepare this shrimp and spinach stir fry ahead of time, and here’s how to store it:

  • Refrigerator: Store leftovers in an airtight container for up to 3 days. Reheat in a pan or microwave.
  • Freezer: This dish can be frozen for up to 2 months. Thaw overnight in the refrigerator before reheating.
  • Make-Ahead Prep: Chop vegetables and marinate shrimp a day in advance for easy cooking.

Frequently Asked Questions

  • Can I use frozen shrimp? Yes, just ensure they are thawed completely before cooking.
  • Is this stir fry gluten-free? Yes, as long as you use gluten-free soy sauce or tamari if adding sauce.
  • What can I serve with this stir fry? Serve over rice, quinoa, or enjoy it on its own for a low-carb meal.
  • How can I increase the protein content? Add edamame or serve with a side of Greek yogurt for extra protein.
  • Can I make this vegetarian? Absolutely! Replace shrimp with tofu or another protein source.
  • What if I don’t like spinach? Feel free to substitute with other leafy greens like kale or bok choy.
  • How do I know when the shrimp are done? They should be pink and opaque; avoid overcooking for the best texture.
  • Can I add more vegetables? Yes, mix in your favorite stir-fry vegetables such as broccoli or snap peas.

Nutrition Tips and Dietary Adaptations

This shrimp and spinach stir fry fits various dietary needs:

  • Pescatarian: This dish is perfect for pescatarians looking for a high-protein meal.
  • Low Carb: It’s a great choice for low-carb diets, focusing on protein and vegetables.
  • Dairy-Free: This recipe contains no dairy, making it suitable for those with lactose intolerance.
  • Customizable Macronutrients: Adjust shrimp quantity or add more vegetables to meet specific dietary goals.

Essential Equipment

Here’s what you need to cook this shrimp and spinach stir fry:

  • Non-stick skillet or wok: Ideal for stir-frying without sticking.
  • Spatula: For flipping and stirring ingredients efficiently.
  • Knife and cutting board: For chopping vegetables and shrimp prep.
  • Measuring spoons: To measure oil, salt, and other seasonings accurately.

Serving Suggestions

Here are a few ways to serve your shrimp and spinach stir fry:

  • Over Rice or Quinoa: Serve over a bed of brown rice or quinoa for a wholesome meal.
  • With Noodles: Toss with whole grain or rice noodles for a fulfilling dish.
  • As a Salad: Serve cold over mixed greens for a refreshing option.
  • Garnished with Nuts: Top with chopped nuts for a crunch and healthy fat boost.

Conclusion

This shrimp and spinach stir fry is not just a meal; it’s a versatile recipe that can adapt to your dietary needs while delivering fantastic flavor and nutrition. Whether you’re hitting the gym or just looking for a quick dinner, this dish will help you stay on track with your protein goals without sacrificing taste. Get cooking and elevate your meals with this protein-packed delight!

Shrimp and Spinach Stir Fry

Prep Time 10 minutes
Cook Time 10 minutes
Total Time 20 minutes
Servings 2 servings
Calories 250
A quick and healthy stir fry combining succulent shrimp with fresh spinach and vibrant vegetables, perfect for a nutritious meal.

Ingredients

Protein

  • 150 gram shrimp

Vegetables

  • 100 gram spinach
  • 1 unit onion
  • 1 unit bell pepper

Aromatics

  • 2 cloves garlic
  • 2 tablespoons olive oil
  • 0.5 unit lemon (for juice)

Seasonings

  • 1 teaspoon salt
  • 0.5 teaspoon pepper

Instructions 

  • Heat olive oil in a pan over medium heat.
  • Add chopped onion and bell pepper; sauté until soft.
  • Stir in minced garlic; cook for about 1 minute.
  • Add shrimp; cook until pink, about 3-4 minutes.
  • Stir in spinach; cook until wilted. Season with salt, pepper, and lemon juice.

Notes

Serve immediately for best flavor and freshness.
Calories: 250kcal
Cost: $12
Course: Main Course
Cuisine: Asian
Keyword: shrimp

Unlock the Secret to a Deliciously Healthy Dessert

Welcome to your new favorite indulgence: the Cranberry Tofu Dessert. This dish seamlessly blends health and flavor, offering a protein-rich treat that’s perfect for satisfying your sweet tooth without the guilt. With the combination of silken tofu and fresh cranberries, you can enjoy a dessert that aligns with your fitness goals. Whether you’re a fitness enthusiast or just someone who enjoys delicious food, this dessert proves that eating healthy doesn’t mean compromising on taste. Let’s dive in!

Why You’ll Love This Recipe

This Cranberry Tofu Dessert is more than just a treat; it’s a testament to how nutritious ingredients can create exquisite flavors. Here are five compelling reasons to try this recipe:

  • High Protein Content: Made with silken tofu, this dessert delivers a substantial protein boost, making it a satisfying option for muscle recovery.
  • Low in Added Sugars: By controlling the amount of sugar, you can enjoy a sweet taste without going overboard on empty calories.
  • Quick Prep Time: This recipe can be prepared in under an hour, making it perfect for last-minute gatherings or meal prep.
  • Versatile Base: The silken tofu acts as a blank canvas, allowing you to infuse various flavors and adapt the recipe to suit your preferences.
  • Perfect for Meal Prep: This dessert stores well, so you can make it ahead of time and have a nutritious treat ready whenever cravings hit.

Ingredients Breakdown

Let’s take a closer look at the ingredients that make this recipe a winner:

  • 1/4 cup flour: A little flour helps bind the cookie crust. For a gluten-free option, consider almond flour or coconut flour.
  • 2 tablespoons unsweetened orange juice: Adds a zesty flavor to the cranberry sauce. You can substitute it with lemon juice if necessary.
  • 1 (10 ounce) package “slice and bake” sugar cookie dough: This is the base for the crust. If you want a healthier version, use whole grain or oat flour cookie dough.
  • 1 (10 ounce) package “lite” silken tofu, extra firm: The hero of this dessert. Silken tofu provides creaminess and protein. You can use regular silken tofu, but the lite version has fewer calories.
  • 3 cups fresh cranberries: Freshness is key here. If fresh cranberries aren’t available, frozen ones will do, but avoid canned due to added sugars.
  • 1/2 teaspoon vanilla extract: Essential for adding depth to the flavor. Use pure vanilla extract for the best taste.
  • 2/3 cup granulated sugar: Adjust the sugar levels based on your taste preference. Consider alternatives like stevia for a lower-calorie option.
  • 1/4 teaspoon almond extract: A splash of almond extract enhances the overall flavor profile. Feel free to omit if you’re not a fan.
  • 1/4 cup water: Used to cook the cranberries down into a sauce.
  • 1/3 cup granulated sugar: This sugar is for the cranberry sauce; adjust according to your sweetness preference.
  • 1 tablespoon cornstarch: Thickens the cranberry sauce, ensuring it holds together nicely.

Pro Tips for Perfecting Your Cranberry Tofu Dessert

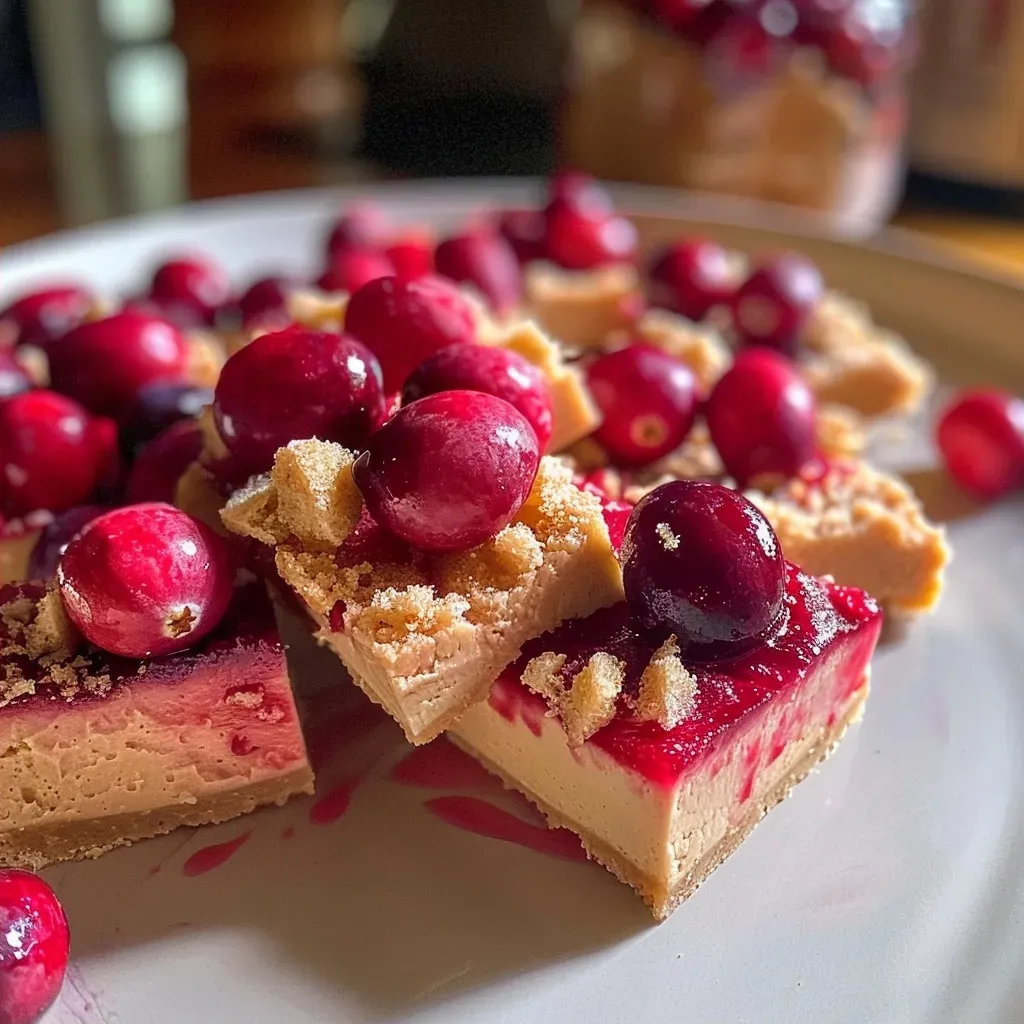
Close-up view of a delicious cranberry tofu dessert showcasing vibrant cranberry toppings.

To ensure your dessert turns out perfectly every time, consider these expert insights:

  • Chill the Tofu: Before blending, chill the tofu for a creamier texture. This step helps achieve a velvety consistency when processed.
  • Don’t Overcook the Cranberries: Keep an eye on the saucepan to avoid overcooking the cranberries. You want them to burst but not turn mushy.
  • Let It Set: After assembling, let your dessert chill in the fridge for at least 2 hours to allow the flavors to meld.
  • Experiment with Flavors: Feel free to add spices like cinnamon or nutmeg to the filling for a fall-inspired twist.
  • Use Quality Ingredients: Whenever possible, use organic cranberries and high-quality extracts for the best flavor.
  • Cut Cleanly: Use a hot, dry knife to slice the dessert cleanly without smearing the layers.
  • Make It Ahead: This dessert can be made up to 2 days in advance, making it perfect for parties or meal preps.
  • Serve Chilled: This dessert is best enjoyed chilled, so keep it in the fridge until it’s time to serve.

Common Mistakes and Troubleshooting

Even the best cooks can face challenges. Here’s how to avoid common pitfalls:

  • Dry Cookie Crust: If your crust turns out dry, ensure that the dough is rolled out evenly and not overbaked.
  • Too Sweet: Adjust the sugar in both the filling and sauce to suit your taste. Always start with less; you can add more if needed.
  • Not Blending Enough: Ensure the tofu is blended until completely smooth; lumps can affect the texture of the filling.
  • Watery Cranberry Sauce: If your sauce is too watery, increase the cornstarch slightly or cook it a bit longer to thicken.

Variations to Try

Get creative with these variations to make this dessert your own:

  • Chocolate Cranberry Tofu Dessert: Add cocoa powder to the tofu mixture to give it a rich chocolate flavor.
  • Nutty Crust: Blend in ground nuts like almonds or walnuts into the cookie crust for added flavor and texture.
  • Berry Blend: Mix in other berries such as blueberries or raspberries with the cranberries for a mixed berry version.
  • Caramel Drizzle: Top with a light drizzle of sugar-free caramel sauce for an extra indulgent touch.

Storage and Make-Ahead Instructions

This dessert is perfect for meal prepping! Here’s how to store it:

  • Refrigeration: Store covered in the refrigerator for up to 3 days. The longer it sits, the more the flavors meld.
  • Freezing: Although not ideal due to texture changes, you can freeze slices in an airtight container for up to 2 months. Thaw in the fridge before serving.

Comprehensive FAQ

Here are answers to some common questions about this recipe:

  • Can I use tofu that is not silken?: While silken tofu is ideal for creaminess, you can use firm tofu; just ensure it’s blended well.
  • What can I substitute for the sugar?: Consider using coconut sugar, honey, or stevia for a healthier alternative.
  • Is this dessert gluten-free?: If you use gluten-free flour and cookie dough, it can easily be made gluten-free.
  • How do I know when the cranberry sauce is done?: The sauce should be thickened and the cranberries should burst when cooked.
  • Can I use frozen cranberries?: Yes, frozen cranberries work well; just do not thaw them before cooking.
  • How can I enhance the flavor?: Adding spices like cinnamon or nutmeg can elevate the taste significantly.
  • Is this dessert suitable for vegans?: Yes, it’s entirely plant-based and dairy-free.
  • How long does it take to prepare?: The preparation time is around 20 minutes, with an additional chilling time of at least 2 hours.

Nutritional Tips and Dietary Adaptations

This dessert is a great option for various dietary needs:

  • For low-carb diets: Use almond flour for the crust and reduce sugar in the filling.
  • For high-protein needs: Pair this dessert with a protein shake or a high-protein snack for a post-workout treat.
  • For vegan diets: This recipe is naturally vegan, made with tofu and plant-based ingredients.
  • For dairy-free diets: The use of silken tofu ensures that it’s completely dairy-free.

Essential Equipment Recommendations

To make the preparation process smooth, consider having the following tools on hand:

  • Food Processor: Essential for blending the tofu smoothly.
  • Springform Pan: Makes it easy to remove the dessert without damaging the crust.
  • Measuring Cups and Spoons: Accurate measurements are crucial for the best results.
  • Whisk: Useful for mixing the cranberries and sugar together.

Serving Suggestions

To elevate your dessert experience, consider these serving ideas:

  • Garnish with Fresh Mint: Adds a pop of color and freshness.
  • Pair with Greek Yogurt: A dollop of Greek yogurt on the side adds creaminess and additional protein.
  • Drizzle with Honey or Maple Syrup: A light drizzle can enhance sweetness without overpowering the dish.
  • Serve with Dark Chocolate Shavings: For a touch of luxury, sprinkle some dark chocolate on top.

In conclusion, the Cranberry Tofu Dessert is not just a delightful treat but a smart choice for anyone looking to indulge without the guilt. By using wholesome ingredients and following these tips, you’re not just satisfying your cravings but also fueling your body. So, what are you waiting for? Get in the kitchen and whip up this amazing dessert today!

Cranberry Tofu Dessert

Prep Time 20 minutes
Cook Time 15 minutes
Total Time 35 minutes
Servings 12 servings
Calories 250
A delightful and creamy dessert combining tart cranberries with smooth silken tofu, perfect for festive occasions.

Ingredients

Cookie crust

  • 1/4 cup flour
  • 2 tablespoons unsweetened orange juice
  • 1 package slice and bake sugar cookie dough (10 ounces)
  • 1 package lite silken tofu, extra firm (10 ounces)
  • 3 cups fresh cranberries
  • 1/2 teaspoon vanilla extract
  • 2/3 cup granulated sugar
  • 1/4 teaspoon almond extract
  • 1/4 cup water
  • 1/3 cup granulated sugar
  • 1 tablespoon cornstarch

Instructions 

  • Roll out sugar cookie dough to 1/8 inch thickness and fit into a springform pan. Bake at 375°F for 12-14 minutes, then cool.
  • Combine cranberries, 2/3 cup sugar, water, cornstarch, and orange juice; boil and cook 1 minute. Cool.
  • Drain and squeeze excess water from tofu. Blend tofu with vanilla, almond extracts, and 1/3 cup sugar until smooth. Spread over crust, top with cranberry sauce, and chill.

Notes

Prepare the crust ahead of time for easier assembly.
Calories: 250kcal
Cost: $15
Course: Dessert
Keyword: Cranberries, dessert, Tofu

Elevate Your Cooking with High-Protein Meals

When it comes to meal prep, hitting your protein goals doesn’t have to mean sacrificing flavor. Today, we dive into a delicious and satisfying recipe for Balsamic Fig Air Fryer Turkey Breast. This dish is not only packed with protein but also rich in taste, making it perfect for anyone looking to elevate their culinary game while keeping their nutrition in check. Whether you’re meal prepping for the week or cooking for a special occasion, this recipe is a game-changer.

Why You’ll Love This Recipe

Here’s why this air fryer turkey breast recipe stands out:

  • High Protein Content: Each serving delivers an impressive amount of protein, ideal for muscle maintenance and recovery.
  • Quick Cooking Time: This recipe cooks in under 15 minutes, perfect for busy weeknights.
  • Flavor Explosion: The balsamic fig glaze adds a unique twist, enhancing the turkey’s natural flavors.
  • Healthy Ingredients: Made with wholesome ingredients that support a balanced diet.
  • Versatile Meal Prep: Great for salads, sandwiches, or as a main dish; it fits various meal plans.

Ingredients Breakdown

Before you start, let’s take a look at what you’ll need:

  • 400g protein of choice: Turkey breast is recommended for its low fat and high protein content. You can substitute with chicken or tofu for a vegetarian option.
  • 2 tbsp cooking oil: Olive oil works best, but avocado oil is a great alternative for high-heat cooking.
  • 2 cups vegetables: Choose your favorites! Broccoli, bell peppers, or zucchini add color and nutrients.
  • 1 cup grain or base: Quinoa, brown rice, or cauliflower rice are excellent choices for a satisfying meal.
  • 3 cloves garlic: Fresh garlic enhances flavor and offers health benefits.
  • Seasoning to taste: Use your favorite spices; consider a dry rub for added flavor.
  • Salt and pepper: Essential for bringing out the flavors.
  • Fresh herbs for garnish: Parsley, basil, or thyme can elevate the dish.

Step-by-Step Instructions

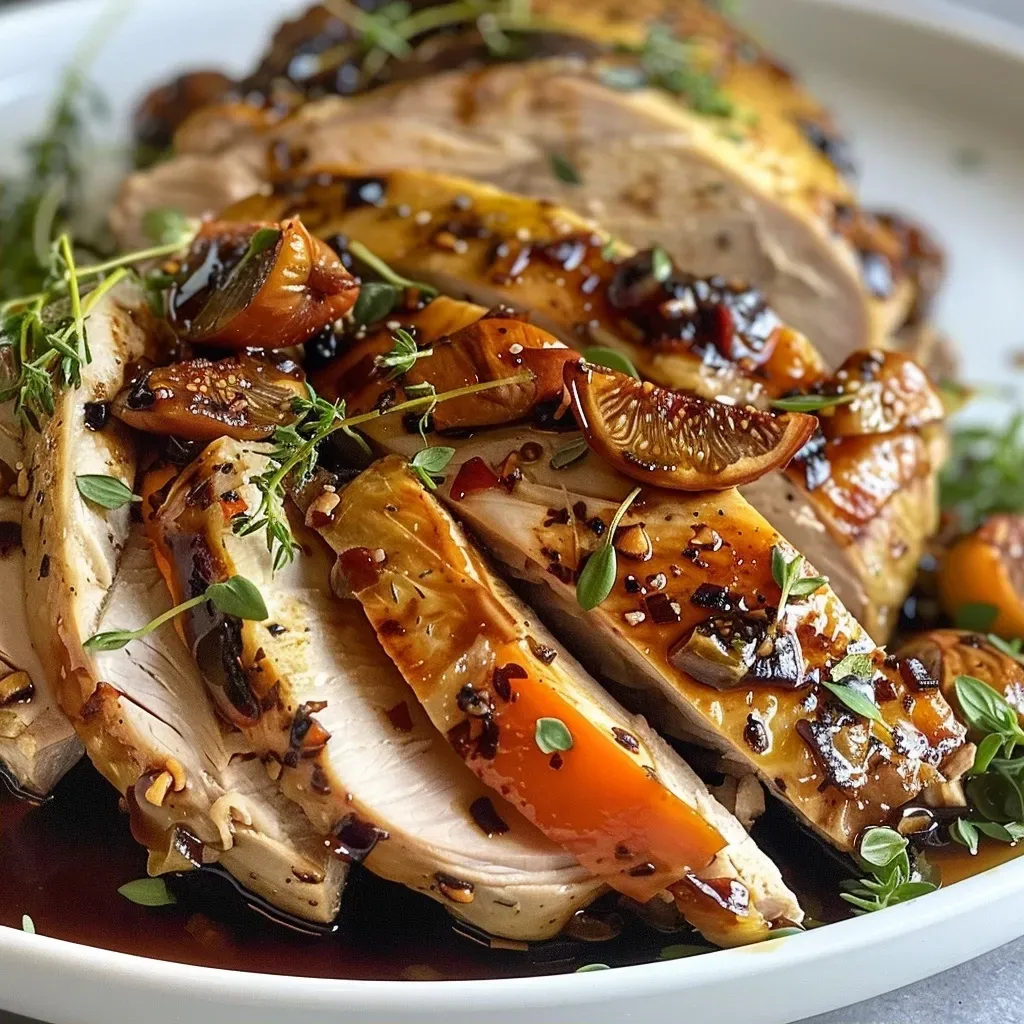
Juicy Balsamic Fig Air Fryer Turkey Breast garnished with herbs.

Ready to cook? Follow these simple steps:

  1. Preheat the air fryer to 400°F (200°C) for 3 minutes.
  2. Season the protein with oil, salt, pepper, and your chosen spices. Toss to coat evenly.
  3. Arrange in a single layer in the air fryer basket. Do not overcrowd.
  4. Air fry for 12 minutes, flipping halfway through, until golden and cooked through.
  5. Remove from air fryer and let rest for 2 minutes before serving.
  6. Plate with your choice of sides and garnish with fresh herbs.

Pro Tips for Perfect Results

To ensure your turkey breast turns out perfectly every time, keep these expert tips in mind:

  • Use a Meat Thermometer: Aim for an internal temperature of 165°F (74°C) for safety and optimal juiciness.
  • Don’t Overcrowd the Basket: For even cooking and crispiness, ensure air can circulate around the turkey.
  • Let It Rest: Allowing the turkey to rest after cooking helps retain juices.
  • Experiment with Seasonings: Vary your spices to keep the flavor profile exciting.
  • Prep in Advance: Marinate the turkey overnight for deeper flavor.
  • Use Fresh Ingredients: Fresh herbs and garlic can significantly enhance the flavor.
  • Double the Recipe: Make extra for meal prep; turkey keeps well in the fridge.
  • Consider Cooking Times: Different air fryers may vary; always keep an eye on your food.

Common Mistakes to Avoid

Even seasoned cooks can make mistakes. Here are some pitfalls to watch for:

  • Skipping the Preheat: Always preheat your air fryer for even cooking.
  • Using Too Much Oil: A little goes a long way; too much can lead to greasy turkey.
  • Not Letting It Rest: This is crucial for juicy turkey; don’t rush this step!
  • Ignoring Seasoning: Flavor is key; don’t hold back on herbs and spices.

Recipe Variations

Looking to mix things up? Here are some variations to try:

  • Honey Mustard Glaze: Replace balsamic with a mixture of honey and mustard for a sweet and tangy alternative.
  • Spicy Chipotle: Add chipotle seasoning for a smoky kick that pairs well with turkey.
  • Barbecue Style: Use your favorite barbecue sauce instead of the balsamic fig for a different flavor profile.
  • Citrus Herb: Marinate with lemon juice and fresh herbs for a refreshing twist.

Storage and Make-Ahead Instructions

This recipe is perfect for meal prep. Here’s how to store it:

  • Refrigeration: Store cooked turkey in an airtight container for up to 4 days.
  • Freezing: Freeze portions for up to 3 months. Thaw in the fridge before reheating.
  • Reheating: Use the air fryer at 350°F (175°C) for about 5 minutes for best results.

FAQs About Balsamic Fig Air Fryer Turkey Breast

Here are some common questions about this recipe:

  • Can I use chicken instead of turkey? Yes, chicken breast works well!
  • What sides pair well with this dish? Consider a fresh salad, roasted vegetables, or a grain like quinoa.
  • Is it suitable for weight loss? Absolutely, as it’s high in protein and low in carbs.
  • Can I cook it without an air fryer? Yes, bake it in the oven at 375°F (190°C) for about 25-30 minutes.
  • What if I don’t have balsamic glaze? You can make a quick substitute by mixing balsamic vinegar with a bit of honey.
  • How can I make it gluten-free? Ensure all sauces and condiments are gluten-free.
  • Can I add more vegetables? Definitely! Feel free to load up your air fryer with veggies.
  • Is this recipe good for meal prep? Yes, it’s perfect for prepping healthy meals throughout the week!

Nutrition Tips and Dietary Adaptations

This recipe is naturally low in carbohydrates and high in protein, making it ideal for various diets:

  • Keto-Friendly: Keep the sides low-carb and focus on non-starchy vegetables.
  • Paleo-Friendly: Stick to whole, unprocessed ingredients.
  • Vegetarian Option: Substitute turkey with marinated tofu or tempeh.

Essential Equipment

For this recipe, you’ll need:

  • Air Fryer: Essential for cooking the turkey quickly and evenly.
  • Meat Thermometer: To ensure the turkey reaches safe temperatures.
  • Mixing Bowls: For seasoning and marinating the turkey.
  • Sharp Knife: For slicing and portioning your cooked turkey.

Serving Suggestions

Here are some ideas to serve your turkey breast:

  • On a Salad: Slice and serve atop a bed of greens with a light vinaigrette.
  • In a Wrap: Use whole grain or lettuce wraps with fresh veggies and hummus.
  • With a Side of Rice: Pair with quinoa or brown rice for a complete meal.
  • As a Snack: Cold turkey slices can be a quick protein-rich snack.

Conclusion

Cooking a Balsamic Fig Air Fryer Turkey Breast is not just about fueling your body; it’s about enjoying flavorful, nutrient-dense meals that fit your lifestyle. With this comprehensive guide, you’re equipped to tackle this recipe with confidence. So, roll up your sleeves, gather your ingredients, and get ready to impress with a dish that checks all the boxes for taste, nutrition, and convenience. Let’s get cooking!

Balsamic Fig Air Fryer Turkey Breast

Prep Time 10 minutes
Cook Time 12 minutes
Total Time 22 minutes
Servings 4 servings
Calories 250
Enjoy a flavorful and juicy turkey breast glazed with balsamic fig sauce, cooked to perfection in the air fryer.

Ingredients

Protein

  • 400 g protein of choice

Cooking oil

  • 2 tbsp cooking oil

Vegetables

  • 2 cups vegetables

Grain or base

  • 1 cup grain or base

Garlic

  • 3 cloves garlic

Seasoning

  • to taste Seasoning

Salt and pepper

  • Salt and pepper

Fresh herbs for garnish

  • Fresh herbs for garnish

Instructions 

  • Preheat air fryer to 400°F (200°C) for 3 minutes.
  • Season turkey with oil, salt, pepper, and spices. Toss to coat.
  • Arrange in air fryer basket without overcrowding.
  • Air fry for 12 minutes, flipping halfway, until cooked.
  • Rest for 2 minutes, then serve with sides and garnish.

Notes

Use a meat thermometer to ensure proper doneness of the turkey.
Calories: 250kcal
Cost: $15
Course: Main Course
Cuisine: American
Keyword: air fryer, Turkey

Unleashing the Power of Bliss Balls: A Comprehensive Guide

Welcome to your ultimate guide on how to create energizing bliss balls that are not only vegan and gluten-free, but also scrumptiously delicious! If you’re looking for a quick snack that fuels your body without compromising on flavor, you’ve come to the right place. In this article, we’re diving deep into the world of bliss balls, exploring their benefits, ingredients, and variations. Let’s transform your snacking habits into something delightful and nutritious!

Why You’ll Love This Recipe

These bliss balls are more than just a snack; they’re a game changer in your dietary routine. Here are five compelling reasons why you’ll love making them:

  • Nutritious Energy Boost: Packed with healthy fats, proteins, and fiber, bliss balls provide sustained energy, making them ideal for a pre- or post-workout snack.
  • Quick and Easy: With minimal ingredients and no baking required, these energy bites can be whipped up in less than 30 minutes.
  • Customizable Flavors: From chocolate to fruity variations, you can easily modify the recipe to suit your taste preferences.
  • Meal Prep Friendly: These bliss balls store well in the fridge for up to a week, making them a perfect grab-and-go option for busy days.
  • Kid-Friendly Treat: With their sweet, satisfying flavor, these bliss balls are a hit among kids, making healthy snacking easier for parents.

Ingredient Breakdown: What You Need

To make these delicious bliss balls, you’ll need the following ingredients:

  • 1 cup dates, pitted: Provides natural sweetness and a chewy texture.
  • 1 cup almond flour: Adds a nutty flavor and healthy fats.
  • 1/2 cup cocoa powder: For that rich chocolatey taste.
  • 1/4 cup maple syrup: A natural sweetener that enhances flavor.
  • 1/4 cup coconut oil, melted: Contributes healthy fats and helps bind the mixture.
  • 1/2 cup shredded coconut: Adds texture and a tropical touch.
  • 1/2 cup chopped nuts: For crunch and additional protein.

### Substitution Options

If you’re missing an ingredient or need to cater to dietary restrictions, here are some alternatives:

  • Dates: You can use dried figs or prunes as a substitute, just ensure they’re soft for easy blending.
  • Almond Flour: Swap with oat flour, or for nut-free options, use sunflower seed flour.
  • Cocoa Powder: Carob powder is an excellent alternative if you’re avoiding chocolate.
  • Maple Syrup: Honey or agave syrup can be used to achieve similar sweetness.
  • Coconut Oil: Any neutral oil like avocado or canola oil will work, but coconut oil adds a unique flavor.

Pro Tips for Perfect Bliss Balls

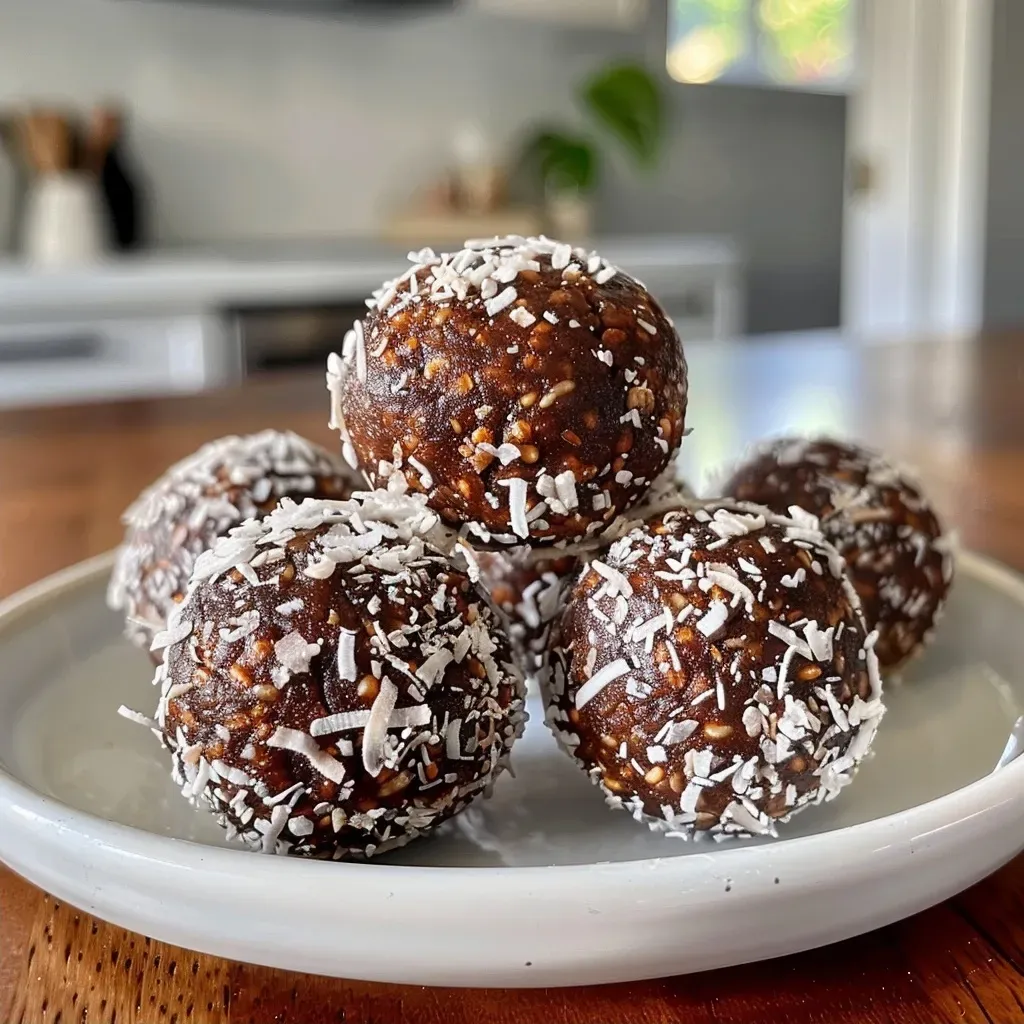
A close-up view of vegan gluten-free bliss balls, showcasing their rich texture and toppings.

Mastering the art of bliss balls is all about technique. Here are some expert insights:

  • Use Fresh Ingredients: Make sure your dates are fresh and soft; this ensures a smooth blend.
  • Blend in Stages: Start by blending the dates alone first, then add dry ingredients to avoid clumping.
  • Chill Before Serving: Refrigerate the balls for at least 30 minutes to firm them up for easier handling.
  • Experiment with Textures: Adjust the ratio of dry to wet ingredients to find your preferred consistency.
  • Don’t Overprocess: Leave some chunks of nuts for added texture and a delightful crunch.
  • Try Different Coatings: Roll the balls in cocoa powder, crushed nuts, or sesame seeds for an extra layer of flavor.
  • Keep a Consistent Size: Use a small ice cream scoop for uniformity in size, which helps with even chilling.
  • Label & Date: If you’re meal prepping, label your storage containers with the date to keep track of freshness.

Common Mistakes and Troubleshooting

Even the best cooks encounter hiccups. Here are common mistakes to avoid and how to fix them:

  • Too Dry? If your mixture is too crumbly, add a splash of water or more maple syrup to achieve the right consistency.
  • Too Sticky? If the mixture sticks to your hands, slightly wet your hands while rolling the balls.
  • Not Sweet Enough? Adjust the sweetness by adding a bit more maple syrup or a sprinkle of stevia.
  • Not Holding Together? Ensure you’ve blended long enough; the mixture needs to be well combined to stick.

Variations on Bliss Balls

Get creative with these bliss ball variations to keep your snacks exciting:

  • Peanut Butter Bliss Balls: Replace half of the coconut oil with natural peanut butter for a nutty twist.
  • Berry Bliss Balls: Incorporate dried cranberries or blueberries for a fruity flavor.
  • Matcha Bliss Balls: Add a teaspoon of matcha powder for a green tea infusion.
  • Spiced Pumpkin Bliss Balls: Mix in pumpkin puree and pumpkin spice for a seasonal treat.

Storage and Make-Ahead Instructions

These bliss balls are great for meal prep. Here’s how to store them:

  • Refrigeration: Store in an airtight container in the fridge for up to one week.
  • Freezing: Freeze the balls in a single layer on a baking sheet, then transfer to a ziplock bag for up to three months.
  • Thawing: To enjoy, simply take them out of the freezer and let them sit at room temperature for about 15-20 minutes.

Comprehensive FAQ

Got questions? Here are the answers to common queries about bliss balls:

  • Can I make these without dates? Absolutely! Use other dried fruits like figs or medjool dates as alternatives.
  • Are they gluten-free? Yes, all the ingredients are gluten-free, making them safe for those with gluten sensitivities.
  • How do I know when they’re done? Once your bliss balls are firm to the touch after chilling, they’re ready to enjoy.
  • Can I add protein powder? Yes! Feel free to mix in your favorite protein powder for an added boost.
  • Are these suitable for kids? Definitely! They’re a healthy snack option that kids will love.
  • How can I enhance the flavor? Consider adding spices like cinnamon or nutmeg for an extra flavor dimension.
  • Can I make them nut-free? Yes, just replace almond flour with sunflower seed flour and omit any nuts.
  • What’s the best way to serve them? Bliss balls can be enjoyed on their own or paired with a smoothie for a balanced snack.

Nutrition Tips and Dietary Adaptations

Keeping your nutritional goals in check is essential. Here are some tips:

  • Protein Boost: Add a scoop of your favorite protein powder to the mixture for enhanced protein content.
  • Low-Sugar Option: Use unsweetened cocoa powder and reduce the amount of maple syrup for lower sugar content.
  • Fiber-Filled: Incorporate chia seeds or ground flaxseed to increase fiber and omega-3 fatty acids.

Essential Equipment Recommendations

Using the right tools can make a big difference in your bliss ball-making experience:

  • Food Processor: A powerful food processor is key for blending the ingredients smoothly.
  • Measuring Cups: Ensure accuracy in measurements for consistent results.
  • Spatula: A silicone spatula is great for scraping down the sides of the processor.
  • Baking Sheet: Use a baking sheet lined with parchment paper to chill your bliss balls.

Serving Suggestions

Enjoying your bliss balls is all about presentation and pairing:

  • Snack Time: Pair with a piece of fruit for a balanced snack.
  • Post-Workout: Enjoy with a protein shake for optimal recovery.
  • Party Treat: Arrange on a platter with fresh fruits for a healthy party option.

In conclusion, making bliss balls is a straightforward and enjoyable process that promotes a healthy lifestyle without sacrificing flavor. With the tips, tricks, and variations outlined in this guide, you’re well-equipped to whip up these delightful snacks any time. So roll up your sleeves, gather your ingredients, and let’s get cooking. Trust me, you’ll be hitting your protein goals while enjoying every bite!

Bliss Balls Recipe Vegan Gluten Free: Irresistibly Delicious Treats

Prep Time 10 minutes
Total Time 10 minutes
Servings 12 pieces
Calories 150
These vegan, gluten-free bliss balls are quick to make and perfect for a healthy, indulgent snack.

Ingredients

Dried Fruits

  • 1 cup dates, pitted

Dry Ingredients

  • 1 cup almond flour
  • 1/2 cup cocoa powder

Sweeteners & Oils

  • 1/4 cup maple syrup
  • 1/4 cup coconut oil, melted

Add-ins

  • 1/2 cup shredded coconut
  • 1/2 cup chopped nuts

Instructions 

  • Blend dates until smooth in a food processor.
  • Add almond flour, cocoa powder, maple syrup, and coconut oil. Blend until combined.
  • Stir in shredded coconut and chopped nuts.
  • Form mixture into small balls.
  • Refrigerate for at least 30 minutes before serving.

Notes

Keep the mixture refrigerated for best texture.
Calories: 150kcal
Cost: $10
Course: Snack
Cuisine: Vegan
Keyword: healthy, No-Bake

Discover the Ultimate High Protein Chickpea and Sweet Potato Soup

Welcome to a world where nutrition meets flavor! If you’re on a mission to hit your protein goals without sacrificing taste, then this high protein chickpea and sweet potato soup is your new best friend. Packed with nutrient-dense ingredients and bursting with flavor, every bowl is a step closer to achieving your fitness objectives. In just 30 minutes, you can whip up a hearty meal that satisfies both your hunger and your nutritional needs. Let’s dive into the details!

Why You’ll Love This Recipe

This isn’t just any soup; it’s a powerhouse of nutrition and flavor. Here are five reasons you’ll adore this chickpea soup:

  • High Protein Content: Each serving provides a whopping 20g of protein from chickpeas and spinach, perfect for muscle repair and growth.
  • Fiber-Rich Ingredients: Sweet potatoes and chickpeas are high in dietary fiber, promoting digestive health and keeping you fuller for longer.
  • Quick and Easy Preparation: Ready in under 30 minutes, this recipe is perfect for busy weeknights or meal prep sessions.
  • Versatile Meal: Enjoy it as a main dish, a side, or a meal prep option that fits into various diets, including vegan and gluten-free.
  • Flavorful and Satisfying: The blend of spices and fresh ingredients creates a comforting, satisfying dish that doesn’t compromise on taste.

What You’ll Need

Gather the following ingredients to make this delicious high protein chickpea and sweet potato soup.

  • 2 cans (15 oz each) chickpeas, drained and rinsed
  • 2 large sweet potatoes (about 1.5 lbs), peeled and cubed
  • 5 cups fresh spinach, roughly chopped
  • 6 cups low-sodium vegetable broth
  • 1 large yellow onion, diced
  • 4 cloves garlic, minced
  • 2 tablespoons olive oil
  • 1 teaspoon ground cumin
  • 1 teaspoon smoked paprika
  • 1/4 teaspoon cayenne pepper (optional)
  • Salt and black pepper to taste
  • 2 tablespoons fresh lemon juice

How to Make High Protein Chickpea and Sweet Potato Soup

Close-up of a vibrant bowl of chickpea and sweet potato soup garnished with spinach.

Follow these simple steps to create your delicious soup:

Step 1: Sauté Aromatics

Heat olive oil in a large Dutch oven over medium heat. Add the diced onion with a pinch of salt and cook for 5-6 minutes until translucent and beginning to brown.

Step 2: Add Flavors

Add minced garlic, cumin, smoked paprika, and cayenne. Stir constantly for 30 seconds until fragrant.

Step 3: Incorporate Sweet Potatoes and Broth

Add cubed sweet potatoes and vegetable broth. Bring to a boil, then reduce to a gentle simmer. Cover partially and cook for 15-20 minutes until sweet potatoes are fork-tender.

Step 4: Mash for Creaminess

Mash about half the sweet potatoes directly in the pot using a potato masher or wooden spoon to create a creamy base.

Step 5: Add Chickpeas

Add drained chickpeas and simmer uncovered for 10 minutes to meld flavors.

Step 6: Wilt the Spinach

Remove the pot from heat. Stir in chopped spinach a handful at a time, letting each wilt before adding more. Let sit for 2 minutes.

Step 7: Final Touches

Stir in fresh lemon juice. Taste and adjust salt and pepper as needed. Serve hot.

What Makes This High Protein Chickpea Soup Different?

This soup stands out because it combines traditional flavors with a modern twist, focusing on high protein and plant-based ingredients. The balance of protein and fiber not only satisfies your hunger but also supports your overall health.

Pro Tips for the Perfect Soup

Here are some expert insights to elevate your soup game:

  • Use Fresh Ingredients: Fresh spinach and organic sweet potatoes enhance flavor and nutrition.
  • Adjust Spice Levels: If you prefer less heat, reduce or omit the cayenne pepper.
  • Blend for Smoothness: For a creamier texture, use an immersion blender after adding the chickpeas.
  • Experiment with Herbs: Fresh herbs like parsley or cilantro can add a fresh twist.
  • Top with Crunch: Add toasted pumpkin seeds or croutons for a delightful texture contrast.
  • Save the Broth: Use leftover broth to blend into smoothies or grains for added flavor.
  • Make it Ahead: This soup tastes even better the next day, so make a big batch!
  • Store Properly: Use airtight containers to keep your soup fresh in the fridge for up to 5 days.

Common Mistakes and Troubleshooting

Here are some pitfalls to avoid:

  • Overcooking Sweet Potatoes: Keep an eye on them to avoid mushiness.
  • Under-seasoning: Be generous with spices and seasoning to enhance flavor.
  • Skipping the Mash Step: Mashing sweet potatoes adds creaminess; don’t skip it!
  • Not Using Enough Broth: For a soup-like consistency, ensure you have sufficient liquid.

Variations Worth Trying

Mix it up with these variations:

  • Spicy Kick: Add diced jalapeños or a splash of hot sauce for heat.
  • Creamy Coconut: Substitute vegetable broth with coconut milk for a rich flavor.
  • Protein Boost: Stir in cooked quinoa or lentils for additional protein.
  • Herb Infusion: Add fresh thyme or rosemary for an aromatic twist.

How to Store and Reheat

Want to make this soup ahead of time? Here’s how:

  • Fridge: Store in an airtight container for up to 5 days. Reheat on the stove over low heat.
  • Freezer: Freeze in portions for up to 3 months. Thaw overnight in the fridge before reheating.
  • Reheat: Use the stovetop or microwave until heated through, adding a splash of broth if needed.

Frequently Asked Questions About High Protein Chickpea and Sweet Potato Soup

Here are some common questions:

  • Can I use frozen spinach? Yes, frozen spinach works well; just thaw and drain excess water.
  • Is this soup gluten-free? Absolutely! All ingredients are naturally gluten-free.
  • Can I make this soup in a slow cooker? Yes, sauté the aromatics, then add to the slow cooker with remaining ingredients for 4-6 hours on low.
  • How do I adjust the consistency? Add more broth for a thinner soup or mash more sweet potatoes for thickness.
  • Can I add meat? Yes, shredded chicken or turkey can be added for extra protein.
  • Is this soup meal-prep friendly? Definitely! It stores and reheats beautifully.
  • What can I serve with this soup? Pair it with whole grain bread or a side salad for a complete meal.
  • Is this recipe suitable for kids? Yes, it’s nutritious and flavorful, making it kid-friendly!

Nutrition Tips and Dietary Adaptations

This high protein chickpea soup is not only delicious but also packed with health benefits:

  • Caloric Control: Each serving is low in calories but high in nutrients, making it weight-loss friendly.
  • Plant-Based Benefits: Rich in antioxidants and vitamins, perfect for boosting your immune system.
  • Sustainable Protein Source: Chickpeas are a low-impact source of protein, great for the environment!

Equipment Recommendations

To make this soup, you’ll need:

  • Large Dutch Oven: Ideal for even cooking and flavor development.
  • Potato Masher: Essential for mashing sweet potatoes to achieve creaminess.
  • Measuring Cups and Spoons: For accurate ingredient measurement and consistency.

Serving Suggestions

Elevate your meal with these pairing ideas:

  • Whole Grain Bread: Perfect for dipping and adding healthy carbs.
  • Green Salad: A fresh side to balance the richness of the soup.
  • Avocado Toast: For a satisfying combo of healthy fats and flavors.

Conclusion

There you have it—your ultimate guide to making a nourishing high protein chickpea and sweet potato soup. With its rich flavor, nutritional profile, and ease of preparation, this recipe is a must-try for anyone looking to enhance their meals while hitting their fitness goals. Enjoy every spoonful, knowing you’re fueling your body with the good stuff!

High Protein Chickpea and Sweet Potato Soup with Spinach

Prep Time 10 minutes
Cook Time 35 minutes
Total Time 45 minutes
Servings 4 servings
Calories 350
A hearty, nutritious soup combining chickpeas, sweet potatoes, and spinach for a high-protein, flavorful meal.

Ingredients

Canned Goods

  • 2 cans chickpeas (15 oz each, drained and rinsed)
  • 2 large sweet potatoes (about 1.5 lbs, peeled and cubed)
  • 5 cups fresh spinach (roughly chopped)
  • 6 cups low-sodium vegetable broth
  • 1 large yellow onion (diced)
  • 4 cloves garlic (minced)
  • 2 tablespoons olive oil
  • 1 teaspoon ground cumin
  • 1 teaspoon smoked paprika
  • 0.25 teaspoon cayenne pepper (optional)
  • to taste Salt and black pepper
  • 2 tablespoons fresh lemon juice

Instructions 

  • Heat olive oil in a large pot over medium heat. Add diced onion and cook 5-6 minutes until translucent.
  • Add minced garlic, cumin, smoked paprika, and cayenne; stir for 30 seconds until fragrant.
  • Add sweet potatoes and vegetable broth; bring to a boil, then simmer 15-20 minutes until tender.
  • Mash half the sweet potatoes in the pot to create a creamy base. Add chickpeas and simmer 10 minutes.
  • Remove from heat, stir in spinach until wilted, then add lemon juice. Adjust salt and pepper, serve hot.

Notes

This soup is perfect for a filling, high-protein meal packed with vegetables and flavor.
Calories: 350kcal
Cost: $15
Course: Soup
Cuisine: Healthy
Keyword: Chickpeas, Spinach, Sweet Potato