Author

Ethan

Browsing

Unlock the Power of Buddha Bowls: A Comprehensive Guide

Buddha bowls are more than just a meal; they’re a celebration of flavor, nutrition, and versatility. If you’re looking to fuel your workouts without sacrificing taste, you’ve landed in the right spot. Packed with protein and essential nutrients, this Buddha bowl recipe is designed to help you hit your macros while keeping your meals exciting. Let’s dive in!

Why You’ll Love This Recipe

  • Deliciously Nutritious: This Buddha bowl is loaded with wholesome ingredients that provide sustained energy, making it perfect for pre- or post-workout meals.
  • Customizable: The beauty of Buddha bowls lies in their adaptability. You can mix and match ingredients based on your preferences, dietary needs, or what’s in your fridge.
  • Quick and Easy Prep: With minimal cooking time, this recipe allows you to whip up a hearty meal in under 45 minutes, perfect for busy schedules.
  • Meal Prep Friendly: Make a big batch and store them in the fridge for easy lunches throughout the week, ensuring you stay on track with your nutrition goals.
  • Vibrant and Colorful: A feast for the eyes as much as the palate, this bowl is packed with colorful veggies that make healthy eating appealing.

Ingredients and Substitutions

Here’s what you’ll need to create your Power-Packed Buddha Bowl, along with some easy substitutions:

  • 1 large sweet potato, chopped (1/2-1 inch pieces) – Substitute with butternut squash or carrots if preferred.
  • 1 red onion, chopped – You can use yellow onion or shallots for a milder flavor.
  • 2 tbsp olive oil, divided – Feel free to replace with avocado oil or coconut oil.
  • 2 tsp garlic powder, divided – Fresh minced garlic works well too.
  • 2 tsp paprika, divided (or smoked paprika) – Experiment with cayenne for a kick!
  • 2 tsp cumin, divided – Coriander or chili powder can also add great flavor.
  • Salt and pepper – To taste.
  • 14 oz canned chickpeas, drained and rinsed – Substitute with black beans or lentils for a different protein source.
  • 2 cups cauliflower, cut into florets – Broccoli or Brussels sprouts are excellent alternatives.
  • 2 cups cooked quinoa (or other grain) – Try brown rice, farro, or bulgur instead.
  • 4 cups kale (or other green) – Spinach, arugula, or mixed greens work perfectly.
  • 1/2 avocado, chopped – This adds healthy fats; you can skip it or use nuts/seeds instead.
  • 1 cup red cabbage, shredded – Add other colorful veggies like bell peppers or carrots for crunch.

How to Make a Buddha Bowl
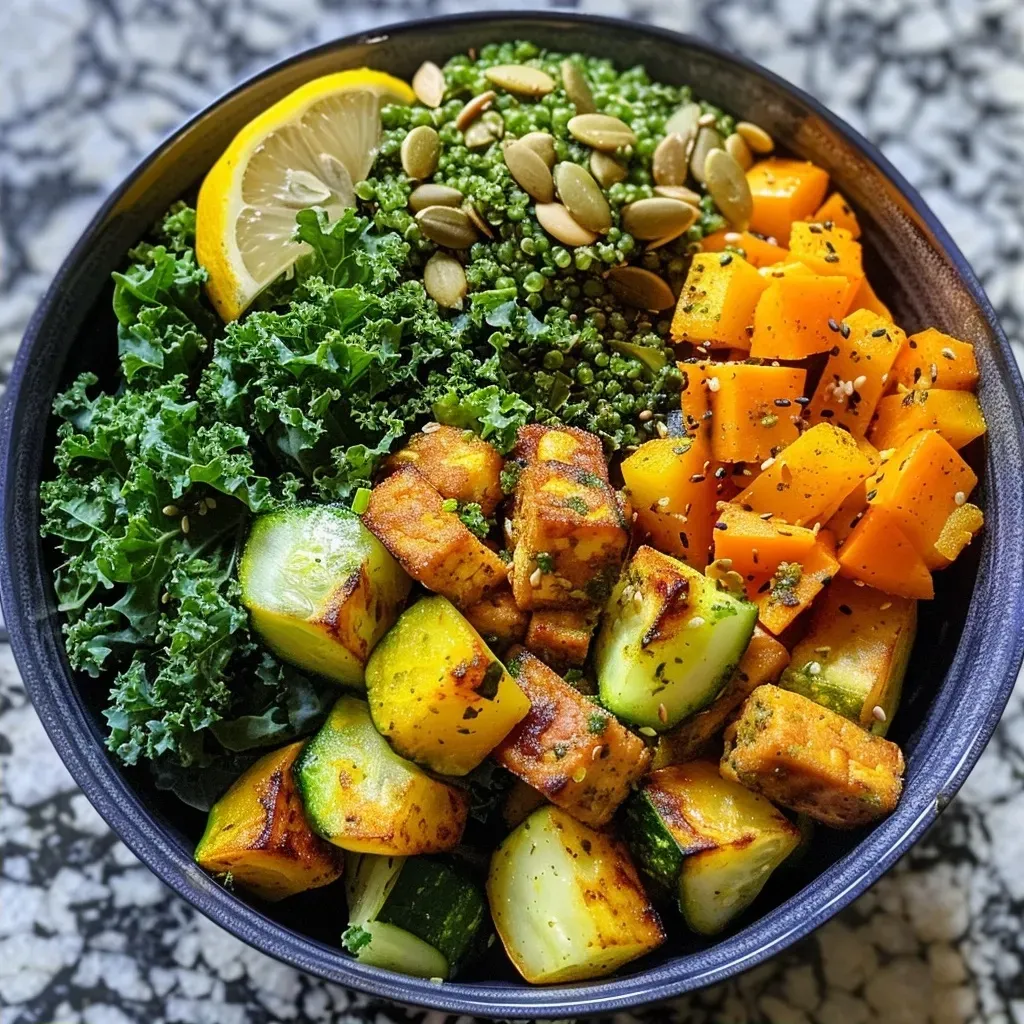
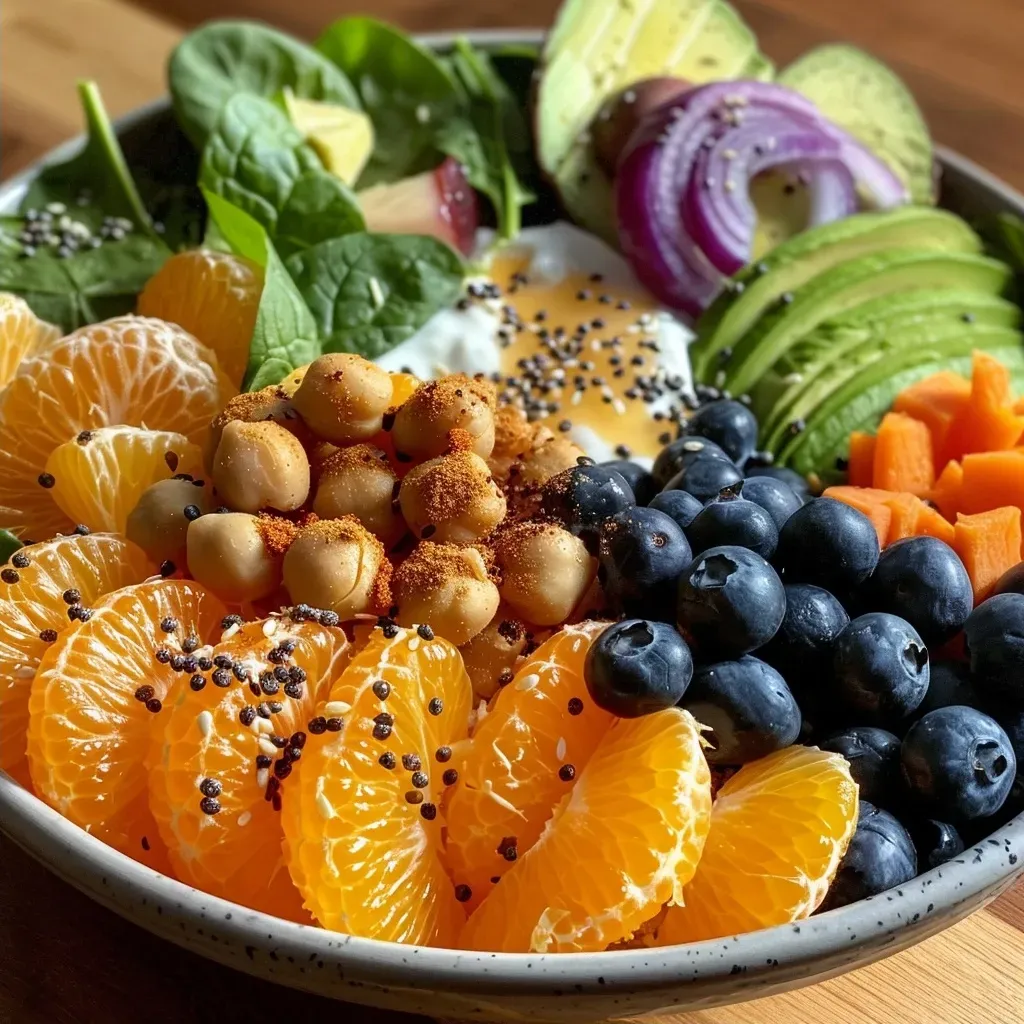
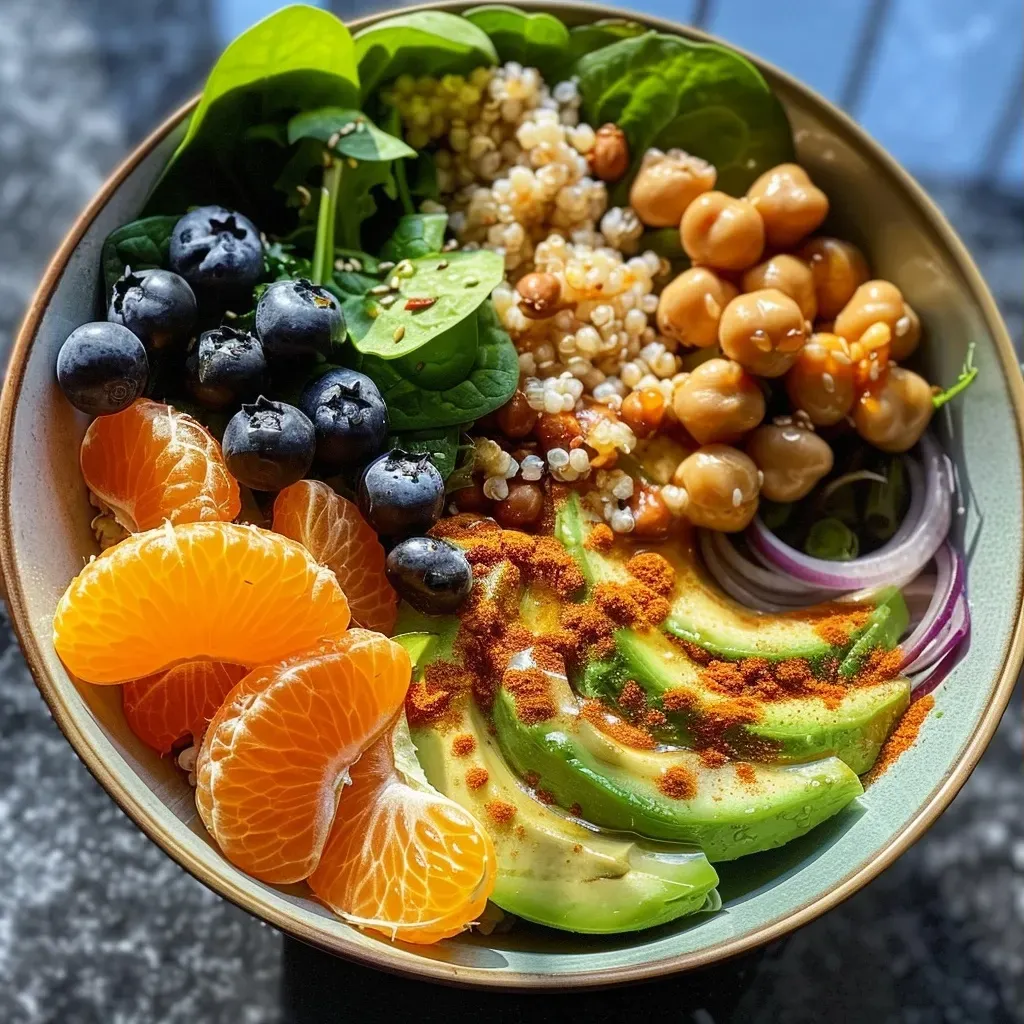
A close-up view of a colorful Buddha Bowl featuring sweet potatoes, kale, and cherry tomatoes.

Follow these simple steps to assemble your delicious Buddha bowl:


Digital Kitchen Scale

★ Recommended Kitchen Tool

Digital Kitchen Scale

Make this recipe even easier with a quality Digital Kitchen Scale — a must-have kitchen staple!


🛒 See Deals on Amazon →

As an Amazon Associate, we earn from qualifying purchases.
  1. Preheat the oven to 400°F (200°C). Toss the sweet potato and red onion with half of the olive oil, garlic powder, paprika, cumin, salt, and pepper.
  2. Spread out the mixture in a single layer on a large baking sheet lined with parchment paper.
  3. While the sweet potatoes roast, toss the chickpeas and cauliflower with the remaining olive oil and spices.
  4. Bake the sweet potatoes and onions for 20 minutes. Remove from the oven, flip them over, and push to one side. Add the chickpeas and cauliflower to the opposite side of the pan, ensuring they are in a single layer.
  5. Return to the oven and roast for an additional 15-20 minutes until everything is tender and perfectly caramelized.
  6. While everything cooks, prepare the maple tahini sauce (see notes below) and massage the kale with a little olive oil to soften its texture.
  7. Assemble the bowls: Start with a base of quinoa, then layer on the roasted sweet potatoes, red onions, chickpeas, cauliflower, kale, red cabbage, and avocado. Drizzle generously with the maple tahini sauce.

Maple Tahini Sauce

This simple yet flavorful sauce is a game changer for your Buddha bowls. Here’s how to make it:

  • 1/4 cup tahini
  • 2 tbsp lemon juice
  • 2 tbsp maple syrup
  • 1-2 tbsp water (to thin out, if needed)
  • Salt to taste

Mix all ingredients in a bowl until smooth. Adjust thickness by adding more water if desired.

Pro Tips for Perfect Buddha Bowls

  • Prep Ahead: Chop veggies and cook grains in advance to save time during the week.
  • Roast in Batches: If you’re making multiple servings, consider roasting larger amounts of veggies at once.
  • Texture Matters: Combine crispy, crunchy, and soft textures for a more enjoyable eating experience.
  • Add a Protein Punch: Top with grilled chicken, tofu, or a fried egg for extra protein.
  • Spice It Up: Experiment with different spices and sauces to keep things interesting.
  • Fresh Herbs: Adding fresh herbs like cilantro or parsley enhances flavor and freshness.
  • Temperature Variation: Serve some components warm and others cold for a delightful contrast.
  • Mind Your Portions: Be mindful of portion sizes to keep your macros in check.
  • Balance Your Plate: Aim for a good mix of protein, healthy fats, and carbs in each bowl.
  • Enjoy the Process: Don’t be afraid to get creative—there’s no wrong way to build your Buddha bowl!

Common Mistakes and Troubleshooting

Even the best cooks can run into problems. Here are some common mistakes to avoid:

  • Overcooking Vegetables: Keep an eye on your veggies to prevent them from becoming mushy. They should be tender but still have a bite.
  • Too Much Dressing: Start with a small amount of sauce and add more as needed—it’s easier to add than take away!
  • Skipping Seasoning: Don’t forget to season each component individually for the best flavor.
  • Not Layering Properly: Layer ingredients thoughtfully to maintain texture and flavor balance.

Variations to Elevate Your Buddha Bowl

Experiment with these delicious variations to keep your Buddha bowl exciting:

  • Asian-Inspired: Use soba noodles, edamame, sesame seeds, and a soy-ginger dressing.
  • Mediterranean Twist: Incorporate couscous, cherry tomatoes, olives, and a lemon-tahini dressing.
  • Southwest Style: Add black beans, corn, avocado, and a chipotle dressing for a spicy kick.
  • Breakfast Bowl: Top with scrambled eggs, sautéed spinach, and a sprinkle of feta cheese.

Storage and Make-Ahead Instructions

This Buddha bowl is perfect for meal prep! Here’s how to store it:

  • Refrigeration: Store all components separately in airtight containers for up to 4 days.
  • Freezing: You can freeze cooked grains and roasted veggies for up to 3 months. Thaw before assembling.
  • Assembly: Assemble your bowls fresh to maintain texture, adding sauces just before serving.

Frequently Asked Questions

Here are some common questions about Buddha bowls:

  • Can I make this Buddha bowl vegan? Yes! All ingredients are plant-based, but be cautious with any toppings you choose.
  • Is this recipe gluten-free? Absolutely! Just ensure you’re using gluten-free grains and sauces.
  • How can I increase the protein content? Add more chickpeas, or top with grilled chicken, tofu, or a boiled egg.
  • What grains can I use? Quinoa, brown rice, farro, or any whole grain you prefer works well.
  • Can I use frozen vegetables? Yes, just adjust the cooking time as frozen veggies may cook faster.
  • What if I don’t like tahini? You can substitute with almond butter or skip it altogether—use your favorite dressing instead!
  • How do I avoid soggy greens? Add greens fresh and dress them just before serving to keep them crisp.
  • Can I eat this bowl cold? Yes! It’s delicious cold, making it a perfect lunch option.

Nutrition Tips and Dietary Adaptations

This Buddha bowl is not only tasty but also packed with nutrients:

  • Protein Power: Chickpeas and quinoa are excellent sources of plant-based protein.
  • Healthy Fats: Avocado and olive oil provide essential fatty acids.
  • Fiber-Rich: This bowl is high in fiber, supporting digestion and satiety.
  • Antioxidants: Colorful veggies like kale and red cabbage are rich in antioxidants, promoting overall health.

Equipment Recommendations

To successfully whip up your Buddha bowl, consider having the following tools:

  • Sharp Knife: For easy chopping of veggies.
  • Baking Sheet: A large one allows for even roasting of all ingredients.
  • Mixing Bowls: For tossing and preparing your ingredients separately.
  • Measuring Cups and Spoons: To ensure precise ingredient ratios.

Serving Suggestions

Elevate your Buddha bowl experience with these serving ideas:

  • Top with Nuts or Seeds: Add toasted pumpkin seeds or almonds for an extra crunch.
  • Garnish with Fresh Herbs: Cilantro, parsley, or green onions can brighten the flavors.
  • Pair with a Side Salad: A light side salad complements the heartiness of the bowl.
  • Enjoy with Whole-Grain Bread: Serve with a slice of whole-grain bread for added carbs.

Conclusion

Incorporating Buddha bowls into your meal rotation is a delicious and effective way to meet your nutrition goals. This Power-Packed Buddha Bowl recipe offers you the flexibility to customize, ensuring you enjoy every bite while fueling your body. Empower yourself to experiment with flavors, textures, and ingredients. Start your journey today, and watch your fitness and culinary skills flourish!
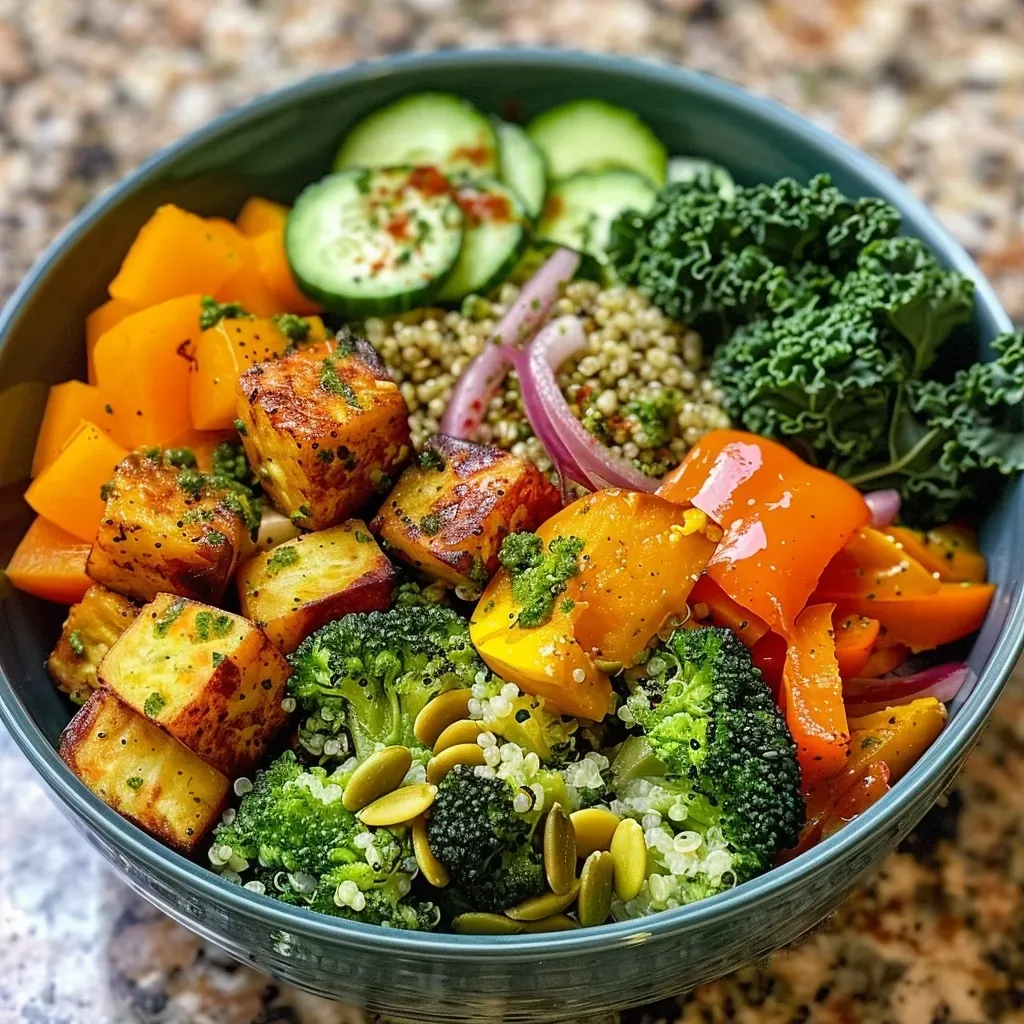
Buddha Bowl

Prep Time 15 minutes
Cook Time 35 minutes
Total Time 50 minutes
Servings 4 servings
Calories 450
A vibrant and nutritious plant-based meal featuring roasted sweet potatoes, chickpeas, and fresh greens, perfect for a wholesome lunch or dinner.

Ingredients

Vegetables and grains

  • 1 large sweet potato (chopped (1/2-1 inch pieces))
  • 1 red onion (chopped)
  • 2 tbsp olive oil (divided)
  • 2 tsp garlic powder (divided)
  • 2 tsp paprika (divided (or smoked paprika))
  • 2 tsp cumin (divided)
  • to taste Salt and pepper
  • 14 oz canned chickpeas (drained and rinsed)
  • 2 cups cauliflower (cut into florets)
  • 2 cups cooked quinoa (or other grain)
  • 4 cups kale (or other green)
  • 1/2 avocado avocado (chopped)
  • 1 cup red cabbage (shredded)

Instructions 

  • Preheat oven to 400°F (200°C). Toss sweet potato and onion with half of olive oil and spices, then roast for 20 minutes.
  • Meanwhile, toss chickpeas and cauliflower with remaining oil and spices. Roast for an additional 15-20 minutes until tender.
  • Massage kale to soften. Assemble bowls with quinoa, roasted vegetables, kale, cabbage, and avocado. Drizzle with sauce.

Notes

Feel free to customize with your favorite toppings or additional sauces.
Calories: 450kcal
Cost: $15
Course: Main Course
Cuisine: Healthy
Keyword: Gluten-Free, Vegan, Vegetarian

Unlock the Flavor: Your Ultimate Guide to Cheesy Zucchini Casserole

Are you ready to elevate your dinner game with a dish that not only satisfies your cravings but also fuels your fitness goals? This Cheesy Zucchini Casserole is the answer! Packed with protein-rich ingredients like Swiss Gruyere and creamy Brie, it’s a delicious way to incorporate more veggies into your meals. In this comprehensive guide, we’ll explore every aspect of this dish—from the ingredients to cooking tips and variations—ensuring that you can enjoy every bite while hitting your nutrition targets.

Why You’ll Love This Recipe

This isn’t just any zucchini casserole; it’s a game-changer for your dinner table! Here’s why:

  • Protein-Packed: Each serving is loaded with high-quality protein, perfect for muscle recovery and growth.
  • Flavor Explosion: The combination of Swiss Gruyere and Brie creates a rich, creamy texture that elevates the humble zucchini.
  • Easy Preparation: With minimal prep time and straightforward steps, you can whip this up on a busy weeknight.
  • Versatile Ingredients: Use what’s on hand! You can substitute cheeses or add other vegetables to customize this dish.
  • Make-Ahead Friendly: Prepare it in advance and simply bake when you’re ready to eat!

Ingredient Breakdown

Let’s dive into what makes this casserole so special. Here’s the detailed list along with possible substitutions:


Professional Chef Knife Set

★ Recommended Kitchen Tool

Professional Chef Knife Set

Make this recipe even easier with a quality Professional Chef Knife Set — a must-have kitchen staple!


🛒 View on Amazon →

As an Amazon Associate, we earn from qualifying purchases.
  • 3 medium Zucchini: Sliced into 1/4″ thick rounds. You can also use yellow squash for a different flavor.
  • 3/4 tsp Sea salt: Helps to draw moisture out of the zucchini.
  • 1 1/2 cup Swiss Gruyere shredded cheese: This cheese brings a nutty flavor. Any sharp cheese can be used if you’re in a pinch.
  • 1/4 tsp Black pepper: Adds a touch of heat.
  • 3 oz Brie cheese: You can substitute with cream cheese for a milder flavor if preferred.
  • 1/3 cup Heavy cream: For richness; half-and-half can work too if you’re looking to lighten it up.
  • 1 tbsp Unsalted butter: For sautéing the garlic.
  • 2 cloves Garlic: Minced or crushed for that aromatic kick.
  • 1/2 tbsp Italian seasoning: A blend of dried herbs to enhance the flavor profile.

Pro Tips for Perfecting Your Casserole

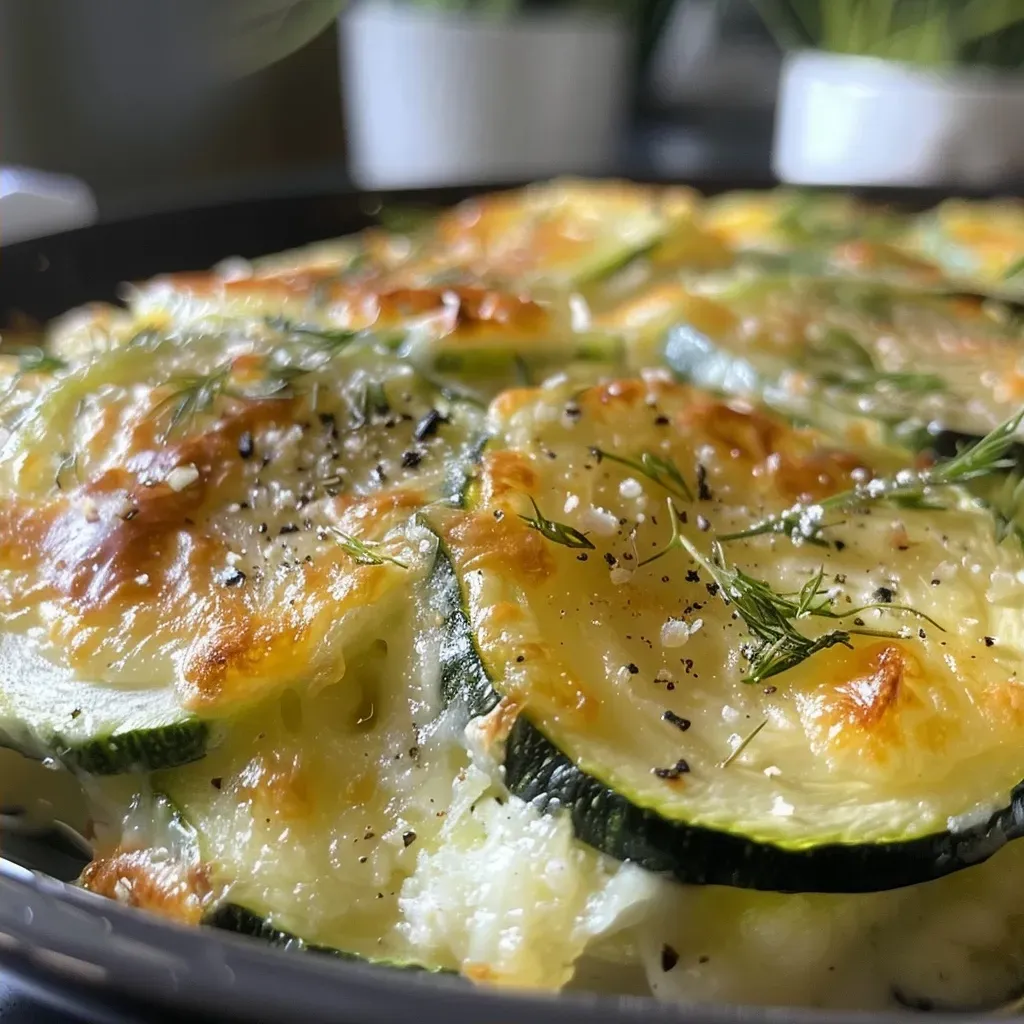
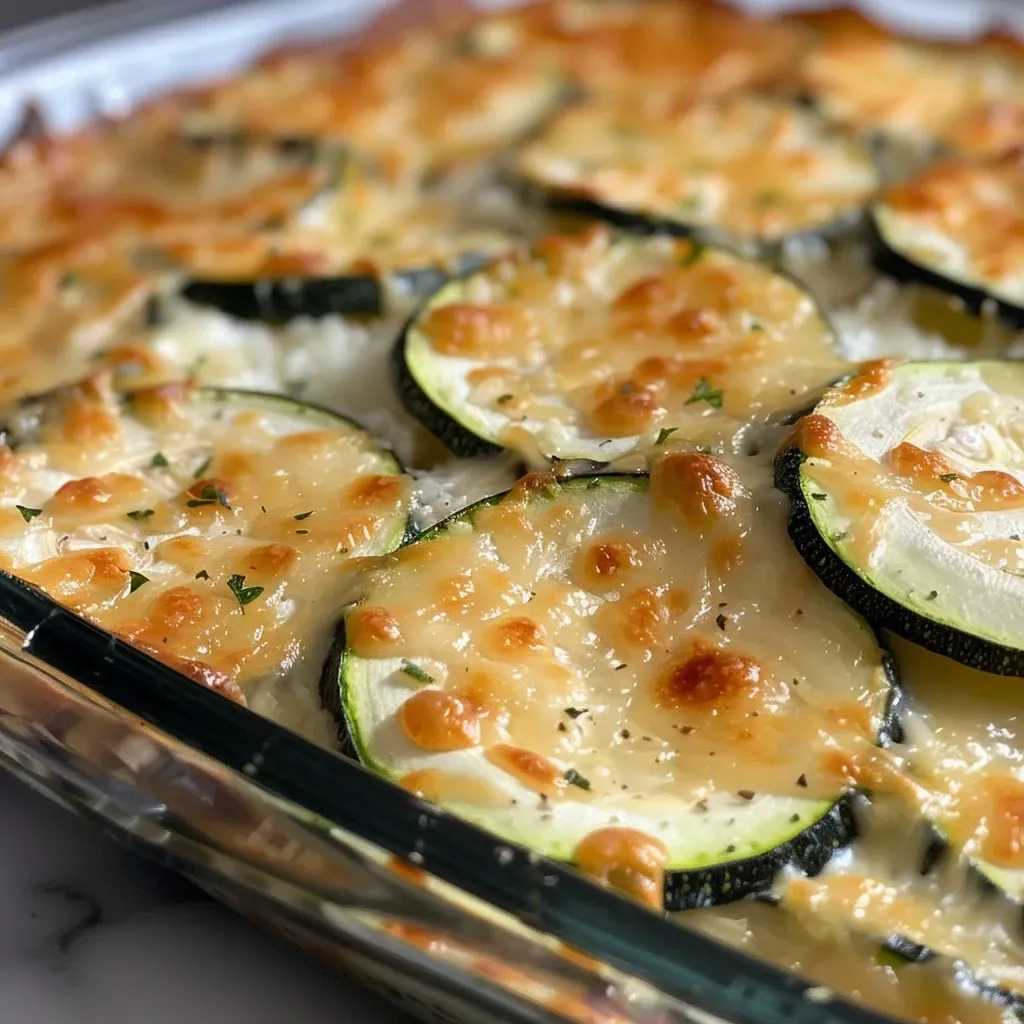
Close-up view of a cheesy zucchini casserole with a golden-brown top, featuring sliced zucchini.

Want to take your cheesy zucchini casserole to the next level? Here are some expert insights:

  • Drain the Zucchini: After salting, let it drain for at least 45 minutes to avoid a watery casserole.
  • Layering Technique: Alternate layers of zucchini and cheese for even distribution of flavors.
  • Low and Slow: Bake at a lower temperature for a longer time if you prefer a softer texture.
  • Experiment with Cheeses: Mixing different cheeses can add complexity to the flavor.
  • Add Proteins: Consider adding cooked chicken or ground turkey to make it a complete meal.
  • Use Fresh Herbs: Garnish with fresh basil or parsley before serving for a fresh touch.
  • Watch the Bake Time: Keep an eye on the casserole; you want a golden top without overcooking the zucchini.
  • Serve Hot: This dish is best enjoyed fresh out of the oven for that gooey cheese experience.

Avoid Common Mistakes

Here are some common pitfalls to watch out for:

  • Not Draining Zucchini: This can lead to a soggy casserole. Always salt and drain!
  • Overcooking: Keep an eye on cooking time to ensure the zucchini remains tender but not mushy.
  • Skipping the Cheese Layer: Don’t skimp on the cheese! It’s what makes this dish incredibly tasty.
  • Not Tasting: Always taste the mixture before baking to adjust seasoning as necessary.

Variations to Try

Want to mix things up? Here are some unique variations you can try:

  • Mexican Twist: Add diced jalapeños and a sprinkle of taco seasoning for a spicy kick.
  • Italian Style: Incorporate diced tomatoes and fresh mozzarella for a Caprese-inspired dish.
  • Herb Garden: Mix in fresh herbs like thyme or dill for an aromatic experience.
  • Meat Lover’s: Add cooked ground beef or sausage for a heartier meal.

Storage and Make-Ahead Instructions

This casserole is perfect for meal prep! Here’s how to store it:

  • Refrigeration: Store leftovers in an airtight container in the fridge for up to 3 days.
  • Freezing: You can freeze the uncooked casserole for up to a month. Just thaw and bake when ready.
  • Reheating: Reheat in the oven at 350°F until warmed through to maintain texture.

FAQs About Cheesy Zucchini Casserole

Got questions? Here are some common inquiries:

  • Can I use other vegetables? Absolutely! Feel free to incorporate bell peppers, mushrooms, or spinach.
  • Is this casserole gluten-free? Yes, all the ingredients listed are gluten-free unless you add breadcrumbs or pasta.
  • How can I make it dairy-free? Substitute the cheeses with plant-based alternatives and use coconut cream.
  • What can I serve with this casserole? It pairs well with a side salad or grilled chicken for a complete meal.
  • Can I make it vegetarian? Yes, simply omit any meats and add more veggies!
  • How long does it take to make? Approximately 1 hour, including prep and baking time.
  • What’s the best way to slice zucchini? Use a sharp knife for even, thin slices for optimal cooking.
  • Can I add pasta? Yes! Layer cooked pasta with the zucchini for a heartier dish.

Nutrition Tips and Dietary Adaptations

Want to ensure this dish aligns with your dietary needs? Here are some tips:

  • Low-Carb Option: Skip the pasta and focus on the zucchini and cheese for a keto-friendly meal.
  • High-Protein Boost: Add cooked chicken or turkey to increase the protein content.
  • Vegan Version: Use plant-based cheeses and substitute heavy cream with a nut milk alternative.
  • Watch Portions: While this is a healthy dish, be mindful of serving sizes to stay within your macro goals.

Essential Equipment Recommendations

To make your cooking experience smooth, here’s what you’ll need:

  • Casserole Dish: A medium to large glass or ceramic dish works best to showcase those beautiful layers.
  • Colander: Essential for draining the zucchini effectively.
  • Sharp Knife: For precise slicing of your zucchini and other vegetables.
  • Mixing Bowl: Useful for combining your cheese mixture before layering.

Serving Suggestions

Finish off your meal in style! Here are a few serving ideas:

  • Garnish: Top with fresh herbs like basil or parsley for a pop of color and flavor.
  • Pair with Protein: Serve alongside grilled chicken or fish for a balanced plate.
  • Accompany with Salad: A side salad will complement the richness of the casserole nicely.
  • Enjoy with Whole Grains: Consider serving with quinoa or brown rice for a complete meal.

In conclusion, this Cheesy Zucchini Casserole is not just a recipe; it’s a journey towards delicious, nutritious eating! With the right ingredients, techniques, and a bit of creativity, you can enjoy a meal that aligns with your health goals without sacrificing flavor. So, roll up your sleeves and get ready to impress your family and friends with this incredible dish. Happy cooking!

Zucchini Casserole (Easy & Cheesy)

Prep Time 15 minutes
Cook Time 25 minutes
Total Time 40 minutes
Servings 4 servings
Calories 350
A deliciously cheesy zucchini casserole that’s simple to prepare and perfect for a comforting meal.

Ingredients

Vegetables

  • 3 medium Zucchini (sliced in 1/4″ thick slices)
  • 3/4 tsp Sea salt
  • 1 1/2 cup Swiss Gruyere shredded cheese blend (divided)
  • 1/4 tsp Black pepper
  • 3 oz Brie cheese (edges cut off; or cream cheese for milder flavor)
  • 1/3 cup Heavy cream
  • 1 tbsp Unsalted butter
  • 2 cloves Garlic (minced or crushed)
  • 1/2 tbsp Italian seasoning

Instructions 

  • Toss zucchini slices with sea salt, drain for 45 minutes, then pat dry.
  • Preheat oven to 400°F (204°C). Arrange zucchini in a baking dish, layering with shredded cheese and seasoning.
  • Combine brie, cream, butter, and garlic in a saucepan; heat until smooth. Pour over zucchini.
  • Top with remaining cheese and Italian seasoning. Bake for 20-25 minutes until golden and zucchini is tender.

Notes

For a milder flavor, substitute cream cheese for Brie.
Calories: 350kcal
Cost: $12
Course: Main Course
Cuisine: American
Keyword: Cheese, zucchini

Why You Need These Decadent Slow Cooker Brownies

If you’re on a mission to hit your protein goals while still enjoying the sweet things in life, these decadent slow cooker brownies are a game-changer. Not only do they satisfy your sweet tooth, but they also fit seamlessly into your nutrition plan. Let’s dive into why this recipe is a must-try!

  • Time-Saving Convenience: With minimal prep and the slow cooker doing all the work, you can focus on your day while these brownies bake to perfection.
  • Fudgy Texture: The slow cooking method ensures a moist and fudgy center that rivals any oven-baked brownie.
  • Meal Prep Friendly: Make a batch to enjoy all week, providing a delicious treat that aligns with your meal prep routine.
  • Customizable: This recipe allows for various substitutions and variations, making it easy to cater to your taste preferences and dietary needs.
  • Guilt-Free Indulgence: Enjoy these brownies knowing you’re making a dessert that won’t derail your nutrition goals.

Ingredients You’ll Need

Gather these simple ingredients to whip up your brownies:

  • 18.4 oz. box Pillsbury chocolate fudge brownie mix: This is the base of the recipe, giving you that classic brownie taste.
  • ⅔ cup cooking oil (such as canola or vegetable oil): Provides moisture, ensuring that your brownies are tender.
  • ¼ cup water: Helps hydrate the mix for even consistency.
  • 2 large eggs: Binds the ingredients together and adds richness.

Substitutions and Variations

If you don’t have one of the ingredients on hand, here are some substitutions you can use:


Cake Decorating Set

★ Recommended Kitchen Tool

Cake Decorating Set

Make this recipe even easier with a quality Cake Decorating Set — a must-have kitchen staple!


🛒 See Deals on Amazon →

As an Amazon Associate, we earn from qualifying purchases.
  • Butter instead of oil: For a richer flavor, replace oil with melted butter.
  • Applesauce instead of oil: A great option for a lower-fat version that still keeps brownies moist.
  • Different brands of brownie mix: Feel free to use any brand you prefer; just follow the ingredient suggestions on the box.
  • Add-ins: Consider adding nuts, chocolate chips, or even a swirl of peanut butter for extra flavor.

Step-by-Step Directions

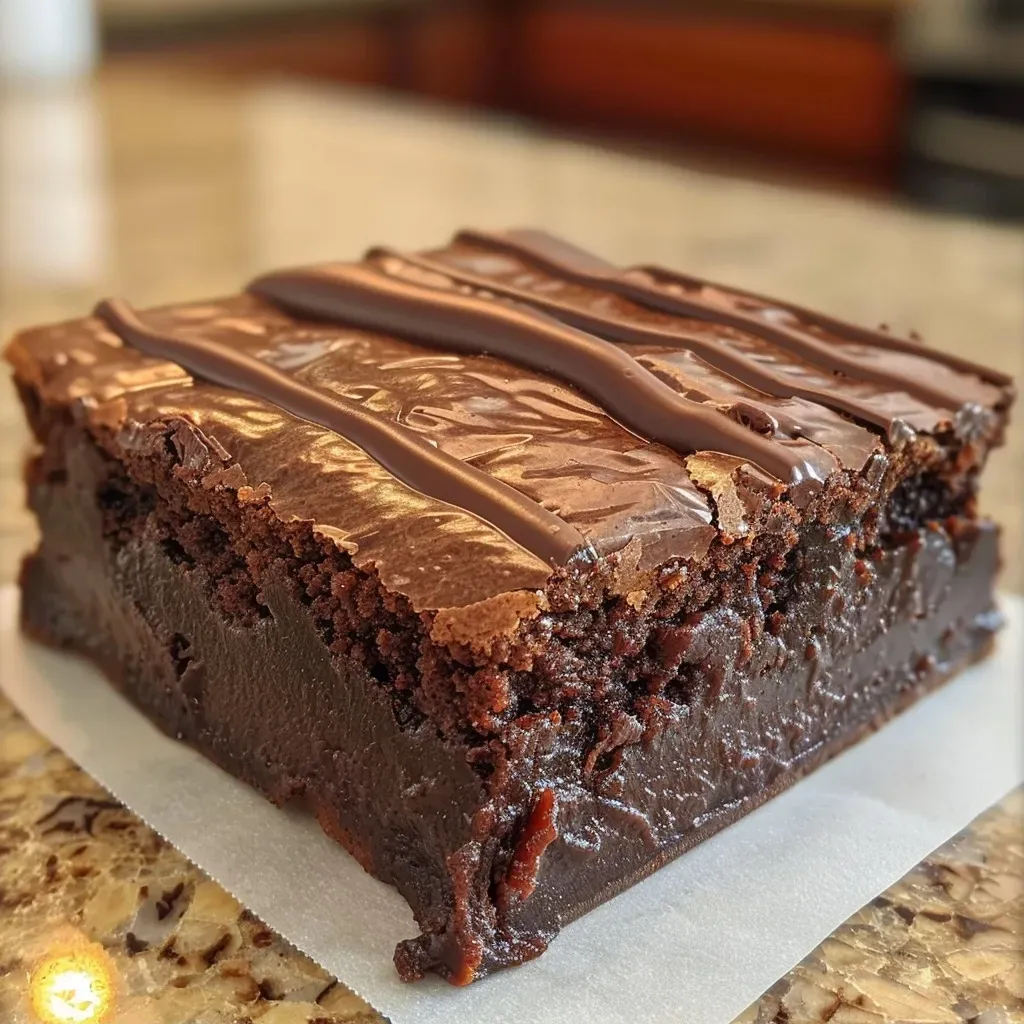
Close-up shot of rich, gooey brownies made in a slow cooker, showing a side view and glistening surface.

Follow these easy steps to create your brownies:

  • Prepare the slow cooker: Spray it with non-stick cooking spray to ensure easy removal.
  • Mix the ingredients: In a large bowl, combine the brownie mix, oil, water, and eggs. Stir gently until smooth; it’s okay to leave a few lumps.
  • Spread the batter: Pour the mixture into the prepared slow cooker, spreading it evenly.
  • Cook: Set your slow cooker to HIGH and let the brownies cook for about 2 hours. Check for doneness; they should be set in the middle.
  • Cool before serving: Let them cool slightly before cutting into squares. Enjoy them warm or at room temperature!

Pro Tips for Perfect Brownies

Maximize your brownie experience with these expert insights:

  • Check doneness: Every slow cooker is different. Start checking at the 1.5-hour mark to prevent overcooking.
  • Let them rest: Allowing the brownies to cool for at least 30 minutes will help them set properly.
  • Use parchment paper: Lining the slow cooker with parchment will make cleanup a breeze.
  • Experiment with toppings: Drizzle with melted chocolate or sprinkle with sea salt for an elevated dessert.
  • Serve with ice cream: Pair your brownies with a scoop of protein-packed ice cream for an indulgent treat.
  • Store leftovers properly: Keep them in an airtight container to maintain freshness.
  • Make ahead: You can mix the ingredients the night before and store them in the fridge until ready to cook.
  • Use a kitchen scale: For precision, weigh your ingredients to ensure consistent results.

Common Mistakes and Troubleshooting

Avoid these common pitfalls to perfect your brownies:

  • Overmixing: Stir just until combined; overmixing can lead to dense brownies.
  • Too much cooking time: Keep an eye on them to avoid drying out.
  • Not using enough oil: Insufficient oil can lead to dry brownies; always measure accurately.
  • Skipping the spray: Not greasing your slow cooker can result in brownies that stick.

Storage and Make-Ahead Instructions

Keep your brownies fresh and ready to enjoy:

  • Storing leftovers: Allow brownies to cool completely before placing them in an airtight container. They can last up to 5 days at room temperature or a week in the fridge.
  • Freezing: For longer storage, freeze brownies wrapped in plastic wrap and then foil. They can be kept for up to 3 months.
  • Reheating: Heat in the microwave for a few seconds for a warm treat, or enjoy them cold.

FAQs About Slow Cooker Brownies

Got questions? Here are some common inquiries about this recipe:

  • Can I use a different brownie mix for this recipe? Yes, just follow the ingredient amounts listed on the box.
  • Are these brownies gluten-free? You can use a gluten-free brownie mix to make them suitable for a gluten-free diet.
  • Can I add nuts? Absolutely! Chopped walnuts or pecans add great texture.
  • How do I know when the brownies are done? Insert a toothpick in the center; it should come out clean or with a few moist crumbs.
  • Can these brownies be made vegan? Yes, substitute eggs with flax eggs and use a plant-based oil.
  • What if my brownies are too gooey? Cook them a bit longer, checking every 15 minutes until set.
  • Can I double the recipe? Yes, but you may need to adjust the cooking time and use a larger slow cooker.
  • What’s the best way to serve these brownies? They’re delicious warm, but you can also serve them with ice cream or whipped cream.

Nutrition Tips and Dietary Adaptations

Keep your health goals in mind while enjoying these brownies:

  • Protein boost: Consider adding protein powder to the mix for an extra nutritional kick.
  • Lower sugar options: Look for reduced-sugar brownie mixes to cut down on added sugars.
  • Healthy fats: Use avocado oil instead of traditional oils for a healthier fat source.
  • Fiber-rich additions: Add ground flaxseed or chia seeds to up the fiber content.

Equipment Recommendations

Here’s what you’ll need to make these brownies:

  • Slow cooker: A 4-quart or larger slow cooker works best.
  • Mixing bowls: Use a large bowl for mixing your ingredients.
  • Spatula: A sturdy spatula is essential for mixing and spreading the brownie batter.
  • Parchment paper: Optional but recommended for easy cleanup.

Serving Suggestions

Elevate your brownie experience with these serving ideas:

  • With ice cream: Top with your favorite ice cream for a delicious contrast.
  • Drizzled with chocolate: A drizzle of melted chocolate enhances the chocolate flavor.
  • Fresh berries: Serve with strawberries or raspberries for a refreshing touch.
  • Sprinkle of sea salt: A pinch of sea salt brings out the chocolate flavor.

Conclusion

Incorporating these slow cooker brownies into your meal prep will not only satisfy your cravings but also keep you on track with your nutrition goals. With simple ingredients, easy preparation, and endless variations, you can enjoy a tasty dessert without the guilt. So, grab your slow cooker, and let’s get baking!

Slow Cooker Brownies

Prep Time 10 minutes
Cook Time 2 hours
Total Time 2 hours 10 minutes
Servings 8 pieces
Calories 250
Enjoy rich, fudgy brownies made effortlessly in your slow cooker with this simple recipe.

Ingredients

Dry Mix

  • 18.4 oz Pillsbury chocolate fudge brownie mix
  • ⅔ cup cooking oil
  • ¼ cup water
  • 2 large eggs

Instructions 

  • Mix brownie mix, oil, water, and eggs until smooth.
  • Spray slow cooker with non-stick spray.
  • Spread batter evenly in slow cooker.
  • Cook on HIGH for 2 hours until set.
  • Let cool, then cut into squares and serve.

Notes

Use the suggested ingredient amounts on different brownie mix brands for best results.
Calories: 250kcal
Cost: $10
Course: Dessert
Keyword: brownies

Fuel Your Gains with a Turkey Stuffed Acorn Squash Recipe

Looking for a meal that combines flavor, nutrition, and ease of preparation? This Turkey Stuffed Acorn Squash recipe is here to transform your dinner table. Packed with protein and fiber, this dish hits all the right notes for a satisfying autumn-inspired meal. Acorn squash is not only delicious but also a nutrient powerhouse, making it the perfect vessel for a hearty stuffing. Let’s dive into how you can create a dish that not only fuels your gains but tantalizes your taste buds!

Why You’ll Love This Recipe

  • High Protein Content: With lean ground turkey, this recipe provides a substantial protein boost, essential for muscle recovery and growth.
  • Flavorful and Hearty: The combination of spices, vegetables, and cheese creates a rich, satisfying taste that doesn’t compromise on flavor.
  • Meal Prep Friendly: Perfect for making ahead, this dish can be prepared in advance and stored for quick meals throughout the week.
  • Seasonal Ingredients: Utilizing seasonal produce not only enhances flavor but also supports local farmers and reduces your carbon footprint.
  • Perfect for Any Occasion: Whether it’s a casual weeknight dinner or a gathering with friends, this dish impresses every time.

Ingredients You Will Need

To make this stuffed acorn squash, gather the following ingredients:

  • 3 small acorn squash (about 1.5 lbs each)
  • 1 tbsp avocado oil (plus more for brushing)
  • Pinch of salt and ground black pepper
  • 1 medium onion (finely chopped)
  • 3 garlic cloves (minced)
  • 1 lb ground turkey (extra lean)
  • 3 cups spinach and/or kale (packed and coarsely chopped)
  • 2 tbsp tomato paste
  • 2 tsp dried rosemary
  • 3 tbsp parsley (finely chopped)
  • 1/2 tsp salt
  • Ground black pepper (to taste)
  • 3/4 cup any hard cheese (shredded & divided)

How to Make Turkey Stuffed Acorn Squash

Close-up side view of juicy turkey stuffed acorn squash with vibrant filling.

Follow these simple steps to prepare your stuffed acorn squash:


Digital Kitchen Scale

★ Recommended Kitchen Tool

Digital Kitchen Scale

Make this recipe even easier with a quality Digital Kitchen Scale — a must-have kitchen staple!


🛒 View on Amazon →

As an Amazon Associate, we earn from qualifying purchases.
  1. Preheat your oven to 450 degrees F. To cut the squash open, place a rubber mat under the cutting board and a towel on top. Cut through using a long serrated knife, making sure to circle around evenly. Scoop out the seeds with a spoon.
  2. Place the squash cut-side up on a large baking sheet. Brush with 1 tbsp of oil and sprinkle with salt and pepper. Bake for 30 minutes.
  3. While the squash is baking, prepare the stuffing. Heat a large skillet over low-medium heat, adding the remaining avocado oil. Sauté the onion and garlic until translucent.
  4. Add the ground turkey, cooking until browned, about 7 minutes, while breaking it into pieces.
  5. Stir in the spinach (or kale), tomato paste, rosemary, parsley, and season with salt and pepper. Cook for an additional 3-4 minutes, then remove from heat and mix in 1/2 cup of cheese.
  6. Once the squash is cool enough to handle, stuff each half with the turkey mixture, dividing it evenly. Top with the remaining cheese.
  7. Return to the oven and bake for another 25 minutes, or until the tops are golden brown. Serve hot and enjoy!

Pro Tips for Best Results

  • Ensure even cooking: When cutting your squash, make sure to slice it evenly for uniform baking.
  • Experiment with spices: Feel free to customize the seasoning. Adding cumin or smoked paprika can elevate the flavor profile.
  • Use fresh herbs: Fresh herbs can intensify flavors compared to dried. Consider using fresh rosemary and parsley if available.
  • Don’t skip the cheese: It adds creaminess and richness that complements the savory filling beautifully.
  • Check doneness: Use a fork to test if the squash is tender before adding the stuffing back into the oven.
  • Stuff generously: Don’t be shy about overfilling the squash; it’s all about maximizing flavor!
  • Rest before serving: Allow the stuffed squash to sit for a few minutes after baking. It helps the flavors meld together.
  • Try different proteins: Swap ground turkey for ground chicken or even plant-based protein for a vegetarian version.

Common Mistakes and Troubleshooting

Even seasoned cooks can run into issues. Here are common mistakes and how to avoid them:

  • Undercooked squash: Make sure to bake the squash until it’s fork-tender. If it’s still firm, add extra baking time.
  • Dry stuffing: To keep the stuffing moist, ensure you don’t overcook the turkey and add enough spinach or other veggies.
  • Too salty: Taste your filling before baking. You can always add more salt, but it’s hard to take it out once it’s in!
  • Overstuffed squash: If it’s overflowing, it can make a mess. Aim for a generous but manageable amount of filling.

Variations You Can Try

Want to mix things up? Here are some tasty variations:

  • Vegetarian Option: Substitute ground turkey with a mix of black beans, quinoa, and corn for a satisfying vegetarian alternative.
  • Mexican-Inspired: Add taco seasoning to the turkey mixture and top with jalapeños and cheese for a spicy twist.
  • Italian Flavor: Incorporate Italian herbs and marinara sauce into the stuffing, then top with mozzarella cheese.
  • Sweet Addition: For a sweeter profile, add dried cranberries or chopped apples to the stuffing for a delightful contrast.

Storage and Make-Ahead Instructions

This recipe is ideal for meal prep. Here’s how to store and reheat:

  • Make Ahead: Prepare the filling a day in advance and store it in the fridge. You can stuff the squash and bake it the next day.
  • Storage: Store leftovers in an airtight container in the refrigerator for up to 4 days.
  • Freezing: You can freeze the stuffed squash for up to 3 months. Thaw in the fridge overnight before reheating.
  • Reheating: Reheat in the oven at 350°F until warmed through, about 15-20 minutes.

Comprehensive FAQ

  • Can I use a different squash? Yes! Butternut or spaghetti squash also works great for stuffing.
  • Is this dish gluten-free? Yes, as long as you use gluten-free breadcrumbs or omit them entirely.
  • How can I add more veggies? Feel free to mix in other vegetables like bell peppers, zucchini, or mushrooms.
  • What type of cheese is best? Hard cheeses like parmesan or cheddar add excellent flavor. Go for what you prefer!
  • Can I use frozen spinach? Yes, but make sure to thaw and drain it well before adding it to the stuffing.
  • How do I know when the squash is done? The skin should be tender, and a fork should easily pierce the flesh.
  • What main dish pairs well with this? A light salad or steamed vegetables make great side dishes to complement the stuffed squash.
  • Can I make this vegan? Absolutely! Use lentils or chickpeas instead of turkey, and nutritional yeast for a cheesy flavor.

Nutrition Tips and Dietary Adaptations

This stuffed acorn squash is not only delicious but also aligns well with various dietary goals:

  • High Protein: Each serving contains a significant amount of protein, crucial for muscle repair.
  • Low Carb Option: If you’re following a low-carb diet, focus on the filling and reduce the amount of squash.
  • Dairy-Free Version: Omit cheese or use a dairy-free alternative to cater to lactose intolerance.
  • Rich in Fiber: The combination of squash and vegetables ensures you get plenty of fiber to aid digestion.

Equipment Recommendations

For this recipe, having the right tools can make a significant difference:

  • Sharp Knife: A serrated knife works best for cutting through the tough skin of the squash.
  • Baking Sheet: Use a large, sturdy baking sheet to hold the squash while baking.
  • Skillet: A non-stick skillet helps with cooking the turkey and vegetables evenly.
  • Measuring Cups and Spoons: Ensure accuracy in your ingredient amounts for the best results.

Serving Suggestions

Enhance your meal with these serving ideas:

  • Garnish with Fresh Herbs: Sprinkle extra parsley or rosemary on top for a fresh finish.
  • Pair with a Salad: A light green salad with vinaigrette complements the richness of the squash.
  • Serve with a Grain: Quinoa or brown rice can add a nice texture and balance to your meal.
  • Offer a Sauce: A drizzle of balsamic glaze or yogurt sauce can elevate the flavor.

Fuel your gains with this delicious Turkey Stuffed Acorn Squash recipe! It’s more than just a meal; it’s a celebration of flavor, nutrition, and the joy of cooking. Whether you’re prepping for the week ahead or impressing guests, this dish is a go-to for any occasion. Enjoy every bite and reap the rewards of your hard work in the kitchen!

Turkey Stuffed Acorn Squash

Prep Time 15 minutes
Cook Time 55 minutes
Total Time 1 hour 10 minutes
Servings 4 servings
Calories 350
A delicious and healthy dish featuring roasted acorn squash filled with savory turkey and greens, topped with cheese.

Ingredients

Squash

  • 4.5 lbs acorn squash (about 1.5 lbs each)
  • 2 tbsp avocado oil
  • 1 pinch salt and ground black pepper
  • 1 medium onion (finely chopped)
  • 3 cloves garlic (minced)
  • 1 lb ground turkey (extra lean)
  • 3 cups spinach and/or kale (packed and coarsely shopped)
  • 2 tbsp tomato paste
  • 2 tsp dried rosemary
  • 3 tbsp parsley (finely chopped)
  • 0.5 tsp salt
  • to taste ground black pepper
  • 0.75 cup hard cheese (shredded & divided)

Instructions 

  • Preheat oven to 450°F (230°C). Cut squash in half, scoop out seeds, brush with 1 tbsp oil, season with salt and pepper, then bake for 30 minutes.
  • Cook onion and garlic in remaining oil until translucent. Add turkey, cook 7 minutes, then stir in tomato paste, rosemary, parsley, salt, pepper, and greens; cook a few more minutes. Remove from heat and stir in 1/2 cup cheese.
  • Stuff roasted squash halves with the turkey mixture, top with remaining cheese, and bake for 25 minutes until golden. Serve hot.

Notes

Ensure squash is cooled before handling to avoid burns.
Calories: 350kcal
Cost: $15
Course: Main Course
Cuisine: American
Keyword: Acorn Squash, Turkey

Discover the Ultimate Creamy Pumpkin Soup Recipe

As the leaves change color and the air turns crisp, nothing warms the soul quite like a bowl of creamy pumpkin soup. This 30-minute creamy pumpkin soup is not only delicious but also high in protein, making it a perfect choice for those looking to stay on track with their nutrition goals. Packed with flavor and nutrients, this easy pumpkin soup recipe is ideal for meal prep and cozy dinners alike. Let’s dive into why this recipe stands out and how you can make it your own!

Why You’ll Love This Recipe

This pumpkin soup recipe is designed to be a hit in your kitchen. Here are just a few reasons why:

  • Quick & Easy: Ready in just 30 minutes, this soup is perfect for busy weeknights.
  • Flavor-Packed: With aromatic spices and rich ingredients, each bite is bursting with flavor.
  • High in Protein: Incorporating heavy cream or coconut milk provides a creamy texture while keeping macros in check.
  • Customizable: Easily adjust ingredients for dietary preferences or what you have on hand.
  • Meal Prep Friendly: This soup stores well and tastes even better the next day, making it great for meal prep.

Ingredient Breakdown

Understanding each ingredient helps you appreciate the recipe and allows for modifications. Here’s what you’ll need:


Digital Kitchen Scale

★ Recommended Kitchen Tool

Digital Kitchen Scale

Make this recipe even easier with a quality Digital Kitchen Scale — a must-have kitchen staple!


🛒 Shop This Tool →

As an Amazon Associate, we earn from qualifying purchases.
  • 2 tbsp olive oil: For sautéing the aromatics and adding healthy fats.
  • 1 large yellow onion, chopped: Provides a sweet and savory base.
  • 3 cloves garlic, minced: Enhances flavor and adds depth.
  • 1 (15-ounce) can 100% pure pumpkin purée: The star of the show, offering rich flavor and nutrition.
  • 4 cups vegetable or chicken broth, low-sodium: A flavorful base; choose vegetable for a vegan option.
  • 1 tsp ground cumin: Adds warmth and earthiness.
  • 1/2 tsp ground nutmeg: A classic spice complementing pumpkin.
  • 1/2 tsp ground cinnamon: For a hint of sweetness and warmth.
  • 2 tbsp maple syrup: Balances the flavors with natural sweetness.
  • 1/2 cup heavy cream or full-fat coconut milk: Adds creaminess; coconut milk is great for dairy-free versions.
  • Salt and freshly ground black pepper: Essential for seasoning; adjust to taste.

Step-by-Step Instructions

A close-up view of a bowl of creamy pumpkin soup garnished with herbs.

Follow these simple steps to whip up your creamy pumpkin soup:

  1. In a large pot or Dutch oven, heat the olive oil over medium heat. Add the chopped onion and cook until softened and translucent, about 5-7 minutes.
  2. Add the minced garlic and cook for another minute until fragrant.
  3. Stir in the ground cumin, nutmeg, and cinnamon. Cook for about 30 seconds until the spices are aromatic.
  4. Add the pumpkin purée, vegetable broth, and maple syrup. Bring to a boil, then reduce heat to low and let it simmer for 15 minutes.
  5. Use an immersion blender to puree the soup directly in the pot until smooth. If you don’t have one, transfer to a blender in batches.
  6. Stir in the heavy cream or coconut milk. Season generously with salt and pepper to taste. Warm through gently without boiling.
  7. Ladle the soup into bowls and garnish as desired.

Expert Tips for the Best Pumpkin Soup

To elevate your soup game, consider these expert tips:

  • Use fresh spices: Freshly ground spices offer a more vibrant flavor compared to pre-ground.
  • Don’t rush the sauté: Allow onions to become translucent for a sweeter flavor base.
  • Adjust creaminess: Control the richness by varying the amount of cream or coconut milk.
  • Add a splash of acid: A squeeze of lemon juice or a dash of vinegar brightens the flavors.
  • Garnish wisely: Top with roasted pumpkin seeds or fresh herbs for added texture and visual appeal.
  • Check seasoning: Always taste before serving; adjust salt and pepper as needed.
  • Make it spicy: Add a pinch of cayenne or chili powder for a kick.
  • Blend to your preference: For a chunkier soup, blend only half or use a potato masher.

Common Mistakes and Troubleshooting

If your soup doesn’t turn out as expected, here are some common pitfalls and how to fix them:

  • Too thick: Add more broth or water to thin it out to your desired consistency.
  • Too bland: Adjust seasoning by adding more salt, pepper, or spices.
  • Too sweet: Balance with a bit of salt or acid (lemon juice or vinegar) to cut the sweetness.
  • Not creamy enough: Increase the cream or use a blender to smooth it out further.

Flavor Variations to Try

Want to mix things up? Here are some delicious variations:

  • Curried Pumpkin Soup: Add 1-2 tsp of curry powder for a warm, spiced flavor.
  • Smoky Pumpkin Soup: Incorporate smoked paprika for a rich, smoky taste.
  • Herbed Pumpkin Soup: Stir in fresh herbs like thyme or sage for an aromatic twist.
  • Chili Pumpkin Soup: Add cooked ground turkey or beef for added protein and heartiness.

Storage and Make-Ahead Instructions

This soup is perfect for meal prep! Here’s how to store it:

  • Refrigerator: Store in an airtight container for up to 5 days.
  • Freezer: Freeze in portions for up to 3 months. Thaw overnight in the fridge before reheating.
  • Reheating: Warm on the stovetop over medium heat until heated through. Add a splash of broth if it’s too thick.

Frequently Asked Questions

Got questions? We’ve got answers!

  • Can I use fresh pumpkin? Yes, just make sure to roast and puree it before adding it to the soup.
  • Is this soup vegan? Yes, just substitute the heavy cream with coconut milk or a vegan alternative.
  • How can I increase the protein content? Consider adding cooked lentils or beans for extra protein.
  • What can I serve with pumpkin soup? Pair with a hearty bread, salad, or protein like grilled chicken.
  • Can I make this soup spicy? Absolutely! Add red pepper flakes or a dash of hot sauce.
  • What’s the best way to blend the soup? An immersion blender is great, but a traditional blender works too—just be cautious with hot liquids.
  • Can I use canned pumpkin? Yes, it’s a great time-saver and ensures consistent flavor.
  • Can I add other vegetables? Feel free to include carrots, sweet potatoes, or spinach for added nutrition.

Nutrition Tips and Dietary Adaptations

This soup can easily fit into various dietary needs:

  • Low-Carb: Skip the maple syrup and use less broth for a thicker texture.
  • Gluten-Free: Ensure all ingredients are certified gluten-free, especially broth.
  • Dairy-Free: Use coconut milk instead of heavy cream for a creamy consistency.

Recommended Equipment

Here’s a list of tools that will make your cooking experience smoother:

  • Large pot or Dutch oven: Ideal for even cooking.
  • Immersion blender: Perfect for a quick and easy blend.
  • Cutting board and knife: Essential for prepping your ingredients.
  • Measuring cups and spoons: Ensure accurate ingredient quantities.

Serving Suggestions

Serve your creamy pumpkin soup with:

  • Crusty bread: Perfect for dipping and adds texture.
  • Salad: A light green salad pairs well for a refreshing contrast.
  • Protein: Grilled chicken or shrimp can boost the protein content.
  • Garnishes: Top with pumpkin seeds, a drizzle of cream, or fresh herbs for added flair.

Conclusion

This 30-minute creamy pumpkin soup is not just a seasonal dish; it’s a versatile recipe that can be enjoyed year-round. By following this guide, you’re equipped with all the knowledge to create a delicious, protein-packed soup that meets your nutritional goals without sacrificing flavor. So grab your ingredients and get cooking—your taste buds will thank you!

Easy Pumpkin Soup (Ready in 30 Minutes!)

Prep Time 10 minutes
Cook Time 20 minutes
Total Time 30 minutes
Servings 4 servings
Calories 250
A quick and comforting pumpkin soup perfect for a cozy meal, ready in just 30 minutes.

Ingredients

Main

  • 2 tbsp olive oil
  • 1 large yellow onion, chopped
  • 3 cloves garlic, minced
  • 1 15-ounce can 100% pure pumpkin purée
  • 4 cups vegetable or chicken broth, low-sodium
  • 1 tsp ground cumin
  • 1/2 tsp ground nutmeg
  • 1/2 tsp ground cinnamon
  • 2 tbsp maple syrup
  • 1/2 cup heavy cream or full-fat coconut milk
  • to taste Salt and freshly ground black pepper

Instructions 

  • Heat olive oil in a large pot. Cook onion until translucent, then add garlic and cook 1 minute.
  • Add spices, then stir in pumpkin, broth, and maple syrup. Bring to boil, then simmer 15 minutes.
  • Puree the soup until smooth using an immersion blender or in batches in a blender.
  • Stir in heavy cream or coconut milk. Season with salt and pepper, warm through.
  • Ladle into bowls and serve hot.

Notes

For a vegan version, use coconut milk and skip the cream.
Calories: 250kcal
Cost: $15
Course: Soup
Cuisine: American
Keyword: Pumpkin

Unlock the Delicious Potential of Protein-Packed Tuna Wraps

If you’re searching for a quick, satisfying, and nutritious meal, look no further than these Protein-Packed Tuna Wraps. This recipe combines the rich flavor of tuna with a variety of crunchy vegetables, making it a perfect choice for a healthy lunch or an easy dinner. These wraps not only meet your protein goals but also tantalize your taste buds, proving that eating healthy doesn’t have to be boring. In this article, we’ll dive deep into the recipe, share pro tips, and explore variations to keep your meals exciting.

Why You’ll Love This Recipe

Here are several reasons to make these protein-packed tuna wraps a staple in your meal rotation:

  • High in Protein: Each wrap is loaded with tuna, providing a lean and satisfying protein source that fuels your workouts and keeps you full.
  • Quick to Prepare: With minimal cooking required, you can whip up these wraps in under 15 minutes, making them ideal for busy weekdays.
  • Versatile Ingredients: The ingredients are easily customizable based on what you have on hand, allowing for endless variations.
  • Perfect for Meal Prep: These wraps can be made ahead of time and stored in the fridge, making them a great option for meal prepping.
  • Flavorful and Satisfying: The combination of creamy dressing and crunchy veggies creates a delicious flavor and texture profile that you’ll crave.

Ingredients Breakdown

Here’s what you’ll need for these tuna wraps and some suggestions for substitutions:


Stainless Lemon Squeezer

★ Recommended Kitchen Tool

Stainless Lemon Squeezer

Make this recipe even easier with a quality Stainless Lemon Squeezer — a must-have kitchen staple!


🛒 Shop This Tool →

As an Amazon Associate, we earn from qualifying purchases.
  • 1 5-ounce can white meat tuna: Opt for tuna packed in water for a lower-calorie option. You can also choose tuna packed in olive oil for added flavor.
  • 1/4 cup finely chopped celery: Adds a satisfying crunch. Substitute with diced cucumber if you prefer.
  • 1/4 cup finely chopped green onion: For a mild onion flavor. Chopped red onion can be used for a sharper taste.
  • 1/4 cup finely chopped dill pickles: Provides tanginess. Consider using relish or chopped olives as alternatives.
  • 1/4 cup mayonnaise: Use Greek yogurt for a lighter option or substitute with avocado for a creamy texture without the mayo.
  • 1 tablespoon Dijon mustard: Adds a zesty kick. You can replace it with yellow mustard if that’s what you have.
  • 1/4 teaspoon dried dill: Enhances flavor. Fresh dill works wonderfully if available.
  • 1/4 teaspoon kosher salt: Adjust to taste.
  • 1 tablespoon shredded or grated Parmesan cheese (optional): Boosts flavor. Leave it out for a dairy-free option.
  • 2 handfuls chopped romaine lettuce: For freshness and crunch. Any leafy greens will work.
  • 1/4 red cabbage, shredded: Adds color and crunch. You can swap it for green cabbage or omit it entirely.
  • 1/2 red pepper, sliced into strips: Sweet and crunchy. Feel free to use any color bell pepper.
  • 2 10-inch burrito style wraps: Whole wheat or gluten-free wraps are excellent alternatives.

Step-by-Step Instructions for Making Tuna Wraps

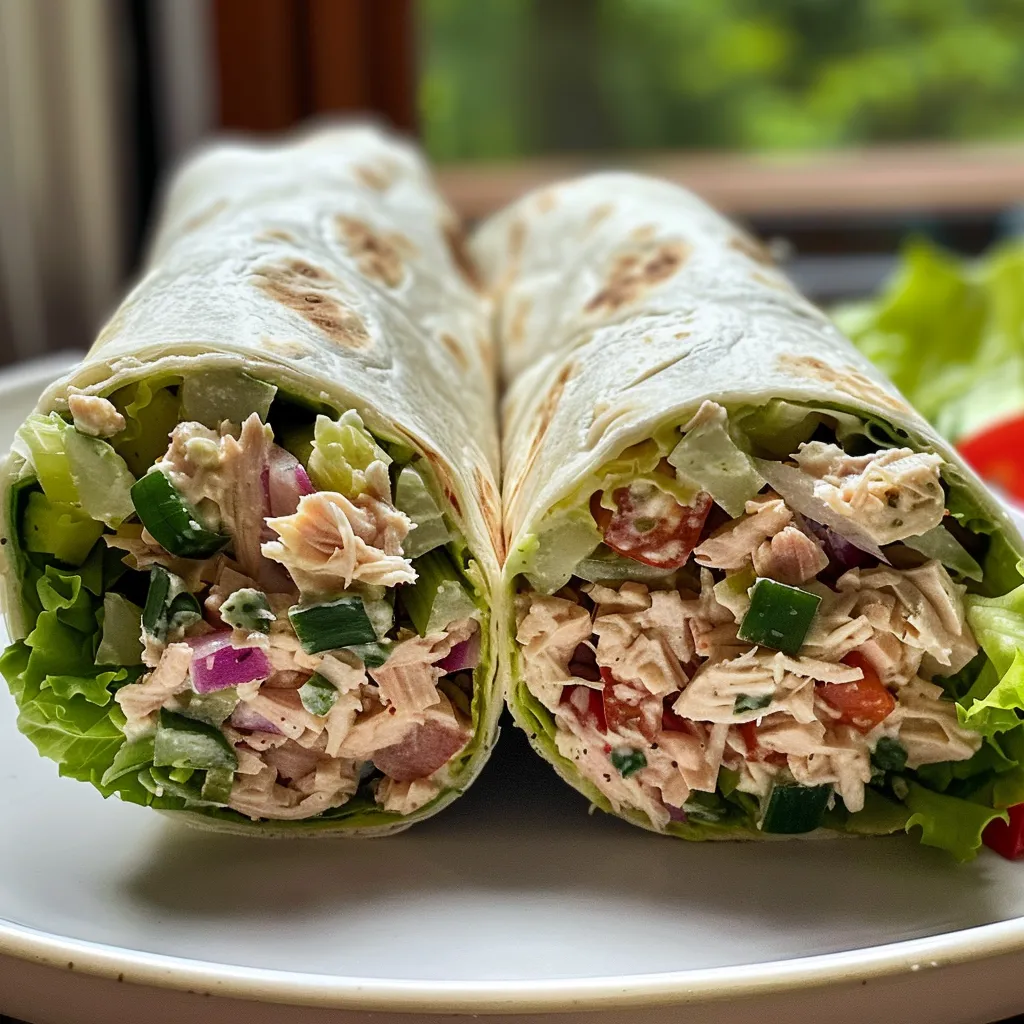
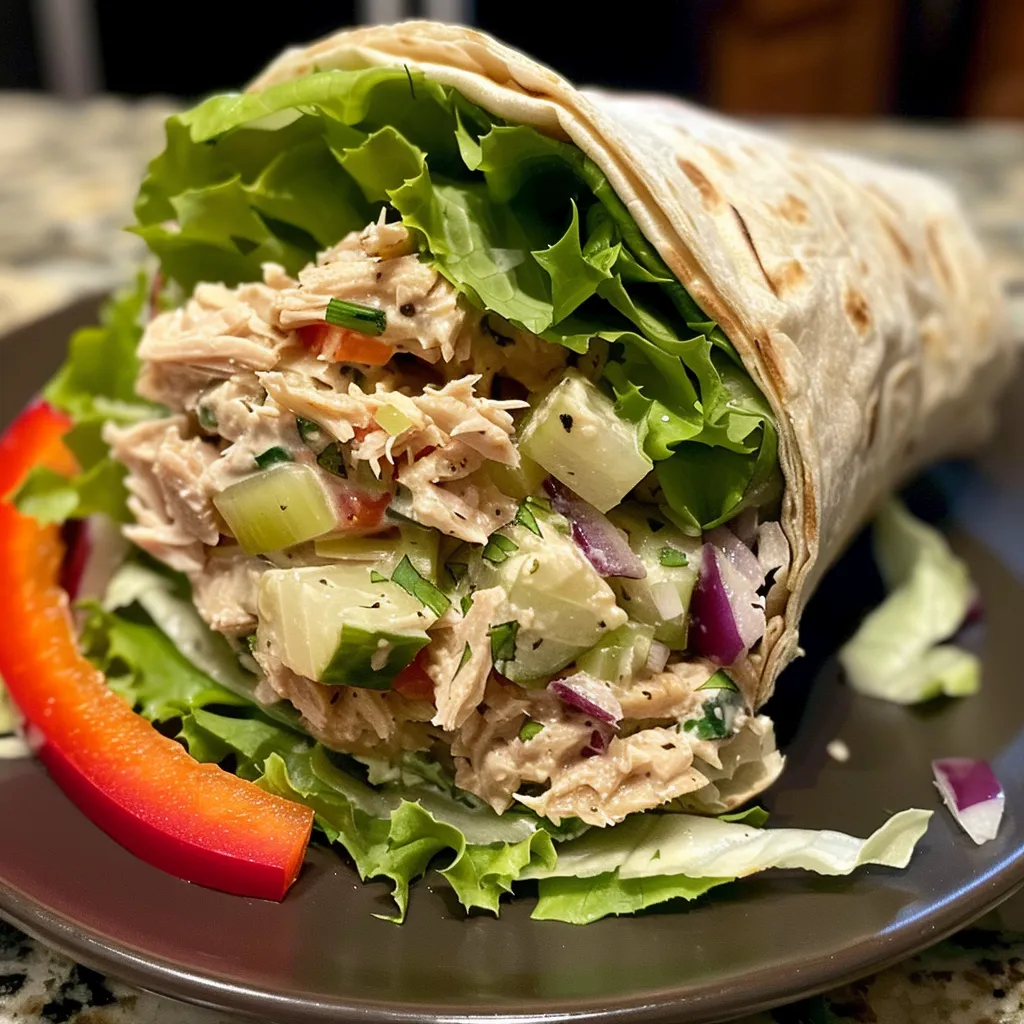
Close-up view of a delicious tuna wrap with colorful vegetables.

Follow these simple steps to create your tasty tuna wraps:

  1. Drain the tuna. Place it in a bowl and use a fork to break apart any large clumps.
  2. In the same bowl, mix together the tuna, chopped celery, green onion, dill pickles, mayonnaise, Dijon mustard, dried dill, and kosher salt. Add the Parmesan cheese if desired (it really steps it up a notch!).
  3. Lay an even layer of romaine lettuce on a tortilla, then top with shredded red cabbage and red pepper. Place half of the tuna salad filling on top.
  4. Make a burrito-style wrap by folding in each side of the tortilla, then rolling it up from the bottom. (A small amount of filling may come out after rolling.) Slice the wrap in half for easier eating.
  5. Enjoy immediately, or wrap it in parchment or wax paper for storage. Refrigerate until serving, up to 8 hours. (Avoid plastic wrap to prevent sogginess. You can also pack the tuna salad and veggies separately and assemble just before serving.)

Pro Tips for Perfect Tuna Wraps

Enhance your tuna wraps with these expert insights:

  • Don’t overmix: When combining ingredients, mix just enough to combine. Overmixing can make the tuna salad too mushy.
  • Texture matters: Ensure your veggies are finely chopped for a balanced texture that complements the creamy tuna.
  • Chill before serving: If possible, let the tuna salad chill in the refrigerator for about 30 minutes before assembling. This enhances the flavors.
  • Experiment with spices: Add a dash of cayenne pepper or paprika for an extra kick.
  • Use fresh herbs: Fresh dill, parsley, or cilantro can elevate the flavor profile significantly.
  • Wrap it right: For a cleaner wrap, ensure you don’t overfill it, as excess filling can cause spills.
  • Make it a bowl: If you prefer, turn this recipe into a tuna salad bowl by serving it over a bed of greens instead of in a wrap.
  • Select quality tuna: Choosing a higher quality tuna will significantly elevate the taste of your wraps.

Common Mistakes and Troubleshooting

Here are some common pitfalls to avoid while making your tuna wraps:

  • Too soggy: If your tuna salad is too wet, reduce the amount of mayonnaise or add more dry ingredients like celery or pickles.
  • Filling falls out: Make sure to wrap tightly and not overfill to avoid spills.
  • Flavorless filling: Don’t skimp on seasonings; they’re crucial for a delicious wrap!

Variations to Keep It Interesting

Mix things up with these delicious variations:

  • Spicy Tuna Wrap: Add chopped jalapeños or a sprinkle of hot sauce for a spicy kick.
  • Mediterranean Twist: Incorporate feta cheese, olives, and sun-dried tomatoes for a Mediterranean flavor.
  • Tropical Tuna Wrap: Mix in diced pineapple and a dash of curry powder for a sweet and savory combination.
  • Asian-Inspired Wrap: Use soy sauce, ginger, and sesame oil, and substitute cabbage for bok choy.

Storage and Make-Ahead Instructions

To keep your wraps fresh:

  • Wrap them in parchment paper or wax paper instead of plastic to prevent sogginess.
  • Store in the refrigerator for up to 8 hours before assembly. If making tuna salad ahead, it can be stored in an airtight container for 2-3 days.
  • For longer storage, consider freezing the tuna salad (without veggies) for up to a month, then assemble fresh wraps when ready to eat.

FAQ About Tuna Wraps

Here are answers to some commonly asked questions:

  • Can I use canned salmon instead of tuna? Yes, canned salmon works well and provides a different flavor profile.
  • How do I prevent my wrap from getting soggy? Use sturdy tortillas and avoid adding too much wet ingredient.
  • Can I make these wraps ahead of time? Yes, prepare the filling in advance and assemble the wraps just before serving.
  • What can I serve with tuna wraps? Pair with a fresh salad, vegetable sticks, or a side of fruit for a balanced meal.
  • Are tuna wraps healthy? Yes, they are high in protein and can be made with nutritious ingredients.
  • How long do tuna wraps last in the fridge? They can be stored for up to 8 hours when wrapped properly.
  • Can I freeze tuna wraps? It’s best to freeze the tuna salad separately and assemble fresh wraps before serving.
  • What are some good substitutes for mayonnaise? Greek yogurt or mashed avocado are excellent alternatives.

Nutrition Tips and Dietary Adaptations

To cater to various dietary needs:

  • Low-Carbohydrate Option: Use lettuce leaves instead of tortillas for a low-carb wrap.
  • Dairy-Free: Substitute mayonnaise with avocado or a dairy-free dressing.
  • Vegetarian Version: Replace tuna with chickpeas or black beans for a protein-rich vegetarian wrap.

Equipment Recommendations

Make your cooking experience seamless with these essential tools:

  • Mixing Bowl: A large bowl for combining the tuna salad ingredients.
  • Fork: For breaking apart the tuna and mixing ingredients efficiently.
  • Cutting Board: A sturdy board for chopping veggies.
  • Knife: A sharp knife for easy slicing of vegetables.
  • Wrap Storage: Parchment or wax paper for wrapping your tuna wraps.

Serving Suggestions

Here are some delicious ideas to serve alongside your tuna wraps:

  • Fresh Salad: A side salad with mixed greens, tomatoes, and a light vinaigrette pairs perfectly.
  • Veggie Sticks: Carrots, cucumbers, and bell peppers are great for dipping in hummus or ranch dressing.
  • Fruit Salad: A refreshing fruit salad rounds out the meal with natural sweetness.

Conclusion

These Protein-Packed Tuna Wraps are an excellent solution for anyone looking to enjoy a nutritious meal without sacrificing flavor or time. With easy preparation, endless variations, and the ability to customize ingredients, these wraps are sure to become a favorite in your kitchen. Try them out today and embrace the delicious world of high-protein cooking!

Easy Tuna Wrap

Prep Time 10 minutes
Total Time 10 minutes
Servings 2 wraps
Calories 350
A quick and delicious lunch option, this tuna wrap combines fresh veggies with flavorful tuna in a convenient burrito style.

Ingredients

Protein

  • 1 can white meat tuna (5-ounce can)
  • 0.25 cup finely chopped celery
  • 0.25 cup finely chopped green onion
  • 0.25 cup finely chopped dill pickles
  • 1 tablespoon mayonnaise
  • 1 tablespoon Dijon mustard
  • 0.25 teaspoon dried dill
  • 0.25 teaspoon kosher salt
  • 1 tablespoon shredded Parmesan cheese (optional)
  • 2 handfuls chopped romaine lettuce
  • 0.25 red shredded red cabbage
  • 0.5 red red pepper, sliced into strips
  • 2 10-inch burrito style wraps

Instructions 

  • Drain tuna and break apart in a bowl.
  • Mix tuna with celery, green onion, pickles, mayonnaise, mustard, dill, salt, and cheese if desired.
  • Layer lettuce, cabbage, and pepper on a wrap, then add tuna mixture. Roll up and slice in half.
  • Serve immediately or wrap and refrigerate up to 8 hours.

Notes

For best results, assemble just before eating to keep the wrap crisp.
Calories: 350kcal
Cost: $10
Course: Lunch
Cuisine: American
Keyword: Tuna

Unlock the Flavor: Your Ultimate Guide to Making an Air Fryer Crunchwrap Supreme

Are you ready to elevate your meal prep game? The Air Fryer Crunchwrap Supreme is not just another recipe; it’s a culinary revolution that combines flavor and nutrition without sacrificing your protein goals. This dish is perfect for busy weeks when you want something quick, satisfying, and loaded with protein. Let’s dive into the details of how to make this delicious crunchwrap that’s just as good as your favorite Taco Bell treat, but with the benefits of being made at home!

Why You’ll Love This Recipe

This recipe isn’t just about assembling ingredients; it’s about creating a fantastic meal experience. Here are five reasons why this Air Fryer Crunchwrap Supreme will become a staple in your kitchen:

  • High Protein Content: With ground beef and cheese, this recipe ensures you hit your macros without compromise.
  • Customizable Fillings: Feel free to swap ingredients based on your dietary needs or preferences—veggies, proteins, and sauces can all be adjusted!
  • Quick Preparation: This dish takes less than 30 minutes from start to finish, perfect for busy weeknights.
  • Meal Prep Friendly: Make a batch ahead of time and store them for quick, healthy meals throughout the week.
  • Deliciously Crunchy Texture: The air frying process gives you that golden-brown crunch without the excess oil.

Ingredient Breakdown

To create the ultimate Air Fryer Crunchwrap Supreme, you’ll need the following ingredients:


Professional Chef Knife Set

★ Recommended Kitchen Tool

Professional Chef Knife Set

Make this recipe even easier with a quality Professional Chef Knife Set — a must-have kitchen staple!


🛒 View on Amazon →

As an Amazon Associate, we earn from qualifying purchases.
  • 5 large tortillas: Use flour or whole wheat tortillas for a softer wrap.
  • 1 pound ground beef: Ground turkey or chicken works well as a leaner alternative.
  • ⅓ cup water: Helps to hydrate the taco seasoning.
  • 3 tablespoons taco seasoning: Use store-bought or homemade for a personalized flavor kick.
  • ⅔ cup nacho cheese sauce: For that creamy, cheesy goodness—feel free to use a reduced-fat version.
  • 4 tostadas (or 2 cups tortilla chips): Adds a satisfying crunch and structure.
  • ⅔ cup sour cream: Greek yogurt can be a great substitute for a healthier option.
  • 1 cup iceberg lettuce (shredded): Adds freshness and crunch.
  • 1 cup tomatoes (diced): For a burst of flavor and color.
  • 2 cups cheese blend (shredded): Cheddar, Monterey Jack, or a blend of your favorites.

How to Make Your Crunchwrap Supreme

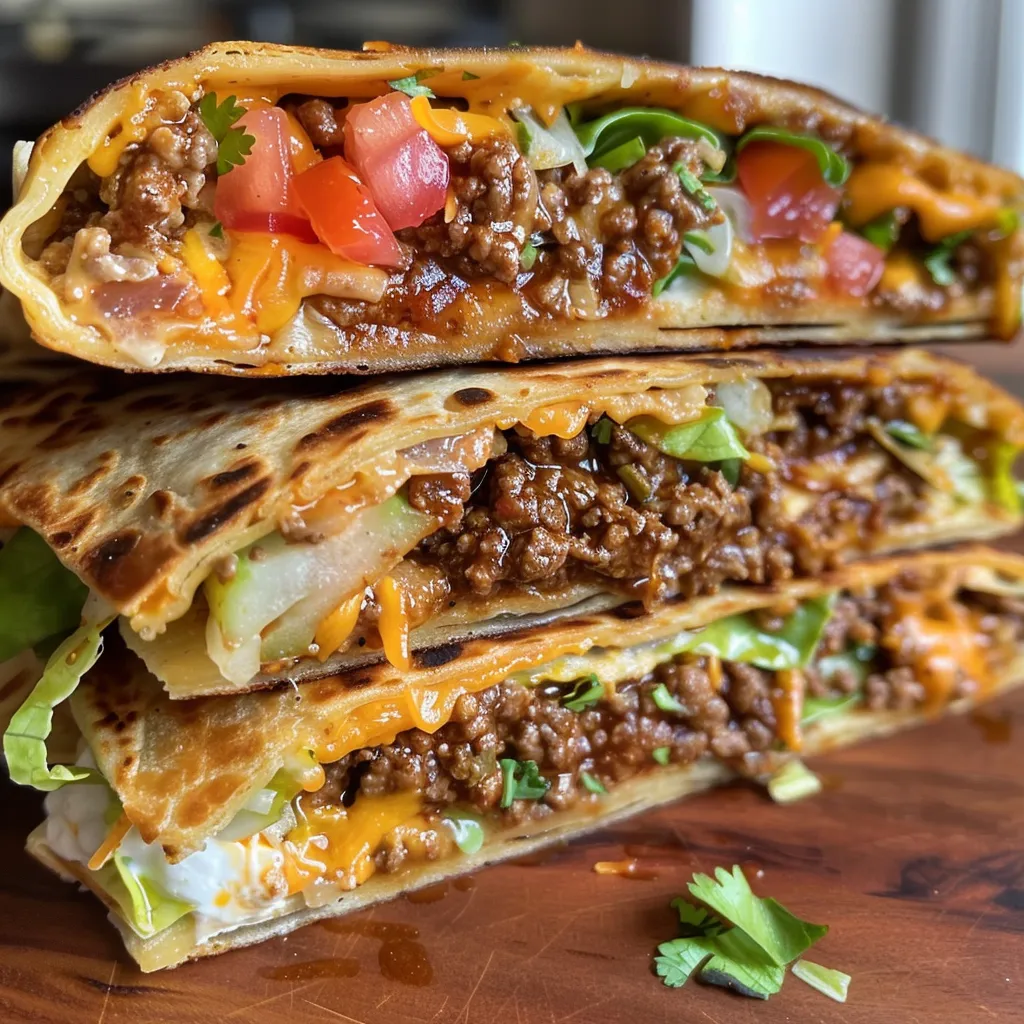
Close-up of a juicy Air Fryer Crunchwrap Supreme with visible layers of ingredients.

Follow these simple steps to whip up your air fryer crunchwrap:

  1. Preheat the air fryer to 400°F.
  2. In a large pan over medium heat, brown the ground beef. Drain excess fat, then add ⅓ cup of water and taco seasoning. Simmer for 5 minutes.
  3. Cut one tortilla into quarters and heat the remaining tortillas in the microwave for 20 seconds to prevent cracking.
  4. In the center of each tortilla, layer ¼ cup of beef, nacho cheese sauce, a tostada shell, sour cream, shredded lettuce, diced tomatoes, and shredded cheese.
  5. Place a quartered piece of tortilla in the center and fold the larger tortilla around it, sealing all sides.
  6. Brush the top with vegetable oil and place seam-side down in the air fryer basket.
  7. Cook for 3-4 minutes or until golden brown. Flip and cook for another 3-4 minutes.

Pro Tips for the Perfect Crunchwrap

Maximize your success with these expert tips:

  • Don’t Overstuff: Keep the filling manageable to ensure easy wrapping and even cooking.
  • Warm Your Tortillas: Heating them prevents cracking and makes them easier to fold.
  • Experiment with Fillings: Consider adding black beans, corn, or jalapeños for added flavor.
  • Brush with Oil: A light coating of oil helps achieve that perfect crispy exterior.
  • Check for Doneness: Depending on your air fryer, cooking time might vary. Keep an eye on your crunchwrap!
  • Use a Toothpick: Secure the wrap with a toothpick if you’re worried about it coming apart during cooking.
  • Make Ahead: Prepare your crunchwrap and store it in the fridge for up to 2 days before air frying.
  • Pair with Dipping Sauces: Serve with salsa, guacamole, or extra nacho cheese for a flavor boost.

Common Mistakes and Troubleshooting

Here are some common pitfalls and how to avoid them:

  • Overstuffing the Wrap: This can lead to messy results. Stick to a manageable amount of filling.
  • Not Preheating the Air Fryer: Always preheat for even cooking and crispiness.
  • Skipping Oil: Not brushing with oil can result in a less satisfying texture.
  • Using Cold Ingredients: Ensure your fillings are at room temperature for even cooking.

Delicious Variations to Try

Feeling adventurous? Here are some variations to customize your crunchwrap:

  • Veggie Crunchwrap: Replace meat with black beans, corn, and a selection of your favorite veggies.
  • Buffalo Chicken Crunchwrap: Use shredded buffalo chicken and blue cheese for a spicy twist.
  • Breakfast Crunchwrap: Add scrambled eggs, bacon, and hash browns for a morning treat.
  • Taco Crunchwrap: Incorporate your favorite taco toppings like olives and avocado for a classic flavor.

Storage and Make-Ahead Instructions

For optimal freshness:

  • Store uncooked crunchwraps in the refrigerator for up to 2 days.
  • Cooked crunchwraps can be refrigerated for 3-4 days. Reheat in the air fryer for 3-5 minutes to restore crispiness.
  • Freezing is an option! Wrap individual crunchwraps tightly in plastic wrap and store in a freezer-safe bag for up to 3 months.

Frequently Asked Questions

Got questions? Here are some common inquiries about the Air Fryer Crunchwrap Supreme:

  • Can I use a different protein? Absolutely! Ground turkey, chicken, or even plant-based proteins work great.
  • How long does it take to cook? Typically, 6-8 minutes total in the air fryer, flipping halfway through.
  • What if I don’t have an air fryer? You can bake them in the oven at 375°F for 15-20 minutes.
  • Can I prepare them in advance? Yes, assemble and refrigerate until ready to cook.
  • What’s the best way to serve them? Pair with salsa, guacamole, or hot sauce for dipping.
  • Can I make these vegetarian? Certainly! Use beans, veggies, and cheese for a hearty vegetarian version.
  • What’s the nutritional info? Each crunchwrap contains approximately 500 calories, with 25g protein, depending on the fillings used.
  • Can I customize the spices? Yes! Adjust the taco seasoning to suit your taste preferences.

Nutritional Tips and Dietary Adaptations

For a healthier crunchwrap:

  • Use Lean Meats: Opt for ground turkey or chicken to reduce fat content.
  • Substitute Cheese: Try low-fat cheese to lower calorie intake.
  • Increase Veggie Content: Add more vegetables to boost fiber and nutrients.
  • Gluten-Free Option: Use gluten-free tortillas for a suitable alternative.

Recommended Equipment

To make this recipe, you’ll need:

  • Air Fryer: Essential for that crispy, golden finish.
  • Large Pan: For browning your ground beef.
  • Microwave: To warm tortillas quickly.
  • Sharp Knife: For cutting tortillas and chopping veggies.

Serving Suggestions

The Air Fryer Crunchwrap Supreme is versatile. Here’s how to serve it:

  • With a Side Salad: A fresh salad complements the richness of the wrap.
  • Chips and Salsa: Add a crunchy side with tortilla chips and your favorite salsa.
  • As a Meal Prep Option: Pack them with fruits or veggies for a balanced meal.

Now that you have all the tips and tricks to make the perfect Air Fryer Crunchwrap Supreme, it’s time to get cooking! Don’t forget to share your delicious creations and enjoy the satisfaction of hitting your protein goals without sacrificing flavor. Happy cooking!

Air Fryer Crunchwrap Supreme

Prep Time 10 minutes
Cook Time 8 minutes
Total Time 18 minutes
Servings 4 servings
Calories 650
A delicious and easy-to-make crunchwrap using the air fryer for a crispy finish. Perfect for a flavorful meal with layers of beef, cheese, and fresh toppings.

Ingredients

Tortillas

  • 5 pieces large tortillas
  • 1 pound ground beef
  • ⅓ cup water
  • 3 tablespoons taco seasoning
  • ⅔ cup nacho cheese sauce
  • 4 tostadas tostadas (or 2 cups tortilla chips)
  • ⅔ cup sour cream
  • 1 cup iceberg lettuce (shredded)
  • 1 cup diced tomatoes
  • 2 cups shredded cheese blend

Instructions 

  • Preheat the air fryer to 400°F (200°C).
  • Cook ground beef in a pan, add water and taco seasoning, simmer for 5 minutes.
  • Heat tortillas briefly in microwave, cut one into quarters.
  • Assemble the wrap with beef, cheese sauce, tostada, sour cream, lettuce, tomato, and cheese, then fold and seal.
  • Brush with oil, place seam side down in the air fryer, and cook for 3-4 minutes until golden. Flip and cook another 3-4 minutes.

Notes

For extra crispiness, lightly spray the wraps with oil before air frying.
Calories: 650kcal
Cost: $15
Course: Main Course
Cuisine: American
Keyword: air fryer, Beef, Tacos

Why You Need These Sizzling Protein-Packed Air Fryer Tacos

If you’re looking for a quick, high-protein meal that delivers on flavor, you’re in the right place. These air fryer tacos with ground beef are not only easy to make but also incredibly satisfying. Perfect for meal prep or taco night, they allow you to enjoy a classic dish without compromising on your nutrition goals. Here’s why you’ll love this recipe:

  • High in Protein: With 2 pounds of ground beef, these tacos pack a punch of protein, making them ideal for muscle recovery and growth.
  • Quick & Easy: In less than 30 minutes, you can serve up delicious tacos that are perfect for busy weeknights.
  • Flavorful Seasoning: The homemade taco seasoning brings a burst of flavor that enhances the beef, ensuring every bite is delicious.
  • Versatile Toppings: Customize your tacos with a variety of toppings, from fresh veggies to zesty salsas, allowing for a personalized touch.
  • Meal Prep Friendly: These tacos can be made ahead of time and stored, making them a perfect option for meal prepping your week.

Ingredients You’ll Need

To whip up these air fryer tacos, gather the following ingredients:

  • 2 pounds ground beef: The main protein source that provides essential nutrients and flavor.
  • 1 medium onion (diced): Adds sweetness and depth to the meat mixture.
  • 2 jalapeños (stem and seeds removed): For a spicy kick—adjust based on your heat preference.
  • 2 cloves garlic (minced): Enhances the overall flavor profile.
  • ½ cup taco seasoning: Essential for that classic taco taste; you can use a store-bought version or make your own.
  • 1 ½ cup water: Helps to create a flavorful beef mixture.
  • 14 flour tortillas (taquito size): The perfect vessel for your taco filling.
  • Optional toppings: Cacique Queso Fresco cheese, shredded lettuce, diced tomatoes, cilantro, avocado salsa.

How to Make Air Fryer Tacos

Follow these simple steps to create mouthwatering air fryer tacos:


Digital Kitchen Scale

★ Recommended Kitchen Tool

Digital Kitchen Scale

Make this recipe even easier with a quality Digital Kitchen Scale — a must-have kitchen staple!


🛒 See Deals on Amazon →

As an Amazon Associate, we earn from qualifying purchases.
  1. In a large cast iron skillet, cook the ground beef with diced onion and jalapeños over medium heat until the meat is no longer pink and the vegetables are tender.
  2. Add minced garlic and cook for an additional two minutes. Drain any excess grease and return the mixture to the skillet.
  3. Sprinkle taco seasoning over the meat mixture and stir well.
  4. Pour in the water and bring to a boil. Reduce the heat and let it simmer for 10 minutes.
  5. Preheat your air fryer at 390°F for 3 minutes.
  6. Fill the flour tortillas with the beef mixture using a metal taco holder. Lightly spray both sides with non-stick cooking spray.
  7. Air fry the tacos at 390°F for 4 minutes. Use tongs to remove the taco holder and repeat until all tacos are cooked.
  8. Top with your favorite garnishes and enjoy!

Pro Tips for Perfect Air Fryer Tacos

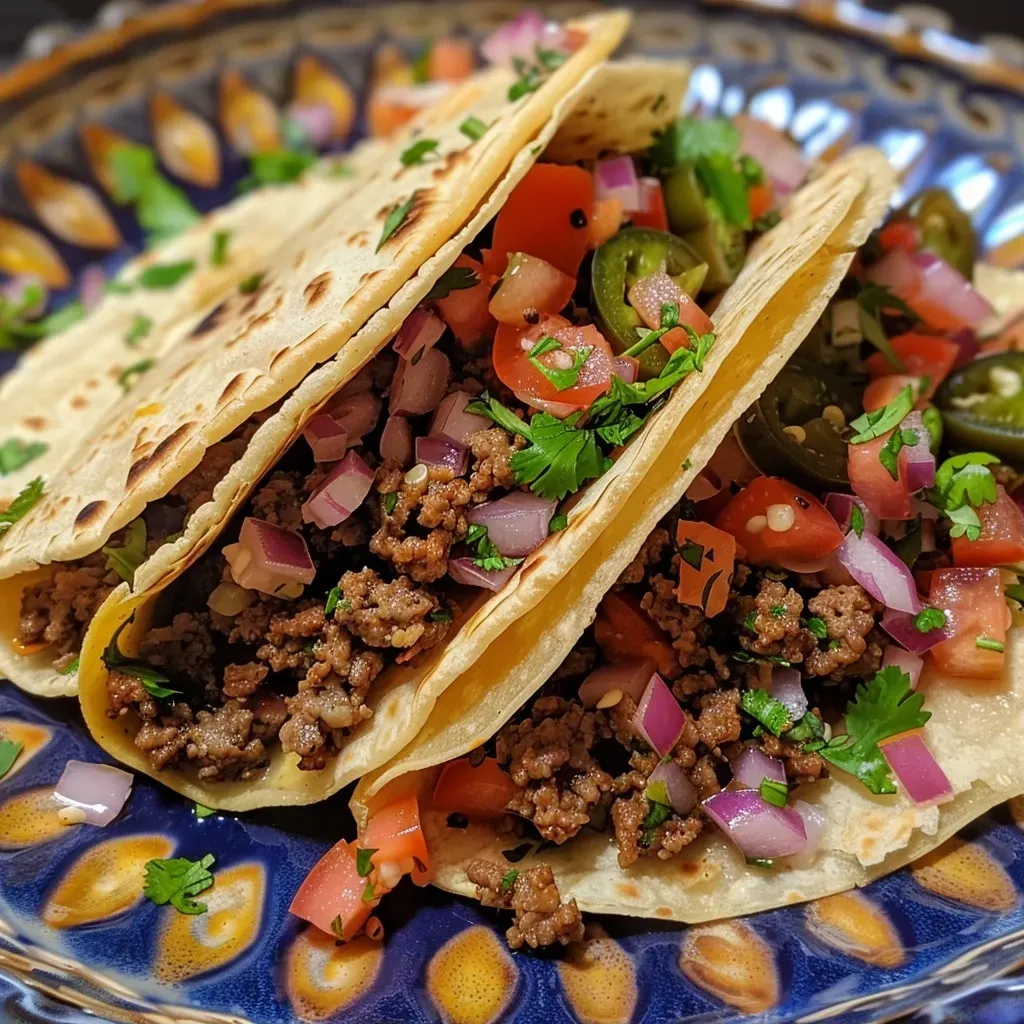
Juicy Air Fryer tacos filled with ground beef and topped with fresh ingredients.

Maximize your taco game with these expert tips:

  • Preheat Your Air Fryer: Ensuring your air fryer is preheated helps achieve that crispy tortilla texture you’re aiming for.
  • Don’t Overfill: Avoid overstuffing the tortillas to prevent spillage and ensure even cooking.
  • Experiment with Tortillas: Try corn tortillas for a gluten-free option or whole-wheat for extra fiber.
  • Use a Taco Holder: A metal taco holder allows for even cooking and keeps the tacos upright.
  • Monitor Cooking Time: Since air fryers can vary, keep an eye on them to prevent overcooking.
  • Customize Seasoning: Feel free to add extra spices like cumin or paprika to the beef for added depth.
  • Layer Toppings Strategically: Start with cheese on the bottom to help it melt, then add vegetables and salsas on top for crunch.
  • Save Leftovers Wisely: Store any leftover beef mixture in an airtight container for up to 3 days.

Common Mistakes and Troubleshooting

Here are some pitfalls to avoid when making your tacos:

  • Under-seasoning: Always taste the meat mixture before serving to ensure it’s flavorful. Adjust seasoning if needed.
  • Not draining grease: Failing to drain excess fat can lead to soggy tacos; be sure to remove grease after cooking the beef.
  • Skipping the preheat: Don’t skip preheating your air fryer; it’s crucial for achieving the perfect texture.
  • Using cold tortillas: Warm tortillas before filling to help prevent cracking or tearing.

Variations to Try

Switching it up can keep taco night exciting! Here are some creative variations:

  • Chicken Tacos: Substitute ground beef for shredded rotisserie chicken for a lighter option.
  • Vegetarian Tacos: Use black beans or lentils instead of beef for a hearty, meat-free meal.
  • Fish Tacos: Replace beef with seasoned fish fillets for a fresh twist.
  • Breakfast Tacos: Fill with scrambled eggs, cheese, and salsa for a delicious breakfast option.

Storage and Make-Ahead Instructions

If you’re planning to make these tacos in advance, here’s how to store them:

  • Refrigerate: Store any leftover beef mixture in an airtight container in the fridge for up to 3 days.
  • Freeze: You can freeze the beef mixture for up to 3 months. Thaw in the fridge before reheating.
  • Assemble Fresh: For best results, assemble and cook the tacos fresh rather than storing already filled tortillas.

Frequently Asked Questions

Here are some common questions about air fryer tacos:

  • Can I use other meats? Yes, ground turkey or chicken works well as substitutes for beef.
  • How do I make them spicier? Add extra jalapeños or chipotle seasoning for a kick.
  • Can I air fry frozen tacos? Yes, but adjust the cooking time and check for doneness.
  • What’s the best way to reheat tacos? Reheat in the air fryer at 350°F for about 3-4 minutes for crispy results.
  • Are air fryer tacos healthy? They can be healthier than traditional frying, especially when you control the ingredients.
  • What can I serve with tacos? Consider sides like black beans, rice, or a fresh salad.
  • Can I make these with whole wheat tortillas? Absolutely! Whole wheat tortillas add fiber and nutrients.
  • How do I keep tacos from getting soggy? Make sure to drain the meat well and don’t overfill the tortillas.

Nutrition Tips and Dietary Adaptations

For those watching their macros, here’s how to adapt this recipe:

  • Low-Carb Option: Use lettuce wraps instead of tortillas for a keto-friendly meal.
  • Lower Calorie: Opt for leaner ground beef or turkey to reduce calories and fat.
  • Vegan Option: Substitute with plant-based ground meat or lentils for a vegan-friendly taco.

Essential Equipment for Air Fryer Tacos

To make the cooking process seamless, consider the following equipment:

  • Air Fryer: A quality air fryer ensures even cooking and crispy results.
  • Metal Taco Holder: Helps to keep tacos upright during cooking.
  • Cast Iron Skillet: Great for browning the beef and vegetables evenly.

Serving Suggestions

Make your meal complete with these serving ideas:

  • Garnish: Fresh cilantro, lime wedges, or avocado can elevate your taco experience.
  • Pair with Sides: Serve with a side of Spanish rice or a crisp salad for a balanced meal.
  • Drink Options: Complement your tacos with a refreshing beverage such as a light beer or sparkling water with lime.

Conclusion

These sizzling protein-packed air fryer tacos are a game changer for anyone looking to enjoy delicious meals while sticking to their nutrition goals. With their incredible flavor, versatility, and ease of preparation, they’re destined to become a staple in your meal rotation. So roll up your sleeves, gather your ingredients, and get ready to impress your friends and family with this high-protein feast that will leave everyone asking for seconds!

Air Fryer Tacos with Ground Beef

Prep Time 10 minutes
Cook Time 15 minutes
Total Time 25 minutes
Servings 4 servings
Calories 450
Enjoy flavorful tacos with tender ground beef, cooked quickly in the air fryer and topped with fresh ingredients.

Ingredients

Meat and Vegetables

  • 2 pounds ground beef
  • 1 medium onion (diced)
  • 2 jalapenos jalapenos (stem and seeds removed)
  • 2 cloves garlic (minced)
  • 0.5 cup taco seasoning
  • 1.5 cups water

Tortillas

  • 14 pieces flour tortillas (taquito size)

Optional toppings

  • to taste Cacique Queso Fresco Cheese
  • to taste Shredded lettuce
  • to taste Tomatoes
  • to taste Cilantro
  • to taste Avocado salsa

Instructions 

  • Cook ground beef, onion, and jalapenos until meat is no longer pink and vegetables are tender.
  • Add garlic, cook for 2 minutes, then drain excess grease and return to pan.
  • Stir in taco seasoning and water, then simmer for 10 minutes.
  • Preheat air fryer at 390°F (200°C) for 3 minutes.
  • Fill tortillas with meat, spray lightly with cooking spray, and air fry at 390°F for 4 minutes. Repeat with remaining tacos.
  • Top tacos with desired toppings like lettuce, tomatoes, avocado salsa, cheese, and cilantro.

Notes

For extra flavor, add a squeeze of lime or hot sauce.
Calories: 450kcal
Cost: $15
Course: Main Course
Cuisine: Mexican
Keyword: Tacos

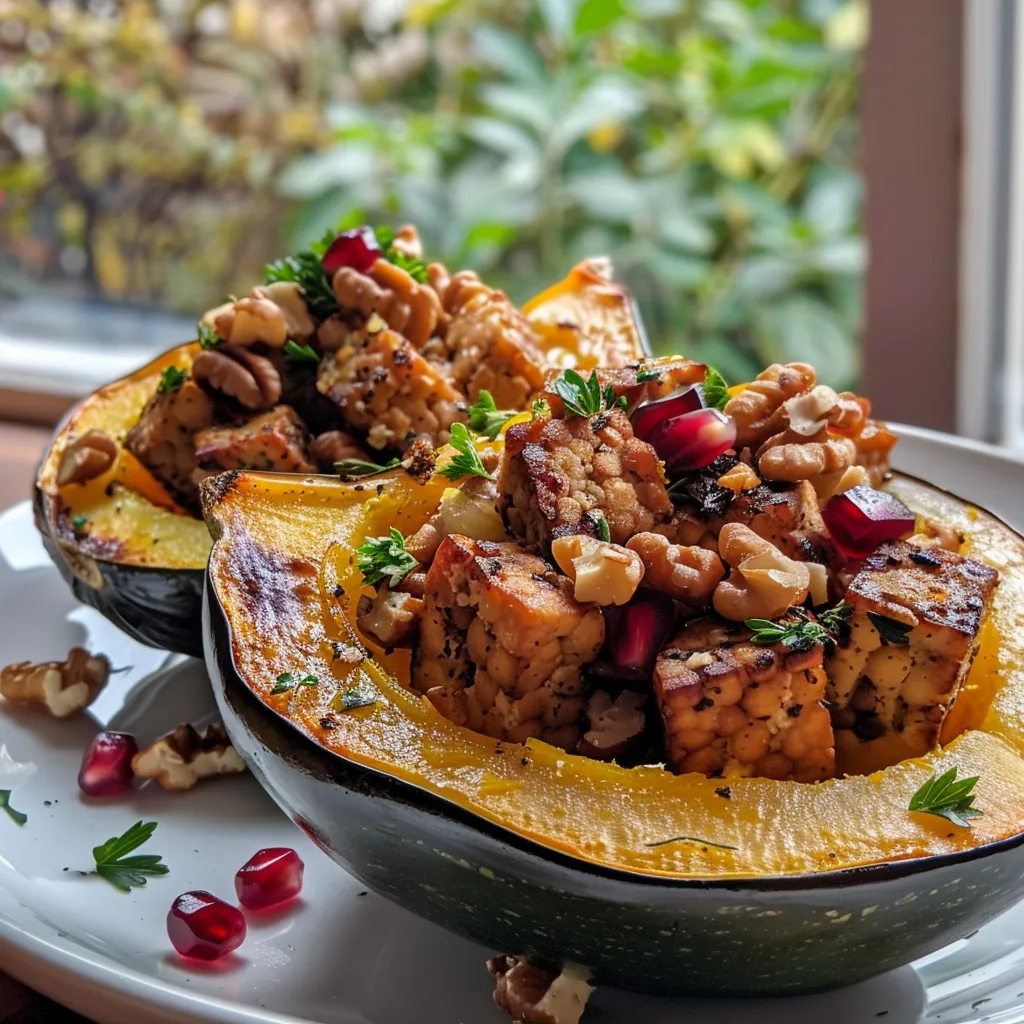
Elevate Your Protein Game with Stuffed Acorn Squash

Are you ready to take your protein intake to the next level without sacrificing flavor? This Stuffed Acorn Squash with Tempeh recipe is the perfect blend of nutrition and taste, making it an excellent choice for meal prep or a weeknight dinner. With a hearty filling made from plant-based tempeh, earthy mushrooms, and seasonal herbs, this dish ensures you meet your protein goals while enjoying every bite. Let’s dive into why this recipe is a must-try!

Why You’ll Love This Recipe

This stuffed acorn squash recipe is more than just a meal; it’s a culinary experience. Here are several reasons to love it:

  • Nutritious & Satisfying: Each serving is packed with protein from tempeh and healthy fats from walnuts, keeping you full and fueled.
  • Seasonal Ingredients: Featuring the best of autumn, this dish uses acorn squash, mushrooms, and herbs, making it perfect for fall dinners.
  • Plant-Based Goodness: This recipe is entirely plant-based, making it suitable for vegetarians and vegans without compromising on taste.
  • Easy to Prepare: Simple steps and common ingredients make it approachable for cooks at any skill level.
  • Impressive Presentation: The vibrant colors from the squash, cranberries, and pomegranate arils create a stunning dish that will wow your guests.

Ingredients You’ll Need

Gather these ingredients to make your stuffed acorn squash:


Professional Chef Knife Set

★ Recommended Kitchen Tool

Professional Chef Knife Set

Make this recipe even easier with a quality Professional Chef Knife Set — a must-have kitchen staple!


🛒 See Deals on Amazon →

As an Amazon Associate, we earn from qualifying purchases.
  • 2 acorn squash, halved
  • Extra-virgin olive oil, for drizzling
  • Sea salt and freshly ground black pepper, to taste
  • 1 (8-ounce) package tempeh
  • 1 tablespoon extra-virgin olive oil
  • ½ yellow onion, chopped
  • 8 ounces cremini mushrooms, diced
  • 3 garlic cloves, minced
  • ⅓ cup coarsely chopped walnuts
  • 1 tablespoon tamari
  • 1 tablespoon apple cider vinegar
  • ½ tablespoon chopped rosemary
  • ¼ cup chopped sage
  • ⅓ cup dried cranberries
  • Parsley, for garnish
  • A few pomegranate arils, for garnish

Ingredient Substitutions

If you’re missing an ingredient or want to customize the recipe, consider these substitutions:

  • Tempeh: You can use crumbled tofu or lentils for a different protein source.
  • Cremini Mushrooms: Button mushrooms or portobello mushrooms work well if you prefer.
  • Walnuts: Any nuts or seeds, like pecans or sunflower seeds, can be used for crunch.
  • Herbs: Fresh thyme or oregano can replace rosemary and sage if desired.

How to Make Stuffed Acorn Squash with Tempeh

Close-up side view of a juicy stuffed acorn squash filled with tempeh and vibrant garnishes.

Follow these detailed steps to create your delicious stuffed acorn squash:

Step 1: Roast the Acorn Squash

Preheat your oven to 425°F (220°C) and line a baking sheet with parchment paper. Scoop out and discard the seeds from the halved acorn squashes. Place the halves cut-side up on the baking sheet, drizzle generously with olive oil, and sprinkle with sea salt and black pepper. Roast for 40 minutes, or until the flesh is tender when pierced with a fork.

Step 2: Prepare the Tempeh

While the squash roasts, cut the tempeh into ½-inch cubes. Place the cubes in a steamer basket over a pot filled with about 1 inch of simmering water. Cover and steam the tempeh for 10 minutes to soften and reduce bitterness. Drain any excess water and crumble the tempeh using your hands into coarse pieces.

Step 3: Cook the Vegetable Filling

Heat 1 tablespoon of olive oil in a large skillet over medium heat. Add the chopped onion along with ½ teaspoon salt and a few grinds of black pepper. Cook for about 5 minutes until the onion softens. Then, add the diced cremini mushrooms and continue to cook, stirring frequently, until the mushrooms are soft and have released their moisture, about 8 minutes.

Step 4: Combine the Filling Ingredients

Stir the crumbled tempeh into the skillet along with minced garlic, chopped walnuts, tamari, apple cider vinegar, rosemary, and sage. Cook the mixture for 2 to 3 more minutes, stirring often. Add about ¼ cup of water if the pan becomes too dry to help meld the flavors. Stir in the dried cranberries and adjust seasoning with salt and pepper to taste. Remove the skillet from heat when everything is heated through and well combined.

Step 5: Stuff the Squash

Spoon the warm tempeh and mushroom filling into the roasted acorn squash halves. Garnish each serving with fresh parsley and a few pomegranate arils for a festive and colorful finish. Serve immediately and enjoy!

Pro Tips for Making Stuffed Acorn Squash with Tempeh

Make the most of your cooking experience with these expert insights:

  • Prepping Ahead: You can roast the acorn squash and prepare the filling a day in advance. Store separately in the fridge and combine before serving.
  • Texture Matters: Ensure the tempeh is well-crumbled for a better texture that blends seamlessly with the other ingredients.
  • Season Well: Don’t skip on seasoning. Taste your filling and adjust salt and pepper as needed for optimal flavor.
  • Experiment with Spices: Add spices like cumin or smoked paprika to introduce a new flavor profile to your filling.
  • Mix & Match: Try adding different vegetables like spinach or kale to the filling for added nutrition.
  • Garnish for Impact: Using pomegranate arils not only adds a pop of color but also a burst of sweetness that complements the squash.
  • Watch Your Timing: Ensure the squash is fork-tender but not mushy; overcooking can lead to a soggy base.
  • Serving Size: Each half of acorn squash makes a satisfying serving, perfect for a nutritious dinner.

Common Mistakes and Troubleshooting

Avoid these common pitfalls to ensure your dish turns out perfectly:

  • Underseasoning: Be generous with your spices and seasoning to enhance the overall flavor.
  • Overcooked Squash: Keep an eye on the roasting time to prevent the squash from becoming mushy.
  • Dry Filling: If your filling is dry, add a splash of vegetable broth or water while cooking.
  • Uneven Cooking: Make sure your squash halves are of uniform size for even roasting.

Variations to Try

Looking to shake things up? Here are some variations to inspire you:

  • Mexican-Inspired: Add black beans, corn, and taco seasoning to the filling for a Mexican twist.
  • Italian Flare: Incorporate marinara sauce, spinach, and Italian seasoning into the filling for an Italian dish.
  • Sweet & Savory: Mix in diced apples or pears for added sweetness that pairs well with the savory flavors.
  • Cheesy Version: Sprinkle nutritional yeast or your favorite dairy-free cheese in the filling for a cheesy flavor.

Make Ahead and Storage Instructions

This stuffed acorn squash is perfect for meal prep! Here’s how to store it:

  • Refrigeration: Store the stuffed squash in an airtight container in the fridge for up to 4 days.
  • Freezing: You can freeze the filling separately or the whole stuffed squash. Thaw overnight in the fridge before reheating.
  • Reheating: Reheat in the oven at 350°F (175°C) until warmed through, about 15-20 minutes.

Frequently Asked Questions (FAQs)

Here are answers to some common questions about this recipe:

  • Can I make this recipe gluten-free? Yes! Just substitute tamari with a gluten-free soy sauce.
  • What can I use instead of tempeh? Crumbled tofu or a mix of lentils and quinoa can work as great substitutes.
  • How do I know when the squash is done? The squash is ready when it is fork-tender but still holds its shape.
  • Can I add more vegetables to the filling? Absolutely! Feel free to experiment with seasonal veggies.
  • Is this recipe suitable for meal prep? Yes! It stores well and is perfect for reheating.
  • What can I serve with stuffed acorn squash? A simple green salad or roasted vegetables pair nicely as side dishes.
  • How long does it take to make? The entire process takes about an hour, including prep and cooking time.
  • Can I use different nuts? Yes, feel free to use any nuts or seeds that you prefer or have on hand.

Nutrition Tips and Dietary Adaptations

To maximize the health benefits of your stuffed acorn squash, consider these nutrition tips:

  • Boost Fiber: Add more vegetables or beans to increase the fiber content.
  • Healthy Fats: Use a variety of nuts or seeds for healthy fats and added crunch.
  • Watch Portions: Keep portion sizes in mind for balanced meals, especially if you’re tracking macros.

Equipment Recommendations

Ensure you have the right tools for a seamless cooking experience:

  • Baking Sheet: A sturdy baking sheet lined with parchment paper is essential for roasting the squash.
  • Steamer Basket: Great for steaming tempeh to remove bitterness.
  • Large Skillet: A non-stick skillet will help your filling cook evenly.

Serving Suggestions

For an impressive presentation, serve your stuffed acorn squash with:

  • Fresh Herbs: Garnish with additional parsley or sage for a fresh touch.
  • Side Salad: A light arugula salad with a lemon vinaigrette balances the richness of the squash.
  • Whole Grains: Pair with quinoa or farro for a complete meal.

Conclusion

This Stuffed Acorn Squash with Tempeh recipe is a game-changer for anyone looking to boost their protein intake with delicious, nutritious food. With its rich, savory flavors and vibrant presentation, it’s bound to become a favorite in your household. So roll up your sleeves and start cooking—your taste buds and your body will thank you!

Stuffed Acorn Squash with Tempeh Recipe

Prep Time 15 minutes
Cook Time 45 minutes
Total Time 1 hour
Servings 4 servings
Calories 350
A hearty and colorful vegan dish featuring roasted acorn squash filled with a savory tempeh and mushroom stuffing, garnished with fresh herbs and pomegranate arils.

Ingredients

Vegetables and Fruits

  • 2 each acorn squash, halved
  • 1 tablespoon extra-virgin olive oil, for drizzling
  • ½ yellow onion yellow onion, chopped
  • 8 ounces cremini mushrooms, diced
  • 3 cloves garlic, minced
  • ⅓ cup coarsely chopped walnuts
  • ¼ cup dried cranberries
  • Parsley for garnish
  • A few pomegranate arils for garnish

Tempeh

  • 1 package 8-ounce package tempeh
  • 1 tablespoon extra-virgin olive oil

Other ingredients

  • ½ yellow onion chopped onion
  • 8 ounces cremini mushrooms, diced
  • 3 cloves garlic, minced
  • ⅓ cup coarsely chopped walnuts
  • 1 tablespoon tamari
  • 1 tablespoon apple cider vinegar
  • ½ tablespoon chopped rosemary
  • ¼ cup chopped sage

Instructions 

  • Preheat oven to 425°F (220°C). Roast squash halves for 40 minutes until tender.
  • Steam and crumble the tempeh. Sauté onion, mushrooms, garlic, walnuts, and seasonings until cooked.
  • Mix in cranberries and adjust seasoning. Stuff the roasted squash with the filling.
  • Garnish with parsley and pomegranate arils. Serve immediately.

Notes

For extra flavor, toast the walnuts before adding.
Calories: 350kcal
Cost: $15
Course: Main Course
Cuisine: vegetarian
Keyword: Acorn Squash, Tempeh, Vegan

Unlock the Power of Buddha Bowls: Your Ultimate Guide to Delicious Meal Prep

Buddha bowls are not just a trend; they are a versatile and nutrient-packed meal option that can help you stay on track with your fitness goals without sacrificing flavor. Whether you’re a fitness enthusiast or just someone looking to eat healthier, this comprehensive guide will show you how to create the best buddha bowl that’s perfect for meal prep. With a mix of grains, proteins, veggies, and sauces, this recipe combines everything you need to hit your protein goals while enjoying every bite.

Why You’ll Love This Recipe

Here are five reasons why this Buddha bowl recipe is a must-try:

  • Quick and Easy: This recipe can be prepared in just 15 minutes, making it ideal for busy schedules.
  • Meal Prep Friendly: Make multiple servings at once and store them for quick lunches or dinners throughout the week.
  • Customizable: Use whatever grains, vegetables, and proteins you have on hand, making it easy to adapt based on your tastes.
  • High in Protein: Packed with chickpeas and Greek yogurt, this bowl helps you reach your daily protein requirements.
  • Flavor Explosion: The combination of spices and fresh ingredients will leave your taste buds blown away by the flavors.

Ingredient Breakdown: What You Need

To create your Easy Buddha Bowl, gather the following ingredients:


Professional Chef Knife Set

★ Recommended Kitchen Tool

Professional Chef Knife Set

Make this recipe even easier with a quality Professional Chef Knife Set — a must-have kitchen staple!


🛒 See Deals on Amazon →

As an Amazon Associate, we earn from qualifying purchases.
  • ¼ cup plain Greek yogurt (60 g, or dairy-free alternative): Provides creaminess and protein.
  • ¼ cup orange juice (60 mL): Adds a refreshing citrus flavor.
  • 2 Tbsp honey (30 g, can sub maple syrup or agave): Natural sweetness to balance the flavors.
  • ½ tsp cinnamon: A warm spice that enhances the flavor profile.
  • Pinch of salt and pepper: Essential for seasoning.
  • 2 handfuls leafy greens (spinach, kale, or lettuce): Adds nutrients and crunch.
  • 1 cup cooked grains (quinoa, couscous, bulgur, or brown rice): The base of the bowl, providing fiber and energy.
  • 1 15-oz can chickpeas (425 g, drained and rinsed): A great plant-based protein source.
  • 1 cup blueberries (100 g): Adds a burst of sweetness and antioxidants.
  • 4 mandarin oranges (peeled and thinly sliced): For a zesty flavor.
  • 1 avocado (sliced): Rich in healthy fats.
  • ¼ red onion (about ½ cup, sliced): Adds a sharp bite.
  • 2 carrots (peeled and shredded): For added crunch and sweetness.

Simple Instructions to Build Your Bowl

A close-up side view of a vibrant Buddha bowl filled with greens, grains, chickpeas, and colorful fruits.

Follow these easy steps to assemble your Buddha bowl:

  1. Dressing: Whisk together the Greek yogurt, orange juice, honey, cinnamon, salt, and pepper in a small bowl. Set aside.
  2. Filling: In four serving bowls, divide the leafy greens evenly. Top each with equal portions of cooked grains, chickpeas, blueberries, oranges, avocado, onion, and carrot.
  3. Serve: Drizzle the dressing over each bowl and enjoy immediately!

Pro Tips for Perfect Buddha Bowls

Make your Buddha bowls even better with these expert insights:

  • Prep Ahead: Cook your grains and chop veggies ahead of time for a quicker assembly during the week.
  • Experiment with Flavors: Try different dressings like tahini or balsamic vinaigrette for variety.
  • Keep It Colorful: Use a variety of colorful vegetables to make your bowl visually appealing and nutrient-dense.
  • Include Healthy Fats: Incorporate nuts or seeds for added texture and healthy fats.
  • Season Well: Don’t skimp on spices; they enhance flavors and make your bowl more exciting.
  • Balance Your Macronutrients: Aim for a good mix of protein, carbs, and fats in each bowl.
  • Think Seasonal: Use seasonal produce to enhance freshness and flavor.
  • Tweak the Texture: Add roasted vegetables or crunchy toppings like seeds for a satisfying bite.

Avoid Common Mistakes

Here are some common pitfalls to avoid when making your Buddha bowl:

  • Overcooking Grains: Follow package instructions to ensure your grains are perfectly cooked.
  • Skipping the Dressing: A good dressing can elevate your bowl; don’t skip it!
  • Not Balancing Ingredients: Make sure to have a good mix of protein, carbs, and healthy fats.
  • Ignoring Texture: Include a variety of textures to keep things interesting.
  • Forgetting Seasoning: Always season to taste before serving.

Variations to Try: Make It Your Own

Here are some exciting variations you can try:

  • Mexican-Inspired Bowl: Use brown rice, black beans, corn, salsa, and avocado.
  • Asian Fusion Bowl: Try soba noodles, edamame, shredded carrots, and sesame dressing.
  • Middle Eastern Bowl: Incorporate quinoa, roasted eggplant, tahini, and pomegranate seeds.
  • Breakfast Bowl: Swap chickpeas for scrambled eggs, add sweet potatoes, and drizzle with avocado sauce.

Storage and Make-Ahead Instructions

Want to meal prep? Here’s how to store your Buddha bowls effectively:

  • Refrigeration: Store assembled bowls in airtight containers for up to 4 days. Keep the dressing separate until serving to avoid sogginess.
  • Freezing: While grains and proteins freeze well, fresh veggies do not. Consider freezing only the base and adding fresh ingredients when ready to eat.
  • Make-Ahead Tips: Prepare grains and proteins in advance. Chop vegetables and store them in ziplock bags for easy assembly during the week.

Frequently Asked Questions

Here are some common questions about Buddha bowls:

  • What are Buddha bowls? Buddha bowls are a balanced meal featuring a base of grains, topped with proteins, vegetables, and a dressing.
  • Can I make them vegan? Absolutely! Use plant-based proteins and dairy-free dressing options.
  • How do I make my bowls more filling? Add healthy fats like avocados or nuts to increase satiety.
  • What grains work best? Quinoa, brown rice, and farro are excellent choices for a hearty base.
  • Can I eat them cold? Yes, Buddha bowls can be enjoyed cold or heated according to your preference.
  • How do I ensure the flavors are balanced? Use a mix of sweet, savory, and acidic ingredients in your bowls.
  • Can I use leftovers? Yes, Buddha bowls are a great way to use up leftovers from previous meals.
  • How long do they last in the fridge? They typically stay fresh for 3-4 days when properly stored.

Nutrition Tips and Dietary Adaptations

To maximize nutrition in your Buddha bowls, consider the following:

  • Include a Variety of Colors: Aim for a rainbow of vegetables to ensure you’re getting a wide range of nutrients.
  • Focus on Whole Foods: Minimize processed ingredients for a healthier meal.
  • Adjust Portions Based on Activity Level: Tailor your ingredient amounts based on your energy needs.
  • Consider Allergies: Modify ingredients to accommodate dietary restrictions.

Equipment Recommendations

Here’s a list of tools that can make your Buddha bowl preparation easier:

  • Sharp Knife: A good knife is essential for chopping vegetables efficiently.
  • Cutting Board: Use a sturdy board for slicing and dicing.
  • Mixing Bowl: For combining your dressing ingredients.
  • Measuring Cups and Spoons: To ensure accurate ingredient amounts.
  • Storage Containers: Airtight containers for meal prep storage.

Serving Suggestions: How to Present Your Bowl

Make your Buddha bowls visually appealing and appetizing with these tips:

  • Layer Ingredients: Arrange ingredients in sections for a colorful presentation.
  • Add Garnishes: Top with fresh herbs, seeds, or nuts for an extra pop.
  • Use a Large Bowl: A spacious bowl allows for easy mixing and a beautiful display.

Conclusion: Fuel Your Fitness and Savor Every Bite

Your journey to achieving your protein goals doesn’t have to be boring or tasteless. By incorporating this Easy Buddha Bowl recipe into your meal prep routine, you can enjoy delicious, nutrient-dense meals that keep you on track. With its customizable nature and rich flavors, you’ll be blown away by how easy it is to create a satisfying meal that fuels your body and satisfies your taste buds. So gather your ingredients, embrace the process, and enjoy every bite of your culinary creation!

Easy Buddha Bowl (15 Min, Meal Prep Friendly)

Prep Time 10 minutes
Cook Time 5 minutes
Total Time 15 minutes
Servings 4 servings
Calories 450
A quick and nutritious Buddha Bowl perfect for meal prep, combining fresh ingredients and a flavorful dressing in just 15 minutes.

Ingredients

Dressing

  • ¼ cup plain Greek yogurt (dairy-free alternative)
  • ¼ cup orange juice
  • 2 Tbsp honey (can sub maple syrup or agave)
  • ½ tsp cinnamon
  • Pinch salt and pepper

Filling

  • 2 handfuls leafy greens (spinach, kale, or lettuce)
  • 1 cup cooked grains (quinoa, couscous, bulgur, or brown rice)
  • 1 can (15 oz) chickpeas (drained and rinsed)
  • 1 cup blueberries
  • 4 mandarin oranges peeled and thinly sliced
  • 1 avocado sliced
  • ¼ red onion about ½ cup, sliced
  • 2 carrots peeled and shredded

Instructions 

  • Whisk dressing ingredients together and set aside.
  • Divide greens into 4 bowls, then top with grains, chickpeas, blueberries, oranges, avocado, onion, and carrots.
  • Drizzle with dressing and serve immediately.

Notes

Prepare ingredients in advance for quick assembly.
Calories: 450kcal
Cost: $15
Course: Main Course
Cuisine: Healthy
Keyword: meal prep, Vegetarian