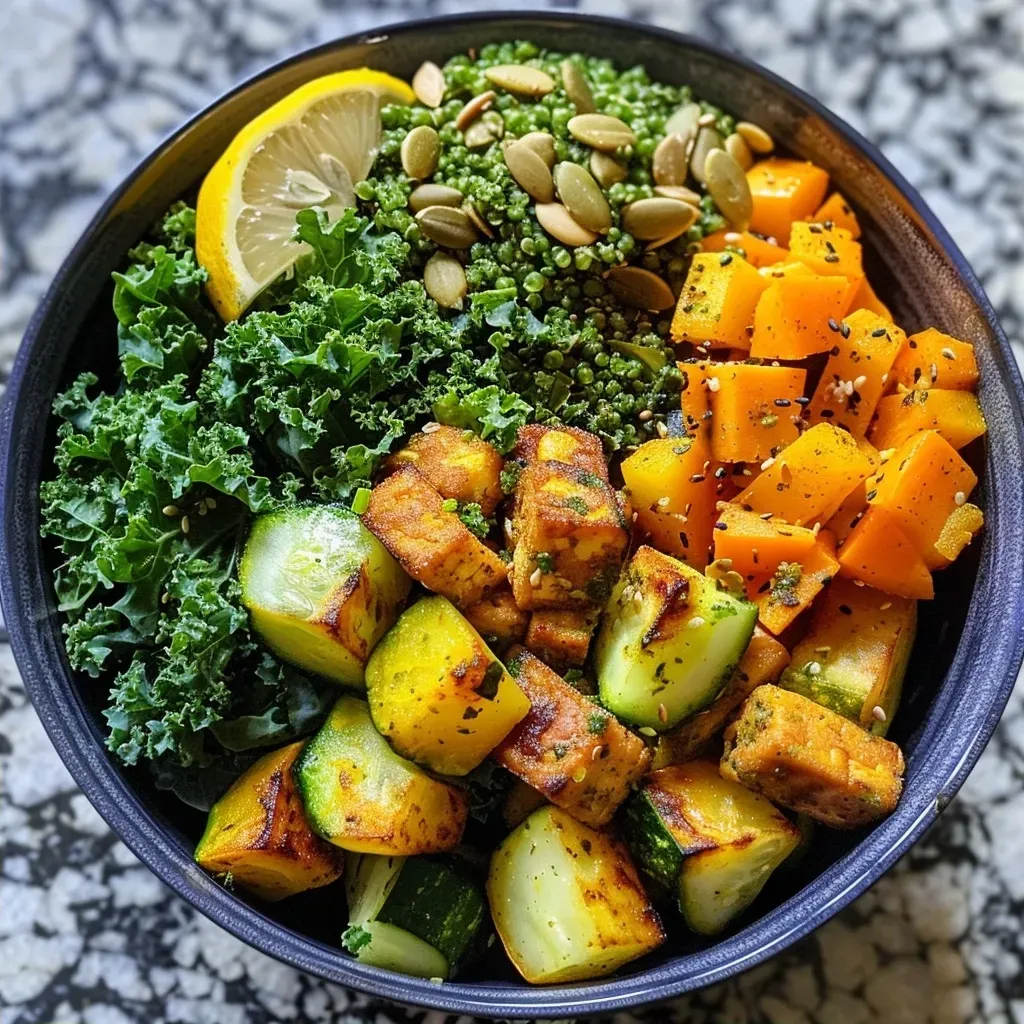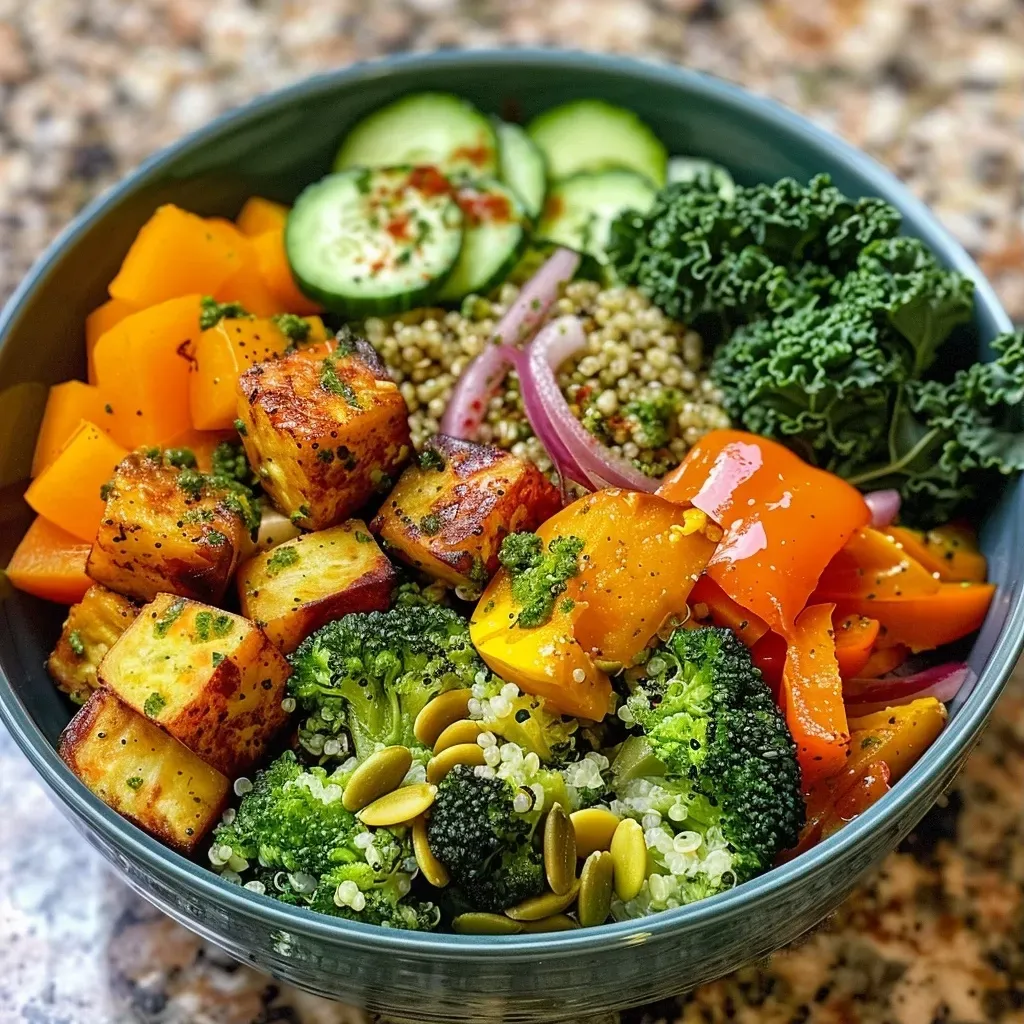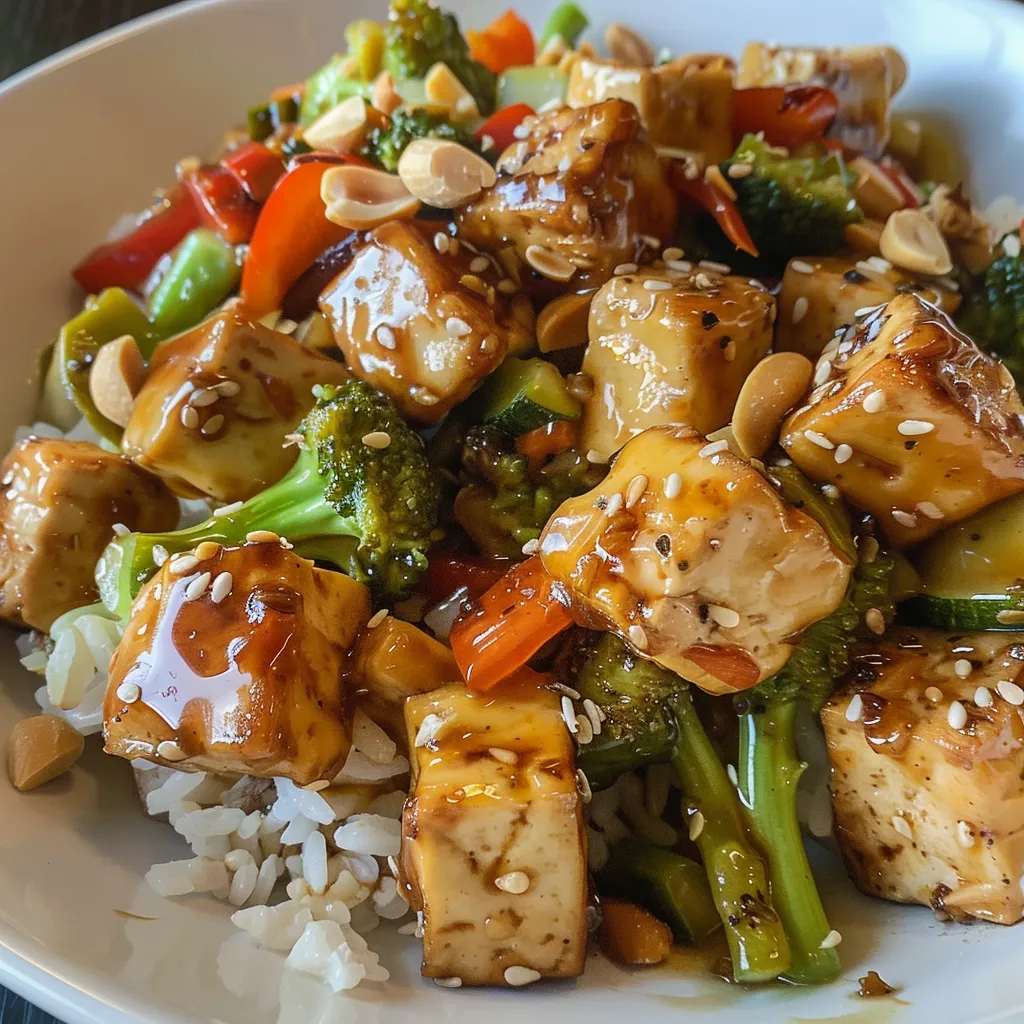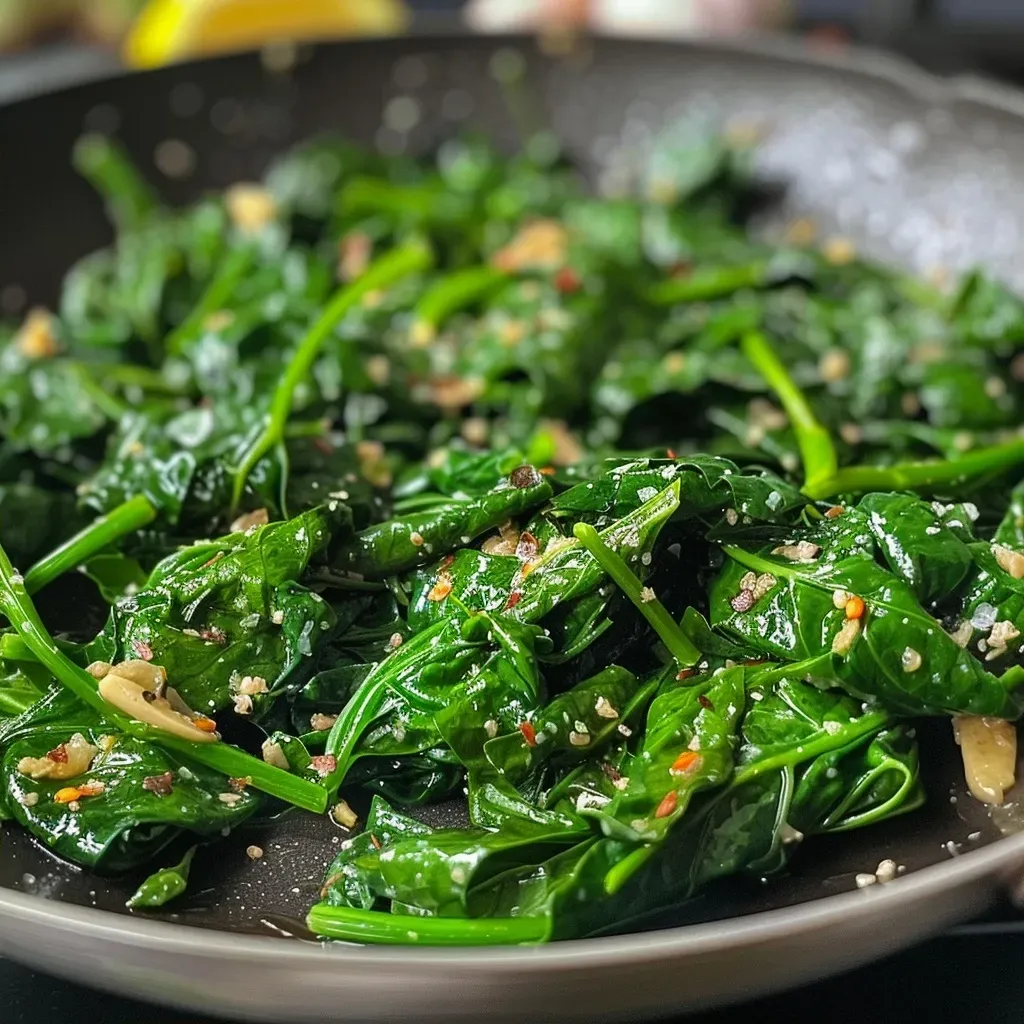
Author

Ethan

Browsing

Unlock the Flavor and Nutrition of Greek Salmon Grain Bowls

Greek Salmon Grain Bowls are the perfect way to elevate your meal prep game while hitting your protein goals. This dish combines the heartiness of Israeli couscous, the freshness of greens, and the rich taste of salmon, all enhanced by vibrant Mediterranean flavors. Whether you’re looking for a quick weeknight dinner or a nutritious lunch option, these bowls deliver both satisfaction and nutrition. Plus, they’re incredibly versatile, allowing you to customize based on your preferences. Let’s dive into why you’ll love this recipe!

Why You’ll Love This Recipe

  • Packed with Protein: Each serving is loaded with protein, primarily from salmon and the nutritious greens, keeping you fuller for longer.
  • Flavor Explosion: The combination of Greek seasoning, lemon, and garlic creates a mouthwatering flavor profile that will make you want seconds.
  • Easy to Customize: You can easily swap out ingredients based on what you have at home or your dietary preferences, ensuring that no two bowls need to be the same.
  • Meal Prep Friendly: These bowls are ideal for meal prep, as they store well and can be made ahead of time, making your weeknights hassle-free.
  • Visually Appealing: With vibrant colors from the greens and salmon, these grain bowls are as beautiful as they are tasty—perfect for impressing guests or yourself!

Ingredient Breakdown

Understanding the ingredients is key to mastering this recipe. Here’s a detailed look at each component, including some substitutions if you want to mix things up:

  • Israeli Couscous: A chewy pasta that serves as the base. You can substitute with quinoa, brown rice, or even cauliflower rice for a lower-carb option.
  • Salmon Filets: Provides protein and healthy fats. If you prefer, you can use chicken breast or tofu for a vegetarian option.
  • Greek Seasoning: A blend of herbs and spices that enhances flavor. If you don’t have it, mix dried oregano, thyme, and garlic powder for a DIY alternative.
  • Kale: A nutrient-dense green that adds color and crunch. Spinach or Swiss chard can be used if you’re not a fan of kale.
  • Olive Oil: Essential for cooking and flavor; it’s heart-healthy. You can use avocado oil if preferred.

Step-by-Step Guide to Making Greek Salmon Grain Bowls
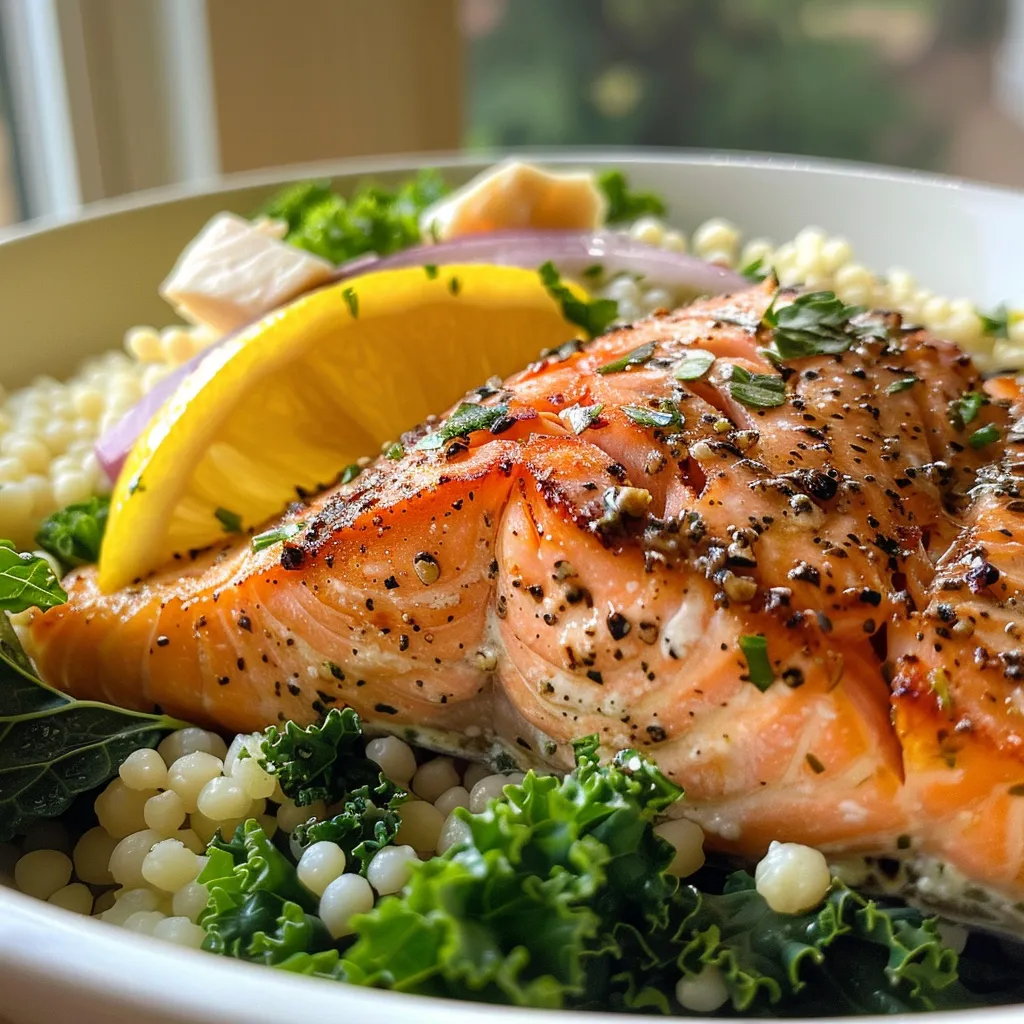
Close-up side view of a colorful Greek salmon grain bowl featuring salmon, couscous, and greens.

Follow these detailed steps to create your own Greek Salmon Grain Bowls:


Stainless Lemon Squeezer

★ Recommended Kitchen Tool

Stainless Lemon Squeezer

Make this recipe even easier with a quality Stainless Lemon Squeezer — a must-have kitchen staple!


🛒 View on Amazon →

As an Amazon Associate, we earn from qualifying purchases.
  1. In a large bowl, mix the cooked Israeli couscous, 1/2 cup olive oil, lemon juice, and sliced onion. Season with salt and pepper to taste. If it’s bland, add another pinch of each.
  2. Season each salmon filet with 1/2 tablespoon of Greek seasoning. Heat 2 tablespoons of olive oil in a skillet over medium heat. Once hot, add the salmon skin-side down, cooking until the skin is browned and the salmon starts to pale on the bottom (about 4 minutes). Flip and cook for another 4 minutes or until cooked through.
  3. In the same skillet, drizzle in another 2 tablespoons of olive oil, adding the chopped kale a handful at a time. Wilt each batch before adding the next. Once all the kale is soft, add minced garlic and sauté until fragrant (about 1 minute). Remove from heat and sprinkle with red pepper flakes.
  4. To serve, divide the couscous mixture into four bowls, top with the wilted kale, and place the salmon filets on top. Enjoy!

Pro Tips for Perfect Greek Salmon Grain Bowls

  • Don’t Overcook the Salmon: Monitor the salmon closely to avoid drying it out. It should flake easily with a fork.
  • Use Fresh Ingredients: Fresh herbs and vegetables make a significant difference in flavor.
  • Adjust Seasoning: Always taste and adjust the salt, pepper, and seasoning to your liking; flavors can vary based on ingredient freshness.
  • Prep Ahead: You can make the couscous and kale ahead of time, storing them in the fridge for easy assembly.
  • Experiment with Toppings: Consider adding feta cheese, olives, or cherry tomatoes for added flavor and textures.
  • Store Properly: Keep leftovers in airtight containers to maintain freshness. Consume within 3-4 days.
  • Consider Cooking Methods: You can grill the salmon instead of pan-searing it for a different flavor.
  • Batch Cooking: Make a larger batch of couscous and kale, and use them in different meals throughout the week.

Common Mistakes and Troubleshooting

Here are some common pitfalls to avoid when making your Greek Salmon Grain Bowls:

  • Underseasoned Couscous: Don’t skip the seasoning; bland couscous can ruin the dish.
  • Overcooked Kale: Sauté just until wilted to retain some texture and vibrant color.
  • Not Letting Salmon Rest: Allow the salmon to rest for a few minutes before serving to lock in moisture.
  • Skipping the Lemon Juice: The acidity brightens the dish, so don’t omit it!

Variations to Try

Make this recipe your own with these tasty variations:

  • Spicy Greek Salmon Bowl: Add more red pepper flakes or a drizzle of sriracha for a kick.
  • Mediterranean Chickpea Bowl: Substitute salmon with roasted chickpeas for a vegetarian option.
  • Quinoa Greek Bowl: Replace Israeli couscous with quinoa for a gluten-free option.
  • Herb-Infused Couscous: Add fresh herbs like parsley or dill to the couscous for a refreshing twist.

Storage and Make-Ahead Instructions

For optimal freshness, store each component separately in airtight containers:

  • Couscous: Keep in the fridge for up to 4 days.
  • Salmon: Consume within 2 days for the best quality.
  • Kale: Can be stored separately for up to 3 days.

Comprehensive FAQ

  • What grains can I use for Greek salmon grain bowls? You can use Israeli couscous, quinoa, brown rice, or even farro.
  • Can I make Greek salmon grain bowls ahead of time? Yes, the components can be prepped ahead of time and assembled when ready to eat.
  • Is this recipe gluten-free? It can be gluten-free if you use quinoa or another gluten-free grain.
  • Can I substitute the salmon? Absolutely! Chicken or tofu work well as substitutes.
  • How long do leftovers last? Store in the fridge for up to 3-4 days.
  • What’s the nutritional value of this dish? Each serving offers a good balance of protein, fiber, and healthy fats.
  • Can I freeze the components? While couscous can be frozen, it’s best to store salmon and kale fresh for optimal taste.
  • How can I make it vegan? Substitute salmon with marinated tofu and use vegetable broth to cook the couscous.

Nutritional Tips and Dietary Adaptations

This recipe is naturally high in protein and healthy fats, making it a great choice for those looking to maintain a balanced diet. Here are some adaptations to consider:

  • Low-Carb Option: Substitute Israeli couscous with cauliflower rice to significantly reduce carbs.
  • High-Fiber Boost: Add chickpeas or black beans for an extra fiber punch.
  • Omega-3 Rich: Choose wild-caught salmon for higher levels of omega-3 fatty acids, beneficial for heart health.

Equipment Recommendations

To make your cooking experience smoother, here are some essential tools:

  • Non-Stick Skillet: Ideal for cooking salmon without sticking.
  • Large Mixing Bowl: For combining your couscous and dressing.
  • Measuring Cups and Spoons: Essential for accurate ingredient measurements.
  • Sharp Knife: For slicing vegetables and fish easily.

Serving Suggestions

Here are some ideas on how to serve your Greek Salmon Grain Bowls:

  • Top with Feta: Crumbled feta cheese adds a rich and tangy flavor.
  • Include a Side Salad: A light cucumber and tomato salad pairs perfectly with the bowl.
  • Drizzle with Tahini: A tahini dressing can enhance the Mediterranean flavors.

In conclusion, Greek Salmon Grain Bowls are not just a meal, but a celebration of flavors and nutrition. With their versatility and ease of preparation, they make it possible to enjoy high-protein meals that are as delightful as they are satisfying. So get cooking, hit those protein goals, and enjoy every bite!
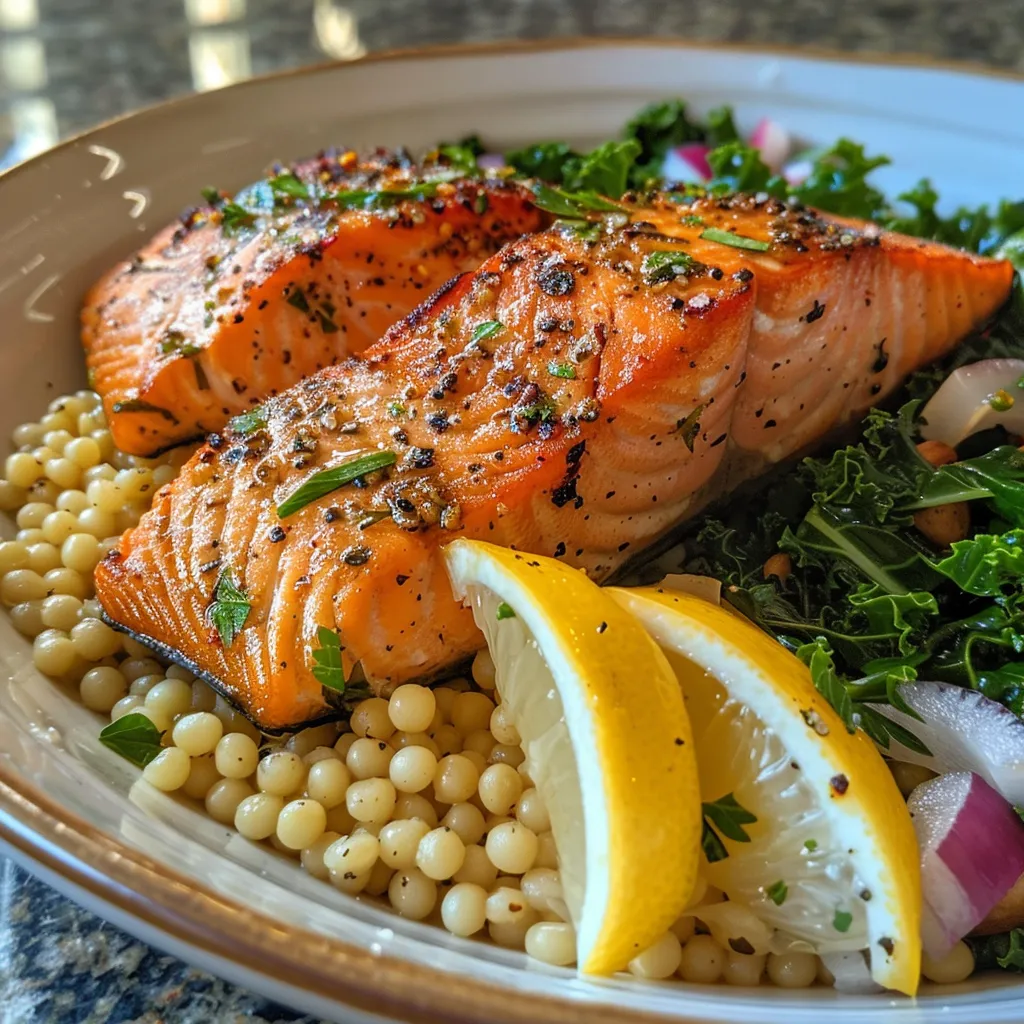
greek salmon grain bowls

Prep Time 10 minutes
Cook Time 20 minutes
Total Time 30 minutes
Servings 4 servings
Calories 650
A flavorful and healthy bowl combining tender salmon, hearty couscous, and vibrant greens, perfect for a nutritious meal.

Ingredients

Grains

  • 2 cups Israeli couscous (cooked to package directions)
  • 1 small yellow onion (sliced)

Liquids & Oils

  • 0.75 cup extra-virgin olive oil (divided)
  • 1 lemon lemon juice (from 1 lemon)

Proteins

  • 4 filets salmon

Spices & Seasonings

  • 2 tablespoons Greek seasoning
  • 3/4 cup extra-virgin olive oil (divided)
  • 4 cloves garlic (finely minced)
  • to taste Salt and Pepper
  • to taste Red pepper flakes

Vegetables

  • 1 large head green kale (roughly chopped)

Instructions 

  • Mix cooked couscous, 1/2 cup olive oil, lemon juice, and onion. Season with salt and pepper.
  • Season salmon with 1/2 tablespoon Greek seasoning. Cook in 2 tbsp olive oil over medium heat, 4 min skin-side down, then flip and cook 4 min. Remove from heat.
  • In the same skillet, add 2 tbsp olive oil, wilt kale in batches, then add garlic and cook 1 min. Sprinkle with red pepper flakes.
  • Divide couscous into bowls, top with kale, then place salmon filets on top.

Notes

Ensure salmon is cooked to an internal temperature of 145°F (63°C) for safety.
Calories: 650kcal
Cost: $15
Course: Main Course
Cuisine: Greek
Keyword: Grain Bowl, Salmon

Why You’ll Love These Creamy Cheesy Quinoa Bowls

If you’re on a mission to hit your protein goals without sacrificing flavor, you’ve landed in the right place. These Creamy Cheesy Quinoa Bowls are not just comfort food; they are packed with nutrients and flavor that will keep you coming back for seconds. Here’s why you’ll find this recipe a staple in your meal prep arsenal:

  • High in Protein: With quinoa as the base and the option to add your favorite protein, these bowls ensure you’re meeting your daily macros without compromising on taste.
  • Quick and Easy: Ready in under 30 minutes, this recipe is perfect for busy weeknights or meal prepping on the weekend.
  • Customizable: You can easily swap out ingredients based on what you have on hand, making it a versatile option for any diet.
  • Plant-Based Option: Using nutritional yeast instead of cheese makes this dish entirely plant-based while still creamy and delicious.
  • Comfort Food Vibes: The combination of creamy textures and cheesy flavor satisfies cravings without guilt, ensuring you can indulge while staying on track.

Ingredient Breakdown & Substitutions

Let’s dive into what makes this recipe work and how you can adjust it to suit your taste and dietary needs:

  • Quinoa: 1/2 cup raw quinoa is the star of this dish, offering a complete protein profile. If you’re short on quinoa, try using farro or brown rice as alternatives.
  • Water: 1 1/4 cup water is needed for cooking. You can substitute with vegetable broth for added flavor.
  • Nutritional Yeast: 3 tbsp provide a cheesy flavor without dairy. If you prefer real cheese, use Parmesan instead.
  • Salt: 1/2 tsp enhances the flavors. Adjust according to your taste preferences.
  • Garlic and Onion Powder: These spices (1/4 tsp each) add depth. Fresh minced garlic and onions can also work if you prefer fresh ingredients.
  • Kale or Spinach: 1 cup of chopped greens boosts the nutrient content. Feel free to add other vegetables like broccoli or bell peppers.
  • Milk of Choice: 1/2 cup (plant-based or dairy) adds creaminess. Coconut milk is a great option for a tropical twist.
  • Butter or Vegan Alternative: 2 tsp for richness; this is optional.
  • Protein of Choice: Adding tofu, tempeh, or beans can increase the protein content significantly.

Step-by-Step Instructions

Here’s how to make your Creamy Cheesy Quinoa Bowls in no time:


Professional Chef Knife Set

★ Recommended Kitchen Tool

Professional Chef Knife Set

Make this recipe even easier with a quality Professional Chef Knife Set — a must-have kitchen staple!


🛒 Shop This Tool →

As an Amazon Associate, we earn from qualifying purchases.
  1. In a medium saucepan, combine water, quinoa, nutritional yeast, salt, garlic, and onion powders. If using, add butter for extra richness.
  2. Bring the mixture to a boil over medium-high heat. Once boiling, reduce to a simmer, cover, and cook for about 20 minutes or until the quinoa is fluffy and the water is absorbed.
  3. Stir in chopped kale (or spinach) and the milk. Return to a medium heat, stirring frequently until the greens are wilted and the mixture is creamy. Adjust thickness by adding more milk if necessary.
  4. If you’re adding a protein, incorporate it now. For pre-cooked proteins like beans or tofu, stir them in and heat through.
  5. Serve warm, and enjoy your nutritious, protein-packed meal!

Pro Tips for Perfecting Your Quinoa Bowls

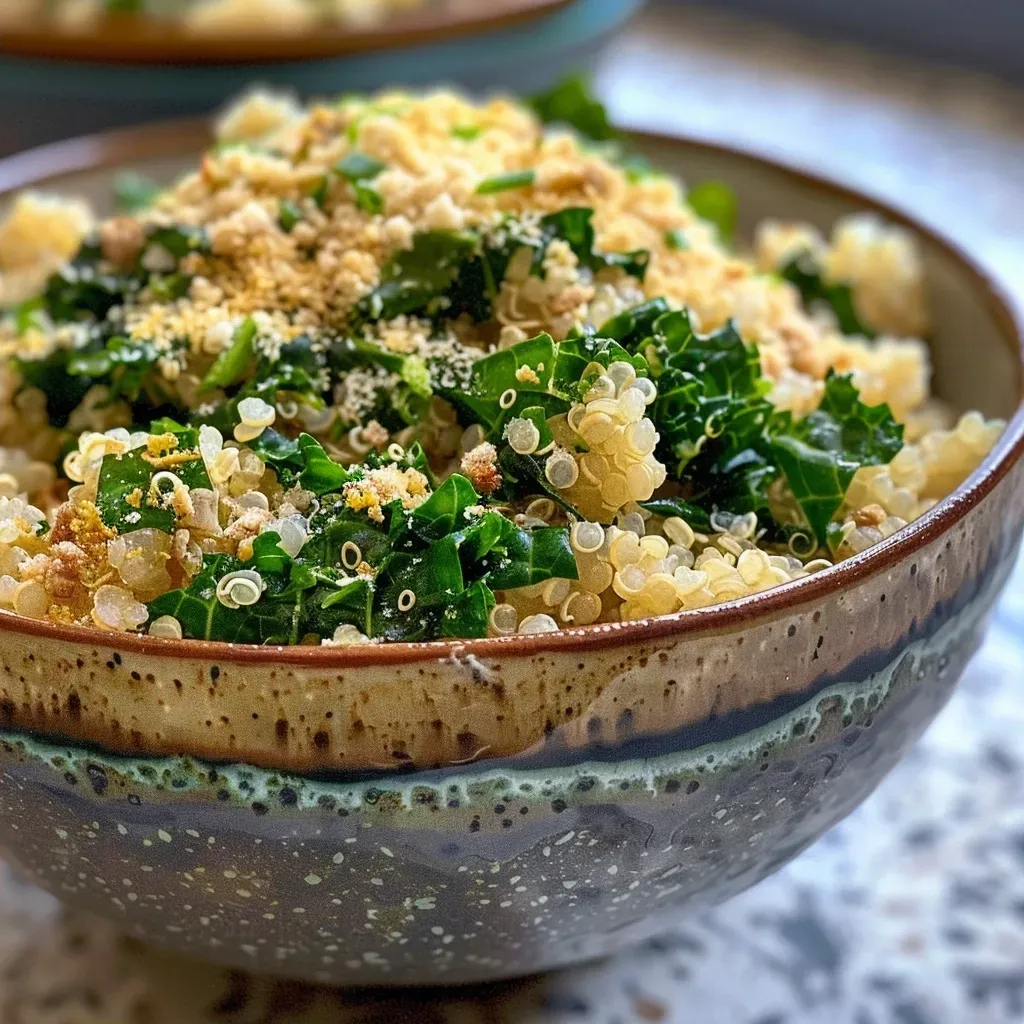
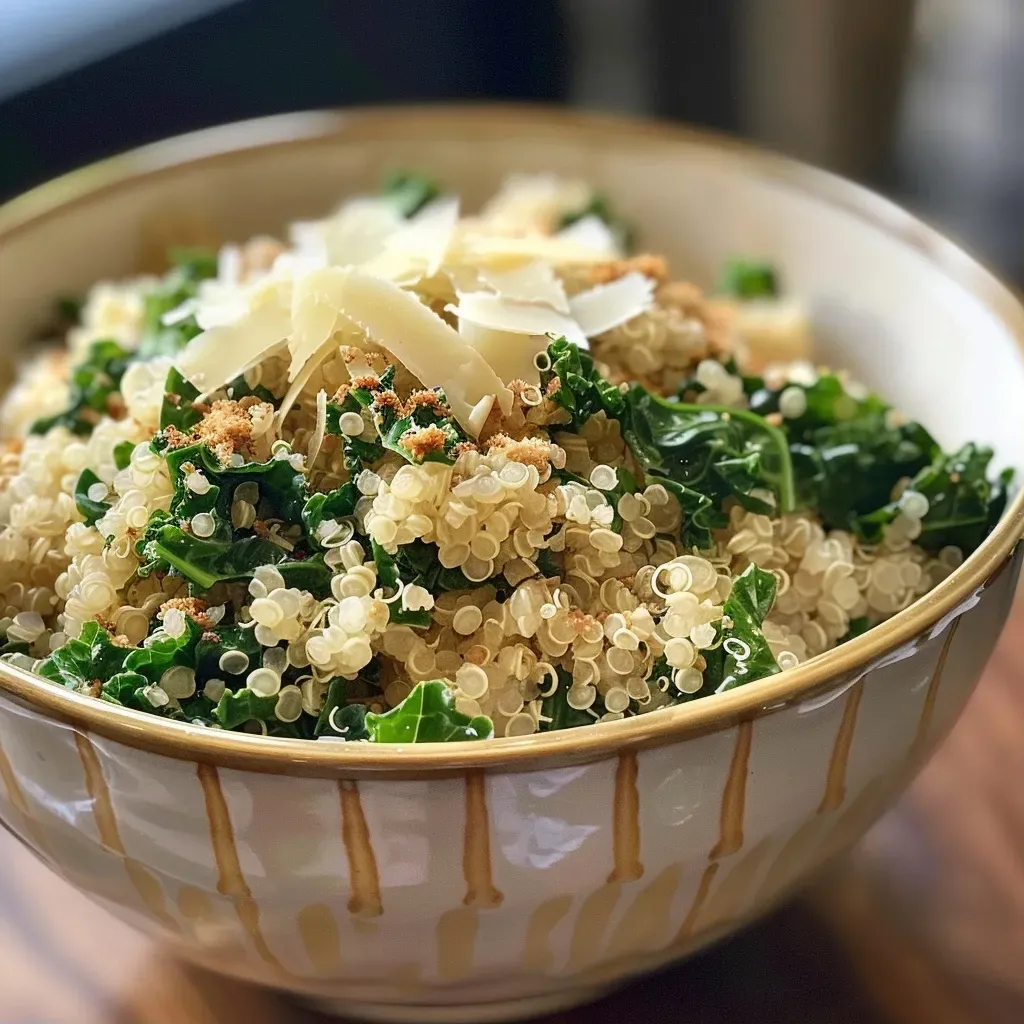
A close-up view of a creamy cheesy quinoa bowl with kale and toppings.

To enhance your experience with this recipe, consider these expert insights:

  • Rinse Your Quinoa: Always rinse quinoa before cooking to remove its natural coating, which can taste bitter.
  • Cook with Broth: For extra flavor, use vegetable or chicken broth instead of water when cooking the quinoa.
  • Experiment with Spices: Add smoked paprika or cumin for a flavor twist.
  • Adjust Creaminess: If you prefer a creamier texture, increase the milk or use a thicker dairy alternative.
  • Mix in Fresh Herbs: Fresh basil or parsley can brighten up the dish.
  • Save Leftovers: These bowls store well in the fridge for up to 4 days, making them perfect for meal prep.
  • Reheat Gently: When reheating, add a splash of water or milk to maintain creaminess.
  • Top it Off: Try adding a sprinkle of hemp seeds or a dollop of Greek yogurt before serving for added texture and protein.

Common Mistakes and Troubleshooting

Even the best recipes can have missteps. Here are some common mistakes and how to avoid them:

  • Overcooking Quinoa: Watch your cooking time! Overcooked quinoa can turn mushy. The grains should be fluffy and slightly chewy.
  • Too Much Liquid: If your dish turns out soupy, reduce the amount of liquid next time or let it simmer uncovered for a few minutes to evaporate excess moisture.
  • Lack of Flavor: Adjust seasoning—taste before serving and add more salt or spices as needed.
  • Skipping the Rinse: Remember to rinse quinoa to avoid bitterness.

Delicious Variations to Try

Mix things up with these creative variations:

  • Mexican Style: Add black beans, corn, diced tomatoes, and taco seasoning for a zesty twist.
  • Italian Flair: Incorporate sun-dried tomatoes, spinach, and Italian herbs like oregano and thyme.
  • Asian-Inspired: Use soy sauce, sesame oil, and top with scallions and sesame seeds.
  • Breakfast Bowl: Top with a fried egg and avocado slices for a hearty breakfast option.

Storage & Make-Ahead Instructions

Planning ahead? Here are tips on storing and reheating your bowls:

  • Refrigeration: Store leftovers in an airtight container in the fridge for up to 4 days.
  • Freezing: For longer storage, freeze in individual portions for up to 3 months. Thaw overnight in the fridge before reheating.
  • Reheating: Warm in the microwave or on the stovetop. Add a splash of liquid to keep it from drying out.

FAQs About Creamy Cheesy Quinoa Bowls

Here are common questions about this recipe:

  • Can I use other grains instead of quinoa? Yes! Brown rice or farro can be great substitutes, but cooking times may vary.
  • Is this recipe gluten-free? Yes, as long as you use gluten-free broth and toppings.
  • Can I make this recipe vegan? Absolutely! Simply use plant-based milk and omit any dairy products.
  • How do I add more flavor? Experiment with spices and herbs to suit your taste preferences.
  • Can I meal prep this dish? Yes! These bowls are perfect for meal prep and can be stored in the fridge or freezer.
  • What proteins work well with this? Tofu, chickpeas, or shredded chicken are great additions.
  • How do I make it spicier? Add red pepper flakes or hot sauce for extra kick.
  • What should I serve it with? Enjoy on its own or pair with a side salad or roasted veggies.

Nutrition Tips and Dietary Adaptations

This recipe is naturally rich in nutrients:

  • High Fiber: Quinoa is packed with fiber, promoting digestive health.
  • Healthy Fats: Adding avocado or seeds boosts healthy fats.
  • Low in Saturated Fat: This dish can be made low in saturated fat by using plant-based milk and skipping butter.

Essential Equipment for Success

To make your cooking experience smooth, consider these kitchen essentials:

  • Medium Saucepan: For cooking quinoa and mixing in ingredients.
  • Measuring Cups and Spoons: To ensure accurate ingredient amounts.
  • Stirring Spoon: A wooden or silicone spoon works best for mixing.
  • Cutting Board and Knife: For chopping vegetables and herbs efficiently.

Serving Suggestions

Ready to serve? Here’s how to elevate your dish:

  • Garnish with Fresh Herbs: A sprinkle of parsley or cilantro adds color and flavor.
  • Add Crunch: Top with toasted nuts or seeds for texture.
  • Serve with a Side Salad: A light salad complements the rich flavors of the quinoa bowl.

In conclusion, these Creamy Cheesy Quinoa Bowls are more than just a meal; they are a gateway to achieving your protein goals while enjoying delicious food. With the flexibility to customize and the assurance of a nutritious profile, you can’t go wrong with this recipe. Get cooking and enjoy the journey of high-protein eating without compromise!

Creamy Cheesy Quinoa Bowls

Prep Time 5 minutes
Cook Time 20 minutes
Total Time 25 minutes
Servings 2 servings
Calories 350
A quick and nutritious bowl combining fluffy quinoa, greens, and cheesy flavor, perfect for a wholesome meal.

Ingredients

Water and grains

  • 1 1/4 cups water
  • 1/2 cup raw quinoa

Flavorings and seasonings

  • 3 tbsp nutritional yeast (or Parmesan)
  • 1/2 tsp salt
  • 1/4 tsp garlic powder
  • 1/4 tsp onion powder

Greens and liquids

  • 1 cup kale (or spinach, chopped)
  • 1/2 cup milk (of choice or unsweetened creamer)

Optional enrichments and proteins

  • 2 tsp butter or vegan butter (for added richness)
  • optional protein of choice

Instructions 

  • Bring water, quinoa, seasonings, and optional butter to a boil. Reduce to simmer, cover, and cook 20 minutes.
  • Stir in kale and milk, then bring to a boil again, stirring until kale wilts and quinoa reaches desired texture.
  • Optional: cook protein separately or stir in with quinoa before serving.

Notes

You can customize the greens and protein to your preference for a hearty, nutritious meal.
Calories: 350kcal
Cost: $10
Course: Main Course
Cuisine: Fusion
Keyword: Quinoa

Unlock the Secrets to Perfectly Air Fried Beets

Air frying beets is not just a cooking method; it’s a transformative experience that elevates your meals. In this comprehensive guide, we’ll dive deep into the art of air frying beets to create a vibrant, nutritious, and delicious side dish. Whether you’re a meal prep enthusiast or just looking for a quick and healthy addition to your plate, you’re in the right place. In the following sections, you’ll discover everything from ingredient breakdowns to expert tips on how to make the most of your air fryer. Let’s get started!

Why You’ll Love This Recipe

Air fryer beets are not just simple to prepare; they are packed with flavor and nutrients. Here are some compelling reasons why you’ll adore this recipe:

  • Quick Cooking Time: The air fryer significantly reduces cooking time compared to traditional roasting methods, allowing you to enjoy perfectly cooked beets in under 20 minutes.
  • Minimal Cleanup: With no pots or pans to scrub, air frying beets means less mess in the kitchen.
  • Flavorful and Nutritious: Air frying enhances the natural sweetness of beets while preserving their essential vitamins and minerals.
  • Versatile Serving Options: Whether served warm or cold, air fried beets can complement a variety of dishes, making them a fantastic addition to salads, bowls, or as a standalone side.
  • Customizable Seasoning: The recipe allows you to experiment with various herbs and spices to suit your taste preferences.

Ingredient Breakdown

To make the best air fryer beets, you’ll need a few simple ingredients. Here’s what you’ll need and some suggested substitutions:


Meal Prep Container Set

★ Recommended Kitchen Tool

Meal Prep Container Set

Make this recipe even easier with a quality Meal Prep Container Set — a must-have kitchen staple!


🛒 See Deals on Amazon →

As an Amazon Associate, we earn from qualifying purchases.
  • Beets (1-2 pounds): Red, golden, or candy cane beets all work beautifully. Choose your favorites or mix them for a colorful presentation.
  • Avocado Oil (1 tablespoon): This oil adds moisture and helps achieve a crispy exterior. You can substitute with olive oil or another neutral oil if desired.
  • Italian Seasoning (2 tsp): A blend of herbs that enhances the flavor profile of the beets. Feel free to use fresh herbs or your favorite seasoning mix.
  • Salt & Pepper: Essential for bringing out the natural flavors of the beets. Adjust to taste.

How to Prepare Air Fryer Beets

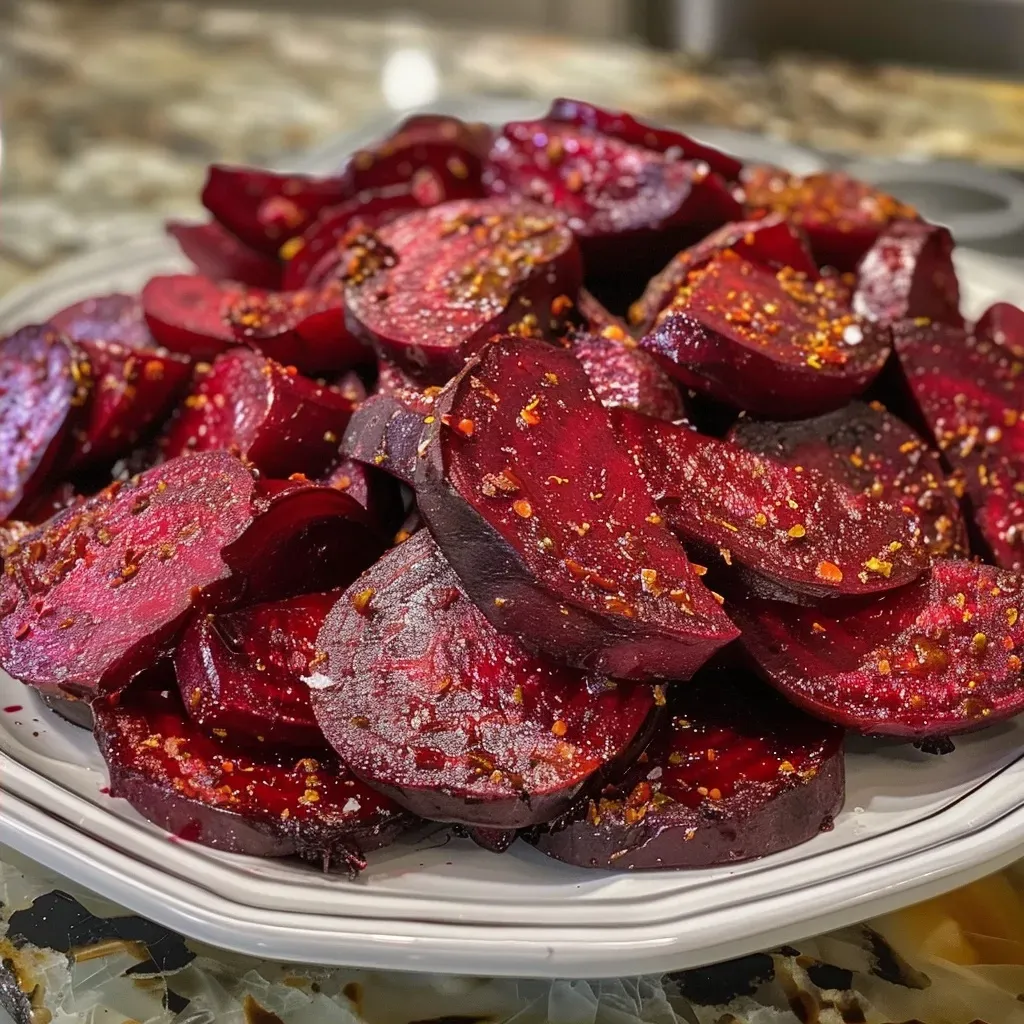
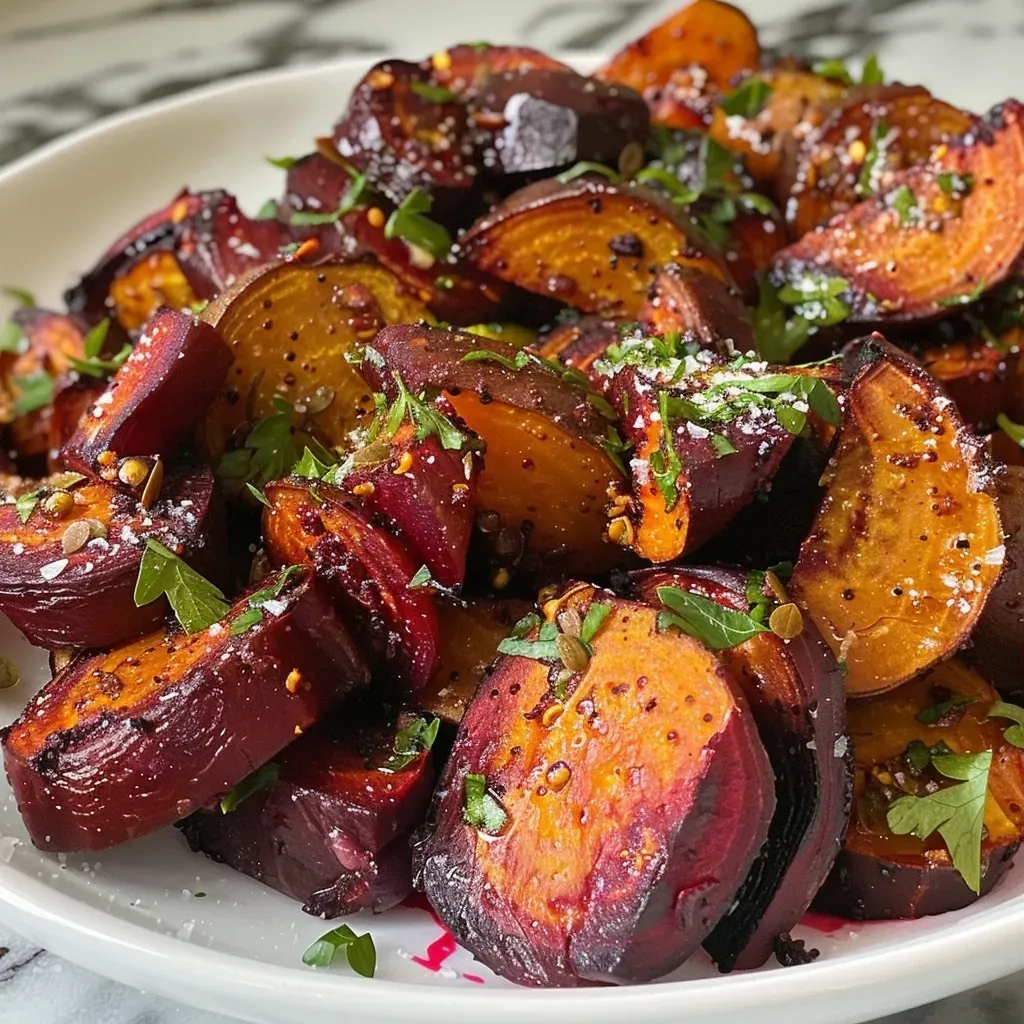
Close-up view of juicy air fryer beets, showing a rich red color and a crispy texture.

Follow these simple steps to create your delicious air fried beets:

  1. Preheat your air fryer to 400°F (200°C). This ensures that the beets cook evenly.
  2. While the air fryer is preheating, peel the beets using a sharp knife and cut them into 1-inch cubes.
  3. In a large mixing bowl, toss the cubed beets with avocado oil and Italian seasoning until they are well-coated.
  4. Carefully transfer the beets to the air fryer basket. Avoid overcrowding; cook in batches if necessary for optimal results.
  5. Cook for 15 minutes, shaking the basket halfway through to promote even cooking.
  6. Check for doneness by poking a piece with a fork. If it goes in easily, your beets are ready. Serve hot or allow to cool for salads.

Expert Tips for Perfect Air Fried Beets

To ensure your air fryer beets turn out perfectly every time, consider the following expert insights:

  • Choose Fresh Beets: Look for firm, vibrant beets with no soft spots for the best flavor and texture.
  • Cut Uniformly: Ensuring all pieces are similar in size promotes even cooking.
  • Don’t Skip the Oil: A bit of oil is essential for achieving that crispy exterior. It also helps seasonings adhere better.
  • Experiment with Seasonings: Try adding garlic powder, smoked paprika, or balsamic vinegar for a flavor twist.
  • Check Frequently: Different air fryer models can vary in intensity. Keep an eye on your beets to avoid overcooking.
  • Use a Meat Thermometer: For precision, check that your beets reach a tender internal temperature of 205°F (96°C).
  • Let Cool Before Storing: Allow beets to cool completely before storing them to prevent condensation and sogginess.
  • Make Extra: Air fried beets can be stored in the fridge and used throughout the week in various meals.

Common Mistakes to Avoid

Even seasoned cooks can stumble when it comes to air frying beets. Here are some common pitfalls and how to troubleshoot them:

  • Overcrowding the Basket: This can lead to uneven cooking. Always give your beets space to circulate air.
  • Not Preheating the Air Fryer: Skipping this step can result in soggy beets. Always preheat for optimal results.
  • Skipping the Peel: Leaving the skin on can result in a bitter taste. Always peel before cooking.
  • Ignoring Cooking Time: Different sizes and types of beets may require adjustments in cooking time. Always check for tenderness.

Variations of Air Fried Beets

Air fryer beets are incredibly versatile! Here are some variations to try:

  • Sweet and Spicy Beets: Add a sprinkle of cayenne pepper and a drizzle of honey for a sweet heat.
  • Herb-Infused Beets: Toss beets with fresh rosemary or thyme for an aromatic twist.
  • Balsamic Glazed Beets: Drizzle with balsamic vinegar in the last few minutes of cooking for a tangy finish.
  • Cheesy Beets: Sprinkle with feta or goat cheese just before serving for a creamy contrast.

Storage and Make-Ahead Instructions

If you want to save time, here’s how to store and prep your air fryer beets:

  • Refrigeration: Store cooked beets in an airtight container in the fridge for up to 5 days.
  • Freezing: Air fried beets can be frozen for up to 3 months. Flash freeze on a baking sheet before transferring to a freezer bag.
  • Make-Ahead Prep: Peel and chop beets a day in advance. Store them in water in the refrigerator to keep them fresh.

Nutrition Tips and Dietary Adaptations

Beets are a nutritional powerhouse. Here’s why you should include them in your diet:

  • Low in Calories: Beets are low in calories while being high in fiber, making them perfect for weight management.
  • Rich in Nutrients: They are packed with folate, manganese, and antioxidants, supporting overall health.
  • Dietary Adaptations: This recipe is naturally vegan, gluten-free, and paleo-friendly, making it accessible to various dietary preferences.

Equipment Recommendations

To make the most of your air fryer beets, here’s the equipment you’ll need:

  • Air Fryer: Choose a model with a good capacity for even cooking.
  • Sharp Knife: For peeling and chopping your beets with precision.
  • Mixing Bowl: A large bowl is ideal for tossing ingredients together.
  • Cutting Board: Use a sturdy board to protect your countertops while prepping.

Serving Suggestions

Wondering how to serve your air fryer beets? Here are some tasty ideas:

  • Salads: Add to mixed greens with walnuts and goat cheese for a vibrant salad.
  • Bowls: Layer with quinoa, roasted veggies, and a tahini dressing for a nourishing bowl.
  • Side Dishes: Serve alongside grilled meats or fish for a colorful plate.
  • Snacks: Enjoy as a healthy snack with a dollop of hummus for dipping.

Frequently Asked Questions (FAQs)

Here are some common questions about air fryer beets:

  • Can I cook whole beets in the air fryer? Yes, but they will take longer to cook. It’s best to cut them into cubes for even cooking.
  • Do I need to peel beets before air frying? Yes, peeling beets enhances their flavor and texture.
  • How do I know when beets are done? When a fork easily pierces the beet, they are done cooking.
  • Can I reheat leftover air fryer beets? Absolutely! Simply warm them in the air fryer for a few minutes to restore their texture.
  • Are air fryer beets healthy? Yes! They are low in calories, high in nutrients, and packed with fiber.
  • Can I use frozen beets? Yes, just adjust the cooking time as needed.
  • What’s the best way to store cooked beets? Store in an airtight container in the refrigerator for up to 5 days.
  • What dishes pair well with air fryer beets? They pair beautifully with salads, grain bowls, or as a side to any protein.

Final Thoughts: Elevate Your Cooking with Air Fryer Beets

Air frying beets is a game changer for anyone looking to add nutritious, flavorful veggies to their meals quickly and easily. With this detailed guide, you now have everything you need to create delicious air fryer beets that will not only satisfy your taste buds but also support your nutritional goals. So fire up your air fryer, gather your ingredients, and enjoy the delightful world of air fried beets!

Air Fryer Beets

Prep Time 10 minutes
Cook Time 15 minutes
Total Time 25 minutes
Servings 4 servings
Calories 80
Enjoy tender, flavorful beets cooked effortlessly in your air fryer, perfect as a side or snack.

Ingredients

Main

  • 1-2 pounds Beets (red, golden, or candy cane)
  • 1 tablespoon Avocado Oil
  • 2 tsp Italian seasoning
  • to taste Salt & Pepper Salt & Pepper

Instructions 

  • Preheat air fryer to 400°F (200°C). Peel beets and cut into 1-inch cubes.
  • Toss beets with avocado oil and Italian seasoning until evenly coated.
  • Place beets in the air fryer basket without overcrowding. Cook for 15 minutes, shaking halfway.
  • Check doneness with a fork; they should be tender. Season with salt and pepper if desired. Serve hot or cold.

Notes

Beets can be stored in the refrigerator for up to a week.
Calories: 80kcal
Cost: $10
Course: Side Dish
Keyword: Beets

Unleashing Flavor and Nutrition: Your Guide to the Vegan Southwest Sweet Potato Bowl

Welcome to your ultimate guide on crafting a mouthwatering Vegan Southwest Sweet Potato Bowl. This recipe is not just a meal; it’s a vibrant fusion of nutrients, textures, and flavors designed to elevate your culinary skills and help you meet your protein goals. In a world where health-conscious eating often means sacrificing taste, this bowl proves you can have both. Whether you’re a seasoned chef or a kitchen novice, this recipe will become a staple in your meal prep rotation. Let’s dive into why you’ll love this dish and how to make it your own.

Why You’ll Love This Recipe

  • High in Protein: With the inclusion of black beans and cashews, this bowl packs a protein punch, helping you meet your daily intake effortlessly.
  • Vibrant Flavors: Enjoy the zesty combination of spices and fresh ingredients that bring the taste of the Southwest to your plate.
  • Customizable: Easily swap ingredients based on your preferences or what’s available in your pantry, making it a versatile choice.
  • Meal Prep Friendly: Perfect for preparing in advance, this recipe stores well and makes for quick, healthy lunches or dinners.
  • Oil-Free Option: The recipe can be made oil-free, using apple cider vinegar instead, ensuring it fits into various dietary needs.

Ingredient Breakdown

Let’s take a closer look at each ingredient in our Vegan Southwest Sweet Potato Bowl, along with potential substitutions to tailor the recipe to your taste.

  • Sweet Potato: 1 large (about 1.72 lbs / 783 g) cubed. Rich in vitamins A and C, sweet potatoes are the heart of this dish. Substitution: Butternut squash or pumpkin can be used for a different flavor.
  • Apple Cider Vinegar: 1 tablespoon for tang. This ingredient enhances the sweetness of the potatoes while keeping the dish oil-free. Substitution: A neutral-tasting oil can be used instead if preferred.
  • Chili Powder: 1 teaspoon adds depth. Adjust to your heat preference. Substitution: Cayenne pepper for more heat or paprika for a milder taste.
  • Ground Cumin: 1/2 teaspoon introduces earthiness. Substitution: Coriander can be used for a different flavor profile.
  • Smoked Paprika: 1/2 teaspoon for a smoky essence. Substitution: Regular paprika if you prefer a milder flavor.
  • Black Beans: 1 can (15 ounces), a great source of fiber and protein. Substitution: Chickpeas or kidney beans can be used instead.
  • Corn: 1 1/2 cups, fresh or frozen, for sweetness and crunch. Substitution: Peas can work if corn isn’t available.
  • Cherry Tomatoes: 2 cups, halved for freshness and juiciness. Substitution: Diced regular tomatoes.
  • Romaine Lettuce: 3-4 cups for a crisp base. Substitution: Spinach or kale can be used for added nutrients.
  • Raw Cashews: 1/2 cup, soaked overnight for creaminess in the dressing. Substitution: Sunflower seeds for a nut-free version.
  • Cilantro: 1/2 cup for freshness. Substitution: Parsley if you’re not a fan of cilantro.
  • Lime Juice: 3 tablespoons for acidity and brightness.
  • Garlic Powder: 1/2 teaspoon enhances flavor. Substitution: Fresh minced garlic if preferred.
  • Maple Syrup: 1/2 teaspoon for a hint of sweetness. Substitution: Agave nectar or honey, if not vegan.
  • Crushed Red Pepper: Optional for heat. Adjust to taste.

Step-by-Step Instructions

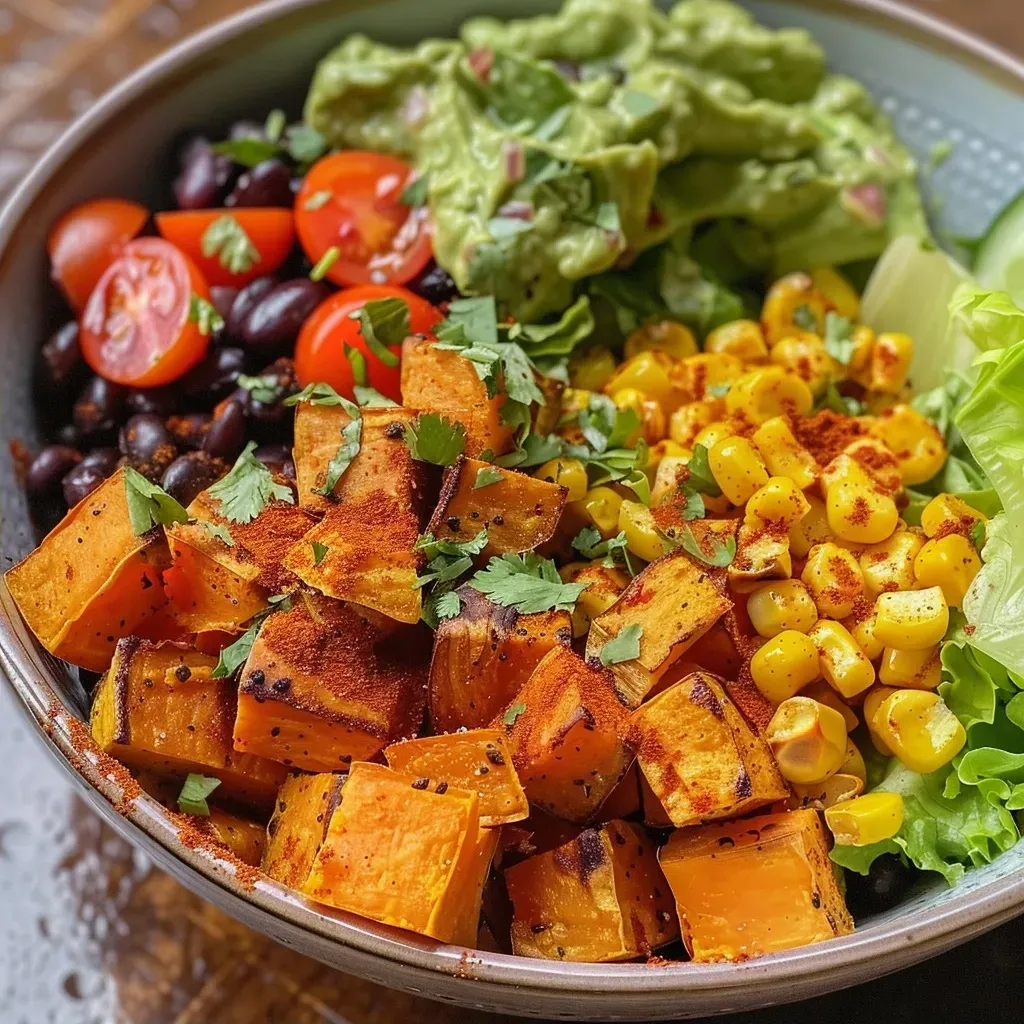
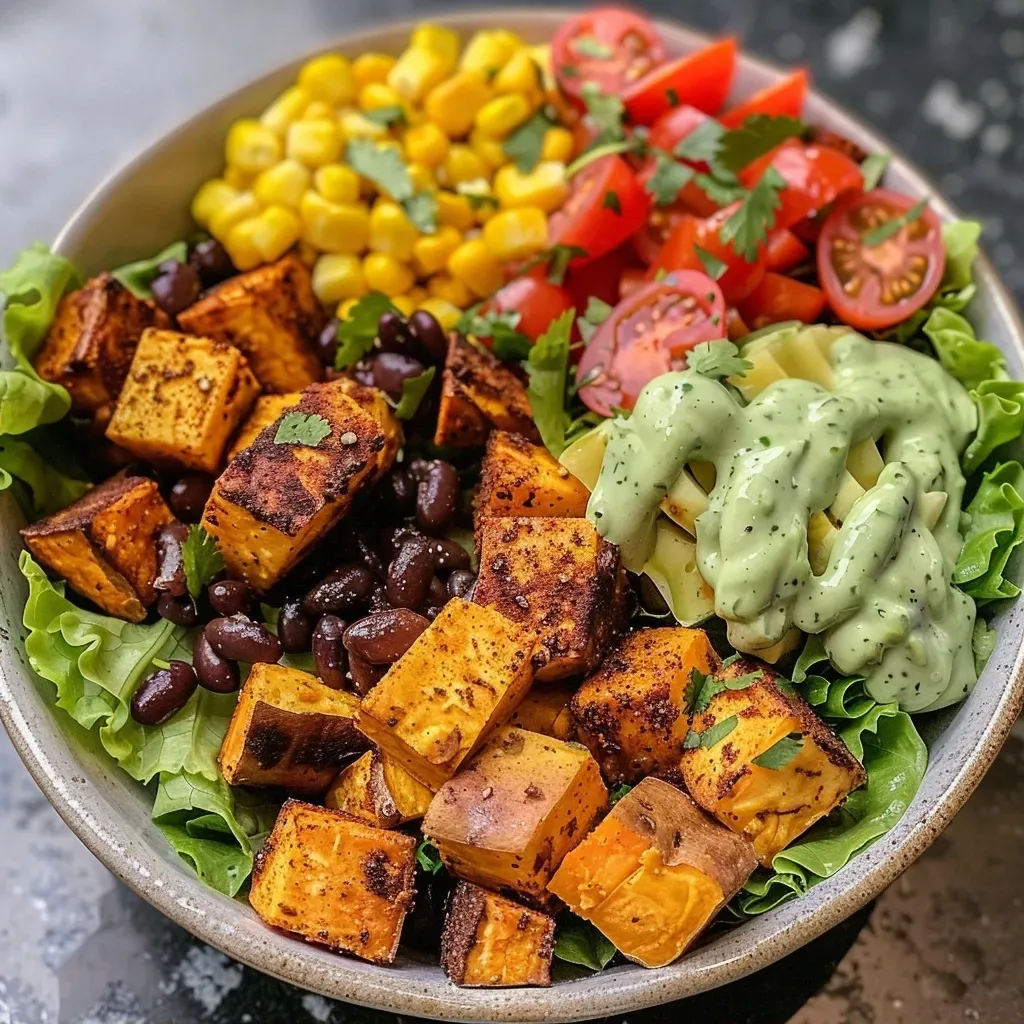
A close-up side view of a vibrant Vegan Southwest Sweet Potato Bowl, showcasing colorful ingredients.

Now that we’ve covered our ingredients, let’s get into the cooking process for your Vegan Southwest Sweet Potato Bowl.


Silicone Baking Cups Set

★ Recommended Kitchen Tool

Silicone Baking Cups Set

Make this recipe even easier with a quality Silicone Baking Cups Set — a must-have kitchen staple!


🛒 Check Price on Amazon →

As an Amazon Associate, we earn from qualifying purchases.
  1. Preheat the oven to 425°F (220°C).
  2. Prepare the sweet potatoes: In a bowl, toss the cubed sweet potatoes with apple cider vinegar, chili powder, cumin, smoked paprika, salt, and pepper. If using oil, skip the vinegar and coat the potatoes lightly with oil.
  3. Roast the sweet potatoes: Place the sweet potatoes on a parchment-lined baking tray and roast for 30-35 minutes, stirring halfway through, until they are soft and lightly browned.
  4. Make the dressing: While the potatoes roast, blend the soaked cashews, cilantro, water, lime juice, cumin, garlic powder, maple syrup, and salt in a blender until smooth. Taste and adjust seasoning as necessary.
  5. Assemble your bowl: Once the potatoes are done, portion them into bowls with black beans, corn, cherry tomatoes, and romaine lettuce. Drizzle with the cashew dressing.

Pro Tips for Perfecting Your Bowl

  • Soak Cashews Properly: Soaking cashews overnight makes them creamy and easy to blend for the dressing.
  • Don’t Overcrowd the Pan: Give your sweet potatoes space on the baking tray for even roasting and caramelization.
  • Fresh Ingredients Matter: Use fresh herbs and produce for maximum flavor and nutrition.
  • Adjust Heat Levels: Taste your dressing and adjust the spice levels according to your preference.
  • Meal Prep for Success: Make a big batch of the bowl and store in individual containers for easy grab-and-go meals.
  • Experiment with Toppings: Try adding avocado, pickled onions, or your favorite hot sauce to elevate the dish.
  • Flavor Infusion: Let the sweet potatoes marinate in the spices for at least 15 minutes before roasting for deeper flavor.
  • Storage Tips: Keep the dressing separate until you’re ready to eat to maintain freshness.

Common Mistakes and Troubleshooting

Even with a straightforward recipe, it’s easy to run into a few hurdles. Here’s how to troubleshoot:

  • Problem: Sweet potatoes are mushy: Make sure to cut them into evenly sized cubes and avoid overcrowding the baking tray.
  • Problem: Dressing is too thick: Add more water, one tablespoon at a time, to reach your desired consistency.
  • Problem: Flavor is lacking: Adjust with more spices or a splash of lime juice for brightness.
  • Problem: Bowl feels dry: Ensure your ingredients are fresh and consider adding a little more dressing or avocado.

Variations to Try

Don’t hesitate to mix things up! Here are some fun variations on your Vegan Southwest Sweet Potato Bowl:

  • Mexican Fiesta Bowl: Add grilled corn, avocado, and a sprinkle of cotija cheese (or vegan alternative) for a festive twist.
  • Quinoa Power Bowl: Replace sweet potatoes with cooked quinoa for a hearty base.
  • Asian-Inspired Bowl: Substitute the dressing with a sesame ginger dressing and add snap peas and edamame.
  • Spicy Chickpea Bowl: Use chickpeas instead of black beans and add a spicy harissa dressing for a kick.

Storage and Make-Ahead Instructions

This bowl is perfect for meal prep! Here’s how to store it:

  • Refrigeration: Store the assembled bowls in airtight containers in the fridge for up to 4 days.
  • Freezing: You can freeze roasted sweet potatoes and black beans separately for up to 3 months but avoid freezing the dressing.
  • Make-Ahead: Prepare the dressing and chop your veggies ahead of time to streamline the cooking process during busy weeks.

FAQs

Here are some frequently asked questions about the Vegan Southwest Sweet Potato Bowl:

  • Can I make this bowl oil-free? Yes! Substitute apple cider vinegar for oil when roasting the sweet potatoes.
  • What can I replace the black beans with? Chickpeas or lentils are excellent alternatives.
  • How long do leftovers last? Leftovers can be stored in the fridge for up to 4 days.
  • Can I add protein powder to the dressing? Absolutely! Just blend it in to boost your protein intake.
  • Is this recipe gluten-free? Yes, it’s naturally gluten-free!
  • Can I make it spicy? Yes! Add more chili powder or hot sauce to your taste.
  • What if I don’t have cashews? You can use sunflower seeds or tahini for a different flavor profile.
  • Is this recipe kid-friendly? Yes! The flavors are mild enough for children, and they can help assemble the bowl.

Nutritional Tips and Dietary Adaptations

This recipe is inherently healthy, but here are some tips to enhance its nutritional profile:

  • Increase Fiber: Add more beans or grains like quinoa for added fiber.
  • Boost Antioxidants: Incorporate more colorful veggies like bell peppers or kale.
  • Healthy Fats: Adding avocado can provide healthy fats that are great for heart health.
  • Protein Power: Consider adding a scoop of your favorite plant-based protein powder to the dressing or on top of the bowl.

Essential Equipment

To make your Vegan Southwest Sweet Potato Bowl, you’ll need:

  • Baking Tray: A sturdy tray for roasting your sweet potatoes.
  • Blender: For making the smooth cashew dressing.
  • Cutting Board & Knife: Essential for prepping your ingredients.
  • Mixing Bowls: For tossing ingredients and assembling your bowl.

Serving Suggestions

When it comes to serving your bowl, consider these options to enhance your meal:

  • Garnish: Fresh cilantro or a sprinkle of nutritional yeast adds an extra layer of flavor.
  • Side Dishes: Pair with a side salad or tortilla chips for a complete meal.
  • Drink Pairing: A refreshing lime-infused drink complements the bowl perfectly.

With this guide in hand, you’re ready to create a Vegan Southwest Sweet Potato Bowl that not only fuels your body but excites your taste buds. By following these steps and tips, you’ll be well on your way to mastering this delicious, protein-rich dish. Enjoy your cooking, and remember: hitting your protein goals doesn’t have to be boring or bland!

Vegan Southwest Sweet Potato Bowl

Prep Time 10 minutes
Cook Time 35 minutes
Total Time 45 minutes
Servings 4 servings
Calories 450
A vibrant and hearty plant-based bowl packed with roasted sweet potatoes, black beans, corn, and fresh veggies, topped with a creamy cilantro cashew dressing.

Ingredients

Sweet Potatoes

  • 1 large sweet potato, cubed (about 1.72 lbs (783 g))
  • 1 tablespoon apple cider vinegar or vegetable broth or a neutral-tasting oil
  • 1 teaspoon chili powder (the spice blend)
  • 0.5 teaspoon ground cumin
  • 0.5 teaspoon smoked paprika
  • to taste Salt and pepper
  • 1 can (15 ounces) black beans, drained and rinsed
  • 1.5 cups fresh or frozen corn (thawed if frozen)
  • 2 cups cherry tomatoes, halved
  • 3-4 cups romaine lettuce
  • 0.5 cup raw cashews, soaked overnight
  • 0.5 cup fresh cilantro (with stems)
  • 0.5 cup water
  • 3 tablespoons fresh lime juice
  • 0.5 teaspoon ground cumin
  • 0.5 teaspoon garlic powder
  • 0.5 teaspoon maple syrup
  • 0.25 teaspoon salt, or to taste
  • 0.25 teaspoon crushed red pepper (optional)

Instructions 

  • Preheat oven to 425°F (220°C).
  • Toss sweet potatoes with vinegar, spices, salt, and pepper. Roast on a lined tray for 30-35 minutes, stirring halfway.
  • Blend all dressing ingredients until smooth. Taste and adjust seasoning.
  • Once roasted and cooled, assemble bowls with sweet potatoes, beans, corn, tomatoes, lettuce, and drizzle with dressing.

Notes

Feel free to customize with your favorite toppings or additional spices for extra flavor.
Calories: 450kcal
Cost: $15
Course: Main Course
Cuisine: American
Keyword: Southwest, Sweet Potato, Vegan

Unlock the Secrets to a Flavorful Spinach Stir Fry

When it comes to quick, nutritious meals, spinach stir fry stands out as a top choice. In just 10 minutes, you can whip up a dish that’s not only packed with flavor but also loaded with essential nutrients. This guide will walk you through everything you need to know about making a delicious healthy spinach stir fry that meets your protein goals without sacrificing taste.

Why You’ll Love This Recipe

This spinach stir fry is more than just a meal; it’s a culinary experience that offers numerous benefits:

  • Quick and Easy: Ready in just 10 minutes, perfect for busy weeknights.
  • High in Protein: Packed with nutrients, this dish supports muscle recovery and growth.
  • Flavor-Packed: The combination of garlic and spices brings out the natural flavors of the spinach.
  • Versatile: Easily customizable with various proteins and vegetables to suit your taste.
  • Nutritious: Rich in vitamins A, C, and K, as well as iron and calcium.

Ingredients Breakdown and Substitutions

Here’s what you’ll need to make this delicious spinach stir fry:


Professional Chef Knife Set

★ Recommended Kitchen Tool

Professional Chef Knife Set

Make this recipe even easier with a quality Professional Chef Knife Set — a must-have kitchen staple!


🛒 Shop This Tool →

As an Amazon Associate, we earn from qualifying purchases.
  • 2 teaspoons coconut oil: For a hint of sweetness; can be replaced with olive oil or avocado oil.
  • 2-3 small garlic cloves: Fresh garlic adds a vibrant flavor; garlic powder can be used as an alternative.
  • 1 teaspoon red pepper flakes: For heat; adjust according to your spice preference.
  • ½ teaspoon bhuna jeera (roasted ground cumin): For a warm, earthy flavor; regular cumin powder works too.
  • ½ tablespoon rice flour: Helps thicken the dish; cornstarch can be an alternative.
  • 1 pound (~500g) spinach leaves: Fresh is best; frozen spinach can also be used but may require extra cooking time.
  • 1 teaspoon salt: Adjust to taste; consider using low-sodium options if necessary.
  • 1 teaspoon toasted sesame seeds: For garnish and added crunch; omit if you have allergies.
  • 1 teaspoon lemon juice: Brightens the dish; lime juice can be a good substitute.

Pro Tips for the Perfect Spinach Stir Fry

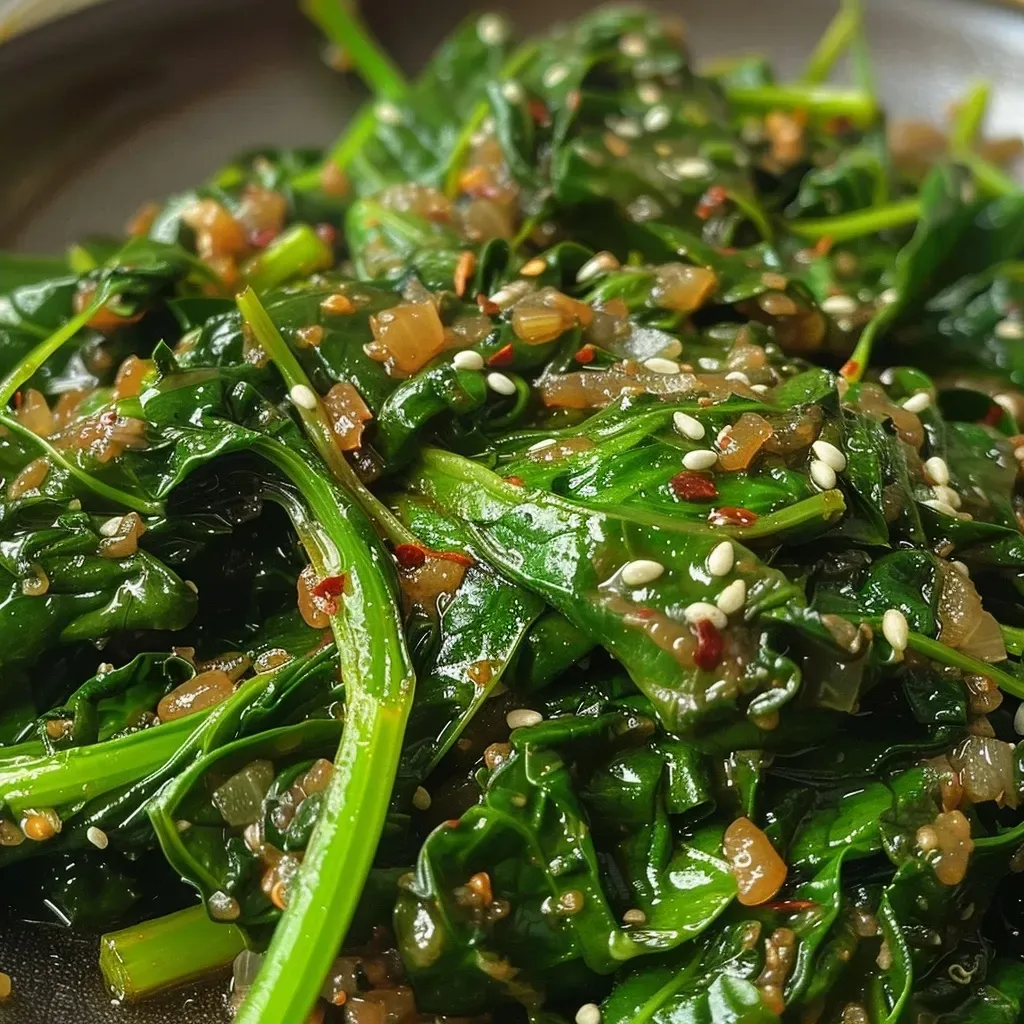
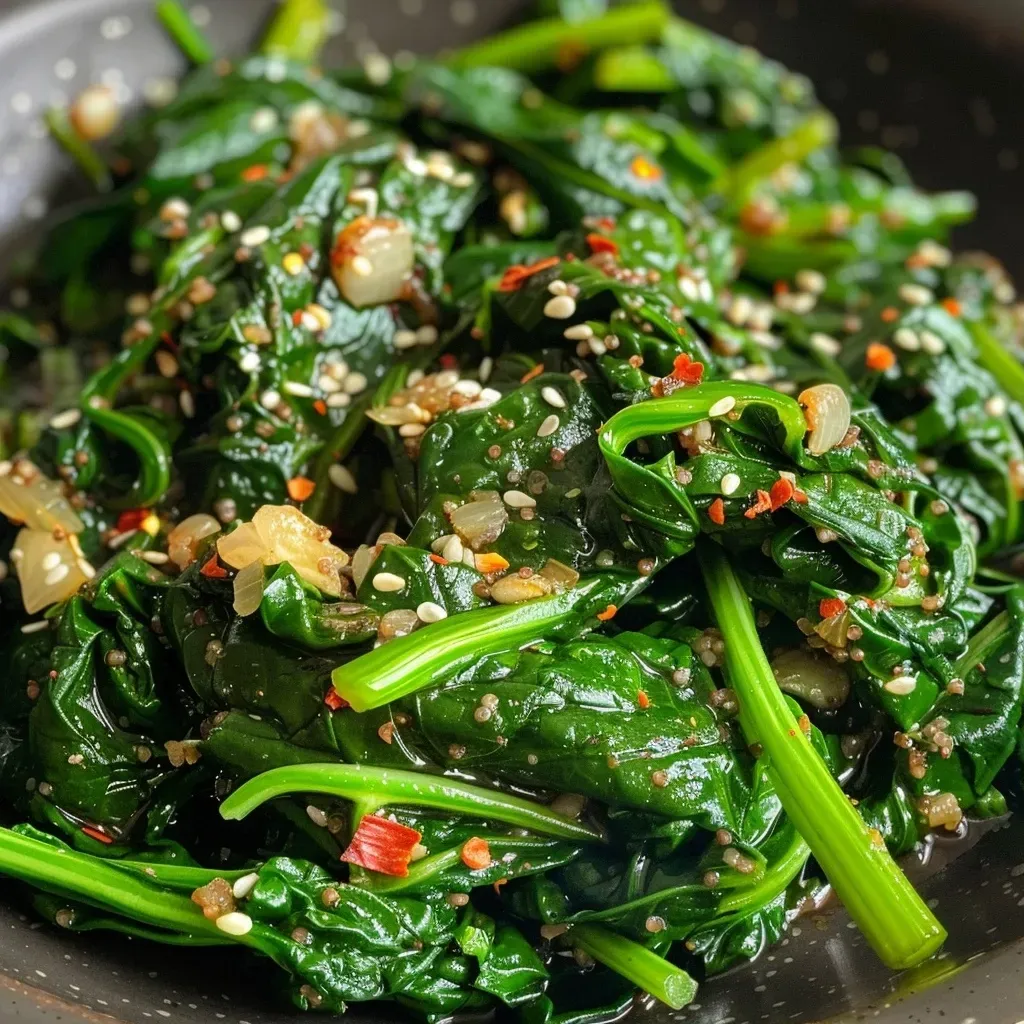
A close-up view of a vibrant green spinach stir fry garnished with garlic and sesame seeds.

Here are some expert insights to elevate your cooking game:

  • Pre-wash the spinach: Ensure your spinach is clean and free from grit before cooking.
  • High heat is key: Cooking on medium-high heat will ensure the spinach wilts quickly without becoming mushy.
  • Don’t overcrowd the pan: Cook in batches if necessary to maintain heat and achieve the best texture.
  • Add proteins: Consider adding tofu, chicken, or shrimp for an extra protein boost.
  • Stir frequently: This ensures even cooking and prevents burning.
  • Season towards the end: Adding salt later enhances flavor without drawing out too much moisture.
  • Experiment with flavors: Feel free to add soy sauce, ginger, or a splash of vinegar for an extra kick.
  • Garnish generously: Top with toasted sesame seeds or chopped nuts for added texture and flavor.

Avoiding Common Mistakes

Here are some common pitfalls to avoid when making your spinach stir fry:

  • Overcooking the spinach: Aim for just a few minutes on high heat to keep the vibrant color and nutrients.
  • Using stale spices: Fresh spices enhance flavor, so check the expiration dates.
  • Skipping the oil: A little fat is necessary for flavor and helps the garlic to sauté properly.
  • Not tasting as you go: Adjust seasonings throughout cooking to achieve the perfect balance.
  • Ignoring texture: Ensure your garlic is golden but not burnt for the best flavor.

Variations to Try

Feel free to switch it up with these variations:

  • Protein-packed: Add grilled chicken or tofu for a heartier meal.
  • Veggie-loaded: Incorporate bell peppers, carrots, or snap peas for added color and nutrition.
  • Asian-inspired: Include soy sauce and ginger for a stir-fry twist.
  • Spicy kick: Toss in some chili paste or sriracha for a fiery flavor.

Storage and Make-Ahead Instructions

Here’s how to store your stir fry for maximum freshness:

  • Refrigeration: Store in an airtight container for up to 3 days.
  • Reheating: Warm in a skillet over medium heat, adding a splash of water to maintain moisture.
  • Make-ahead: Prepare the ingredients in advance, and cook just before serving for the best taste.

Frequently Asked Questions

Got questions? We’ve got answers:

  • Can I use frozen spinach? Yes, but it may require additional cooking time.
  • What can I serve with spinach stir fry? Pair with brown rice, quinoa, or whole grain noodles for a complete meal.
  • Is this dish vegan? Absolutely! All ingredients are plant-based.
  • How do I add more protein? Incorporate beans, lentils, or your choice of meat or tofu.
  • Can I make this gluten-free? Yes, just ensure you use gluten-free soy sauce or tamari.
  • How long does it take to cook? The entire process takes about 10 minutes.
  • Can I add other vegetables? Definitely! Broccoli, carrots, and zucchini work well.
  • What if I don’t have rice flour? Cornstarch can easily be used as a substitute.

Nutritional Tips and Dietary Adaptations

To further enhance the nutritional profile of your stir fry:

  • Opt for whole grains: Serve your stir fry over quinoa or brown rice for added fiber.
  • Add healthy fats: Include avocado slices or drizzle with extra virgin olive oil.
  • Incorporate legumes: Beans or lentils can provide an additional protein source.

Equipment You’ll Need

Here are the essentials for making your spinach stir fry:

  • Wok or large skillet: Ideal for high-heat cooking and quick stir-frying.
  • Spatula: A sturdy spatula helps to toss ingredients efficiently.
  • Measuring spoons: For accurate ingredient measurements.
  • Cutting board and knife: Essential for prepping your ingredients.

Serving Suggestions

For a well-rounded meal, consider serving your spinach stir fry with:

  • Steamed brown rice: A wholesome base that complements the flavors.
  • Quinoa salad: For an extra protein boost and crunchy texture.
  • Grilled chicken or shrimp: To elevate the dish’s protein content and flavor.

Conclusion

In just 10 minutes, you can transform simple spinach into a delicious and nutritious dish that meets your protein goals. With a combination of garlic, spices, and your choice of protein, this healthy spinach stir fry is the perfect solution for busy weeknights. Remember, cooking should be enjoyable, and with these tips and variations, you can make it as exciting as it is nourishing. So, roll up your sleeves, grab those fresh ingredients, and let’s get cooking!

Healthy Spinach Stir Fry With Garlic: 10 Minute Recipe

Prep Time 2 minutes
Cook Time 8 minutes
Total Time 10 minutes
Servings 2 servings
Calories 150
This quick and nutritious spinach stir fry is perfect for a healthy meal in just 10 minutes, packed with garlic and spices for flavor.

Ingredients

oil

  • 2 teaspoons coconut oil (see notes)

garlic

  • 2-3 cloves small garlic cloves

spices

  • 1 teaspoon red pepper flakes
  • 0.5 teaspoon bhuna jeera (roasted ground cumin) (or regular cumin powder)

flour

  • 0.5 tablespoon rice flour (see notes)

vegetables

  • 1 pound spinach leaves (see notes)

seasoning

  • 1 teaspoon salt (adjust to taste)

seeds

  • 1 teaspoon toasted sesame seeds

acid

  • 1 teaspoon lemon juice

Instructions 

  • Heat coconut oil in a pan over medium heat.
  • Add minced garlic and sauté for 30 seconds.
  • Stir in red pepper flakes, cumin, and rice flour; cook for 1 minute.
  • Add spinach and salt; cook until wilted, about 3-4 minutes.
  • Finish with toasted sesame seeds and lemon juice; toss well and serve.

Notes

Ensure not to overcook the spinach to retain nutrients and vibrant color.
Calories: 150kcal
Cost: $8
Course: Main Course
Cuisine: Healthy
Keyword: Spinach

Unlock the Power of Buddha Bowls: A Complete Guide to Your New Favorite Meal

If you’re looking to elevate your protein game while enjoying a meal that’s as delicious as it is nutritious, you’ve landed in the right spot. Welcome to the world of Buddha bowls—the ultimate bowl recipe that combines vibrant vegetables, hearty grains, and protein-packed ingredients, all in one dish. This guide will take you through a flavorful buddha bowl recipe that not only hits your macros but also excites your taste buds. Let’s dive in!

Why You’ll Love This Recipe

  • Protein-Packed: With ingredients like eggs and pecans, this bowl is designed to help you hit your protein goals effortlessly.
  • Customizable: Swap in your favorite veggies or grains to make this dish your own—no two Buddha bowls need to be the same!
  • Meal Prep Friendly: Perfect for batch cooking; make several servings at once for quick meals throughout the week.
  • Flavorful and Satisfying: Each bite is packed with flavors, making healthy eating a delightful experience.
  • Nutrient-Dense: Loaded with vitamins, minerals, and healthy fats, this bowl fuels your body effectively.

Ingredient Breakdown

Let’s take a closer look at the ingredients that make this Buddha bowl a true powerhouse:

  • 4 cups broccoli florets: A great source of vitamins C and K, fiber, and folate.
  • 2 cups cubed butternut squash: Rich in beta-carotene, this adds sweetness and texture.
  • 1 small onion (sliced into ½ moons): Adds a depth of flavor and natural sweetness when roasted.
  • 1 tablespoon olive oil: A healthy fat that helps absorb nutrients from the veggies.
  • 1 small (4-ounce Hass avocado, sliced): Packed with healthy fats and fiber, it adds creaminess.
  • Olive oil spray: A convenient way to lightly coat your pan for cooking eggs.
  • 4 large eggs: A stellar source of protein and essential amino acids.
  • Kosher salt: Enhances the flavors of the other ingredients.
  • Freshly ground black pepper: Adds a kick of flavor.
  • 2 cups cooked brown rice: A whole grain that adds fiber and sustains energy.
  • ¼ cup chopped pecans: Offers healthy fats and a satisfying crunch.

Pro Tips for the Perfect Buddha Bowl

A colorful Buddha Bowl featuring broccoli, butternut squash, sliced onion, avocado, eggs, and brown rice.
  • Prep Ahead: Roast your vegetables in advance and store them in the fridge to make assembling your bowl a breeze.
  • Season Well: Don’t skimp on seasoning your veggies before roasting; it makes all the difference in flavor.
  • Cook Eggs Just Right: For perfect eggs, cook them low and slow. This keeps the yolk runny for extra creaminess.
  • Mix Your Grains: Consider using a mix of grains like quinoa or farro for added texture and nutrients.
  • Be Creative: Don’t hesitate to experiment with different toppings like seeds, sprouts, or fresh herbs.
  • Dress It Up: Try a drizzle of tahini or a simple vinaigrette to elevate the dish further.
  • Don’t Overcrowd the Pan: Give your veggies space on the baking sheet for even roasting.
  • Store Properly: Keep ingredients separate if meal prepping to avoid sogginess.

Common Mistakes and Troubleshooting

Here are some common pitfalls to avoid when making your Buddha bowl:


Meal Prep Container Set

★ Recommended Kitchen Tool

Meal Prep Container Set

Make this recipe even easier with a quality Meal Prep Container Set — a must-have kitchen staple!


🛒 Shop This Tool →

As an Amazon Associate, we earn from qualifying purchases.
  • Overcooked Veggies: Keep an eye on roasting times to ensure veggies are crisp-tender, not mushy.
  • Underseasoned Ingredients: Always taste and adjust seasoning as you go; bland food is a common mistake.
  • Skipping the Base: Don’t forget that a solid grain base is crucial for a fulfilling meal.
  • Neglecting Balance: Ensure you have a good balance of protein, carbs, and fats in your bowl.

Buddha Bowl Variations

Want to switch things up? Here are some variations to try:

  • Mexican Buddha Bowl: Swap brown rice for quinoa and top with black beans, corn, and salsa.
  • Asian-Inspired Bowl: Use soba noodles, add edamame, and drizzle with soy sauce or teriyaki.
  • Middle Eastern Twist: Incorporate chickpeas, roasted eggplant, and tahini sauce.
  • Breakfast Bowl: Replace eggs with scrambled tofu and add cooked spinach and tomatoes.

Storage and Make-Ahead Instructions

To maximize freshness and flavor:

  • Store roasted veggies in an airtight container in the fridge for up to 4 days.
  • Keep cooked grains separate from the veggies until ready to eat.
  • Assemble your bowl fresh to avoid sogginess, but you may prep ingredients ahead of time.
  • For freezing, individually wrap portions and store in a freezer-safe container for up to 3 months.

Frequently Asked Questions

Got questions? Here are some common inquiries:

  • Can I make this Buddha bowl vegan? Yes, simply replace the eggs with tofu or your favorite plant-based protein.
  • What other veggies work well in this recipe? Feel free to use any seasonal veggies like bell peppers, zucchini, or kale.
  • How can I increase the protein content? Add more eggs, or consider including grilled chicken, tempeh, or beans.
  • Can I use frozen vegetables? Absolutely! Just be sure to thaw and drain them before roasting.
  • What dressing pairs well with this bowl? A lemon-tahini dressing or a simple olive oil and vinegar mix works great!
  • How do I keep the avocado from browning? Store it with a squeeze of lemon juice or keep the pit in until you’re ready to eat.
  • Can I meal prep this bowl? Yes! Just store components separately and assemble on the day you plan to eat.
  • Is this bowl gluten-free? Yes, as long as you use gluten-free grains like quinoa or rice.

Nutrition Tips and Dietary Adaptations

To make this recipe fit various dietary needs:

  • Low-Carb: Substitute brown rice with cauliflower rice.
  • Dairy-Free: Ensure no dairy-based dressings are used, or opt for plant-based alternatives.
  • High-Fiber: Add legumes like lentils or chickpeas to boost fiber content.

Recommended Equipment

Having the right tools can streamline your cooking process:

  • Sheet Pan: Ideal for roasting vegetables evenly.
  • Skillet: A non-stick skillet makes cooking eggs easier.
  • Measuring Cups and Spoons: To ensure precise ingredient measurements.
  • Food Storage Containers: For easy meal prep and storage.

Serving Suggestions

To round out your Buddha bowl experience:

  • Pair with a light salad or a side of roasted vegetables.
  • Top with fresh herbs like cilantro or parsley for a burst of flavor.
  • Enjoy with a refreshing drink like iced tea or flavored water to cleanse your palate.

Final Thoughts: A Delicious Journey Awaits

Your journey into the world of Buddha bowls starts here. They’re not just meals; they’re a canvas for creativity and a way to nourish your body without sacrificing flavor. Whether you’re meal prepping for the week or whipping up something quick, this buddha bowl recipe is designed to be both satisfying and nutritious. Enjoy the process, experiment with the ingredients, and most importantly, relish every bite. Here’s to hitting your protein goals while enjoying every meal!

Buddha Bowl

Prep Time 10 minutes
Cook Time 25 minutes
Total Time 35 minutes
Servings 4 servings
Calories 550
A nutritious and colorful Buddha Bowl packed with roasted vegetables, brown rice, and a perfectly cooked egg for a wholesome meal.

Ingredients

Vegetables

  • 4 cups broccoli florets
  • 2 cups cubed butternut squash
  • 1 small onion (sliced into ½ moons)
  • 1 tablespoon olive oil
  • 1 small Hass avocado, sliced
  • Olive oil spray olive oil spray
  • 4 large eggs
  • Kosher salt Kosher salt
  • Freshly ground black pepper black pepper
  • 2 cups cooked brown rice
  • ¼ cup chopped pecans

Instructions 

  • Preheat oven to 400°F (200°C).
  • Toss broccoli, squash, and onions with olive oil, salt, and pepper. Roast for 20-25 minutes.
  • Heat a skillet over medium-low heat, spray with oil, and cook eggs until whites are set and yolks are runny.
  • Cook brown rice according to package instructions.
  • Assemble bowls with rice, roasted vegetables, sliced avocado, pecans, and top with eggs.

Notes

Feel free to add your favorite hot sauce or dressing for extra flavor.
Calories: 550kcal
Cost: $15
Course: Main Course
Cuisine: Healthy
Keyword: vegetables

Unlock the Full Potential of Your Meal Prep with This Easy Vegetable Stir Fry

If you’re looking for a **quick, delicious, and protein-packed** dinner option, look no further than this **easy vegetable stir fry** with tofu. With a medley of colorful veggies, satisfying tofu, and a savory sauce, this recipe makes hitting your protein goals enjoyable and achievable. Best of all, it’s flexible enough to accommodate various dietary preferences and ingredient availability, making it the perfect addition to your meal prep routine. Ready to discover how to create a dish that’s not only nutritious but also bursting with flavor? Let’s dive in!

Why You’ll Love This Recipe

This vegetable stir fry isn’t just another recipe; it’s a game-changer for your dinner rotation. Here are five reasons why:

  • Quick Cooking Time: Ready in just 15-20 minutes, this dish is perfect for busy weeknights when you want to eat healthy without spending hours in the kitchen.
  • High Protein Content: Featuring tofu as a primary protein source, it helps you meet your daily protein goals without compromising on taste.
  • Customizable Ingredients: You can easily swap in your favorite vegetables or proteins, making it a versatile option that caters to your taste buds.
  • Deliciously Flavorful: The combination of soy sauce, maple syrup, garlic, and ginger creates a flavorful sauce that ties all the ingredients together beautifully.
  • Meal Prep Friendly: Great for batch cooking, this stir fry can be stored and reheated, making your meal prep easier and more efficient.

Ingredients Breakdown

Let’s look at the ingredients you’ll need to make this delicious vegetable stir fry:


Digital Kitchen Scale

★ Recommended Kitchen Tool

Digital Kitchen Scale

Make this recipe even easier with a quality Digital Kitchen Scale — a must-have kitchen staple!


🛒 See Deals on Amazon →

As an Amazon Associate, we earn from qualifying purchases.
  • 1.5 cups short grain rice: Use either brown or white rice based on your preference for fiber and nutrients.
  • 1 tablespoon toasted sesame oil: This adds a rich, nutty flavor to the dish.
  • 4 cups mixed veggies: A colorful mix of bell peppers, broccoli, and carrots works wonderfully, but feel free to get creative!
  • 1/4 cup reduced-sodium soy sauce: This will be your flavor base, keeping the sodium content lower.
  • 1/4 cup maple syrup: Adds a hint of sweetness that balances the saltiness of the soy sauce.
  • 1 garlic clove, peeled and grated: Fresh garlic gives depth and flavor to the sauce.
  • 1 inch ginger, grated: Ginger adds a lovely warmth and complexity.
  • 1 recipe Sesame Tofu: You can easily make this at home or use store-bought for convenience.
  • Optional toppings: Add peanuts, lime juice, and/or hot sauce for an extra kick!

Step-by-Step Instructions

Close-up of a colorful vegetable stir fry with tofu on rice.

Follow these simple steps to create your vegetable stir fry:

  1. Prepare the rice according to package directions.
  2. Meanwhile, warm the sesame oil in a nonstick or cast iron skillet over medium heat. Add the mixed veggies and stir to coat them in the oil.
  3. Cover and cook for 8-10 minutes, or until the veggies are soft when poked with a fork, yet still tender.
  4. Add the prepared Sesame Tofu to the skillet.
  5. In a small bowl, stir together the soy sauce, maple syrup, ginger, and garlic. Pour this mixture into the skillet with the veggies and tofu.
  6. Stir well to combine and serve warm over rice, garnished with peanuts, lime juice, and/or hot sauce if desired.

Expert Tips for a Perfect Stir Fry

Here are some pro tips to help you elevate your stir fry game:

  • Use High Heat: Cooking on high heat helps the veggies retain their crunch and color.
  • Prep Ahead: Chop your veggies and marinate your tofu in advance to save time during the cooking process.
  • Don’t Overcrowd the Pan: Cook in batches if necessary to ensure even cooking and browning.
  • Experiment with Sauces: Try teriyaki sauce or a homemade stir fry sauce for different flavor profiles.
  • Season to Taste: Don’t hesitate to adjust the soy sauce or add spices according to your personal preference.
  • Add Crunch: Toss in nuts or seeds right before serving for added texture.
  • Use Fresh Ingredients: Fresh veggies will always give you the best flavor and nutrition.
  • Don’t Forget the Garnishes: A sprinkle of sesame seeds or a squeeze of lime can make all the difference!

Common Mistakes to Avoid

Here are some common pitfalls and how to avoid them:

  • Overcooking Veggies: Aim for a tender-crisp texture by keeping an eye on cooking time.
  • Skipping the Marinade: Marinating your tofu enhances its flavor significantly.
  • Using Too Much Sauce: Less is often more; start with half of the sauce and adjust as necessary.
  • Ignoring Seasoning: Don’t forget to taste and season your dish before serving!

Variations to Try

Don’t hesitate to mix things up! Here are some variations you can try:

  • Protein Swap: Substitute tofu with chicken, shrimp, or tempeh for different protein sources.
  • Vegetable Medley: Experiment with seasonal veggies like zucchini, snap peas, or bok choy.
  • Spicy Kick: Add sliced jalapeños or a dash of chili flakes for some heat.
  • Different Sauces: Swap the soy sauce for coconut aminos or a spicy peanut sauce for a unique twist.

Storage and Make-Ahead Instructions

This stir fry is excellent for meal prep! Here’s how to store it:

  • Refrigeration: Store in an airtight container in the fridge for up to 4 days.
  • Freezing: You can freeze the stir fry for up to 3 months. Just be aware that the texture may change slightly upon reheating.
  • Reheating: Warm in a skillet over medium heat or in the microwave until heated through.

Frequently Asked Questions

Here are some common queries about this vegetable stir fry:

  • Can I make this dish vegan? Yes! This recipe is already vegan-friendly as it uses tofu and plant-based ingredients.
  • What’s the best type of tofu to use? Extra-firm tofu works best for stir-fries as it holds its shape and texture.
  • Can I use frozen vegetables? Absolutely! Just be sure to thaw and drain them well before cooking.
  • How can I make this dish gluten-free? Use tamari or coconut aminos instead of soy sauce.
  • What can I serve with this stir fry? It pairs well with rice, quinoa, or noodles.
  • How can I increase the spice level? Add chili oil or fresh chilies to the stir fry while cooking.
  • Can I add fruits? Pineapple or mango can add a sweet twist to the dish!
  • How can I ensure my veggies are crispy? Make sure to avoid overcrowding the pan and cook on high heat.

Nutrition Tips and Dietary Adaptations

This recipe is not only satisfying but also nutritionally balanced. Here are some tips:

  • Protein Boost: Consider adding edamame or chickpeas for an additional protein source.
  • Fiber Rich: Opt for brown rice to increase fiber content, which aids digestion.
  • Low Carb Option: Serve over cauliflower rice or zucchini noodles if you’re watching carbs.
  • Allergy-Friendly: Substitute soy sauce with coconut aminos for those with soy allergies.

Equipment Recommendations

To make your cooking experience seamless, here’s some recommended equipment:

  • Nonstick Skillet: Ideal for stir-frying without sticking.
  • Rice Cooker: Simplifies cooking rice to perfection.
  • Grater: For quick and easy garlic and ginger preparation.
  • Spatula: Essential for tossing ingredients evenly.

Serving Suggestions

Finally, here are some ideas on how to serve your stir fry:

  • Garnish with Green Onions: Freshly chopped green onions add a pop of color and flavor.
  • Serve with Lime Wedges: A squeeze of lime brightens up the entire dish.
  • Pair with a Side Salad: A simple side salad can complement the richness of the stir fry.

In conclusion, this **easy vegetable stir fry with tofu** is not just a meal; it’s a way to nourish your body while enjoying vibrant flavors. Whether you’re a meal prep pro or a cooking novice, this recipe will guide you toward creating something delicious and satisfying. So roll up your sleeves, gather your ingredients, and get ready to enjoy a dish that fuels your workouts and delights your taste buds!

Easy Vegetable Stir Fry (with Rice and Tofu)

Prep Time 10 minutes
Cook Time 15 minutes
Total Time 25 minutes
Servings 4 servings
Calories 450
A quick and flavorful stir fry featuring fresh vegetables, tofu, and a sweet-savory sauce served over rice.

Ingredients

Grains

  • 1.5 cups short grain rice (brown or white)

Sauces and oils

  • 1 tablespoon toasted sesame oil

Vegetables

  • 4 cups mixed veggies
  • 1/4 cup reduced-sodium soy sauce
  • 1/4 cup maple syrup
  • 1 clove garlic (peeled and grated)
  • 1 inch ginger (grated)

Protein

  • 1 recipe Sesame Tofu

Optional toppings

  • peanuts, lime juice, and/or hot sauce (optional)

Instructions 

  • Cook rice according to package instructions.
  • Heat oil in a skillet over medium heat. Add vegetables and stir to coat.
  • Cover and cook for 8-10 minutes until tender.
  • Add Sesame Tofu to the skillet.
  • Mix soy sauce, maple syrup, ginger, and garlic; pour over veggies and tofu. Serve over rice with optional toppings.

Notes

Feel free to customize with your favorite vegetables or toppings.
Calories: 450kcal
Cost: $12
Course: Main Course
Cuisine: Asian
Keyword: Stir Fry, Tofu, vegetables

Unlocking Protein Power: The Ultimate Sweet Potato Tuna Casserole

Are you tired of bland meals that make hitting your protein goals feel like a chore? Look no further! This Sweet Potato Tuna Casserole is a game-changer that combines nutrition and flavor in one hearty dish. With every bite, you’ll experience the comfort of sweet potatoes and the protein-packed goodness of tuna. In this article, we’ll dive deep into the recipe, explore its benefits, and equip you with everything you need to make this dish a staple in your kitchen.

Why You’ll Love This Recipe

This casserole isn’t just another recipe; it’s a solution to common mealtime dilemmas. Here are five reasons to fall in love with it:

  • High Protein Content: With tuna as a primary ingredient, this dish is loaded with protein, perfect for muscle repair and growth.
  • Comfort Food Redefined: The sweet potatoes provide a creamy base that feels indulgent, satisfying your cravings without the guilt.
  • Meal Prep Champion: Easily scale the recipe for weekly meal prep, ensuring you have nutritious meals ready to go.
  • Versatile and Flexible: Enjoy it warm, cold, or as a salad; it adapts to your preference and the season.
  • Quick and Easy: In under an hour, you can whip up this delicious casserole, making it perfect for busy days.

Ingredient Breakdown

Understanding your ingredients is key to successful cooking. Here’s what you’ll need and some great substitutions:


Stainless Lemon Squeezer

★ Recommended Kitchen Tool

Stainless Lemon Squeezer

Make this recipe even easier with a quality Stainless Lemon Squeezer — a must-have kitchen staple!


🛒 Shop This Tool →

As an Amazon Associate, we earn from qualifying purchases.
  • Sweet Potatoes (1 pound): These provide a nutritious base. Substitute with butternut squash for a different flavor profile.
  • Tuna (1 can, 5 ounces / 142 grams): Use canned salmon or chickpeas for a vegetarian option.
  • Mayonnaise (½ cup): Greek yogurt can be a lighter alternative for added protein.
  • Lemon Juice (2 tablespoons): Fresh lemon juice brightens the flavor; bottled works in a pinch.
  • Chopped Onion (¼ cup): Opt for green onions for a milder taste.
  • Chopped Celery (¼ cup): Adds crunch; you can use bell peppers instead.
  • Sweet Pickle Relish (¼ cup): For a tangy twist, substitute with dill pickle relish.
  • Salt and Pepper: Essential for seasoning, adjust to taste.

Pro Tips for Success

Close-up view of a baked Sweet Potato Tuna Casserole with a golden crust.

Enhance your casserole-making skills with these expert insights:

  • Prep Ahead: Peel and cube the sweet potatoes a day in advance to save time.
  • Flavor Boost: Roast the sweet potatoes instead of boiling for a deeper, richer flavor.
  • Texture Control: Don’t over-mash the sweet potatoes; leave a few chunks for a heartier texture.
  • Season Gradually: Add salt and pepper in increments, tasting as you go to avoid over-seasoning.
  • Chill for Flavor: Let the casserole sit in the fridge for 30 minutes before serving; it enhances the flavors.
  • Experiment with Spices: Try adding garlic powder, paprika, or cayenne for an extra kick.
  • Even Mixing: Use a folding technique when mixing ingredients to keep the texture light and fluffy.
  • Garnish Wisely: Top with fresh herbs like parsley or chives just before serving for a pop of color and flavor.

Common Mistakes and Troubleshooting

Even the best cooks can make errors. Here’s how to avoid some common pitfalls:

  • Overcooking Sweet Potatoes: Cook until fork-tender; overcooking can lead to a mushy casserole.
  • Too Much Liquid: Ensure tuna is well-drained to maintain the right casserole consistency.
  • Flavor Imbalance: If it tastes bland, try adding more seasoning or a splash of hot sauce for extra depth.
  • Texture Issues: If it’s too dry, consider adding a bit more mayonnaise or Greek yogurt.

Variations to Try

Make this casserole your own with these tasty variations:

  • Mexican Twist: Add black beans, corn, and taco seasoning for a southwest flavor.
  • Cheesy Delight: Stir in a cup of shredded cheese before baking for a creamy, cheesy finish.
  • Vegetable Medley: Mix in spinach, kale, or any seasonal veggies for added nutrition.
  • Curry Inspired: Add curry powder and peas for an exotic flavor profile.

Storage and Make-Ahead Instructions

This casserole is perfect for meal prep! Here’s how to store it:

  • Refrigeration: Store leftovers in an airtight container in the fridge for up to 3 days.
  • Freezing: Freeze in portions for up to 2 months. Thaw overnight in the fridge before reheating.
  • Reheating: Warm in the microwave or reheat in the oven at 350°F (175°C) until heated through.

Comprehensive FAQ

Here are some frequently asked questions to help you navigate your casserole-making experience:

  • Can I use frozen sweet potatoes? Yes, but ensure they are thawed and drained to avoid excess moisture.
  • Is this recipe gluten-free? Yes, as long as your mayonnaise is gluten-free, this recipe is safe.
  • Can I make this dish vegan? Substitute tuna with chickpeas, use vegan mayo, and skip the sweet pickle relish.
  • What side dishes pair well? Serve with a simple green salad or steamed vegetables for a complete meal.
  • How long does it take to prepare? Total time is about 45-60 minutes, including prep and cooking.
  • Can I add more protein? Absolutely! Consider adding cooked chicken or beans for an additional protein boost.
  • What if I don’t have mayonnaise? Greek yogurt or avocado can serve as delicious alternatives.
  • Can I make this casserole in advance? Yes! It can be prepared a day ahead and baked just before serving.

Nutrition Tips and Dietary Adaptations

Whether you’re looking to bulk up or maintain a healthy diet, this casserole can adapt to your needs:

  • Protein Boost: Increase the tuna quantity to enhance protein per serving.
  • Low-Carb Option: Replace sweet potatoes with cauliflower for a lower carb version.
  • Fiber Enhancement: Incorporate more vegetables like spinach or carrots to increase fiber content.
  • Heart-Healthy Fats: Use olive oil instead of mayonnaise for a healthier fat option.

Equipment Recommendations

Having the right tools makes cooking easier. Here are my top recommendations:

  • Potato Masher: Essential for creating that creamy sweet potato base.
  • Mixing Bowls: A set of various sizes will help with ingredient prep.
  • Measuring Cups and Spoons: Precision is key, especially with seasonings.
  • Oven-Safe Dish: Use a 2-quart casserole dish for even cooking.

Serving Suggestions

Serving this casserole can be as creative as the recipe itself:

  • Garnished with Fresh Herbs: Sprinkle chopped parsley or cilantro on top for added freshness.
  • Pair with a Salad: A simple green salad drizzled with vinaigrette balances the meal.
  • Serve with Bread: A slice of whole-grain bread can complement the dish nicely.
  • Chilled Version: Serve cold as a refreshing salad for summer days.

In conclusion, the Sweet Potato Tuna Casserole is not just a recipe; it’s a delicious solution for anyone looking to hit their protein goals without sacrificing flavor. With the tips, variations, and insights provided, you’re well on your way to mastering this dish. So roll up your sleeves and get cooking—your taste buds will thank you!

Sweet Potato Tuna Casserole Recipe

Prep Time 15 minutes
Cook Time 15 minutes
Total Time 30 minutes
Servings 4 servings
Calories 350
A delicious and easy-to-make casserole combining sweet potatoes and tuna for a nutritious meal.

Ingredients

Main ingredients

  • 1 pound sweet potatoes
  • 1 can tuna (5 ounces / 142 grams)
  • ½ cup mayonnaise
  • 2 tablespoons lemon juice
  • ¼ cup chopped onion
  • ¼ cup chopped celery
  • ¼ cup sweet pickle relish
  • to taste Salt
  • to taste Pepper

Instructions 

  • Peel and cube the sweet potatoes, then boil in salted water for 12-15 minutes until tender.
  • Drain and mash the sweet potatoes until smooth.
  • Drain the tuna and mix it into the mashed sweet potatoes with mayonnaise and lemon juice.
  • Stir in chopped onion, celery, and sweet pickle relish. Season with salt and pepper.
  • Gently fold all ingredients together and serve immediately or refrigerate for 30 minutes.

Notes

For extra flavor, add a dash of paprika or chopped herbs before serving.
Calories: 350kcal
Cost: $15
Course: Main Course
Cuisine: American
Keyword: Sweet Potato, Tuna

Unlock the Flavor: Quick and Flavorful Spinach Sauté

When it comes to meal prep that doesn’t compromise on taste or nutrition, sautéed spinach is a game changer. In under ten minutes, you can whip up this vibrant side dish packed with nutrients, perfect for any meal. Let’s dive into why this simple yet impactful recipe deserves a spot on your dinner table.

Why You’ll Love This Recipe

This quick spinach recipe is not just about ease; it’s about elevating your meals while hitting your protein goals. Here are five compelling reasons to give this dish a try:

  • Quick Preparation: Ready in just a few minutes, this sautéed spinach recipe is ideal for busy weeknights or meal prep.
  • Flavor Packed: Infused with garlic and a splash of lemon, each bite is bursting with flavor, making it a delightful addition to any plate.
  • Nutrient Dense: Spinach is rich in vitamins A, C, and K, along with iron and antioxidants, making this dish a powerhouse of nutrition.
  • Versatile Side Dish: Whether paired with grilled chicken, fish, or as part of a vegetarian spread, sautéed spinach complements a variety of meals.
  • Customizable: Easily tweak the recipe with additional ingredients or seasonings to suit your taste preferences, making it your own.

Ingredient Breakdown

For the perfect sautéed spinach, you’ll need:


Professional Chef Knife Set

★ Recommended Kitchen Tool

Professional Chef Knife Set

Make this recipe even easier with a quality Professional Chef Knife Set — a must-have kitchen staple!


🛒 Shop This Tool →

As an Amazon Associate, we earn from qualifying purchases.
  • 1 tablespoon olive oil: A high-quality oil enhances flavor and helps tenderize the spinach. Extra virgin olive oil is recommended.
  • 2 garlic cloves, thinly sliced: Fresh garlic adds a rich aroma and depth to the dish. If you prefer a milder taste, reduce the quantity or use garlic powder.
  • 10 ounces fresh baby spinach: Always opt for fresh spinach for the best texture and taste. If you’re in a pinch, frozen spinach can work, but it requires proper thawing and draining.
  • ½ teaspoon kosher salt: Essential for enhancing the natural flavors of the spinach.
  • ½ teaspoon crushed red pepper flakes: Adds a kick of heat. Adjust the amount based on your spice tolerance.
  • Juice of ½ lemon (about 1 tablespoon): Fresh lemon juice brightens the dish and balances the flavors.

How to Cook Your Spinach

Close-up image of sautéed spinach with garlic and spices in a skillet.

Follow these simple steps for a quick spinach sauté:

  1. Heat a skillet or Dutch oven over medium heat and add a tablespoon of olive oil.
  2. Once the oil is heated, add the sliced garlic and sauté for about 30 seconds until fragrant.
  3. Add the spinach and sauté for 2-3 minutes, stirring frequently until wilted.
  4. Season with salt and crushed red pepper flakes to taste.
  5. Finish by squeezing fresh lemon juice over the spinach for an added layer of flavor.

Tips for the Best Sautéed Spinach

To ensure your sautéed spinach turns out perfectly every time, keep these tips in mind:

  • Fresh Spinach: Always use fresh baby spinach for the best results. It wilts beautifully and adds a vibrant color to your plate.
  • Don’t Overcrowd the Pan: If you’re preparing a large batch, sauté in batches to avoid steaming, which can lead to a soggy texture.
  • Use a Wide Skillet: A wide, heavy-bottomed skillet allows for even cooking and proper sautéing.
  • Limit Cooking Time: Sauté just until the spinach is wilted and bright green for the best texture and nutrition retention.
  • Experiment with Seasonings: Feel free to add spices like nutmeg or herbs like thyme for a flavor twist.
  • Try Different Fats: While olive oil is classic, consider using coconut oil or butter for different flavor profiles.
  • Add Protein: For a more substantial dish, incorporate cooked chicken, shrimp, or beans.
  • Keep it Crisp: A quick sauté ensures the spinach retains its vibrant color and crunch, avoiding overcooking.

Common Mistakes and Troubleshooting

Even a simple sauté can go wrong. Here are some common pitfalls and how to avoid them:

  • Overcooking: If your spinach turns mushy, reduce cooking time. It should wilt but retain some texture.
  • Too Much Moisture: If your spinach releases excess water, make sure to dry it thoroughly before cooking.
  • Burnt Garlic: Keep an eye on the garlic; it can burn quickly. Sauté it just until fragrant.
  • Lack of Flavor: If the dish tastes bland, adjust seasoning. A pinch of salt or a squeeze of lemon can elevate it significantly.

Variations to Try

Once you master the basic sauté, try these delicious variations:

  • Spinach and Feta: Stir in crumbled feta cheese for a Mediterranean twist.
  • Garlic Parmesan Spinach: Finish with grated Parmesan cheese for a rich, cheesy flavor.
  • Asian-Inspired Spinach: Add soy sauce and sesame oil, and finish with sesame seeds for an Asian flair.
  • Spinach with Nuts: Toss in toasted pine nuts or walnuts for added crunch and healthy fats.

Storage and Make-Ahead Instructions

If you want to prepare your spinach sauté in advance, here’s how:

  • Refrigerating: Store cooked spinach in an airtight container in the fridge for up to 3 days.
  • Reheating: Sauté in a pan over low heat until warmed through, adding a splash of water or broth if necessary to prevent drying out.
  • Freezing: While not ideal, you can freeze cooked spinach for up to 3 months. Thaw and sauté again to reheat.

FAQ

Here are some frequently asked questions about sautéed spinach:

  • Can I use frozen spinach? Yes, but make sure to thaw and drain it well before sautéing to avoid excess water.
  • How do I know when spinach is cooked? It should be bright green and wilted, typically taking just 2-3 minutes over medium heat.
  • Can I add other vegetables? Absolutely! Bell peppers, onions, or mushrooms can be sautéed alongside spinach for added flavor and nutrition.
  • What other spices can I use? Feel free to experiment with spices such as cayenne, cumin, or black pepper to suit your taste.
  • Is sautéed spinach healthy? Yes, spinach is low in calories and high in nutrients, making it an excellent addition to any diet.
  • Can I make this vegan? The recipe is already vegan-friendly! Just ensure any added ingredients are also plant-based.
  • How can I make this dish more filling? Serve with a protein source like grilled chicken or chickpeas for a balanced meal.
  • What can I serve with sautéed spinach? It pairs well with a variety of proteins, grains, or as part of a larger vegetable medley.

Nutritional Tips and Dietary Adaptations

As you work towards your protein goals, consider these nutritional tips:

  • Pair with Protein: Combine sautéed spinach with a protein source to create a balanced meal.
  • Vegan Options: This dish is naturally vegan, making it a great side for plant-based meals.
  • Gluten-Free: Sautéed spinach is gluten-free, making it suitable for those with gluten sensitivities.
  • Low-Carb Friendly: This dish is low in carbs, making it an excellent choice for ketogenic or low-carb diets.

Equipment Recommendations

To make the most out of your sautéed spinach, consider the following kitchen tools:

  • Heavy-Bottomed Skillet: A good quality skillet ensures even heat distribution.
  • Wooden Spoon: Ideal for stirring without scratching your cookware.
  • Salad Spinner: Perfect for rinsing and drying fresh spinach before cooking.
  • Chef’s Knife: A sharp knife is essential for slicing garlic and prepping your ingredients.

Serving Suggestions

To elevate your sautéed spinach dish, try these serving ideas:

  • As a Side Dish: Serve alongside grilled chicken, steak, or fish for a nutritious meal.
  • In a Wrap: Use as a filling in wraps or sandwiches for added flavor and nutrition.
  • Over Pasta: Toss with pasta and a protein of choice for a quick and satisfying main course.
  • On Toast: Top whole-grain toast or bruschetta for a delicious breakfast option.

In conclusion, sautéed spinach is not just a side dish; it’s an essential component of a healthy, balanced diet. With its quick preparation and endless customization options, it’s time to make this recipe a staple in your kitchen. With the right ingredients and techniques, you’ll be able to whip up a nutrient-dense dish that’s as flavorful as it is functional. So grab your skillet and get cooking — your body and taste buds will thank you!

Easy Stovetop Sautéed Spinach

Prep Time 5 minutes
Cook Time 5 minutes
Total Time 10 minutes
Servings 2 servings
Calories 80
A quick and flavorful way to enjoy fresh spinach with garlic and lemon.

Ingredients

Main

  • 1 tablespoon olive oil
  • 2 garlic cloves garlic, thinly sliced
  • 10 ounces fresh baby spinach
  • ½ teaspoon kosher salt
  • ½ teaspoon crushed red pepper flakes
  • 1 tablespoon lemon juice (about 1 Tbs)

Instructions 

  • Heat a skillet over medium heat and add olive oil.
  • Sauté garlic for 30 seconds.
  • Add spinach and cook for 2-3 minutes, stirring.
  • Season with salt and red pepper flakes.
  • Squeeze lemon juice over spinach before serving.

Notes

Use fresh spinach for best flavor and texture.
Calories: 80kcal
Cost: $5
Course: Side Dish
Cuisine: American
Keyword: Spinach

Unlock the Secrets of a High-Protein Chicken Stir Fry

Are you ready to elevate your meal prep game with a dish that’s not only delicious but also packed with protein? This chicken stir fry is the perfect solution for anyone looking to hit their protein goals without sacrificing flavor. Using fresh ingredients and a few simple steps, you can create a meal that’s both satisfying and nutritious. Let’s dive into the culinary world where high-protein meets vibrant flavors!

Why You’ll Love This Recipe

This chicken stir fry isn’t just another recipe; it’s a gateway to a healthier lifestyle. Here are five compelling reasons why this dish deserves a spot in your weekly meal rotation:

  • Quick and Easy: Ready in under 30 minutes, making it perfect for busy weeknights.
  • One Pan Wonder: Minimal cleanup means you can spend more time enjoying your meal and less time cleaning up.
  • High in Protein: Each serving is loaded with lean chicken and nutrient-rich vegetables, ensuring you meet your dietary needs.
  • Customizable: Easily adjust ingredients to fit your taste preferences or dietary restrictions.
  • Flavor Explosion: The combination of spices and fresh vegetables creates a delicious meal that’s anything but boring!

Ingredient Breakdown

Let’s take a closer look at the ingredients that make this high-protein chicken stir fry a standout dish.


Digital Meat Thermometer

★ Recommended Kitchen Tool

Digital Meat Thermometer

Make this recipe even easier with a quality Digital Meat Thermometer — a must-have kitchen staple!


🛒 Shop This Tool →

As an Amazon Associate, we earn from qualifying purchases.
  • Boneless, skinless chicken breast: A lean protein powerhouse, providing over 25g protein per 3-ounce serving.
  • Extra-virgin olive oil: Offers healthy fats and enhances the flavors of the dish. Substitute with avocado oil if needed.
  • Smoked paprika: Adds a rich, smoky flavor that elevates the overall taste of the stir fry.
  • Dried oregano: This herb complements the other ingredients and provides additional health benefits.
  • Garlic powder: A flavor enhancer that also offers health benefits, such as boosting the immune system.
  • Sea salt and black pepper: Essential for seasoning, but adjust to taste based on dietary needs.
  • Red bell pepper: Packed with vitamins and adds a sweet crunch to the dish.
  • Yellow onion: Introduces a savory flavor and depth to the stir fry.
  • Cherry tomatoes: Provides a burst of sweetness and juiciness, balancing the savory flavors.
  • Fresh spinach: A nutrient-dense leafy green that wilts down, adding volume and nutrients.
  • Fresh lemon juice: Optional, but recommended for a zesty finish that brightens the dish.

Step-by-Step Cooking Instructions

Close-up shot of a colorful chicken stir fry with spinach and cherry tomatoes.

Follow these simple steps to whip up your chicken stir fry quickly:

  • Heat the oil: In a large skillet over medium-high heat, add the olive oil and let it heat until shimmering.
  • Add the chicken: Season with smoked paprika, oregano, sea salt, and black pepper. Cook for 5–6 minutes until browned.
  • Incorporate vegetables: Stir in the sliced bell pepper and onion, cooking for another 3–4 minutes until slightly softened.
  • Blister the tomatoes: Add halved cherry tomatoes and cook until they blister and release their juices.
  • Fold in the spinach: Add the fresh spinach and cook just until wilted (about 1–2 minutes).
  • Finish with lemon: Remove from heat and drizzle with fresh lemon juice, tossing everything together.

Pro Tips for Perfecting Your Stir Fry

Here are some expert insights to ensure your dish turns out perfectly every time:

  • Prep in advance: Chop all vegetables and chicken beforehand to streamline the cooking process.
  • Use a high heat: Cooking on high heat helps to sear the chicken and vegetables quickly, retaining their crunch.
  • Don’t overcrowd the pan: Cook in batches if necessary to ensure even cooking and browning.
  • Experiment with sauces: Try adding low-sodium soy sauce or teriyaki sauce for an extra layer of flavor.
  • Check doneness: Ensure the chicken reaches an internal temperature of 165°F (74°C) for safe consumption.
  • Adjust flavors: Taste as you go and adjust seasoning as needed to match your preference.
  • Include more veggies: Feel free to add any other vegetables you enjoy, such as broccoli, snap peas, or carrots.
  • Use leftovers creatively: Repurpose any leftovers into wraps or salads for a quick lunch option.

Common Mistakes and Troubleshooting

Even the best chefs make mistakes. Here are some common pitfalls and how to avoid them:

  • Overcooking the chicken: Monitor your cooking time closely to prevent dry chicken. Aim for a golden brown color.
  • Not enough seasoning: Don’t skip the seasoning step; it’s crucial for flavor. Taste and adjust as needed.
  • Using cold ingredients: Ensure your chicken and vegetables are at room temperature before cooking to avoid steaming.
  • Skipping the marination: If time allows, marinate the chicken for at least 30 minutes for deeper flavor.

Variations to Spice Things Up

Want to mix it up? Here are four variations to consider:

  • Asian-inspired: Add soy sauce, ginger, and sesame oil for a unique twist.
  • Mediterranean flair: Incorporate olives, feta cheese, and sun-dried tomatoes for a fresh take.
  • Spicy kick: Add red pepper flakes or Sriracha for a heat element that amps up the flavor.
  • Vegetarian option: Replace chicken with tofu or tempeh for a plant-based alternative that’s still high in protein.

Storage and Make-Ahead Instructions

Meal prepping is essential for a busy lifestyle. Here’s how to store your stir fry:

  • Refrigerate: Store in an airtight container in the fridge for up to 3 days.
  • Freeze: For longer storage, freeze in a freezer-safe container for up to 2 months. Thaw in the refrigerator before reheating.
  • Reheat: Gently reheat in the microwave or on the stovetop until warmed through, adding a splash of water to prevent drying out.

Frequently Asked Questions

Here are some common questions about making this chicken stir fry:

  • Can I use frozen vegetables? Yes, frozen vegetables can be used, but adjust cooking time accordingly.
  • What can I substitute for chicken? Tofu, shrimp, or beef can be excellent alternatives.
  • How can I make this dish gluten-free? Use tamari instead of soy sauce and ensure all ingredients are gluten-free.
  • Can I add nuts? Absolutely! Cashews or peanuts add a great crunch and additional protein.
  • Is this dish suitable for meal prep? Yes, it holds up well in the fridge and reheats nicely.
  • How do I make it spicier? Add chili paste or fresh chili peppers to the stir fry while cooking.
  • Can I use different herbs? Yes, feel free to experiment with basil or cilantro for different flavors.
  • Is this recipe kid-friendly? Definitely! Adjust the seasoning to your family’s taste preferences.

Nutritional Tips and Dietary Adaptations

To make this dish fit various dietary needs:

  • Low-carb: Skip the starchy vegetables and focus on non-starchy options like spinach and bell peppers.
  • High-fiber: Add beans or legumes to boost fiber content while maintaining protein levels.
  • For weight loss: Control portion sizes and pair with a side salad for a balanced meal.

Essential Equipment for Success

Here’s what you’ll need to make this dish:

  • Large skillet or wok: Ideal for stir-frying ingredients evenly.
  • Cutting board and sharp knife: Essential for prepping your vegetables and chicken.
  • Measuring spoons: For accurate seasoning and marinating.

Serving Suggestions

This high-protein chicken stir fry can be served in various ways:

  • Over rice: Serve atop brown rice or quinoa for a complete meal.
  • In wraps: Use lettuce wraps for a low-carb option.
  • Piled on salads: Top a fresh salad with the stir fry for a nutritious lunch.

Conclusion

With this effortless chicken stir fry recipe, hitting your protein goals has never been easier or more delicious. By incorporating fresh ingredients and following these straightforward steps, you’ll create a meal that’s not only nutritious but also full of flavor. So, gather your ingredients, fire up the skillet, and enjoy a dish that fuels your body and satisfies your taste buds!

Chicken Stir Fry with Spinach & Cherry Tomatoes

Prep Time 10 minutes
Cook Time 15 minutes
Total Time 25 minutes
Servings 4 servings
Calories 350
A quick and healthy chicken stir fry packed with fresh vegetables and vibrant flavors.

Ingredients

Protein

  • 1.5 lbs Boneless, skinless chicken breast, cut into bite-size pieces

Oil

  • 2 tbsp Extra-virgin olive oil (Use avocado oil if needed)

Spices & Seasonings

  • 1 tsp Smoked paprika
  • 1 tsp Dried oregano
  • 1.5 tsp Garlic powder (or 2 fresh cloves, minced)
  • 1.5 tsp Sea salt (adjust to taste)
  • 1/4 tsp Black pepper

Vegetables

  • 1 Red bell pepper, sliced
  • 1 Small yellow onion, sliced
  • 1.5 cups Cherry tomatoes, halved
  • 3 cups Fresh spinach
  • 1 tbsp Fresh lemon juice (optional but recommended)

Instructions 

  • Heat olive oil in a large skillet over medium-high heat.
  • Add chicken, season with spices, and cook until browned, about 5–6 minutes.
  • Stir in bell pepper and onion, cook for 3–4 minutes.
  • Add cherry tomatoes and cook until blistered.
  • Fold in spinach, cook until wilted, then add lemon juice and toss.

Notes

Feel free to customize with your favorite vegetables or adjust seasonings to taste.
Calories: 350kcal
Cost: $15
Course: Main Course
Cuisine: American
Keyword: Chicken, Stir Fry, vegetables