
Discover the Perfect Pear Crisp: Your New Go-To Dessert
Indulging in a warm, comforting dessert doesn’t have to derail your fitness goals. This pear crisp recipe combines juicy, spiced pears with a crunchy topping, creating a delightful treat that fits seamlessly into your healthy lifestyle. Whether you’re recovering from a workout or simply treating yourself, this dish delivers on flavor without sacrificing your macros.
Why You’ll Love This Recipe
- High Protein Option: With whole oats and minimal sugar, this pear crisp helps you meet your protein goals while providing essential nutrients.
- Flavorful and Satisfying: The combination of spiced pears and a crunchy topping ensures each bite is bursting with flavor, making it a satisfying dessert.
- Easy to Prepare: With simple ingredients and straightforward steps, this recipe is perfect for busy weeknights or last-minute gatherings.
- Versatile Serving Options: Whether enjoyed warm on its own or topped with a scoop of vanilla bean ice cream, this crisp can be customized to your liking.
- Great for Meal Prep: Make it ahead of time and store it in your fridge for a quick and healthy dessert option throughout the week.
Ingredient Breakdown and Substitutions
This pear crisp recipe requires minimal ingredients, many of which you might already have at home. Let’s break it down:
- Pears (3 pounds, peeled and sliced): Any variety of pears works, but Bosc or Anjou are ideal for their sweetness and texture. You can also use a mix of apples and pears for added flavor.
- Light Brown Sugar (1/2 cup packed): Brown sugar adds moisture and a rich flavor. If you prefer a lower sugar option, try coconut sugar or a sugar alternative like stevia.
- Cornstarch (1 tablespoon): This helps thicken the pear mixture. If you don’t have cornstarch, tapioca starch works as a substitute.
- Ground Cinnamon (1 tablespoon): Essential for that warm, comforting flavor. Feel free to experiment with other spices like nutmeg or ginger.
- All-Purpose Flour (1 cup): For a gluten-free version, substitute with almond flour or a 1:1 gluten-free flour blend.
- Whole Old-Fashioned Oats (1 cup): Old-fashioned oats offer the best texture. Avoid quick oats as they can become mushy.
- Baking Powder (1 teaspoon): This adds a bit of lift to the topping.
- Salted Butter (1/2 cup, cubed): Butter enhances the flavor and texture. For a dairy-free option, use coconut oil or vegan butter.
Pro Tips for the Best Pear Crisp

- Choose Ripe Pears: Make sure your pears are ripe but not overly soft to ensure they hold their shape during baking.
- Mix Your Toppings: Consider adding chopped nuts or seeds to the topping for extra crunch and nutritional value.
- Don’t Overmix: When mixing the topping, keep it crumbly. Overmixing can lead to a dense texture.
- Cool Before Serving: Allow the crisp to cool slightly before serving to let the juices thicken.
- Experiment with Flavors: Add vanilla extract or citrus zest for an extra layer of flavor.
- Use Fresh Ingredients: Fresh spices and quality butter will enhance the overall taste of your crisp.
- Watch Your Bake Time: Keep an eye on the crisp as it bakes; you want it golden brown and bubbly, not burnt!
- Serve Warm: For the best experience, serve the pear crisp warm with a scoop of ice cream or yogurt.
Common Mistakes and Troubleshooting
- Too Watery Filling: If your filling is too watery, try adding a bit more cornstarch or flour.
- Burnt Topping: If the topping is browning too quickly, cover it lightly with aluminum foil.
- Underbaked Crisp: If the topping isn’t golden after the recommended time, check your oven temperature with an oven thermometer.
- Not Enough Flavor: Make sure to taste your filling before baking; adjust sweetness or spices as needed.
- Overbaking Pears: Avoid using overly ripe pears as they can become mushy when baked.
Variations to Try
Feeling adventurous? Here are some delicious variations to customize your pear crisp:

★ Recommended Kitchen Tool
Professional Chef Knife Set
Make this recipe even easier with a quality Professional Chef Knife Set — a must-have kitchen staple!
- Mixed Fruit Crisp: Combine pears with apples, peaches, or berries for a fruit medley.
- Nutty Topping: Incorporate chopped walnuts or pecans into the topping for added crunch.
- Spiced Crisp: Add chai spices or pumpkin spice mix to the filling for a seasonal twist.
- Chocolate Drizzle: Drizzle melted dark chocolate over the warm crisp for a decadent touch.
Storage and Make-Ahead Instructions
This pear crisp can be made ahead of time and stored properly for future enjoyment:
- Refrigerate: Cover the baked crisp with plastic wrap and store in the refrigerator for up to 4 days.
- Freeze: To freeze, wrap the cooled crisp tightly in plastic wrap and aluminum foil for up to 3 months. Thaw in the refrigerator before reheating.
- Reheat: To reheat, place in a preheated oven at 350°F for about 15-20 minutes or until warmed through.
Frequently Asked Questions
- Can I use canned pears? Yes, but be sure to drain them well and reduce the sugar in the recipe.
- Do I need to peel the pears? Peeling is recommended for a smoother texture, but you can leave the skins on for added fiber.
- Can I make this vegan? Yes, substitute the butter with coconut oil or vegan butter and use a plant-based sweetener.
- What’s the best way to serve pear crisp? Serve warm with a scoop of vanilla bean ice cream for a delightful contrast.
- How do I know when it’s done baking? The crisp should be bubbly and the topping golden brown when finished.
- Can I use different fruits? Absolutely! Experiment with any seasonal fruits you enjoy.
- Is this recipe gluten-free? You can easily make it gluten-free by using a gluten-free flour blend.
- How long does it take to prepare? Preparation takes about 15 minutes, with a baking time of 45-50 minutes.
Nutritional Tips and Dietary Adaptations
This pear crisp not only satisfies your sweet tooth but also aligns with your nutritional goals:
- Boost Protein: Add protein powder to the topping mix for an extra protein kick.
- Lower Sugar: Use a sugar substitute to keep the glycemic index lower.
- Increase Fiber: Mix in chia seeds or flaxseeds to the topping for added fiber and omega-3 fatty acids.
Recommended Equipment
To make this pear crisp, you’ll need:
- 9×13 Baking Dish: Perfect size for baking and serving.
- Mixing Bowls: Use one large and one medium bowl for mixing ingredients.
- Whisk: Great for combining dry ingredients and ensuring an even mixture.
- Oven Mitts: Essential for safe handling of hot dishes.
Serving Suggestions
Elevate your pear crisp experience with these serving tips:
- Top with Ice Cream: A scoop of vanilla bean ice cream pairs perfectly with warm crisp.
- Pair with Yogurt: Greek yogurt offers a protein-packed alternative to ice cream.
- Add Fresh Berries: Fresh berries can add a bright flavor contrast and extra nutrients.
Conclusion: Your New Favorite Dessert Awaits
This pear crisp is more than just a dessert; it’s a celebration of flavors that aligns with your health goals. With its ease of preparation and versatile serving options, it’s perfect for any occasion. Whether you’re enjoying it solo or sharing with friends, this warm, comforting dish will surely impress. So, gather your ingredients, preheat that oven, and get ready to enjoy a guilt-free treat that you can feel good about!
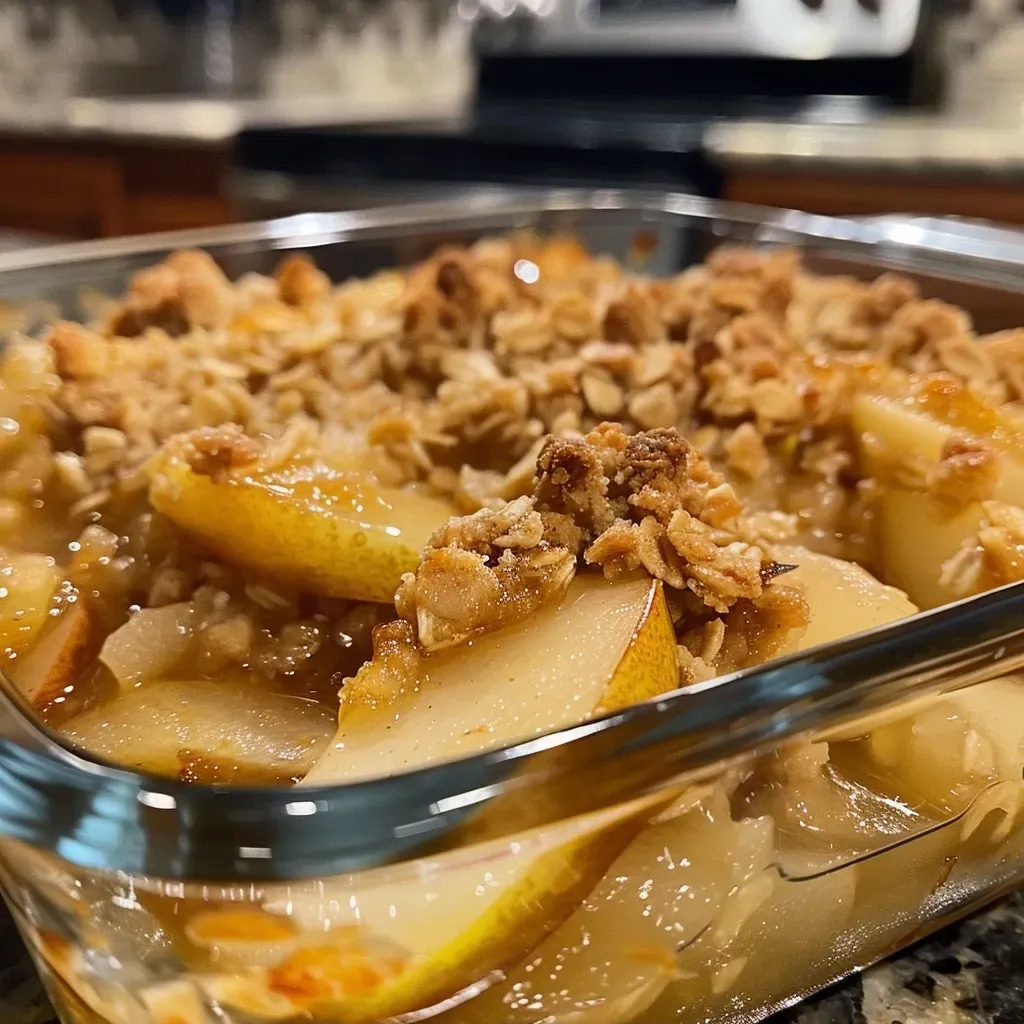
Pear Crisp
Ingredients
Fruits
- 3 pounds pears (peeled and sliced)
- 1/2 cup packed light brown sugar
- 1 tablespoon cornstarch
- 1 tablespoon ground cinnamon
- ¼ teaspoon ground nutmeg
- 1 cup all-purpose flour
- 1 cup whole old-fashioned oats (not quick oats)
- 1/2 cup packed light brown sugar
- 1 teaspoon baking powder
- 1/2 cup salted butter (cubed) (cubed)
Instructions
- Preheat oven to 350℉ and spray a 9x13 pan.
- Mix pears, brown sugar, cornstarch, cinnamon, and nutmeg; spread in pan.
- Combine flour, oats, brown sugar, and baking powder; cut in butter until pea-sized.
- Sprinkle topping over pears and bake 45-50 minutes until golden.
- Serve warm with vanilla ice cream.