Author

Ethan

Browsing

Elevate Your Meal Prep with Crispy Tofu Bowls

Are you ready to transform your meal prep game? This crispy tofu bowl recipe doesn’t just hit the mark on protein; it’s also packed with flavor and versatility. In just a few steps, you can create a nutrient-dense meal that fits perfectly into your macros without compromising on taste. If you’ve ever struggled to find a satisfying meal that supports your fitness goals, look no further. Here’s everything you need to know about making these delicious, protein-rich bowls.

Why You’ll Love This Recipe

This crispy tofu bowl recipe offers numerous benefits that make it a must-try:

  • High Protein Content: Each bowl is loaded with protein from the crispy tofu, making it an ideal choice for muscle recovery and growth.
  • Customizable Ingredients: With various options for grains and veggies, you can easily tailor each bowl to your dietary preferences.
  • Delicious Dressing: The carrot ginger dressing is not just flavorful; it also adds a touch of sweetness that pairs perfectly with the savory tofu.
  • Meal Prep Friendly: Prepare multiple servings in advance, saving you time and ensuring you have healthy options ready to go.
  • Plant-Based Goodness: This recipe is vegan-friendly, making it suitable for those following a plant-based diet.

Ingredient Breakdown

Let’s dive into what you’ll need to make these crispy tofu bowls:

  • Tofu: 14 ounces of extra-firm tofu is essential for that crispy texture. If you prefer a different protein, try baked tempeh or chickpeas.
  • Avocado Oil: Use 1½ teaspoons for a healthy fat source that helps crisp the tofu.
  • Tamari or Soy Sauce: 2 tablespoons adds umami flavor. For a gluten-free option, stick with tamari.
  • Sriracha: A half teaspoon gives a nice kick; adjust to your spice tolerance.
  • Cornstarch: 1 tablespoon is crucial for achieving that golden, crispy exterior.
  • Grains: Use 2 cups of cooked brown rice, quinoa, or even cauliflower rice for a low-carb option.
  • Broccoli: Air-fried or roasted, this veggie adds nutrients and color.
  • Avocado: One large avocado, sliced, contributes creaminess.
  • Carrot Ginger Dressing: Drizzle generously for flavor.
  • Garnishes: Add thinly sliced daikon radish, microgreens, sesame seeds, and red pepper flakes for a finishing touch.

Pro Tips for Perfect Tofu Bowls
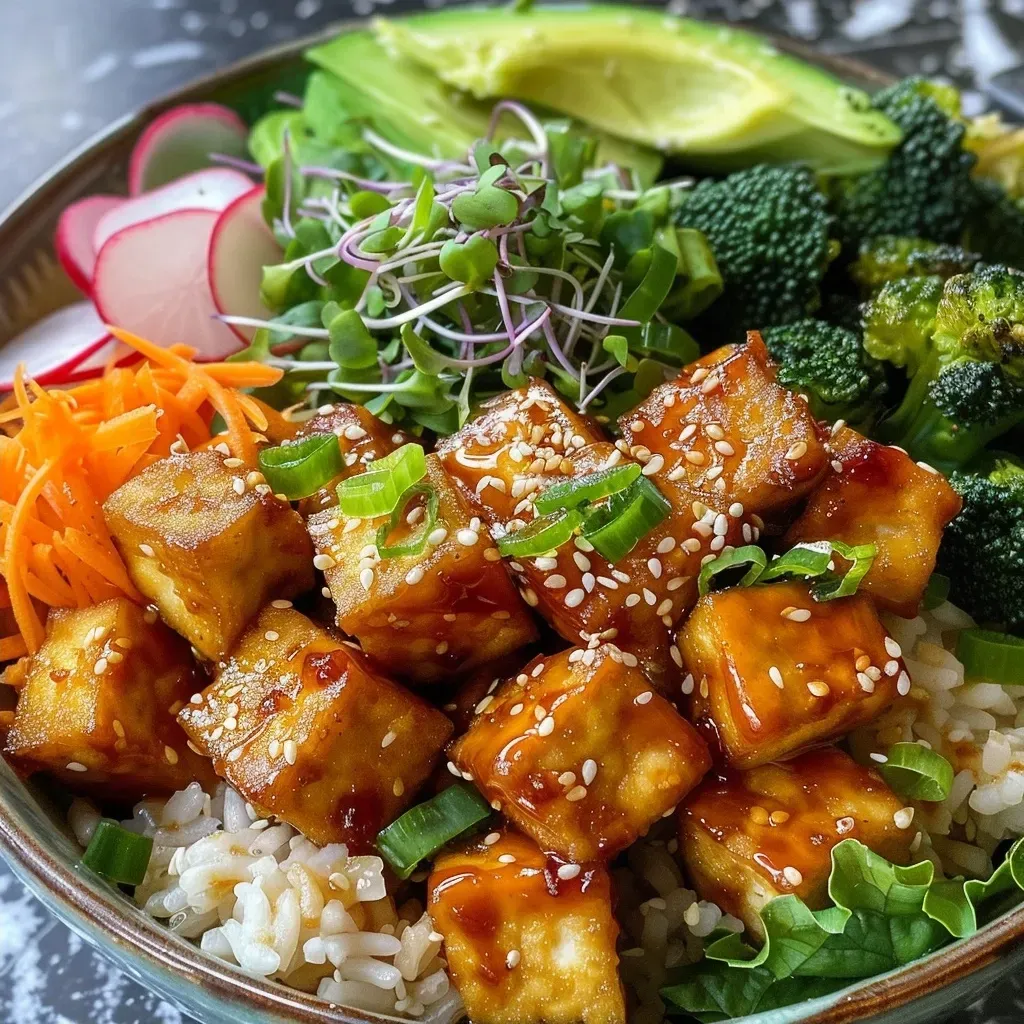
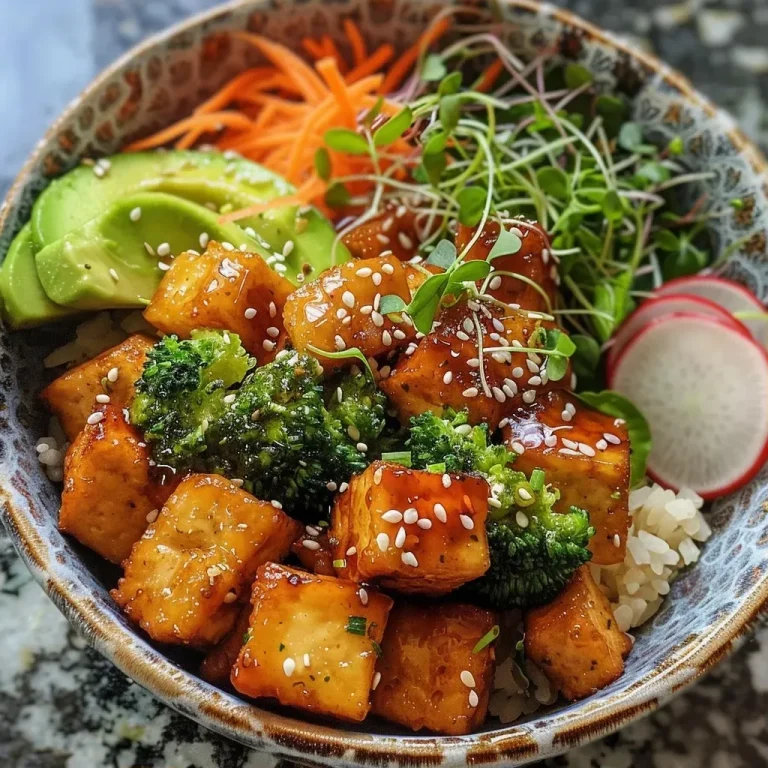
Side view of a delicious crispy tofu bowl with brown rice, broccoli, and carrot ginger dressing.

Here are some expert insights to ensure your crispy tofu bowls are a success:

  • Press Your Tofu: For the crispiest results, press your tofu for at least 30 minutes to remove excess moisture.
  • Cut Evenly: Cube the tofu into uniform pieces to ensure even cooking.
  • Don’t Overcrowd: When air frying, arrange the tofu in a single layer. This allows hot air to circulate and crisps it perfectly.
  • Experiment with Flavors: Try marinating the tofu in your favorite sauces for added flavor before cooking.
  • Adjust Cook Time: Every air fryer is different; keep an eye on your tofu to avoid burning.
  • Mix Up Grains: While brown rice is great, you can also try quinoa or farro for different textures.
  • Make it Colorful: Add a variety of vegetables like bell peppers, carrots, or spinach for a nutrient boost.
  • Save Leftovers: Store any leftover tofu and dressing separately to maintain crispness and freshness.

Common Mistakes and Troubleshooting

If you’re new to cooking tofu, here are some common pitfalls and how to avoid them:

  • Under-pressing: Not pressing tofu long enough can lead to soggy results. Aim for at least 30 minutes.
  • Skipping Cornstarch: Omitting cornstarch will prevent the tofu from achieving that crispy texture. Don’t skip this step!
  • Overcooking: Monitor the tofu closely while frying. Overcooked tofu can become tough and chewy.
  • Forgetting to season: Always season your ingredients. It enhances the overall flavor of your dish.

Variations to Try

Here are some delicious variations to keep things exciting:

  • Asian-Inspired Bowl: Use brown rice, edamame, bok choy, and a sesame dressing for an Asian twist.
  • Mexican Fiesta Bowl: Swap for black beans, corn, and top with avocado and salsa.
  • Mediterranean Bowl: Incorporate quinoa, roasted peppers, olives, and tzatziki sauce.
  • Breakfast Bowl: Add a soft-boiled egg on top for a protein-packed breakfast version.

Storage and Make-Ahead Instructions

This recipe is perfect for meal prep. Here’s how to store and reheat:

  • Refrigeration: Store assembled bowls in airtight containers in the fridge for up to 4 days.
  • Freezing: While tofu can be frozen, it’s best to freeze uncooked tofu. Cooked tofu is best enjoyed fresh.
  • Reheating: Reheat in the microwave or air fryer. If using the microwave, be aware that the tofu may lose some crispiness.

Comprehensive FAQ

Got questions? Here are some common inquiries about crispy tofu bowls:

  • Can I use firm tofu instead of extra-firm? Yes, but the texture may be softer. Extra-firm is recommended for best results.
  • What if I don’t have an air fryer? You can bake the tofu in the oven at 400°F for about 25-30 minutes.
  • Can I make this recipe gluten-free? Absolutely! Use tamari instead of soy sauce.
  • How can I make the dressing vegan? The dressing provided is already vegan-friendly!
  • What vegetables can I add? Feel free to add any vegetables you like, such as bell peppers, carrots, or snap peas.
  • Can I prepare this dish in advance? Yes! You can prep the tofu and dressing ahead of time.
  • How do I ensure the tofu stays crispy? Store the tofu separately from moist ingredients until you’re ready to serve.
  • What type of rice is best? Brown rice is great for fiber, but feel free to use any grain you prefer!

Nutritional Tips and Dietary Adaptations

Here are some tips to maximize nutrition in your crispy tofu bowls:

  • Balance Your Macros: Pair the tofu with complex carbs and healthy fats for a balanced meal.
  • Fiber Boost: Add more vegetables to increase fiber intake.
  • Healthy Fats: Include avocados or nuts to enhance the meal’s healthy fat content.

Essential Equipment Recommendations

To achieve the best results, consider the following equipment:

  • Air Fryer: Essential for achieving crispy tofu without excess oil.
  • Tofu Press: Helps remove moisture for perfectly crispy tofu.
  • Sharp Knife: For cutting tofu and vegetables neatly.
  • Mixing Bowls: Useful for marinating and tossing ingredients.
  • Airtight Containers: Ideal for meal prep and storage.

Serving Suggestions

Make your crispy tofu bowls even more appealing with these serving ideas:

  • Plate Presentation: Layer ingredients artfully for a colorful display.
  • Garnish: Top with fresh herbs like cilantro or green onions for added flavor.
  • Side Dishes: Serve alongside a simple green salad for extra crunch.

Final Thoughts

Creating delicious, protein-packed crispy tofu bowls is not just a meal; it’s an experience that fuels your body and satisfies your taste buds. With the right ingredients and techniques, you can whip up a batch that not only supports your fitness goals but also excites your palate. So, roll up your sleeves, grab your ingredients, and let’s get cooking!
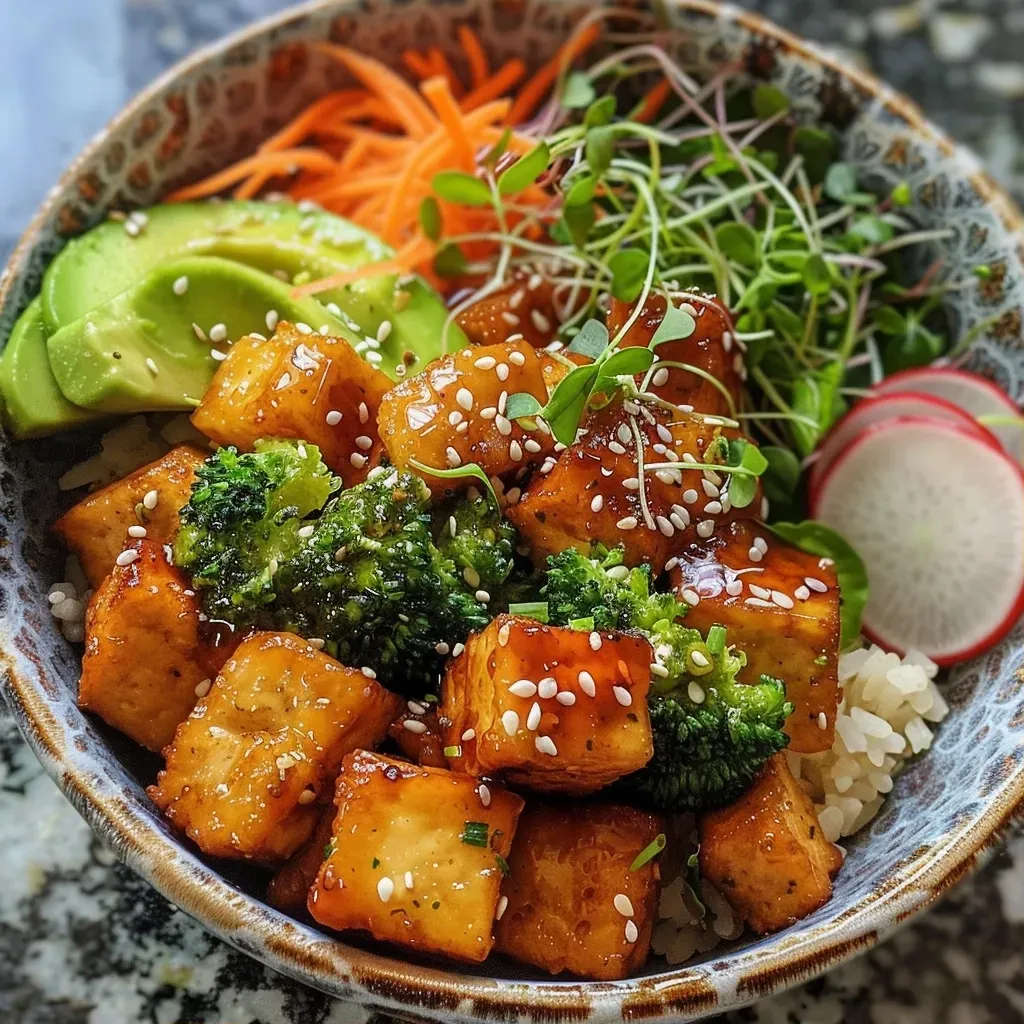
Crispy Tofu Bowls with Carrot Ginger Dressing

Prep Time 15 minutes
Cook Time 15 minutes
Total Time 30 minutes
Servings 4 servings
Calories 550
A delicious and healthy bowl featuring crispy tofu, brown rice, and fresh vegetables drizzled with a flavorful carrot ginger dressing.

Ingredients

Tofu and Dressing

  • 14 ounces extra-firm tofu (cubed)
  • 1.5 teaspoons avocado oil
  • 2 tablespoons tamari or soy sauce
  • 0.5 teaspoon sriracha
  • 1 tablespoon cornstarch
  • 2 cups cooked brown rice
  • 1 recipe Air Fryer Broccoli or Roasted Broccoli
  • 1 large avocado (sliced)
  • 1 serving Carrot Ginger Dressing (for drizzling)
  • to taste thinly sliced daikon radish (or red radish)
  • to taste microgreens or salad greens
  • to taste sesame seeds
  • optional red pepper flakes
  • to taste sea salt (or flaky sea salt)

Instructions 

  • Preheat the air fryer to 400°F.
  • Toss tofu with avocado oil, tamari, and sriracha. Add cornstarch and toss until coated.
  • Air fry tofu in a single layer for 11-15 minutes, flipping halfway, until golden and crisp.
  • Assemble bowls with rice, broccoli, tofu, and avocado.
  • Drizzle with dressing and top with radish, microgreens, sesame seeds, and optional red pepper flakes. Season with sea salt.
Notes

For extra crunch, ensure tofu is well-coated with cornstarch before air frying.
Calories: 550kcal
Cost: $15
Course: Main
Cuisine: Asian
Keyword: Tofu

Mastering the Art of Chicken Rice Mushroom Soup

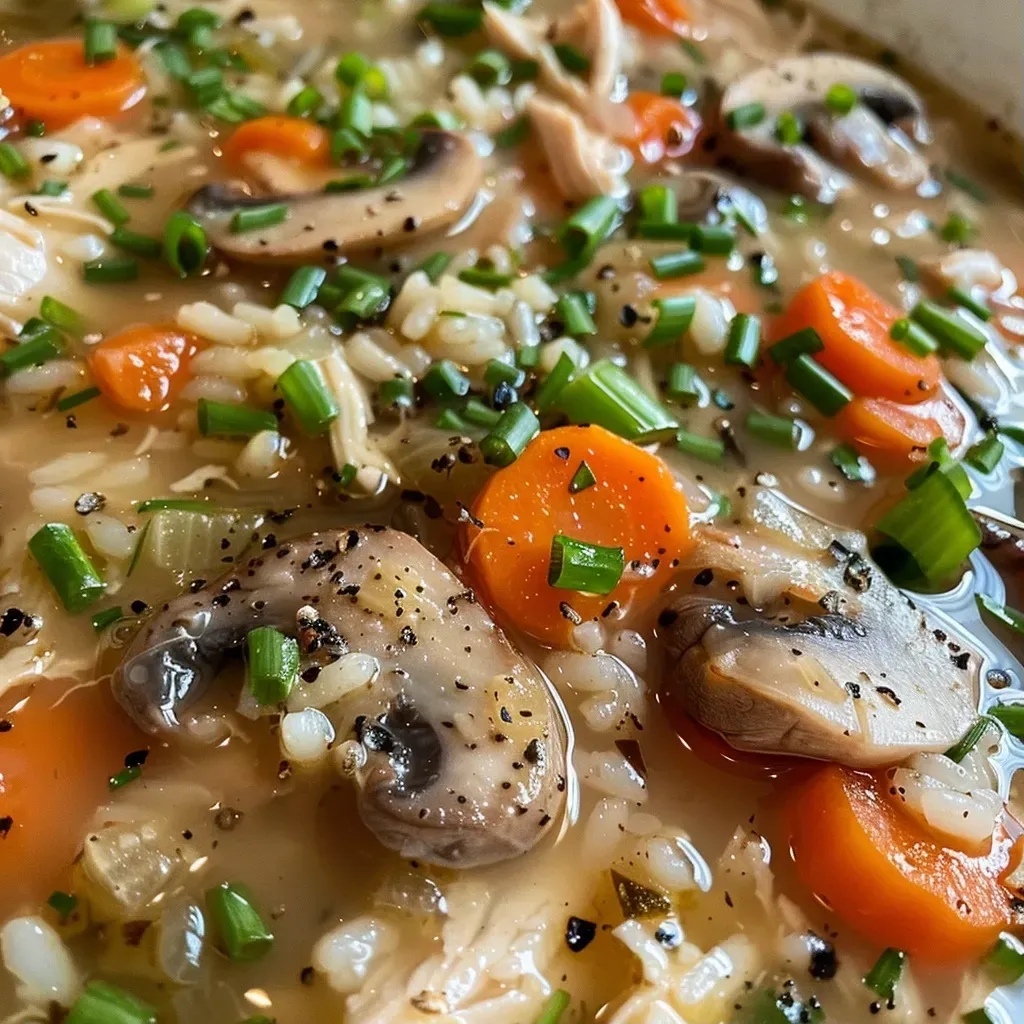
Welcome to your ultimate guide on how to create a wholesome, protein-packed Chicken Rice Mushroom Soup that not only fuels your fitness goals but also satisfies your taste buds. This recipe is designed for those who believe that eating healthy doesn’t mean sacrificing flavor. Packed with tender chicken, earthy mushrooms, and wholesome rice, this dish is a comforting classic that you’ll return to time and again.

Why You’ll Love This Recipe

Here’s why this Chicken Rice Mushroom Soup stands out:

  • High Protein Content: Each serving is loaded with protein from chicken thighs and rice, making it perfect for muscle recovery and growth.
  • Flavorful Ingredients: The combination of shiitake mushrooms, fresh vegetables, and seasonings creates a taste explosion in every spoonful.
  • Easy to Make: With simple steps and minimal prep time, this soup fits seamlessly into any busy schedule.
  • Versatile Dish: Easily adaptable to various dietary needs or ingredient preferences, ensuring everyone can enjoy it.
  • Meal Prep Friendly: This soup stores well, making it a fantastic choice for make-ahead meals throughout the week.

Ingredient Breakdown

Here’s what you’ll need to make this nourishing soup:

  • 1 tbsp butter: For sautéing the vegetables and adding richness.
  • 1 small onion: Adds sweetness and depth of flavor.
  • 1 tbsp flour: A light thickener that gives the soup body.
  • 6 cups less-sodium chicken broth (Swanson): The foundation of our soup, providing flavor without excess salt.
  • 3 cups water: To adjust the consistency of the soup.
  • 2/3 cup chopped carrots: For sweetness and color.
  • 3 garlic cloves: A must-have for that aromatic base.
  • 2 celery stalks: Adds crunch and flavor.
  • 14 oz boneless (skinless chicken thighs): Tender and juicy, perfect for shredding.
  • 4.5 oz long grain rice & wild rice combo: Provides texture and heartiness.
  • 1/2 cup brown rice: For added nutrition and fiber.
  • 4 oz shiitake mushrooms (sliced): Earthy flavor and umami richness.
  • 2 tbsp light sour cream: Adds creaminess and a slight tang.
  • Salt and fresh pepper (to taste): Essential for seasoning.

Ingredient Substitutions

  • Butter: Use olive oil or coconut oil for a dairy-free option.
  • Chicken Thighs: Substitute with chicken breast for a leaner option or tofu for a vegetarian version.
  • Sour Cream: Swap with Greek yogurt for a tangy alternative or omit for a lighter soup.
  • Rice Blend: Feel free to use quinoa or any other grain you prefer.

Pro Tips for Perfect Soup

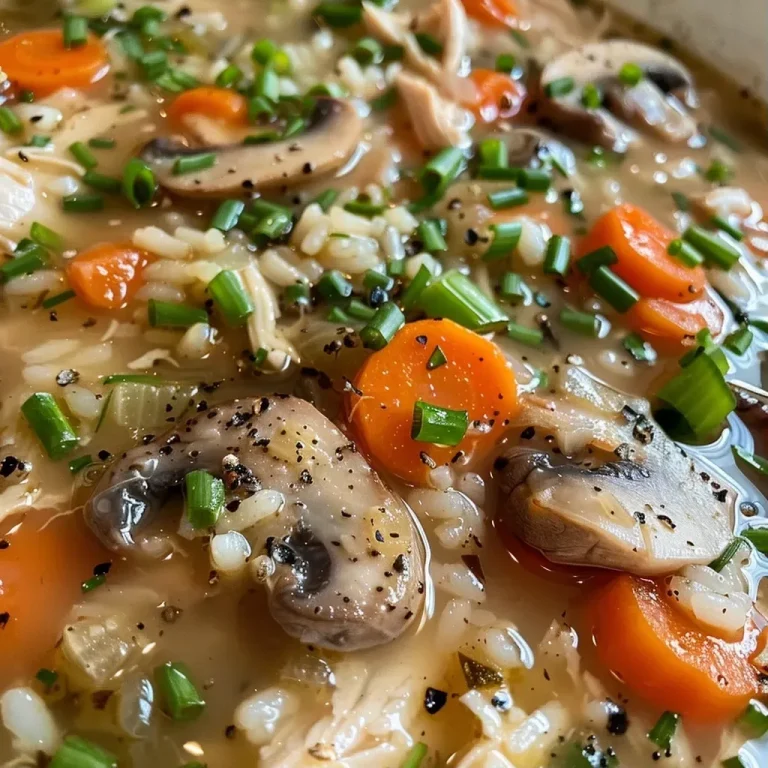
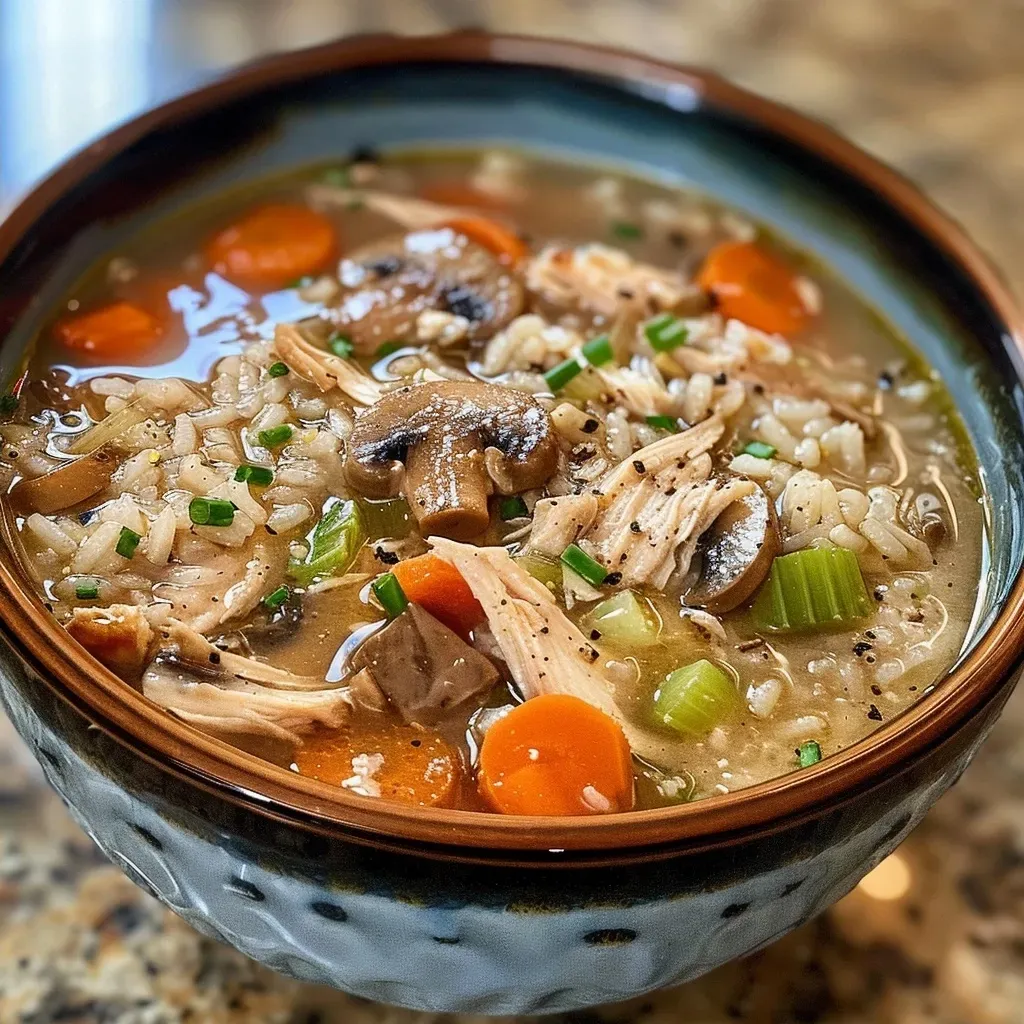
Side view of a steaming bowl of Chicken Rice Mushroom Soup with visible mushrooms and vegetables.

Here are some expert insights to elevate your soup game:

  • Use Fresh Ingredients: Fresh vegetables and herbs can significantly enhance the flavor of your soup.
  • Don’t Rush the Sautéing: Take your time when sautéing the onions and garlic to develop deeper flavors.
  • Shred Chicken Efficiently: Allow the chicken to cool slightly before shredding—it makes the process easier.
  • Adjust Consistency: If the soup is too thick, add more broth or water to reach your desired consistency.
  • Let It Rest: Allowing the soup to sit for a bit after cooking allows the flavors to meld beautifully.
  • Season Gradually: Taste and adjust seasonings throughout the cooking process for the best flavor.
  • Garnish with Fresh Herbs: Adding fresh parsley or cilantro right before serving brightens the dish.
  • Freeze Portions: If you make a large batch, consider freezing portions for a quick meal later.

Common Mistakes and Troubleshooting

Here are some pitfalls to avoid while making your soup:

  • Overcooking the Chicken: Keep an eye on the chicken to prevent it from becoming dry and tough.
  • Too Much Salt: Since broth can vary in sodium, always taste before adding extra salt.
  • Not Enough Liquid: If the soup seems too thick, don’t hesitate to add more broth or water to balance it out.

Delicious Variations

Mix things up with these delicious variations:

  • Spicy Chicken Rice Soup: Add red pepper flakes or diced jalapeños for a kick.
  • Mushroom Lovers Soup: Increase the amount of shiitake mushrooms or add other varieties for more depth.
  • Herbed Chicken Soup: Incorporate fresh herbs like thyme, rosemary, or dill for added freshness.
  • Vegetable-Loaded Soup: Add more veggies like spinach, peas, or bell peppers to boost nutrition.

Storage and Make-Ahead Instructions

This soup is perfect for meal prep! Here’s how to store and reheat it:

  • Refrigerate: Store in an airtight container for up to 4 days.
  • Freeze: For longer storage, freeze in portions for up to 3 months. Let it cool completely before transferring to freezer-safe containers.
  • Reheat: To reheat, thaw in the fridge overnight, then warm over low heat on the stove, adding a splash of water or broth if needed.

Frequently Asked Questions

  • Can I use different types of rice? Absolutely! Any rice blend works, but adjust the cooking times as necessary.
  • Is this soup gluten-free? Yes, if you use gluten-free flour and broth, this recipe can easily be made gluten-free.
  • How can I make it dairy-free? Substitute the butter with olive oil and omit the sour cream or use a dairy-free yogurt.
  • Can I add beans for extra protein? Yes! Adding white beans or chickpeas would enhance the protein content and texture.
  • What can I do with leftovers? Use leftovers in a grain salad or as a filling for wraps.
  • How long does it take to cook? The total cooking time is approximately 50 minutes, including prep and simmering.
  • Can I make this in a slow cooker? Yes! Just add all ingredients and cook on low for 6-8 hours.
  • How do I know when the chicken is cooked? The internal temperature should reach 165°F (75°C) for safe consumption.

Nutritional Tips and Dietary Adaptations

This soup is naturally rich in protein and low in calories. Here are some tips for maximizing nutritional benefits:

  • Protein Boost: Add more chicken or incorporate legumes for additional protein.
  • Load Up on Veggies: The more vegetables, the better! They increase fiber and nutrient density.
  • Watch the Sodium: Opt for low-sodium broth to keep sodium levels in check.
  • Healthy Fats: Use heart-healthy oils or add avocado for extra creaminess.

Equipment Recommendations

To make this soup, you will need:

  • Large Pot: For cooking the soup evenly.
  • Cutting Board and Sharp Knife: Essential for food prep.
  • Measuring Cups and Spoons: For precise ingredient measurements.
  • Wooden Spoon: For stirring and breaking up the chicken.

Serving Suggestions

To complete your meal:

  • Serve with Crusty Bread: A slice of whole-grain bread pairs perfectly with the soup.
  • Top with Fresh Herbs: A sprinkle of chopped parsley or chives adds a fresh touch.
  • Pair with a Salad: A side salad can balance the meal and add more nutrients.

Conclusion

Now that you have the ultimate guide to making Chicken Rice Mushroom Soup, it’s time to roll up your sleeves and get cooking! Remember, hitting your protein goals doesn’t mean sacrificing flavor or satisfaction. Enjoy this recipe as a staple in your meal prep rotation, and watch how it transforms your approach to healthy eating. Happy cooking!

Chicken Rice Mushroom Soup

Prep Time 15 minutes
Cook Time 45 minutes
Total Time 1 hour
Servings 6 servings
Calories 350
A comforting and hearty soup packed with chicken, rice, and mushrooms.

Ingredients

Base Ingredients

  • 1 tbsp butter
  • 1 small onion
  • 1 tbsp flour
  • 6 cups less-sodium chicken broth ((Swanson))
  • 3 cups water
  • 2/3 cup chopped carrots
  • 3 cloves garlic
  • 2 stalks celery
  • 14 oz boneless (skinless chicken thighs)
  • 4.5 oz long grain rice & wild rice combo
  • 1/2 cup brown rice
  • 4 oz shiitake mushrooms (sliced)
  • 2 tbsp light sour cream
  • salt and fresh pepper ((to taste))

Instructions 

  • Melt butter in a pot, add onion and sauté until soft, about 3-4 minutes.
  • Add flour and sauté another minute.
  • Add broth, water, carrots, garlic, celery, brown rice, and chicken, cover and simmer 20 minutes.
  • Add wild rice mix, long grain rice, and mushrooms, simmer on low for 25 minutes.
  • Shred chicken, return to pot, add sour cream, adjust thickness and seasoning, serve.

Notes

For extra flavor, consider adding herbs like thyme or parsley.
Calories: 350kcal
Cost: $15
Course: Soup
Cuisine: American
Keyword: Chicken

Unlock the Secret to Crispy Air-Fryer Chicken Tenders

If you’re on a quest to hit your protein goals without sacrificing flavor, you’re in the right place. These air-fryer chicken tenders are not just any tenders—they’re crispy, juicy, and packed with the nutrients you need to fuel your workouts. In this comprehensive guide, I’ll walk you through everything you need to know about making the perfect chicken tenders in your air fryer. Let’s dive in!

Why You’ll Love This Recipe

  • High in Protein: Each serving provides a substantial amount of protein, essential for muscle repair and growth.
  • Quick and Easy: With a prep time of just 15 minutes and cooking time of 8 minutes, you’ll have dinner on the table in no time.
  • Meal Prep Friendly: These tenders are perfect for meal prep, allowing you to batch cook and enjoy throughout the week.
  • Customizable Flavors: The basic recipe can be easily adapted with different spices and marinades to keep things exciting.
  • Healthier Alternative: Compared to traditional fried chicken, air-frying uses significantly less oil, making it a lighter option.

Ingredients Breakdown

To make these crispy chicken tenders, you’ll need the following ingredients:

  • 1 pound chicken tenderloins: These are the star of the dish. Look for fresh, high-quality chicken for the best flavor.
  • 3/4 teaspoon salt: Enhances the overall flavor. Adjust according to taste.
  • 1/4 teaspoon pepper: Adds a subtle kick. You can use black or white pepper.
  • 1/2 cup panko bread crumbs: Provides that signature crunch. For gluten-free, substitute with crushed rice crackers.
  • 1/2 cup seasoned bread crumbs: Adds extra flavor. You can make your own by seasoning plain crumbs with herbs.
  • 1/2 teaspoon garlic powder: For a savory depth. Fresh garlic can be too strong, so powder is ideal.
  • 1/2 teaspoon paprika: Adds color and a hint of smokiness. Smoked paprika can enhance this even more.
  • 2 large eggs, room temperature: Acts as the binding agent for the breadcrumbs.

Directions: Step-by-Step Guide

Side view of crispy Air Fryer Chicken Tenders garnished with herbs.

Follow these simple steps to make the perfect air-fryer chicken tenders:

  1. Preheat the air fryer: Set it to 400°F and let it preheat while you prep the chicken.
  2. Prepare the chicken: Sprinkle the chicken with salt and pepper, and set aside.
  3. Set up your breading station: In three bowls, combine the panko, garlic powder, and paprika in the first; whisk the eggs in the second; and leave the third empty.
  4. Coat the chicken: Using your less dominant hand, dip a chicken tender into the egg wash, shake off excess, and then coat it with breadcrumbs using your dominant hand. Repeat for all tenders.
  5. Air-fry the chicken: Place the tenders in a single layer in the air fryer basket, spray lightly with cooking spray, and cook for 7-8 minutes. Flip halfway through for even browning.
  6. Check for doneness: Ensure there’s no pink in the center. If needed, air-fry for an additional 1-2 minutes.

Pro Tips for Perfect Tenders

  • Don’t overcrowd the basket: Leaving space allows the hot air to circulate, resulting in crispy tenders.
  • Use room temperature eggs: This helps with better coating adherence.
  • Experiment with spices: Feel free to mix in your favorite herbs or spices into the breadcrumb mixture.
  • Let them rest: Allow the cooked tenders to sit for a few minutes before serving; this keeps them juicy.
  • Serve with a variety of sauces: Pair these tenders with honey mustard, ranch, or a spicy dipping sauce for added flavor.

Common Mistakes and Troubleshooting

Even the best recipes can go awry. Here are some common mistakes to avoid:

  • Too much moisture: Ensure the chicken is dry before breading. Pat it with paper towels if necessary.
  • Inadequate preheating: Skipping this step can lead to uneven cooking.
  • Not using enough oil spray: A light spray helps achieve that golden brown finish.
  • Overcooking: Keep an eye on the time. Chicken is done at an internal temperature of 165°F.

Recipe Variations

Switch things up with these delicious variations:

  • Spicy Buffalo Tenders: Add cayenne pepper or hot sauce to the breadcrumb mixture for a kick.
  • Herb-Lemon Tenders: Mix fresh herbs like parsley or dill and lemon zest into the bread crumbs.
  • Asian-Inspired Tenders: Use panko, add sesame seeds, and serve with teriyaki dipping sauce.
  • BBQ Tenders: Incorporate smoked paprika and serve with a side of BBQ sauce for dipping.

Storage and Make-Ahead Instructions

Planning to make these ahead? Here’s how to store and reheat:

  • Fridge: Store cooked tenders in an airtight container for up to 3 days.
  • Freezer: Freeze cooled tenders in a single layer, then transfer to a freezer-safe bag for up to 3 months.
  • Reheating: Air-fry at 350°F for 5-7 minutes to restore crispiness.

Frequently Asked Questions

Here are some common questions about air-fryer chicken tenders:

  • Can I use chicken breasts instead of tenderloins? Yes, but cut them into strips for even cooking.
  • What dipping sauces pair well? Honey mustard, BBQ sauce, ranch, and garlic aioli all complement these tenders.
  • Are these tenders gluten-free? Use gluten-free breadcrumbs and ensure your seasoning is gluten-free.
  • Can I bake these instead? Yes, bake at 425°F for about 15-20 minutes, flipping halfway.
  • Can I marinate the chicken before breading? Absolutely! Just pat them dry before coating.
  • What’s the best way to ensure they’re crispy? Don’t overcrowd the air fryer and spray the tops with oil.
  • How can I make them spicy? Add cayenne pepper or your favorite hot sauce to the breadcrumbs.
  • Can I use frozen chicken tenders? Yes, just adjust the cooking time; they may require a few extra minutes.

Nutritional Tips and Dietary Adaptations

These chicken tenders can fit into various dietary needs:

  • Low-Carb: Skip the breadcrumbs and coat with crushed pork rinds for a keto-friendly option.
  • High-Protein: Serve with a side of Greek yogurt dip to boost protein content.
  • Low-Fat: Use skinless chicken and minimal oil for a leaner meal.

Equipment Recommendations

Here’s what you’ll need to make this recipe:

  • Air Fryer: A reliable air fryer is key for achieving that crispy texture.
  • Meat Thermometer: To check the internal temperature for perfectly cooked chicken.
  • Mixing Bowls: For setting up your breading station.
  • Cooking Spray: A must for getting that golden finish without excess oil.

Serving Suggestions

Pair your air-fryer chicken tenders with these delicious options:

  • Fresh Salad: A crisp green salad balances the richness of the tenders.
  • Sweet Potato Fries: Baked or air-fried, these add a nutritious side.
  • Vegetable Sticks: Carrots and celery with dip make for a crunchy accompaniment.

Conclusion

With this comprehensive guide, you’ll be equipped to make the best air-fryer chicken tenders that are not only delicious but also nutritious. Remember, hitting your protein goals doesn’t have to be boring or bland. Happy cooking, and enjoy your delicious, crispy tenders!

Air-Fryer Chicken Tenders

Prep Time 15 minutes
Cook Time 16 minutes
Total Time 31 minutes
Servings 4 servings
Calories 350
Enjoy crispy and flavorful chicken tenders made effortlessly in an air fryer.

Ingredients

Chicken

  • 1 pound chicken tenderloins
  • 3/4 teaspoon salt
  • 1/4 teaspoon pepper
  • 1/2 cup panko bread crumbs
  • 1/2 cup seasoned bread crumbs
  • 1/2 teaspoon garlic powder
  • 1/2 teaspoon paprika
  • 2 large eggs, room temperature

Instructions 

  • Preheat air fryer to 400°F.
  • Season chicken with salt and pepper. Prepare three bowls: one with bread crumbs, one with whisked eggs, and one empty.
  • Dip chicken in egg, coat with bread crumbs, and place in the empty bowl.
  • Arrange chicken in air fryer basket, spray with cooking spray, and cook for 7-8 minutes per side until golden brown.
  • If pink remains, cook for an additional 1-2 minutes per side.

Notes

Using one hand for raw chicken and egg keeps the other hand clean for breading.
Calories: 350kcal
Cost: $15
Course: Main Course
Cuisine: American
Keyword: Chicken

Unleash the Flavor: Your Ultimate Guide to Stuffed Spaghetti Squash

Welcome to a culinary journey where health meets flavor in an extraordinary way! If you’re on the lookout for a dish that’s not only **high in protein** but also bursting with flavor, you’ve landed in the right place. This Stuffed Spaghetti Squash with Poblano Cashew Cream is your ticket to a satisfying meal that won’t make you compromise on taste. Perfect for meal prep or a weeknight dinner, this recipe is packed with nutrients and can easily be adapted to meet your dietary needs.

In this article, we will cover everything from the ingredients and pro tips to common mistakes and a comprehensive FAQ. By the end, you’ll be armed with all the knowledge you need to whip up the best stuffed spaghetti squash you’ve ever tasted!

Why You’ll Love This Recipe

  • Protein-packed: Each serving delivers a hearty dose of protein, thanks to the black beans and cashew cream, making it a great choice for muscle recovery.
  • Flavorful filling: The roasted poblano pepper adds a smoky depth while the combination of fresh ingredients creates a delicious, satisfying filling.
  • Easy meal prep: This dish can be made in advance and stored, making it perfect for busy individuals looking to stay on track with their macros.
  • Versatile recipe: Easily adaptable for dietary preferences, whether you’re vegan, gluten-free, or simply looking for a healthy meal.
  • Visually stunning: Serve this dish as a centerpiece for your dinner table, and watch as it impresses your guests with its vibrant colors and textures.

Ingredient Breakdown

Let’s dive deeper into the ingredients you’ll need for this delicious dish and some potential substitutions:

  • Spaghetti Squash: A small to medium-sized squash that serves as the perfect vessel for your filling. You can substitute with zucchini boats for a lower-carb option.
  • Extra-virgin Olive Oil: Essential for roasting; it adds flavor and healthy fats. Feel free to use avocado oil for a higher smoke point.
  • Cherry Tomatoes: These provide a burst of sweetness. Substitute with diced bell peppers for a different flavor profile.
  • Black Beans: Packed with protein and fiber. For a vegetarian option, substitute with quinoa or lentils.
  • Poblano Pepper: Adds a smoky flavor. If unavailable, use jalapeño for a spicier kick.
  • Fresh Corn: Sweet and crunchy; frozen corn can be used as an alternative.
  • Pepitas: These pumpkin seeds add crunch. Substitute with sunflower seeds for a similar texture.
  • Avocado: Creamy texture that enhances the dish. You can omit it if you prefer a lighter filling.
  • Cashews: The base for the creamy sauce. To keep it nut-free, use sunflower seed butter instead.
  • Garlic: Essential for flavor. Fresh garlic is best, but garlic powder can work in a pinch.
  • Cilantro: Adds freshness; you can use parsley if you’re not a fan of cilantro.

Pro Tips for Perfecting Your Dish

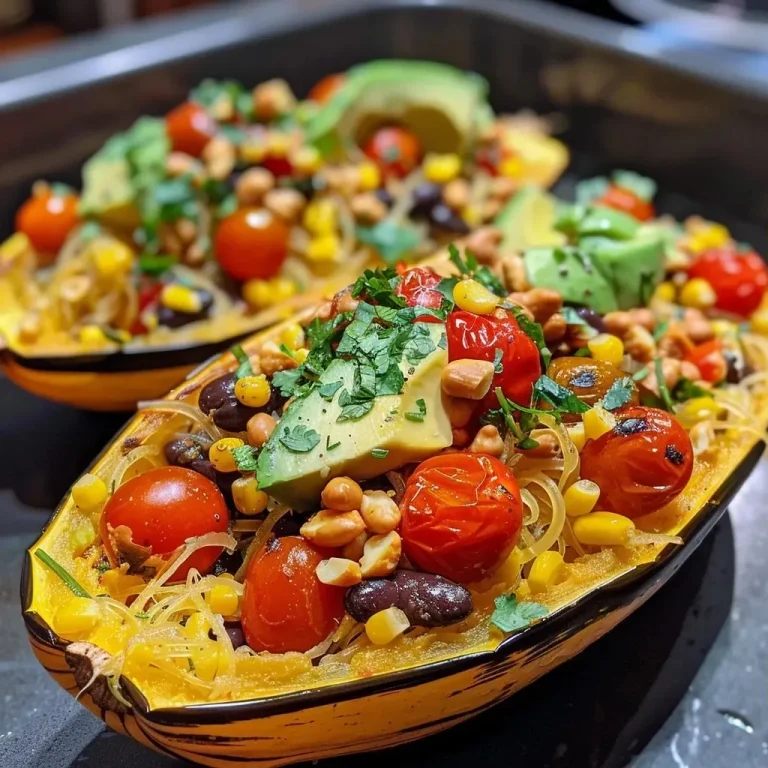
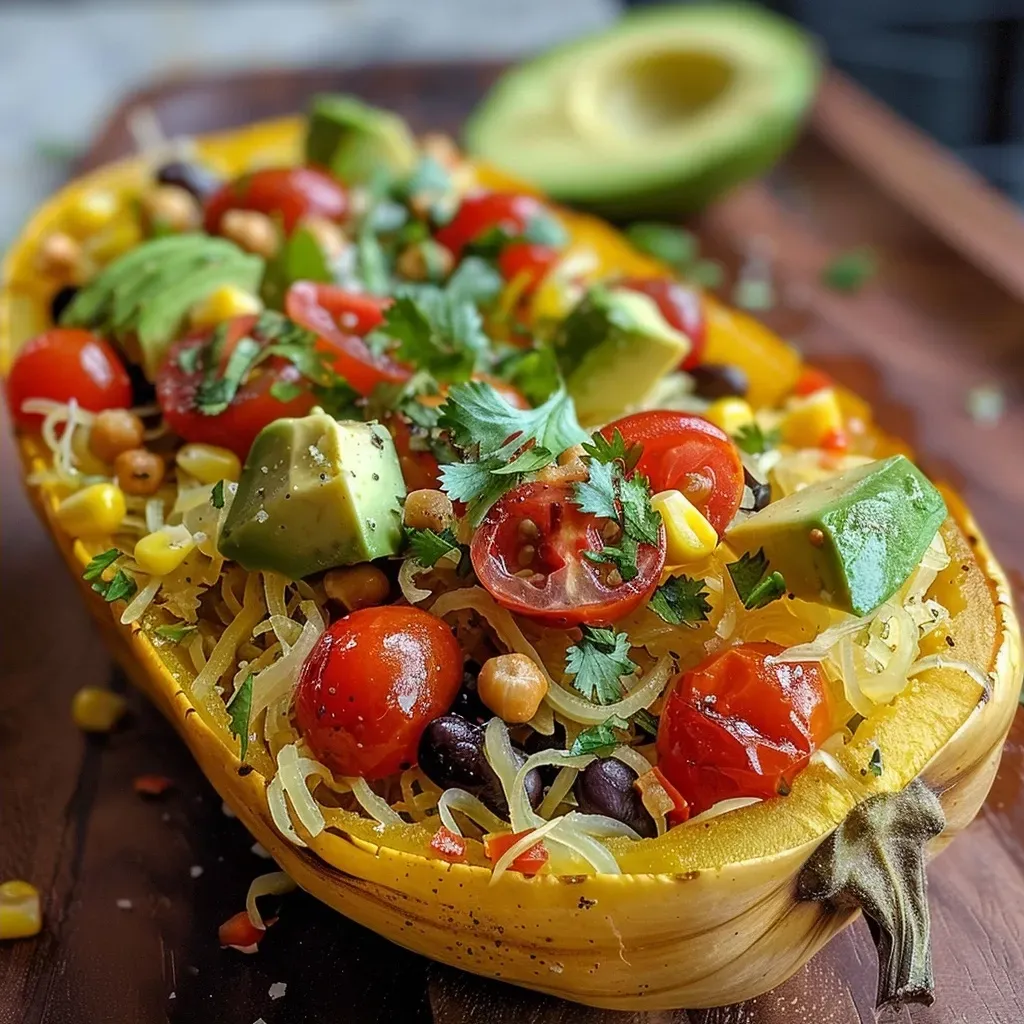
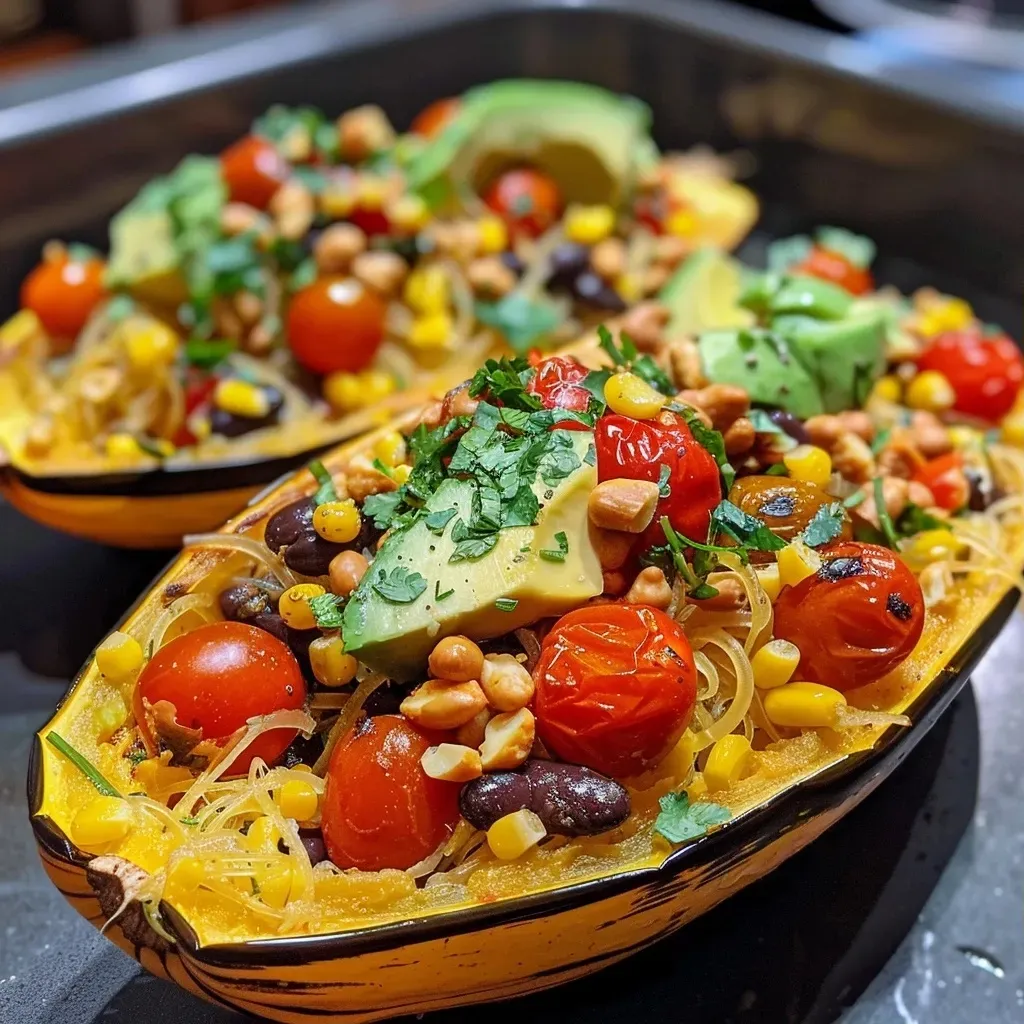
Juicy stuffed spaghetti squash showcasing vibrant cherry tomatoes and black beans.
  • Roast your squash correctly: Make sure to roast the squash until it’s tender enough to easily scrape with a fork. This ensures the right texture for your spaghetti strands.
  • Soak your cashews: Soak them for at least 3-4 hours to achieve a creamy consistency in your cashew cream.
  • Season generously: Don’t skimp on the salt and pepper! Proper seasoning enhances all the flavors in your dish.
  • Use fresh ingredients: Fresh herbs and vegetables elevate the dish’s flavor. Try to use organic where possible.
  • Adjust the spice level: If you like it hot, add some diced jalapeños or a dash of cayenne to your filling.
  • Meal prep friendly: This dish can be stored in the refrigerator for up to 4 days, making it ideal for meal prep.
  • Texture matters: Aim for a good balance of textures in your filling—creamy, crunchy, and tender all in one bite.
  • Don’t rush the roasting: Allow enough time for the flavors to develop while roasting the tomatoes and squash.
  • Garnish for a pop: Fresh lime juice and additional cilantro on top add brightness to the finished dish.
  • Use a fork and knife: Serve with a fork and knife to enjoy the delicious filling without making a mess!

Common Mistakes and Troubleshooting

Even the best cooks can make mistakes. Here are some common pitfalls and how to avoid them:

  • Squash not tender: If your spaghetti squash isn’t soft after roasting, increase the cooking time until it is fork-tender.
  • Too dry filling: If your filling turns out dry, try adding more lime juice or a bit of vegetable broth.
  • Cashew cream not creamy: If your cashew cream is chunky, blend it longer or add a little more water until smooth.
  • Over-seasoning: Always taste as you go! It’s easier to add salt than to remove it.

Variations to Explore

This stuffed spaghetti squash recipe is incredibly versatile. Here are some variations to try:

  • Vegan Gluten-Free: Keep it plant-based by using all vegan ingredients, like nutritional yeast instead of cheese, and ensure your cashew cream is nut-free.
  • Meat Lovers: For a protein boost, add ground turkey or chicken to the filling.
  • Italian Style: Incorporate Italian herbs like oregano and basil, and top with marinara sauce instead of cashew cream.
  • Mexican Twist: Add taco seasoning to the filling, and serve with salsa and avocado on top.

Storage and Make-Ahead Instructions

Planning ahead? Here’s how to store and prepare this dish in advance:

  • Refrigerator: Store leftovers in an airtight container for up to 4 days. The flavors will continue to meld, enhancing the taste!
  • Freezing: You can freeze the filling separately from the squash for up to 2 months. Thaw in the fridge before reheating.
  • Make ahead: Prepare the filling in advance and stuff the squash just before baking for a quick meal option.

Comprehensive FAQ

Let’s tackle some frequently asked questions about this recipe:

  • Can I use other squashes? Yes! Butternut squash can be a great alternative if you want a sweeter flavor.
  • Is this recipe suitable for meal prep? Absolutely! It stores well and can be reheated easily.
  • Can I make this dish nut-free? Yes, use sunflower seeds instead of cashews for the cream.
  • What can I serve with this dish? Pair it with a side salad or quinoa for a complete meal.
  • How do I know when spaghetti squash is done? When it’s fork-tender and easily shreds with a fork, it’s ready!
  • Can I add cheese to the filling? Yes, shredded cheese can add a creamy texture if desired.
  • How spicy is this recipe? It’s mild with the poblano pepper; adjust spice levels by adding jalapeños for more heat.
  • Can I grill the squash instead of roasting? Yes, grilling adds a fantastic smoky flavor!

Nutrition Tips and Dietary Adaptations

This recipe is inherently healthy, but you can make further modifications:

  • Make it lower-carb: Substitute the spaghetti squash with zucchini for a lighter option.
  • Increase fiber: Add more vegetables like spinach or bell peppers to the filling.
  • Boost healthy fats: Add more avocado or use a drizzle of tahini for added creaminess.

Equipment Recommendations

Here’s what you’ll need to make this stuffed spaghetti squash:

  • Sharp Knife: For cutting the squash safely.
  • Baking Sheets: To roast your ingredients evenly.
  • Food Processor: Essential for blending the cashew cream until smooth.
  • Fork: For scraping the squash into strands.

Serving Suggestions

Finish off your dish with these great serving ideas:

  • Garnish: Top with fresh cilantro and a squeeze of lime for a burst of freshness.
  • Side Dishes: Serve alongside a colorful salad or whole grain for a balanced meal.
  • Presentation: Plate in the hollowed squash for an attractive presentation that will impress your guests!

Now that you’re fully equipped with everything you need to create a show-stopping Stuffed Spaghetti Squash with Poblano Cashew Cream, it’s time to get cooking! Don’t forget to share your creations and tips with others, and remember that hitting your protein goals doesn’t have to be boring. Enjoy your delicious, nutritious meal!

Stuffed Spaghetti Squash

Prep Time 20 minutes
Cook Time 1 hour
Total Time 1 hour 20 minutes
Servings 4 servings
Calories 400
A delicious and healthy stuffed spaghetti squash filled with vibrant vegetables and creamy cashew sauce.

Ingredients

Vegetables

  • 1 spaghetti squash small to medium spaghetti squash
  • 1.5 cup halved cherry tomatoes
  • 0.5 cup cooked black beans (drained and rinsed)
  • 0.25 cup diced roasted poblano pepper
  • 0.5 ear fresh corn (husked)
  • 0.25 cup pepitas
  • 0.5 avocado diced avocado
  • 1 lime juice of 1/2 lime
  • 1 cup raw unsalted cashews (soaked at least 3 to 4 hours, drained and rinsed)
  • 0.5 cup fresh water
  • 1 clove garlic
  • 2-3 tablespoons fresh lime juice
  • 0.5 poblano pepper roasted poblano pepper
  • 1 handful cilantro (about 1/4 cup packed)
  • to taste sea salt and freshly ground black pepper

Instructions 

  • Roast the poblano pepper until the skin blisters, then cool and prepare for blending.
  • Preheat oven to 325°F and prepare baking sheets.
  • Toss tomatoes with olive oil, salt, and pepper; roast squash and tomatoes until tender.
  • Blend cashews, water, garlic, lime juice, and seasonings until creamy.
  • Loosen squash strands, mix in other ingredients, and serve with cashew cream.

Notes

For extra flavor, add spices or herbs of your choice.
Calories: 400kcal
Cost: $15
Course: Main Dish
Cuisine: American
Keyword: Spaghetti Squash

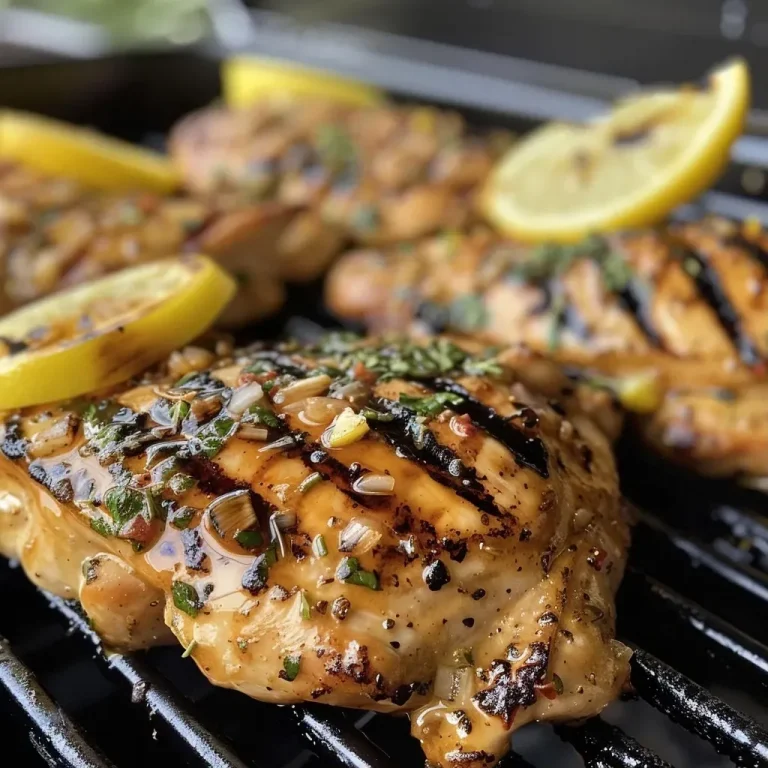
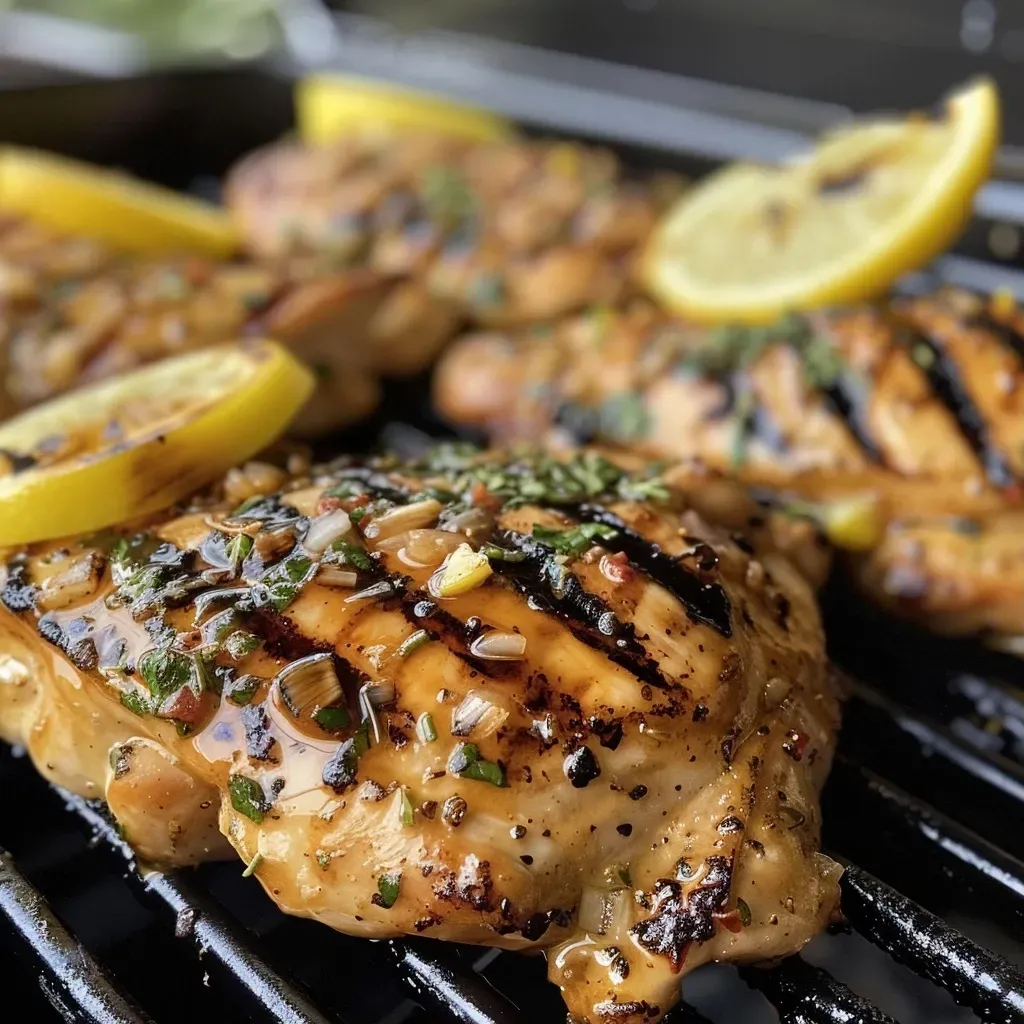
When it comes to hitting your protein goals, few meals are as versatile and satisfying as grilled chicken breasts. This recipe is designed not just to fuel your body but to elevate your cooking game, ensuring every bite is juicy, flavorful, and packed with nutrition. In this comprehensive guide, we’ll break down the ingredients, techniques, and tips you need to master this dish, so let’s get grilling!

Why You’ll Love This Recipe

This grilled chicken breast recipe is not only easy to follow, but it also delivers on multiple fronts, making it a go-to for any meal prep or family dinner. Here are five compelling reasons to add this recipe to your repertoire:

  • High Protein Content: Each serving contains a substantial amount of protein, making it ideal for muscle recovery and growth.
  • Quick and Easy: With minimal prep time and straightforward cooking steps, you can have dinner ready in under 30 minutes.
  • Flavorful Marinade: The marinade combines balsamic vinegar, olive oil, and lemon juice, creating a depth of flavor that keeps the chicken moist and tender.
  • Meal Prep Friendly: This recipe is perfect for meal prep, allowing you to cook in bulk and enjoy delicious, healthy meals throughout the week.
  • Versatile Pairings: Serve this chicken with a variety of sides, from salads to grains, making it adaptable for any dietary preference.

Ingredients Breakdown

Understanding your ingredients is crucial for achieving the best results. Here’s what you’ll need:

  • 1/4 cup balsamic vinegar: Adds a sweet tang that enhances the chicken’s flavor.
  • 2 tablespoons olive oil: Helps to keep the chicken moist and aids in the marinating process.
  • 1-1/2 teaspoons lemon juice: Provides acidity, which not only adds flavor but also tenderizes the chicken.
  • 1 teaspoon salt: Essential for enhancing all the flavors in the marinade.
  • 1/2 teaspoon lemon-pepper seasoning: For an extra kick of flavor.
  • 4 boneless skinless chicken breast halves (6 ounces each): The star of the dish, high in protein and lean.
  • Optional: lemon wedges and chopped herbs: For garnish and additional flavor.

Substitutions

Don’t have an ingredient? Here are some substitutions you can use:

  • Apple cider vinegar: Use in place of balsamic vinegar for a sweeter flavor.
  • Canola oil: A neutral oil that works well if you’re out of olive oil.
  • Honey: Instead of lemon juice for sweetness, though it will change the flavor profile.
  • Dried herbs: Instead of fresh herbs, use dried versions for convenience.

Step-by-Step Directions

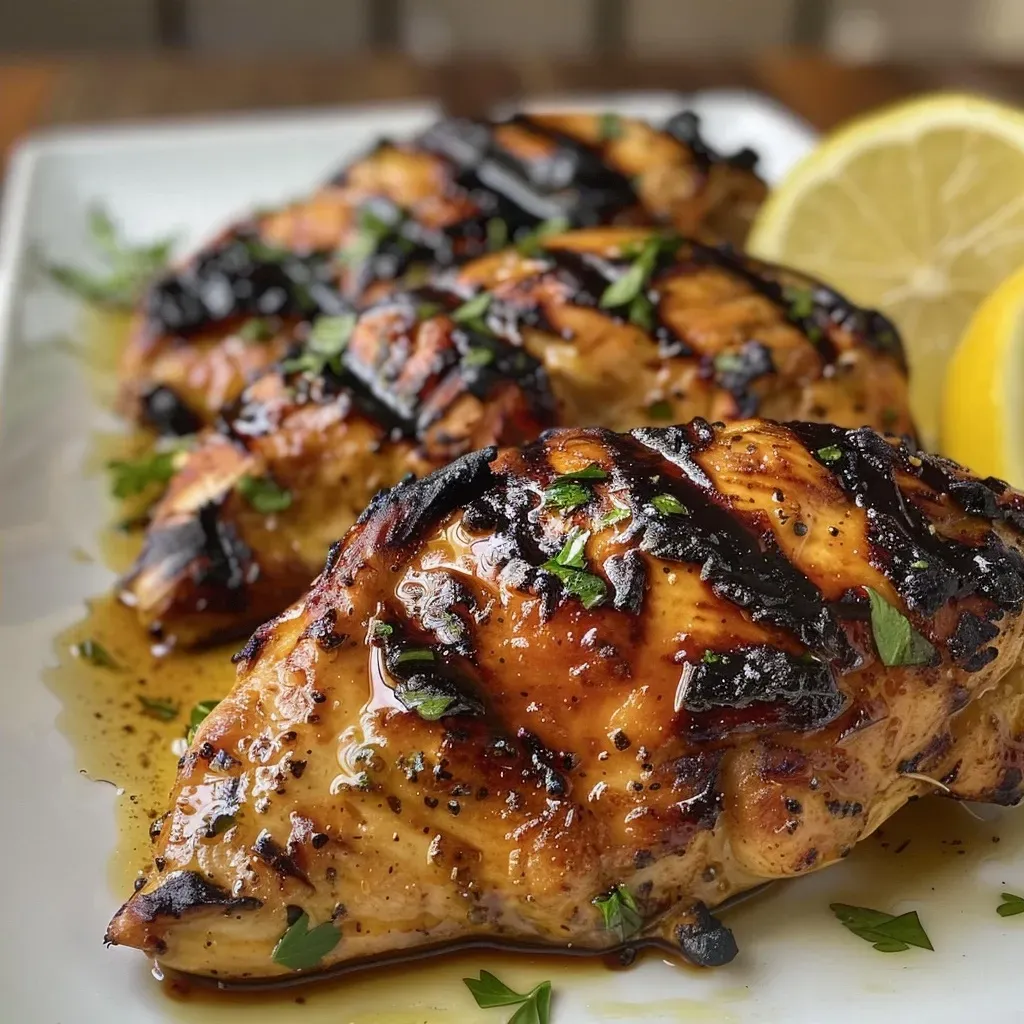
Close-up of perfectly cooked chicken breasts on a plate.

Follow these steps to create perfectly grilled chicken breasts:

  • Step 1: Marinate the Chicken: In a large bowl or resealable bag, combine the balsamic vinegar, olive oil, lemon juice, and lemon-pepper seasoning. Add the chicken, ensuring it’s well-coated. Cover and refrigerate for at least 30 minutes. For best results, marinate for up to four hours.
  • Step 2: Prepare the Grill: Preheat your grill to medium heat. Clean the grill grates thoroughly to prevent sticking. Use tongs and a paper towel moistened with cooking oil to lightly coat the grates.
  • Step 3: Grill the Chicken: Place the chicken on the grill and cook covered for 5-7 minutes. Flip the chicken and grill for another 5-7 minutes, or until the internal temperature reaches 170°F. Let the chicken rest for 5 minutes before slicing to retain juices.

Pro Tips for Perfect Grilled Chicken

To ensure your grilled chicken is always a success, keep these expert tips in mind:

  • Use a Meat Thermometer: Checking the internal temperature is the best way to avoid dry chicken. Aim for 170°F.
  • Let it Rest: Allowing the chicken to rest after grilling redistributes the juices, ensuring a juicy result.
  • Double the Marinade: Prepare an extra batch of marinade to use as a sauce after grilling.
  • Try Different Seasonings: Experiment with different spices and herbs to find your favorite flavor profiles.
  • Grill in Batches: If cooking for a crowd, grill in batches to avoid overcrowding the grill.
  • Preheat Properly: Ensure the grill is hot enough before adding the chicken to get those perfect grill marks.
  • Use Chicken Thighs: For a richer flavor, consider using boneless skinless chicken thighs instead of breasts.
  • Marinate Longer for Deeper Flavor: If time allows, marinate overnight for even more flavor.

Common Mistakes and Troubleshooting

Even the best chefs make mistakes. Here’s how to avoid common pitfalls:

  • Over-Marinating: Avoid leaving chicken in acidic marinades for too long, as it can make the meat mushy.
  • Underseasoning: Season well with salt and spices. Chicken can taste bland without enough seasoning.
  • Not Preheating the Grill: Skipping this step can lead to sticking and uneven cooking.
  • Cutting Too Soon: Resist the urge to cut into the chicken immediately; let it rest first to keep it juicy.

Variations to Try

Mix things up with these delicious variations:

  • Honey Mustard Chicken: Swap balsamic vinegar for honey mustard for a sweet and tangy twist.
  • Spicy Sriracha Chicken: Add sriracha to the marinade for a kick of heat.
  • Herb-Infused Chicken: Add fresh herbs like rosemary or thyme to the marinade for an aromatic flavor.
  • Asian-Inspired Chicken: Use soy sauce instead of balsamic for an Asian flair and add ginger to the marinade.

Storage and Make-Ahead Instructions

Planning ahead is key for meal prep:

  • Refrigeration: Store grilled chicken in an airtight container in the fridge for up to 4 days.
  • Freezing: Freeze cooked chicken breasts for up to 3 months. Thaw in the refrigerator before reheating.
  • Reheating: To reheat, use an oven or microwave. Add a splash of water or broth to keep it moist.

FAQ: Your Grilling Questions Answered

Here are some frequently asked questions about grilling chicken breasts:

  • Can I use frozen chicken breasts?: Yes, but they should be thawed before marinating and grilling for even cooking.
  • How long do I need to marinate chicken?: At least 30 minutes, but for best results, up to 4 hours is ideal.
  • What if I don’t have a grill?: You can use a grill pan or bake the chicken in the oven at 375°F.
  • Can I cook chicken with skin on?: Yes, but skin-on chicken will require a slightly longer cooking time.
  • How do I know when my chicken is done?: Use a meat thermometer to ensure the internal temperature reaches 170°F.
  • Can I use other cuts of chicken?: Absolutely! Chicken thighs or drumsticks can be used with similar marinade techniques.
  • What sides go well with grilled chicken?: Grilled vegetables, rice, quinoa, or salads make excellent pairings.
  • Is this recipe suitable for meal prep?: Yes! It’s great for meal prep and can be paired with various sides for different meals.

Nutrition Tips and Dietary Adaptations

This recipe is naturally low in carbs and high in protein, making it suitable for various dietary preferences:

  • Low-Carb: Perfect for keto or low-carb diets when paired with non-starchy vegetables.
  • Gluten-Free: All ingredients are gluten-free; just ensure any sides are also gluten-free.
  • Balanced Meal: Serve with whole grains and vegetables for a well-rounded meal.
  • Vegetarian Option: Substitute chicken with grilled tofu or tempeh for a plant-based version.

Equipment Recommendations

Here’s what you’ll need to make this recipe:

  • Grill: A gas or charcoal grill works best for achieving those classic grill marks.
  • Meat Thermometer: Essential for ensuring your chicken is cooked to the proper temperature.
  • Grill Tongs: Long-handled tongs are necessary for safely flipping chicken on the grill.
  • Mixing Bowl: A large bowl or resealable bag for marinating is essential.

Serving Suggestions

Complete your meal with these fantastic sides:

  • Quinoa Salad: A nutritious option that pairs well with grilled chicken.
  • Roasted Vegetables: Seasoned and roasted veggies complement the flavors of the chicken.
  • Garlic Mashed Potatoes: A comforting side that balances the dish.
  • Fresh Green Salad: A refreshing option to accompany the chicken.

In conclusion, grilling chicken breasts is not just about cooking; it’s about mastering a technique that ensures flavor, nutrition, and versatility. By following this guide, you’ll not only hit your protein goals but also enjoy every bite along the way. Now, fire up that grill and enjoy a delicious, healthy meal that fuels your body and satisfies your taste buds!

Grilled Chicken Breasts

Prep Time 30 minutes
Cook Time 15 minutes
Total Time 45 minutes
Servings 4 servings
Calories 250
Juicy grilled chicken breasts marinated in a tangy balsamic mixture, perfect for a summer meal.

Ingredients

Marinade

  • 60 ml balsamic vinegar
  • 30 ml olive oil
  • 7.5 ml lemon juice
  • 5 g salt
  • 1.5 g lemon-pepper seasoning
  • 4 pieces boneless skinless chicken breast halves ((6 ounces each))

Optional Garnish

  • lemon wedges (for serving)
  • chopped herbs (for serving)

Instructions 

  • Combine balsamic vinegar, olive oil, lemon juice, and lemon-pepper seasoning in a bowl or bag. Add chicken, coat well, and refrigerate for at least 30 minutes.
  • Preheat the grill to medium and clean the grates.
  • Lightly oil the grill rack and place chicken on it. Grill covered for 5-7 minutes, then flip and grill for another 5-7 minutes until cooked through.
  • Let chicken rest for 5 minutes before slicing or serving.

Notes

Marinate chicken for up to four hours for better flavor, but avoid marinating too long to prevent mushiness.
Calories: 250kcal
Cost: $15
Course: Main Course
Cuisine: American
Keyword: Chicken

Unlock the Secrets to Irresistible Baked Sweet Potato Chips

If you’re on a journey to elevate your snacking game while hitting your protein and nutritional goals, you’ve just found the perfect recipe. Baked Sweet Potato Chips are not just a delicious snack; they’re a powerhouse of nutrition. With just three simple ingredients, these chips pack a punch in flavor and health benefits. Whether you’re looking to satisfy your crunch cravings or find a healthier alternative to traditional chips, this guide will walk you through everything you need to know to create the perfect batch of Baked Sweet Potato Chips.

In this comprehensive guide, we will dive into the why’s and how’s of this recipe, explore variations, troubleshooting tips, and even some nutritional insights. By the end of this article, you’ll be equipped with all the information you need to make these chips a staple in your snacking routine.

Why You’ll Love This Recipe

Here are five compelling reasons to try out this Baked Sweet Potato Chips recipe:

  • Simple Ingredients: You only need three ingredients to make these chips—sweet potatoes, olive oil, and sea salt. No complicated lists or hard-to-find items!
  • Health-Conscious Snacking: These chips are baked, not fried, making them a healthier alternative to store-bought snacks that are often loaded with unhealthy fats.
  • Customizable Flavor: You can easily adjust the seasoning to suit your taste, whether you want something savory, spicy, or even sweet.
  • Meal Prep Friendly: These chips can be made ahead of time and stored for a perfect grab-and-go snack, making them ideal for busy lifestyles.
  • Great Source of Nutrients: Sweet potatoes are rich in vitamins A and C, fiber, and antioxidants, making these chips not just tasty but also nutritious.

Detailed Ingredient Breakdown

Understanding your ingredients is key to making the best Baked Sweet Potato Chips.

  • Sweet Potatoes: Opt for organic sweet potatoes for the best flavor and nutritional value. Each potato should weigh around 150 grams. Feel free to experiment with different varieties like purple or Japanese sweet potatoes for unique flavors.
  • Olive Oil: This healthy fat enhances the flavor and helps in achieving the crispy texture. You can substitute with avocado oil if you prefer.
  • Sea Salt: While optional, a sprinkle of sea salt elevates the taste. Experiment with flavored salts like garlic or smoked sea salt for a twist.

Pro Tips for Perfect Baked Sweet Potato Chips

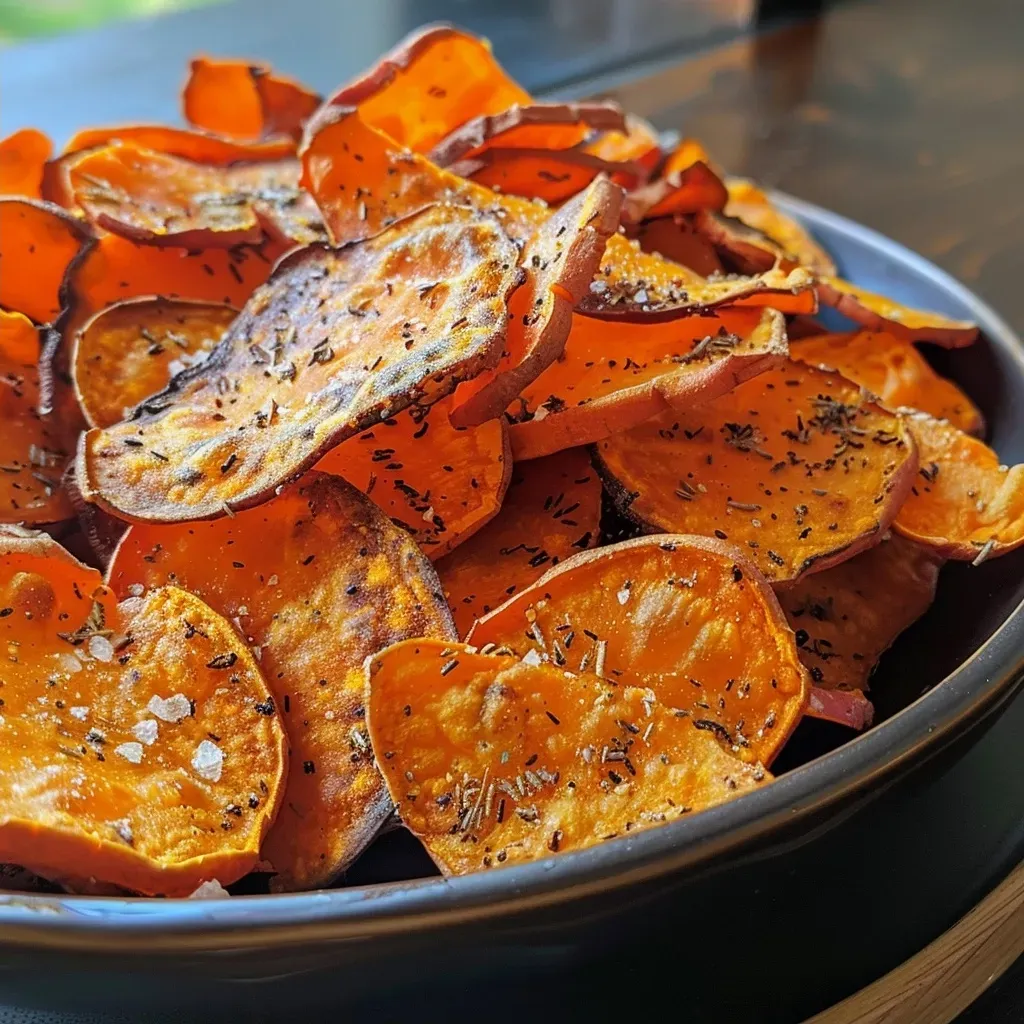
Side view of golden-brown baked sweet potato chips on a wooden surface.

Follow these expert insights to ensure your chips turn out perfectly every time:

  • Uniform Slices: Use a mandolin for consistent thickness (about 1/8-1/16 inch). Uneven slices will result in some chips being burnt while others remain chewy.
  • Dry Thoroughly: After washing, make sure to dry the sweet potatoes completely; moisture will prevent them from crisping up.
  • Low and Slow: Bake at a lower temperature (250°F / 121°C) for a longer duration to achieve that perfect crunch without burning.
  • Flip and Rotate: Turn the chips halfway through baking and rotate the baking sheet for even cooking.
  • Resting Time: Let the chips cool for about 10 minutes after baking. They will continue to crisp up as they rest.
  • Monitor Closely: Check your chips frequently in the second half of baking to prevent burning.
  • Flavor Variations: Experiment with spices like paprika, cumin, or nutritional yeast for added flavor.
  • Batch Size: Consider making larger batches; they disappear quickly!

Common Mistakes and Troubleshooting

Even the best cooks can run into issues. Here are common mistakes and how to avoid them:

  • Thick Slices: If your chips are too thick, they will not crisp up. Aim for uniformity to ensure even cooking.
  • Overcrowding the Pan: Make sure to lay chips in a single layer. Overlapping will lead to soggy chips.
  • Skipping the Oil: Don’t skip the olive oil; it’s essential for achieving that crispy texture.
  • Burnt Chips: If your chips are burning, your oven might be too hot. Lower the temperature and check more frequently.
  • Soggy Chips: If chips come out soggy, they may need more time in the oven. Give them a few extra minutes and check regularly.

Variations on Baked Sweet Potato Chips

One of the best parts about this recipe is its versatility. Here are four variations to try:

  • Spicy Sweet Potato Chips: Add cayenne pepper or chili powder to your olive oil before tossing with sweet potato slices for a spicy kick.
  • Herb-Infused Chips: Toss the slices with dried herbs like thyme, rosemary, or oregano for a fragrant twist.
  • Sweet Cinnamon Chips: For a sweet treat, sprinkle cinnamon and a touch of sugar before baking.
  • Cheesy Chips: Add nutritional yeast to the olive oil mixture for a cheesy flavor without the dairy.

Storage and Make-Ahead Instructions

To keep your Baked Sweet Potato Chips fresh and flavorful, follow these storage tips:

  • Cool Completely: Allow chips to cool completely before storing to prevent moisture buildup.
  • Airtight Containers: Store in an airtight container or zip-lock bag to keep them crisp. You can also add a paper towel to absorb moisture.
  • Best Enjoyed Fresh: For optimal taste and texture, enjoy within 3-5 days. However, they can last up to a week if stored properly.
  • Re-crisping: If chips lose their crunch, pop them back in the oven at a low temperature for a few minutes to re-crisp.

Comprehensive FAQ

Got questions? Here are some answers to common queries about Baked Sweet Potato Chips:

  • Can I use other types of potatoes? Yes, you can use regular potatoes, but cooking times may vary.
  • Do I need to peel the sweet potatoes? No, the skin adds texture and nutrients. Just wash them thoroughly.
  • Can I make chips without oil? While it’s possible, oil helps achieve the desired crispiness and flavor.
  • Can I season them after baking? Yes, you can sprinkle additional seasonings after they come out of the oven.
  • Are these chips gluten-free? Yes, they are naturally gluten-free, making them suitable for gluten-sensitive diets.
  • Can I freeze leftover chips? Freezing is not recommended as it affects the texture. It’s best to enjoy them fresh.
  • How do I know when they are done? Chips should be golden brown and crispy. Keep an eye on them in the last 10 minutes of baking.
  • Can kids help make these chips? Absolutely! It’s a fun and easy recipe that kids can help with, especially with slicing (with supervision).

Nutritional Tips and Dietary Adaptations

For those looking to maximize health benefits while enjoying Baked Sweet Potato Chips, consider these tips:

  • Boost Fiber: Pair your chips with a high-fiber dip, like hummus or a bean dip, to make your snack even more filling.
  • Protein-Packed Dips: Serve with Greek yogurt-based dips for a protein boost.
  • Low-Sodium Option: Use herbs and spices to flavor instead of salt if you’re watching your sodium intake.
  • Vegan-Friendly: This recipe is naturally vegan, making it a great option for plant-based diets.

Essential Equipment Recommendations

Here’s what you’ll need to make this recipe successfully:

  • Mandolin Slicer: For even and thin slices to ensure uniform cooking.
  • Baking Sheet: A large, rimmed baking sheet that can hold your sweet potatoes in a single layer.
  • Parchment Paper: To prevent sticking and make cleanup easier.
  • Measuring Spoon: For precise measurement of olive oil and salt.

Serving Suggestions

Make your snacking experience even better with these serving ideas:

  • Pair with Dips: Serve with guacamole, salsa, or a yogurt-based dip for a flavor explosion.
  • Add to Salads: Crumble crispy chips over salads for an added crunch.
  • Perfect for Picnics: Great for outdoor gatherings; pack them in a sealed container for a tasty snack on the go.
  • Gourmet Touch: Drizzle with balsamic glaze for an elegant appetizer at your next dinner party.

Conclusion: Your Crunchy Adventure Awaits!

Now that you have the complete guide to making Baked Sweet Potato Chips, it’s time to roll up your sleeves and get cooking! With a few simple ingredients and some insider tips, you can create a snack that’s not only delicious but also fits perfectly into your health and wellness goals. Remember, the journey to a healthier lifestyle doesn’t have to be boring—snacking can be both enjoyable and fulfilling. So, get in the kitchen, experiment with flavors, and most importantly, enjoy every crunchy bite. Happy cooking!

Baked Sweet Potato Chips

Prep Time 15 minutes
Cook Time 1 hour 45 minutes
Total Time 2 hours
Servings 4 servings
Calories 150
Enjoy these crispy and healthy baked sweet potato chips as a delicious snack!

Ingredients

Vegetables

  • 2 pieces organic sweet potatoes ((~150 g each))
  • 2 Tbsp olive oil
  • 1/4 tsp sea salt ((optional))

Instructions 

  • Preheat oven to 250°F (121°C) and position rack in center.
  • Rinse, dry, and slice sweet potatoes thinly (~1/8-1/16 inch).
  • Toss slices with olive oil and salt, then lay on a parchment-lined baking sheet.
  • Bake for 1.5 to 1.75 hours, flipping halfway and checking for doneness.
  • Remove when crisp and golden, let rest for 10 minutes before serving.

Notes

For extra crispiness, ensure slices are uniform and check frequently while baking.
Calories: 150kcal
Cost: $5
Course: Snack
Cuisine: American
Keyword: Sweet Potato

Unlock the Flavorful World of Moroccan Lentil-Stuffed Eggplant

Welcome to a culinary adventure that not only tantalizes your taste buds but also fuels your fitness goals! This Moroccan Lentil-Stuffed Eggplant recipe is the perfect fusion of nutrition and flavor, designed to help you hit your protein targets without sacrificing taste. Packed with earthy spices, hearty lentils, and wholesome vegetables, this dish is ideal for meal prep or a cozy dinner at home.

In this article, we will dive deep into the world of Moroccan cuisine, explore the nutritional benefits of each ingredient, and provide you with all the tips and tricks you need to make this dish a success. Let’s get cooking!

Why You’ll Love This Recipe

  • High in Protein: This dish provides a significant protein boost thanks to the lentils and eggplant, making it a great option for muscle recovery and growth.
  • Flavor Explosion: The combination of Moroccan spices and roasted eggplant creates a rich, complex flavor that is sure to impress.
  • Meal Prep Friendly: Easily make large batches for the week ahead. This dish stores well and tastes even better the next day!
  • Vegetarian and Vegan: Perfect for anyone following a plant-based diet, but satisfying enough for meat lovers too!
  • Customizable: With simple ingredient swaps, you can adjust the recipe to suit your dietary needs and preferences.

Detailed Ingredient Breakdown

Understanding your ingredients is key to creating a successful dish. Here’s a breakdown of the primary components:

  • Eggplants: We use small eggplants for a perfect size to hold the lentils. If unavailable, zucchini or bell peppers can serve as great alternatives.
  • Lentils: The foundation of this dish. Use brown or green lentils for the best texture; red lentils will work but will become mushier.
  • Crushed Tomatoes: They add moisture and depth of flavor. You can substitute with diced tomatoes or a homemade tomato sauce if desired.
  • Moroccan Spices: Cumin, cinnamon, and smoked paprika are essential for authenticity. Feel free to adjust the spice levels according to your taste.
  • Vegan Parmesan and Panko: These toppings provide a delightful crunch. For a gluten-free version, ensure your panko is gluten-free.

Substitutions and Variations

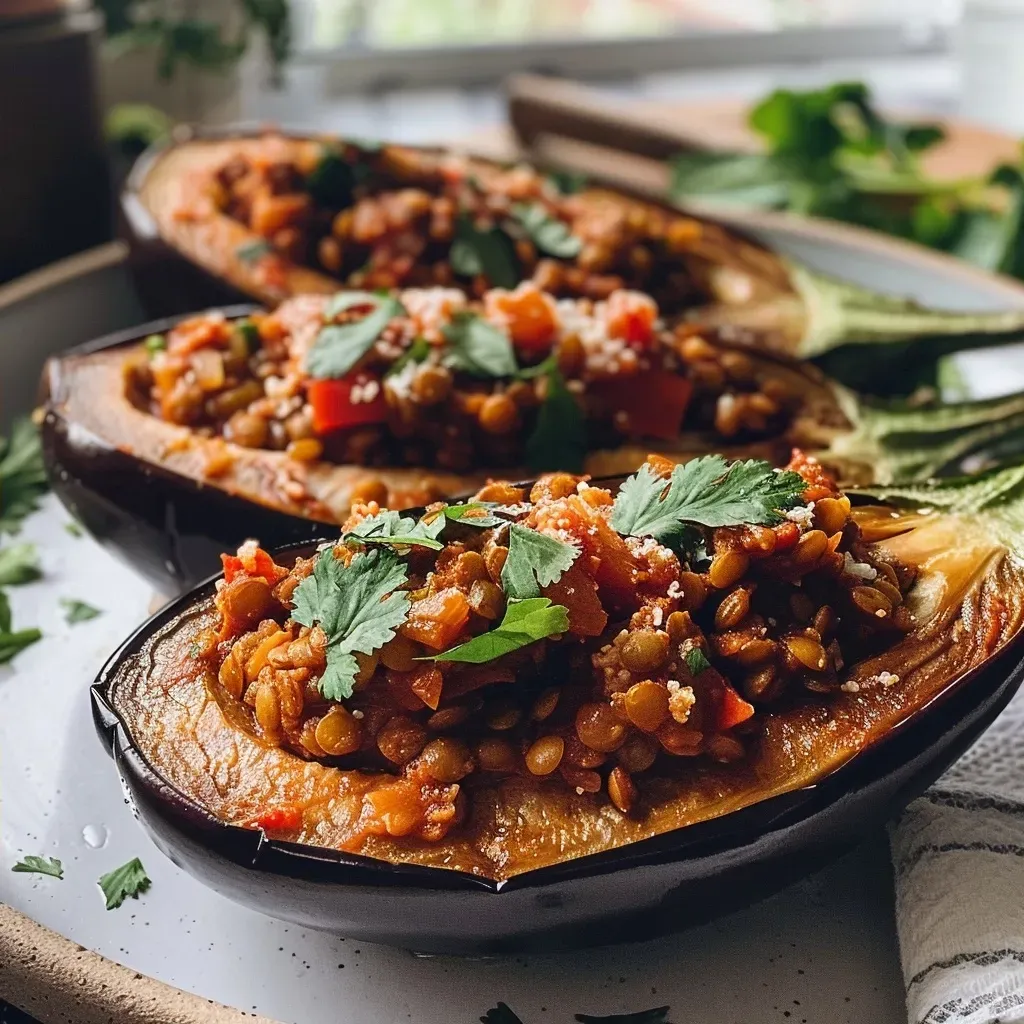
Side view of a succulent eggplant filled with colorful lentils and spices.

Don’t have all the ingredients? No problem! Here are some substitutions and creative variations you can try:

  • Quinoa or Brown Rice: Use these instead of lentils for a different texture and taste.
  • Cheese Alternatives: If you’re not vegan, feta or goat cheese can be a delicious topping.
  • Additional Veggies: Add spinach, kale, or bell peppers into the lentil mixture for extra nutrients.
  • Spice Adjustments: Experiment with harissa for added heat or different herbs like cilantro or mint for freshness.

Pro Tips for Perfect Stuffed Eggplant

To ensure your Moroccan Lentil-Stuffed Eggplant turns out perfectly every time, keep these expert tips in mind:

  • Choose the Right Eggplants: Go for firm, shiny eggplants with no blemishes. Smaller ones are preferable for stuffing.
  • Pre-cook Lentils: Cooking lentils beforehand enhances their flavor and texture when combined with other ingredients.
  • Season Generously: Don’t be shy with salt and spices. They elevate the dish significantly.
  • Layer Your Flavors: Sauté spices in oil before adding tomatoes and lentils to release their full flavor potential.
  • Monitor Cooking Time: Keep an eye on the eggplants while baking. They should be tender but not mushy.
  • Garnish Wisely: Fresh herbs like parsley or cilantro add a burst of color and flavor at serving.

Common Mistakes and Troubleshooting

Every cook faces challenges. Here are some common mistakes and how to avoid them:

  • Overcooking Eggplants: Keep an eye on them in the oven. They should be tender but hold their shape.
  • Too Dry Filling: If your lentil mixture seems dry, add a splash of vegetable broth or extra tomatoes.
  • Under-seasoned Filling: Always taste your filling before stuffing. Adjust salt and spices as needed.
  • Not Enough Toppings: Don’t skimp on the vegan parmesan and breadcrumbs; they add essential texture!

Storage and Make-Ahead Instructions

This recipe is perfect for meal prep! Here’s how to store and reheat:

  • Refrigeration: Store leftovers in an airtight container for up to 4 days.
  • Freezing: Freeze stuffed eggplants for up to 1 month. Thaw overnight in the fridge before reheating.
  • Reheating: Warm in the oven at 350°F (175°C) for 15-20 minutes or until heated through.

Comprehensive FAQ

Have questions? We’ve got answers! Here are some frequently asked questions about this recipe:

  • Can I use different lentils? Yes, but note that cooking times may vary. Brown or green lentils work best for stuffing.
  • Is this recipe gluten-free? Yes, just use gluten-free panko and ensure your spices are certified gluten-free.
  • Can I make this dish spicy? Absolutely! Add chopped jalapeños or more smoked paprika for an extra kick.
  • How do I know when the eggplants are done? They should be fork-tender and slightly browned on the edges.
  • Can I prepare this ahead of time? Yes, you can assemble the stuffed eggplants and refrigerate them before baking.
  • What can I serve with this dish? Serve it over rice or quinoa, or alongside a fresh salad for a complete meal.
  • Can I omit the oil? Yes, you can use a water sauté or vegetable broth instead.
  • How do I adjust the serving size? This recipe is easily scalable. Just multiply the ingredients by the desired number of servings.

Nutritional Tips and Dietary Adaptations

This Moroccan Lentil-Stuffed Eggplant is not only delicious but also nutrient-dense. Here are some nutritional insights:

  • Fiber-Rich: Lentils are packed with fiber, which aids digestion and keeps you feeling full longer.
  • Vitamins and Minerals: Eggplants provide antioxidants and essential vitamins, contributing to overall health.
  • Low in Calories: This dish is low in calories, making it suitable for weight management.
  • Customizable Macros: Adjust serving sizes and ingredient ratios to fit your specific dietary needs.

Equipment Recommendations

To make the cooking process smoother, here’s a list of recommended kitchen tools:

  • Sharp Knife: For easily slicing eggplants and other vegetables.
  • Large Skillet: Ideal for sautéing lentils and spices.
  • 9×13-inch Baking Dish: Perfect size for baking stuffed eggplants.
  • Measuring Cups and Spoons: Accurate measurements are crucial for recipe success.
  • Food Processor: Use it for finely chopping ingredients or making sauces.

Serving Suggestions

To elevate your dining experience, consider these serving ideas:

  • Garnish: Top with fresh herbs and a drizzle of tahini for added flavor.
  • Side Dishes: Pair with a simple cucumber salad or roasted vegetables for a complete meal.
  • Grains: Serve over couscous, quinoa, or brown rice to soak up the delicious juices.
  • Yogurt Sauce: A dollop of Greek yogurt or a dairy-free alternative can add creaminess.

Conclusion: Your Path to Flavorful Gains

Embrace the magic of Moroccan spices and the heartiness of lentils with this Moroccan Lentil-Stuffed Eggplant recipe. It’s not just a meal; it’s a celebration of culture, flavor, and nutrition. Whether you’re meal prepping for the week or looking to impress your friends, this dish will help you achieve your protein goals without sacrificing taste. So gather your ingredients, unleash your inner chef, and enjoy the journey of cooking!

Moroccan Lentil-Stuffed Eggplant

Prep Time 20 minutes
Cook Time 35 minutes
Total Time 55 minutes
Servings 4 servings
Calories 350
A delicious and hearty dish featuring eggplants stuffed with spiced lentils, perfect for a comforting meal.

Ingredients

Vegetables

  • 4 small eggplants

Oil

  • 2 Tbsp avocado or coconut oil (if avoiding oil, sub water)

Seasoning

  • 1 pinch sea salt
  • 1 batch Moroccan-Spiced Lentils
  • 1.75 cups crushed tomatoes (crushed are best for flavor and texture // can sub diced or puréed tomatoes)
  • 0.25 tsp sea salt (plus more to taste)
  • 0.25 tsp black pepper (plus more to taste)
  • 0.5 tsp smoked paprika (plus more to taste)
  • 1.5 Tbsp vegan parmesan cheese
  • 1.5 Tbsp gluten-free panko bread crumbs

Herbs

  • Fresh chopped parsley or cilantro

Grains

  • White or brown rice or cauliflower rice

Instructions 

  • Preheat oven to 375°F (190°C) and prepare a baking dish.
  • In a saucepan, combine lentils, crushed tomatoes, salt, pepper, and paprika. Heat until bubbling, then simmer for 5 minutes.
  • Cut an angled divot out of the eggplants and scrape out the center, leaving enough flesh to hold the lentils.
  • In a skillet, heat oil and cook eggplants cut-side down until softened and browned.
  • Place eggplants cut-side up in the baking dish, fill with lentils, top with cheese and breadcrumbs, then bake for 30-35 minutes.
  • Serve as is or over rice, garnished with parsley or cilantro.

Notes

Best when fresh, though leftovers keep covered in the refrigerator up to 4 days or in the freezer up to 1 month.
Calories: 350kcal
Cost: $15
Course: Main Course
Cuisine: Moroccan
Keyword: Eggplant

Unleash Your Gains: The Ultimate High-Protein White Bean and Vegetable Soup

Welcome to your new favorite meal! This high-protein white bean and vegetable soup is not only a powerhouse of nutrients but also incredibly delicious. In just one bowl, you’ll get a perfect blend of flavors, textures, and all the protein you need to fuel your fitness journey. Whether you’re meal prepping for the week or looking for a quick healthy dinner, this recipe is designed to help you hit your macros without compromising on taste.

Why You’ll Love This Recipe

  • Nutrient-Dense: Packed with plant-based protein from white beans, this soup supports muscle recovery and keeps you full longer.
  • Flavor Explosion: With fresh herbs, garlic, and a medley of vegetables, every spoonful is bursting with taste that makes healthy eating enjoyable.
  • Meal Prep Friendly: This soup stores well in the fridge or freezer, making it perfect for busy weeks when you need a quick meal.
  • Customizable: You can easily adapt the recipe with different vegetables or proteins to cater to your preferences.
  • Easy to Make: With straightforward steps and minimal prep, you’ll have a hearty meal ready in no time!

Ingredients Breakdown

Let’s dive deep into the ingredients of this high-protein white bean and vegetable soup, ensuring you understand not only what to use but also why each component is essential.

Main Ingredients

  • White Beans: Opt for 2 cans of cannellini beans (or 1/2 lb dried beans, soaked overnight). They provide a substantial amount of protein and fiber, making them a great base.
  • Olive Oil: 1 tablespoon of extra virgin olive oil adds healthy fats and enhances the flavor.
  • Onion: 1/2 large yellow onion, chopped, adds sweetness and depth to the soup.
  • Fresh Herbs: 1 tablespoon chopped fresh thyme contributes aromatic notes that elevate the entire dish.
  • Garlic: 2 minced cloves for that robust flavor that complements the beans perfectly.
  • Cabbage: 1/8 head of green cabbage, cut into pieces, adds crunch and is rich in nutrients.
  • Fresh Tomatoes: 1 cup of chopped tomatoes brings acidity and freshness.
  • Celery: 2 celery stalks for crunch and flavor.
  • Carrots: 1 1/2 carrots cut into pieces add natural sweetness.
  • Vegetable Stock: 5 cups (or more) provide the liquid base for the soup, enhancing the overall flavor.
  • Potato: 1 medium potato, cut into pieces, adds heartiness to the soup.
  • Basil: 1/4 cup chopped fresh basil for brightness and freshness.
  • Red Cabbage: 1/4 head, cut into pieces, adds color and additional nutrients.
  • Zucchini: 2 zucchini, cut into pieces, for added texture and flavor.
  • Salt: 2 teaspoons to enhance all the flavors.
  • Parmesan Cheese: 1/2 cup grated, to finish the soup off with richness.

Substitutions

  • Beans: Can use black beans or kidney beans for different flavors.
  • Vegetable Stock: Chicken stock can be used if you’re not strictly plant-based.
  • Herbs: If you don’t have thyme, try rosemary or oregano for a different flavor profile.
  • Cheese: Nutritional yeast can replace Parmesan for a vegan option.

Step-by-Step Cooking Instructions

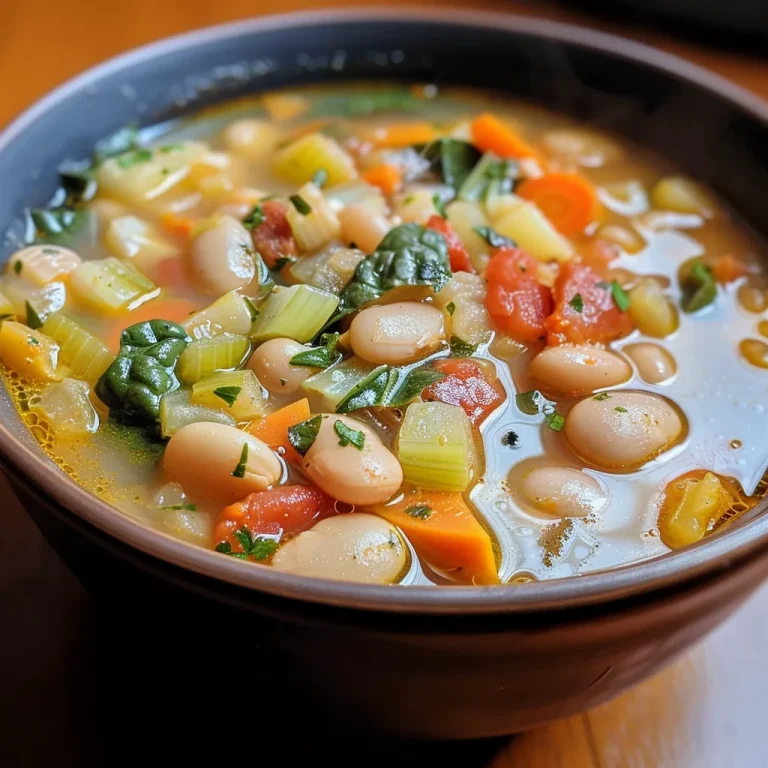
A side view of a steaming bowl of white bean and vegetable soup, showcasing fresh ingredients.

Ready to bring this high-protein soup to life? Follow these simple steps for a delicious result!

  1. Heat the olive oil in a large pot over medium heat.
  2. Add the chopped onion, thyme, and minced garlic. Sauté for about 5 minutes until fragrant.
  3. Stir in the cabbage, tomatoes, celery, carrots, and potato. Cook for an additional 10 minutes, stirring occasionally.
  4. Add the white beans and vegetable stock. Bring the mixture to a boil.
  5. Reduce the heat, cover, and let it simmer for one hour. Stir occasionally to prevent sticking.
  6. After an hour, add the zucchini, red cabbage, and basil. Cook for about 20 minutes longer until all vegetables are tender.
  7. Season with salt to taste, and just before serving, stir in the grated Parmesan cheese. A dash of hot sauce can be added for those who like it spicy!

Pro Tips for Perfect Soup

  • Prep Ahead: Chop all your vegetables the night before to save time.
  • Flavor Development: Let the soup sit for a few hours or overnight in the fridge; the flavors meld beautifully.
  • Texture Check: If you prefer a creamier texture, blend half the soup and return it to the pot.
  • Store Properly: Make sure to cool the soup completely before transferring to containers for storage.
  • Freezing: This soup freezes well; portion it out in freezer-safe containers for quick meals later.
  • Garnish: Top with fresh herbs or additional cheese just before serving for an attractive presentation.

Common Mistakes & Troubleshooting

Even the best cooks can make mistakes! Here are some common pitfalls and how to avoid them:

  • Under-seasoning: Don’t be shy with salt! Taste as you cook to ensure flavors are balanced.
  • Overcooking vegetables: Add delicate vegetables like zucchini later in the cooking process to maintain their texture.
  • Too thick: If your soup is thicker than you like, simply add more vegetable stock or water to reach your desired consistency.
  • Burning: Stir the soup occasionally to prevent it from sticking to the bottom of the pot.

Variations to Try

Want to switch things up? Here are some delicious variations to keep your soup exciting:

  • Spicy Version: Add diced jalapeños or red pepper flakes for a kick.
  • Protein Boost: Mix in some cooked chicken or turkey for a non-vegetarian option.
  • Cheesy Delight: Experiment with different cheeses like feta or gouda for diverse flavors.
  • Herb-Infused: Swap in fresh dill or parsley for a different herbal note.

Storage & Make-Ahead Instructions

This soup is perfect for meal prep! Here’s how to store and reheat:

  • Refrigerate: Store in an airtight container for up to 5 days in the fridge.
  • Freeze: Freeze portions for up to 3 months. Thaw overnight in the refrigerator before reheating.
  • Reheat: Warm on the stove over medium heat, adding a splash of water or stock if it thickens too much.

Frequently Asked Questions

Have questions? Here are answers to some common queries:

  • Can I use dried beans instead of canned? Absolutely! Just soak them overnight and adjust cooking time accordingly.
  • Is this soup vegan? Yes, as long as you omit the cheese or use a vegan alternative.
  • Can I add more vegetables? Definitely! Feel free to throw in any seasonal veggies you have on hand.
  • How do I make it thicker? Blend a portion of the soup or add more beans.
  • What to serve with it? It pairs well with crusty bread, a salad, or even over rice for a heartier meal.
  • Can I make this in a slow cooker? Yes! Sauté the vegetables first, then transfer everything to the slow cooker and let it cook on low for 6-8 hours.
  • How can I enhance the flavors? Let the soup sit for a few hours or overnight; the flavors will develop further.
  • Is it gluten-free? Yes, this recipe is naturally gluten-free!

Nutrition Tips & Dietary Adaptations

For those mindful of their nutritional intake, here are some tips:

  • Increase Protein: Add more beans or top with grilled chicken for added protein.
  • Reduce Sodium: Use low-sodium vegetable stock to control salt levels.
  • Fiber Boost: Add more vegetables or a fiber supplement if needed.

Recommended Equipment

To create this soup, you’ll need:

  • Large Pot: A heavy-bottomed pot is ideal to cook the soup evenly.
  • Cutting Board and Knives: Essential for prepping your ingredients.
  • Measuring Cups and Spoons: Ensure accuracy in your ingredients.

Serving Suggestions

Here are some ways to enjoy your high-protein soup:

  • Top with Fresh Herbs: Sprinkle with parsley or cilantro for a fresh finish.
  • Serve with Bread: Pair with whole-grain bread for dipping.
  • Accompany with Salad: A side salad adds crunch and freshness.

Conclusion

Incorporating this high-protein white bean and vegetable soup into your meal routine is a game-changer. Not only does it make meeting your protein goals easier, but it also proves that healthy meals can be packed with flavor and satisfaction. So grab your ingredients, and let’s get cooking! Remember, hitting your protein goals doesn’t have to be a compromise—this soup is the perfect example that food can be both fuel and delicious!

White Bean and Vegetable Soup

Prep Time 15 minutes
Cook Time 1 hour 10 minutes
Total Time 1 hour 25 minutes
Servings 6 servings
Calories 300
A hearty and nutritious soup packed with vegetables and white beans, perfect for a cozy meal.

Ingredients

Canned Beans

  • 2 cans cannellini or white kidney beans (drained)

Vegetables

  • 1 tablespoon extra virgin olive oil
  • 1/2 large yellow onion (chopped)
  • 1 tablespoon chopped fresh thyme
  • 2 cloves garlic (minced)
  • 1/8 head green cabbage (cut into 1/2 inch pieces)
  • 1 cup chopped fresh tomatoes
  • 2 stalks celery (cut into 1/2 inch pieces)
  • 1 1/2 carrots cut into 1/2 inch pieces
  • 5 cups vegetable stock (or more)
  • 1 medium potato (cut into 1/2 inch pieces)
  • 1/4 cup chopped fresh basil
  • 1/4 head red cabbage (cut into 1/2 inch pieces)
  • 2 zucchini or summer squash (cut into 1/2 inch pieces)
  • 2 teaspoons salt
  • 1/2 cup grated Parmesan cheese
  • Tabasco sauce (optional)

Instructions 

  • Heat olive oil in a large pot over medium heat. Add onion, thyme, and garlic. Sauté 5 minutes.
  • Add remaining vegetables and sauté for 10 minutes.
  • Bring to a boil. Reduce heat, cover and simmer for one hour.
  • Cover and simmer until vegetables are tender, about 20 minutes longer. Taste, and season with salt if needed.
  • To serve, stir in the cheese. Add Tabasco sauce for extra flavor. Serve with ground pepper and bread.

Notes

For a heartier soup, add more beans or vegetables as desired.
Calories: 300kcal
Cost: $15
Course: Soup
Cuisine: American
Keyword: White Beans

Unlock the Secrets of Healthy Guacamole

When it comes to snacking, few things can compete with the creamy, zesty goodness of guacamole. This healthy guacamole recipe is not just a dip; it’s a versatile powerhouse that can elevate your meals while helping you hit your macro goals. Packed with fresh ingredients, rich flavors, and nutritional benefits, this guacamole is your go-to for parties, meal prep, or a quick protein boost. Let’s dive into why this recipe will quickly become a staple in your kitchen.

Why You’ll Love This Recipe

Here are five compelling reasons to whip up this guacamole:

  • Protein-Packed Goodness: With avocados at the forefront, this guacamole provides healthy fats that support muscle recovery and overall health.
  • Versatile Usage: Whether as a dip for veggies, a topping for tacos, or a spread on sandwiches, this guacamole fits into various meals seamlessly.
  • Quick and Easy: This recipe takes less than 10 minutes to prepare, making it perfect for last-minute gatherings or meal prep.
  • Customizable Flavor: You can adjust the spice level, add extra ingredients like corn or beans, and make it uniquely yours.
  • Fresh Ingredients: Utilizing fresh produce ensures you’re getting maximum flavor and nutrition in every bite.

Ingredient Breakdown

Let’s explore the ingredients you’ll need for this healthy guacamole recipe, along with suggested substitutions for flexibility:

  • 3 ripe avocados (should be soft to touch): The creamy base that provides healthy fats.
  • 1 large or two small Roma tomatoes (diced): Adds fresh texture and brightness.
  • 1/3 cup red onion (finely chopped): Offers a bit of crunch and bite; chop finely for even distribution.
  • 1/2 cup chopped cilantro (packed): Brings a fresh, herbal note to the dish.
  • 1 garlic clove (minced): For depth of flavor; adjust according to preference.
  • 1/2 tsp crushed red pepper (more or less depending on how spicy you like it): Provides a kick; adjust based on your heat tolerance.
  • Juice of 1/2 a lime: Brightens the flavors and prevents oxidation.
  • Sea salt and cracked pepper to taste: Enhances all the flavors.

Pro Tips for the Best Guacamole

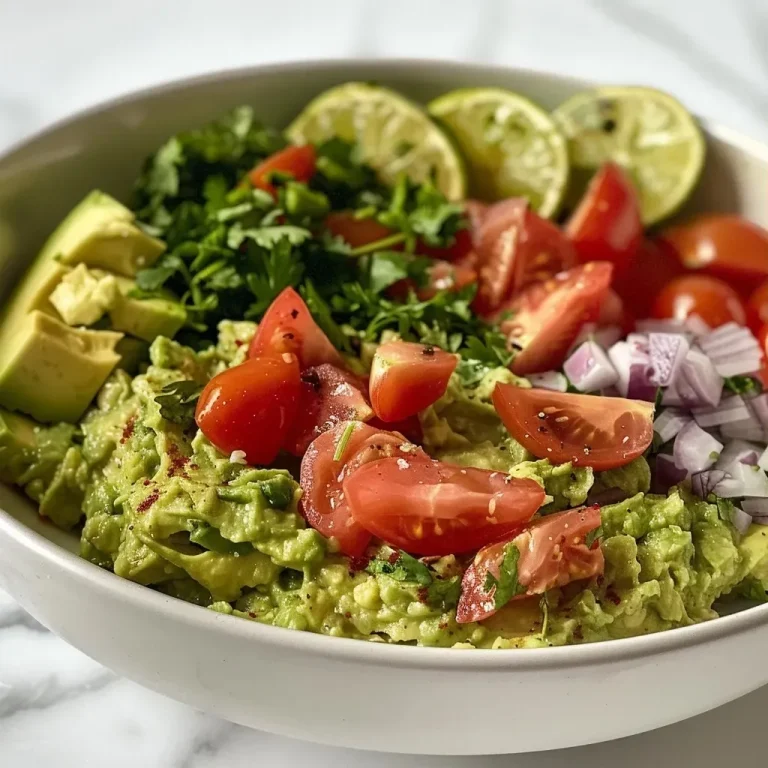
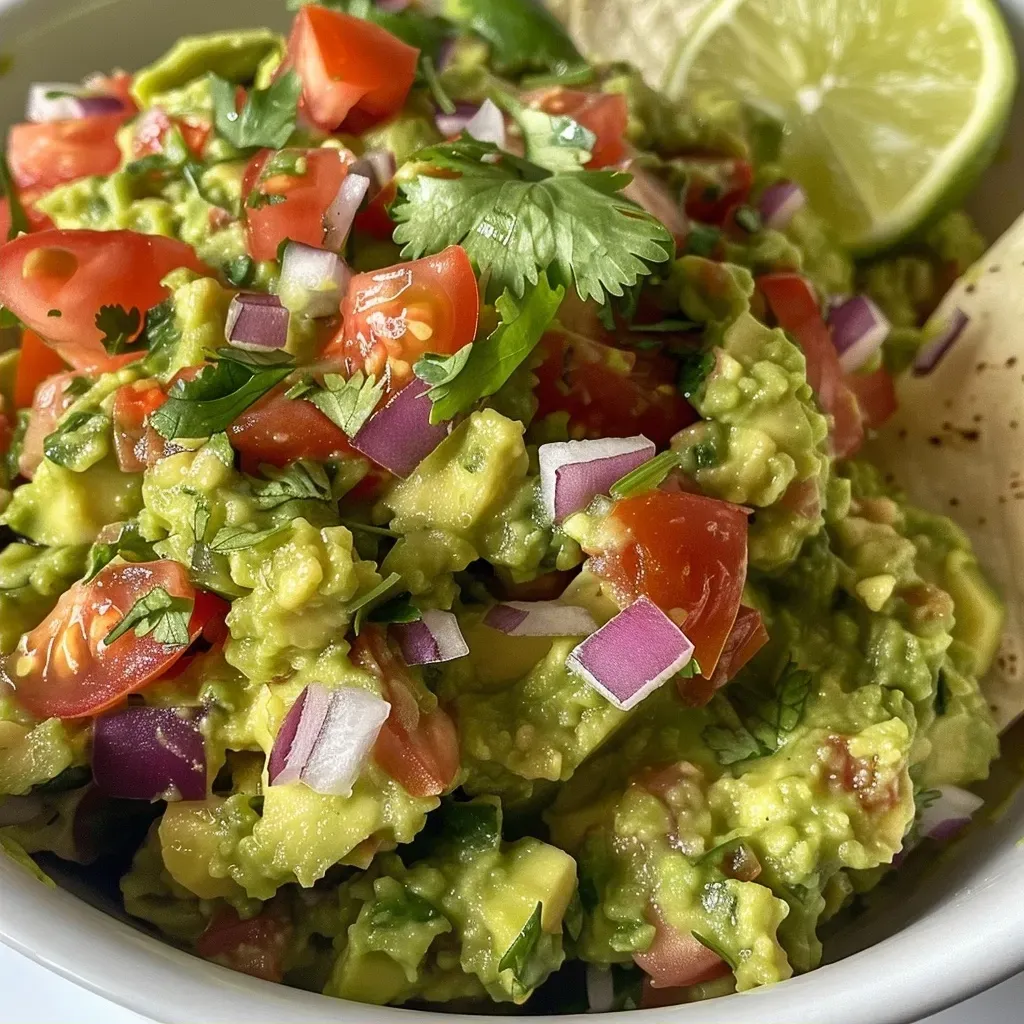
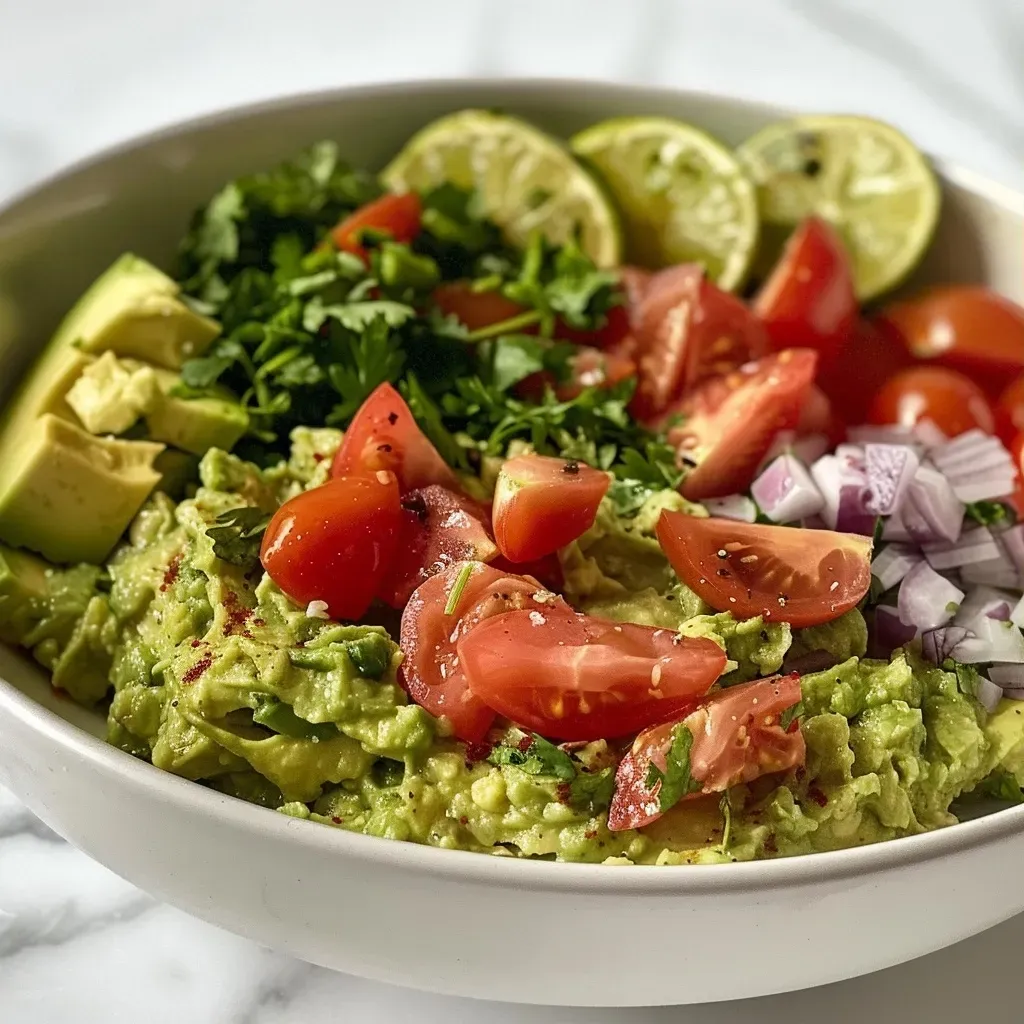
A side view of creamy guacamole in a bowl, garnished with cilantro.

Follow these expert insights to elevate your guacamole game:

  • Choosing Avocados: Opt for avocados that yield slightly to pressure; this indicates ripeness and creaminess.
  • Texture Control: Mash the avocados to your preferred consistency—smooth or chunky—depending on your taste.
  • Flavor Layering: Add lime juice gradually, tasting as you go, to achieve the perfect balance.
  • Storage Tips: To prevent browning, press plastic wrap directly onto the surface of the guacamole before sealing in a container.
  • Freshness Check: Always use fresh ingredients; avoid those that are overripe or wilted.
  • Experiment with Add-Ins: Consider adding corn, diced jalapeños, or even diced mango for a tropical flair.
  • Serving Temperature: Serve guacamole chilled for the best flavor experience.
  • Make-Ahead Option: Prepare a day in advance, but remember to store it properly to keep it fresh.

Common Mistakes and Troubleshooting

Even the best cooks can make mistakes. Here’s how to avoid common pitfalls:

  • Over-Mashing: Be careful not to over-mash the avocados; a few lumps add character.
  • Too Much Lime: Start with less lime juice and add more gradually to prevent overwhelming the flavor.
  • Skipping Salt: Always season your guacamole—salt enhances the natural flavors of the ingredients.
  • Letting it Sit: Guacamole is best enjoyed fresh; if you must store it, ensure it’s sealed tightly to maintain freshness.

Delicious Variations

Feeling adventurous? Here are four variations to try:

  • Spicy Guacamole: Add 1 finely chopped jalapeño to bring some heat.
  • Roasted Garlic Guacamole: Substitute fresh garlic with roasted garlic for a milder, sweeter flavor.
  • Mango Guacamole: Mix in 1/2 cup diced ripe mango for a sweet twist.
  • Smoky Guacamole: Add 1 tsp smoked paprika for a unique smoky flavor profile.

Storage and Make-Ahead Instructions

To keep your guacamole fresh and flavorful:

  • Refrigeration: Store in an airtight container; press plastic wrap directly onto the guacamole’s surface before sealing to minimize air exposure.
  • Consumption Timeline: Consume within 1-2 days for best flavor and freshness.
  • Make-Ahead: Prepare up to 24 hours in advance; just ensure proper storage to prevent browning.

Frequently Asked Questions

Here are some common queries regarding guacamole:

  • Can I use frozen avocados? Yes, but fresh avocados yield better texture and flavor.
  • What can I serve with guacamole? Veggies, chips, tacos, and sandwiches all pair wonderfully.
  • How do I prevent browning? Use lime juice and store properly with plastic wrap pressed directly onto the surface.
  • Can I make guacamole vegan? Yes, all the ingredients are plant-based!
  • How spicy can I make it? Adjust the crushed red pepper to fit your heat preference.
  • Is guacamole healthy? Absolutely! It’s full of healthy fats, vitamins, and minerals.
  • Can I add other ingredients? Yes, feel free to experiment with add-ins like corn or beans.
  • How long does guacamole last? It’s best consumed within 1-2 days when stored properly.

Nutritional Tips and Dietary Adaptations

Guacamole is inherently nutritious, but here are a few tips to enhance its health benefits:

  • Low-Calorie Option: Replace some of the avocado with mashed white beans for a lower-calorie dip.
  • Boost Fiber: Add additional veggies like diced bell peppers or carrots for extra fiber and crunch.
  • Control Portions: Use smaller serving dishes or cups for portion control when serving.

Essential Equipment for Making Guacamole

Having the right tools can simplify your guacamole-making process:

  • Sharp Knife: For easily cutting avocados and veggies.
  • Cutting Board: Essential for food prep and keeping your workspace organized.
  • Mixing Bowl: A medium-sized bowl is perfect for mashing and mixing ingredients.
  • Fork or Potato Masher: Use a fork for a chunkier consistency or a masher for a smoother dip.

Serving Suggestions

Here are some creative serving ideas to enjoy your guacamole:

  • Veggie Platter: Serve with an array of fresh veggies for a healthy snack.
  • Taco Topping: Use as a delicious topping for tacos or burritos.
  • Chips and Dips: Pair with tortilla chips for the classic guacamole experience.
  • Breakfast Bowls: Add a scoop on top of eggs or breakfast burritos for a protein-rich start to your day.

In conclusion, guacamole is not just a dip; it’s a healthy, versatile addition to any meal. With this recipe, you can achieve your protein goals without sacrificing flavor. Dive into the world of guacamole and discover how easy it is to make delicious, nutritious meals that fuel your body and satisfy your taste buds. Happy cooking!

Simple Healthy Guacamole Recipe

Prep Time 10 minutes
Total Time 10 minutes
Servings 4 servings
Calories 250
This simple guacamole recipe is fresh, flavorful, and perfect for any occasion!

Ingredients

Produce

  • 3 whole ripe avocados (should be soft to touch)
  • 1 large or 2 small Roma tomatoes (diced)
  • 1/3 cup red onion (finely chopped)
  • 1/2 cup chopped cilantro (packed)
  • 1 clove garlic (minced)
  • 1/2 tsp crushed red pepper (more or less depending on how spicy you like it)
  • 1/2 lime Juice
  • Sea Salt and cracked pepper (to taste)

Instructions 

  • Cut avocados in half, remove the pit, and scoop the flesh into a bowl.
  • Mash the avocados with a fork until desired consistency is reached.
  • Add diced tomatoes, chopped red onion, cilantro, minced garlic, and crushed red pepper.
  • Pour in lime juice and mix well.
  • Season with sea salt and cracked pepper to taste.

Notes

Serve with tortilla chips or fresh veggies for a healthy snack!
Calories: 250kcal
Cost: $10
Course: Appetizer
Cuisine: Mexican
Keyword: Avocado

Elevate Your Meal Prep with a Flavorful Korean Beef Bowl

Welcome to your new favorite recipe: the Korean Beef Bowl. This delightful dish combines the rich flavors of Korean cuisine with the nutritional benefits of high-protein ingredients, making it perfect for anyone looking to hit their protein goals without sacrificing taste. In this comprehensive guide, we’ll explore everything you need to know to make this Korean beef recipe a staple in your kitchen.

In less than 30 minutes, you can create a satisfying meal that’s both delicious and nutritious. With lean ground beef, fiber-rich brown rice, and a kick of Gochujang sauce, this meal packs a punch in flavor and protein.

Why You’ll Love This Recipe

Here are five reasons to make this Korean Beef Bowl your go-to recipe:

  • Quick and Easy: This dish can be prepared in under 30 minutes, making it perfect for busy weeknights.
  • High Protein: With lean ground beef and brown rice, each serving is packed with protein to fuel your day.
  • Customizable: Whether you prefer extra veggies or a different grain, this recipe adapts to your tastes.
  • Meal Prep Friendly: Make a large batch and store it for a quick lunch or dinner option throughout the week.
  • Authentic Flavor: The Gochujang sauce brings genuine Korean flavor right to your kitchen.

Ingredient Breakdown

Understanding your ingredients is key to mastering this Korean Beef Bowl. Here’s what you’ll need:

  • Ground Beef: 93% lean is ideal, but you can substitute with turkey or chicken for a lighter option.
  • Low Sodium Soy Sauce: Keeps the dish flavorful without excessive salt. Tamari is a gluten-free alternative.
  • Light Brown Sugar: Balances the savory flavors. You can use honey or maple syrup for a different sweetness.
  • Sesame Oil: Adds depth; consider using toasted sesame oil for an extra nutty flavor.
  • Gochujang Sauce: This fermented chili paste gives the dish its signature kick. Adjust the amount to suit your spice preference.
  • Vegetables: Fresh cucumbers and scallions provide crunch and freshness. Feel free to add bell peppers or carrots for more color.
  • Rice: Brown rice is a healthy whole grain option. Quinoa or cauliflower rice can be used for a lower-carb alternative.

Pro Tips for Perfecting Your Korean Beef Bowl

Juicy Korean Beef Bowl with brown rice, sliced cucumbers, and scallions.

Here are some expert insights to elevate your cooking:

  • Use a Hot Pan: Start with a hot skillet to ensure the ground beef browns nicely, enhancing flavor.
  • Don’t Overcook the Beef: Aim for a tender texture by cooking just until browned; overcooking can make it tough.
  • Chop Ingredients Ahead: Pre-chop your vegetables to streamline cooking and make the process quicker.
  • Store Sauce Separately: If meal prepping, keep the Gochujang sauce separate until ready to serve to maintain flavor integrity.
  • Experiment with Spices: Add garlic powder or onion powder to the beef for an extra flavor boost.
  • Garnish Generously: Don’t skimp on the sesame seeds and scallions—they add both flavor and visual appeal.

Common Mistakes and Troubleshooting

Even the best chefs make mistakes! Here’s how to avoid common pitfalls:

  • Too Salty: If your beef bowl turns out too salty, balance it with a little more rice or a splash of vinegar.
  • Overcooked Beef: If your beef is tough, try cooking it for less time on a higher heat.
  • Not Enough Flavor: Adjust the Gochujang and soy sauce to your taste if the dish lacks depth.
  • Soggy Rice: Ensure your rice is fully cooked and fluffed before adding it to the bowl.

Delicious Variations

If you’re looking to mix things up, try these variations:

  • Spicy Korean Beef Bowl: Add more Gochujang and a splash of sriracha for an extra kick.
  • Veggie-Packed Bowl: Incorporate a variety of vegetables like bell peppers, spinach, or snap peas for added nutrition.
  • Low-Carb Version: Substitute brown rice with cauliflower rice for a lighter meal that’s still filling.
  • Beef and Chicken Combo: Mix ground beef with ground chicken for a unique flavor and texture.

Storage and Make-Ahead Instructions

This Korean Beef Bowl is perfect for meal prep. Here’s how to store it:

  • Refrigeration: Store leftovers in an airtight container for up to 4 days.
  • Freezing: Freeze individual portions for up to 3 months. Thaw in the refrigerator overnight before reheating.
  • Reheating: Microwave or reheat on the stovetop, adding a splash of water or soy sauce to keep it moist.

Frequently Asked Questions

Here are some common questions about this recipe:

  • Can I use a different protein? Yes! Ground turkey, chicken, or tofu can be used as substitutes.
  • How spicy is Gochujang? It varies by brand, but it typically has a mild to moderate heat. Start with a little and adjust to your taste.
  • Is this recipe gluten-free? Yes, if you use gluten-free soy sauce or tamari.
  • What can I serve with this dish? It pairs well with steamed vegetables or a side salad for a balanced meal.
  • Can I omit sugar? Yes, you can omit or reduce the sugar, but it helps balance the flavors.
  • How can I make it lower in calories? Use leaner beef or substitute with ground turkey and reduce the amount of oil.
  • What type of rice is best? Brown rice is preferred for its fiber content, but jasmine or basmati rice are also great options.
  • Can I make this vegetarian? Absolutely! Substitute the beef with plant-based ground meat or mushrooms.

Nutrition Tips and Dietary Adaptations

This Korean Beef Bowl can fit into various dietary needs:

  • For Weight Loss: Opt for lean ground beef and serve with more vegetables to reduce calorie density.
  • For Muscle Gain: Increase the portions of beef and rice to boost protein and carbohydrate intake.
  • For a Balanced Meal: Include a side of steamed vegetables for added nutrients and fiber.

Equipment Recommendations

To make this Korean Beef Bowl, you’ll need:

  • Nonstick Skillet: Ideal for cooking the ground beef without sticking.
  • Measuring Cups and Spoons: For precise ingredient measurements.
  • Spatula: To break up the beef while cooking.
  • Rice Cooker: For perfect, fluffy rice every time. (Optional but recommended)

Serving Suggestions

To enhance your Korean Beef Bowl experience:

  • Top with Fresh Herbs: A sprinkle of cilantro or parsley adds freshness.
  • Serve with Kimchi: This traditional Korean side dish provides a tangy contrast.
  • Drizzle with Extra Sesame Oil: For an added depth of flavor.

In conclusion, this Korean Beef Bowl is not just a meal; it’s a culinary experience that balances flavor and nutrition. With its rich ingredients and ease of preparation, you’ll find it a satisfying addition to your weekly meal rotation. So, roll up your sleeves, gather your ingredients, and let’s get cooking! Hitting your protein goals has never been more delicious!

Korean Beef Bowl Recipe

Prep Time 10 minutes
Cook Time 15 minutes
Total Time 25 minutes
Servings 4 servings
Calories 600
A delicious and easy Korean Beef Bowl that combines savory beef with fresh vegetables over rice.

Ingredients

Sauce

  • 1/4 cup low sodium soy sauce (*)
  • 2 teaspoons light brown sugar
  • 1 teaspoon sesame oil
  • 1/2 teaspoon crushed red pepper flakes

Beef

  • 1 pound 93% lean ground beef
  • 1/4 cup chopped yellow onion
  • 2 cloves garlic (crushed)
  • 1 teaspoon fresh grated ginger

Rice

  • 3 cups cooked brown rice

Vegetables

  • 1 small sliced cucumber (skin on)
  • 2 tablespoons Gochujang Sauce ((or more if desired*))
  • 1/2 tablespoon sesame seeds
  • 2 sliced scallions (white and green parts)

Instructions 

  • Combine soy sauce, water, brown sugar, sesame oil, and red pepper flakes in a bowl.
  • Heat skillet, spray with oil, add beef, and cook until browned.
  • Add onion, garlic, and ginger; cook for 1 minute.
  • Pour sauce over beef, cover, and simmer for 10 minutes.
  • Assemble bowls with rice, beef, cucumbers, Gochujang, sesame seeds, and scallions.

Notes

Adjust Gochujang to taste for spiciness.
Calories: 600kcal
Cost: $15
Course: Main
Cuisine: Korean
Keyword: Beef